Introduction. Modding Kit Feature List
|
|
|
- Irene Malone
- 5 years ago
- Views:
Transcription
1
2 Introduction Welcome to the Modding Guide of Might and Magic X - Legacy. This document provides you with an overview of several content creation tools and data formats. With this information and the resources which are shared with the game, you will be able to create your own adventures. First we want to start with some general explanations. This Modding Kit is NOT a simple-to-use level editor. It is an enhancement of the Unity 3D engine editor. Nearly all of the full features of the engine and tools can be used. In this way the Modding Kit allows all modders to create content to the same level of quality as the dev team itself. We are sharing the same tools Limbic Entertainment is using to create the world of Might and Magic X - Legacy. To use the Modding Kit, modders will be required to work with the Unity 3D engine. If you are new to Unity 3D, we strongly recommend that you check the tutorials and documentation that accompany the engine. This document will not explain how the engine works. It will only explain how to use the tools from Limbic Entertainment to create worlds/dungeons/cities for the game Might and Magic X - Legacy. Modding Kit Feature List General overview of the modding kit feature list. Creating modding packs for own levels/adventures. Creating levels (e.g. dungeons, villages) for MMXL. Flexible level height configuration Setting for special area markers (free, blocking, hazard,...) Modder can include their own models/textures in the levels. Access to the Castle, Cave and Shantiri tile set. Monsters and Interactive Objects from the full game can be used in the Modding Kit. All monsters which are part of the main game are available. Door, barrels, levers and other interactive elements from the main game can be used. Modders can create their own quests and link them in the levels. Each mod has its own game database which can be modified freely Monster values and assigned 3D models Item stats and enchantments Loot of monsters and chests Stats of all 12 of the character classes of the main game Merchant offers and pricing Many more. Multi language support: Each mod can configure its localization independently from the main game. Minimap / region map background can be configured for each level. For each mod an image can be configured to be used for the start screen. Full support of the current Unity 3D professional version (most of the Unity features can be used for creating levels for MMXL) 1
3 Unity 3D Editor Unity is available in different license packages. In this section we are focusing on the Unity free and professional editions. Unity professional contains many tools for lightmap and occlusion calculation. Some of these tools are required in order to create 3D worlds with high quality and good performance. These features don t come with the Modding Kit. But to get the best game experience it is recommended that modders use the full feature set of the engine. The Modding Kit itself will not fully run with the Unity free version. The main reason is that the core feature which is used for the export of the 3D environment is a Unity premium-only feature. We are sorry for this, but at the moment we have no workaround available which would replace the need for this premium feature. Because of this Unity free is not officially supported by this Modding Kit. Although we are aware that it won t be enough for passionate modders who really want to go in deep with the Modding Kit, it should be noted that the professional version of Unity is available as a free 30-day trial. Aside from the 3D environment export issue, the Modding Kit should work fine with Unity free. This means that you can create, edit, and save levels in the normal scene structure of Unity. These can then be exchanged with friends. So if you have a contact who has access to Unity professional, he can make the exports for you if you share your source files. The exported files are required to load your Mod in the game. UI Modding The Modding Kit does not contain any functionality for UI modding yet, as the currently used pipeline does not support templates. Therefore it is not possible to change the look and feel of Might and Magic X - Legacy UI. For the moment we cannot say if and when we will add functionalities for UI modding. 2

4 Installation Guide for Unity 3D The current Unity 3D version can be downloaded here: All components available through the Unity installer should be installed. The demo which is included with Unity can help you get a grasp of the general technology. The Unity 3D documentation is available here: 3

 you can")
5 Running Unity and loading the Modding Kit project On Unity startup you will be asked which project you want to open. Here you should select the ModdingKit folder in your game installation target folder. You can select a new path by clicking on the Open Other... button. If you have already loaded a different project (for example the sample project from Unity) you can switch the project by opening a new one: 4
. Select the 30-day trial and press \"OK\".")
6 Warning: The asset import on the first load will take a while. Unlocking Unity Pro trial On Unity startup you will get a request to activate your version (free, pro or pro trial). Select the 30-day trial and press "OK". If you have already a free version of Unity running you can also upgrade it by going to the "Manage License" window: 5


7 And select Activate new license. 6
 with a double click. 4. If nothing is displayed after following these steps, check the camera position.")
8 Loading sample level To open the sample level we added to the Modding Kit please follow these steps: 1. Switch to the project tab. 2. Open the Assets / MMXL_ModKit / Scenes / Dungeon folder. 3. Open the Spider_Lair scene file (the file with the Unity logo) with a double click. 4. If nothing is displayed after following these steps, check the camera position. To do that, open the grid origin in the Hierarchy tab by double clicking it. 5. In the scene view you will see the spider lair demo level. 7
, including creating background textures for minimaps are located here. 2.")

9 Modding UI Modding Main Menu 1. All tools which help create and set up new scenes (needed as first step for new levels), including creating background textures for minimaps are located here. 2. This is a collection of creation tools, which you can use to create databases (for localization and dialogues), new grid data, and grid origin. 3. This opens the level editor tab, which contains all the functionality which is required to add game logic to a level. 4. This tool is for checking the condition of the grid and reports issues. Mod Info Element To open the mod info element of the sample you need to follow these steps: 1. Open the "Project" tab 2. Open the "Assets" folder 3. Open the "MMXL_ModKit" folder 8

10 4. Open the "ModSample" folder 5. Open the "ModInfo" file by double clicking 6. Open the "Inspector" tab The ModInfo window contains these elements: 1. The "ModInfo" tab contains the general mod configuration. 2. The "ModConfig" tab contains the configuration for the game. This configuration replaces the game configuration after the mod is loaded. 3. In this area you can enter header data for your mod. The name and the creators are displayed in the game client, when the mod is loaded. The version number is also used to check if a save game is still valid. It will not be possible to load a save game with an older version number than the mod which is installed. 4. In this area you can add the levels which are part of the mod. Here you need to add (just drag and drop from the project tab) the scene and the grid data file. Only levels assigned to the ModInfo tab can be exported into the modding package. 9

. To use a mod in the game it needs to be unzipped.")
11 5. Here you can configure custom language and dialogue files. Also the background image of the main menu of your mod can be configured. The last input field is for the path where the mod should be exported. If these files are not configured the mod will use the files from the main game as backdrop. 6. These two buttons are used for exporting the mod. It will build the asset bundles of the assigned scenes and also copy all data which is required to run the mod. You can decide if you want to export raw files or a zip archive (reduced size makes it easier to exchange the mod). To use a mod in the game it needs to be unzipped. The second tab of the ModInfo window contains the general game configuration for the mod. 10
12 1. The most important value you have to set is the starting level. You need to configure it, so that the game knows which level to load first. 2. The other values are default values from the main game, so don't need to be changed. If you want to have different settings for the day/night change you can just configure it. Not every value will have an impact though. For example if you are changing the inventory size, the game logic knows how to handle that, but the UI will stay unchanged. 11
 The different components of these assets are available in the following folders: Assets/MMXL_ModKit/Materials Assets/MMXL_ModKit/Models Assets/MMXL_ModKit/Prefabs")
13 Modding Kit Assets With this version of the Modding Kit the following tile sets are shared: 1. Castle 2. Cave 3. Shantiri 4. Village (Sorpigal buildings) The different components of these assets are available in the following folders: Assets/MMXL_ModKit/Materials Assets/MMXL_ModKit/Models Assets/MMXL_ModKit/Prefabs Assets/MMXL_ModKit/Textures Monsters and interactive Objects are not available as raw assets. However, they can be placed using spawners and will be loaded automatically in the game, so are available to use. 12


14 Level Editor Tab First setting up This is the central tool used to configure the game logic of a level. To open the Level Editor tab you need to: 1. Open "M&M X Legacy MOD" main menu entry 2. Select "Open Level Editor" The first thing you should check is if the Level Editor is using the correct static game data files. To do this, open the "Settings" tab of the Level Editor. Directly after installation of the Modding Kit this entry is most likely empty and should be updated with the path of your Modding Kit folder. If this is not correctly configured there is a high risk that the modding UI will not work properly. 13

15 To select the correct path to the static data, you need to open the "Settings" tab and click on "Open". Browse to the installation path of your game. There, select the Modding Kit folder and browse to Assets/MMXL_ModKit/GameAssets/Staticdata. Like in the image above. The static data will be loaded automatically and the Level Editor will be ready to use. 14

16 Slot tab The "Slot" tab of the Level Editor is used to configure most of the gameplay related logic. In this area you are able to define triggers, commands and quest objective changes. 1. Open the "Slot" tab in the Level Editor. 2. Here you can create new Triggers, Commands and Quest Objective operations. 3. The "Trigger" tab is used to place interactive elements. 15

17 Trigger section The Spider Lair sample level contains several samples for triggers. For example, if you click on a tile with a little monster icon you can see the settings which the game actually uses. This trigger is reacting to movement and will spawn a monster when the player is in spawn range (this is a setting in the global game config which you can modify in the "ModInfo" window). You can select the type of object you want to spawn by clicking on the "Spawn Type" (1). Depending on the object s type you choose, you will see different settings (2). In the screenshot above you can see the monster configuration, since the selected spawn type is the monster. Here you can configure which monster is spawned and how often it is triggered. The following list is a general overview of the most common triggers and what they are used for: 16
18 Party This trigger is used to define party spawn points. Monster This trigger spawns an instance of the configured monster. For normal spawn behaviour no extra commands are needed. Sign This trigger can be used for signs. The data which is shown on a sign is defined by a corresponding view sign interaction, which is added to the sign trigger. Door The door trigger is usually used together with the toggle door command. With this combination doors can be opened and closed by the player. Entrance With this trigger you can start level changes. The level change itself is defined by entrance 17
19 commands. Teleporter This trigger is used with the teleport command to move the party from one tile to another. Teleportation to a different level is also possible. Lever This trigger is usually used together with the lever toggle and the door toggle command. Sensor This trigger will be executed when a specific tile is entered. Container With this trigger you can interact with lootable objects. It is used together with the open container command. You can also add traps directly to a container. NPC container With this trigger you can start an interaction with NPCs (which are handled by an NPC container). It is used together with the start dialogue command. 18
.")
20 Trap effect container Traps are split into two triggers. One to mark the tile on which a trap is triggered and one for the effect. This split was made to have better control over the location that a trap effects (the trigger and the effect don't need to be placed on the same tile). The trap trigger marks the tile on which a trap is triggered, while the trap effect contains the visual and game logic related information. Some metadata needs to be added to the trap effect container with the set data command to make the trap work: Pressure plate The pressure plate trigger can be used very flexibly to trigger different types of commands. For example it can be used to control buttons, doors or complex riddles with several prefabs. Barrel Barrels can be used with this trigger. You can link different commands to it like the barrel interaction for buffs or loot. 19

21 Recharging object With this trigger you can activate effects which are regenerated after a certain amount of time. It is used together with the recharging interaction command. To see working examples of each of these spawn types we recommend looking at the triggers already added to the sample level. Also, you can take a look at the levels from the game. The XML files can be accessed in the Might and Magic X Legacy_Data/StreamingAssets/Maps folder of your game installation. Additional documentation for the triggers and spawn types will follow shortly. 20

22 Command section With the "Commands" tab you can define interactions and their configuration. When you create a command it is automatically assigned to the current active trigger or is assigned by the id which is configured in the Target Spawn ID field. A command is basically an action which is performed after its trigger is activated (depending on the configured timing). An interaction is, for example, a level change, opening a door or pulling a lever. Some interactions are assigned to prefabs for visualization purposes. The exact timing of commands can be configured using the following states. Depending on these settings a command is executed after its trigger is executed. Never On spawn On execute On success On fail On after spawn On level loaded In the following subsections you will find several test cases and examples on how to use commands together with triggers. These are production samples from Might & Magic X - Legacy and are used in the course of the game. Door with key 21

23 For this you need to place a normal door trigger and a toggle door and remove token command (shown above). The toogle door command checks if the door can be toogled or not, depending if the configured token is available or not. This will be done on the execution phase of the trigger. After a successful execution of the trigger the command to remove the token will be triggered. It removes the configured token from the party. Tokens are configured in the static data tables of the game/mod. You can re-use the tokens from the main game or you can define your own if you create a separate static data database for your mod. After they are configured in the tables you can access them in the editor and place them--for example as loot from monsters or in chests. Tokens are a very important mechanic for flow control. You can even define which dialogue is shown depending on a token. In the data of the main game you will find many examples on how to use tokens. Secret Doors 22

24 The secret door uses a normal door trigger with two set data commands and an open door command. The first set data defines the used prefab of the secret door. The 2 nd set data command flags it as secret. The open door command contains a who will challenge (based on the magic attribute) and the text used for the popup (the text needs to be contained in the localization database). Players are only able to interact with secrets if they have the spot secret ability/spell active. Teleporter 23


25 To implement a teleporter you need two teleport triggers which have each been assigned a set data command. The set data is used to define which prefab is used for the teleporter. Both triggers are used as start and endpoints of the teleport. The starting trigger also needs a teleport command. In this command the id of the endpoint trigger needs to be entered in the Target Spawn ID field. Players will be teleported after interacting with the first trigger to the location of the 2 nd trigger. Level switch For the transition between levels you need an entrance trigger. The prefab used for this trigger can be configured with a corresponding set data command. Here the assigned prefab is not a 3D model. You are assigning the animated 2D image which is used to show a level transition (for example, see the picture below used for entering the spider lair). This is called a transition icon. For the level change itself a use entrance command is required. There you can configure the target map with a spawn point of the party. 24
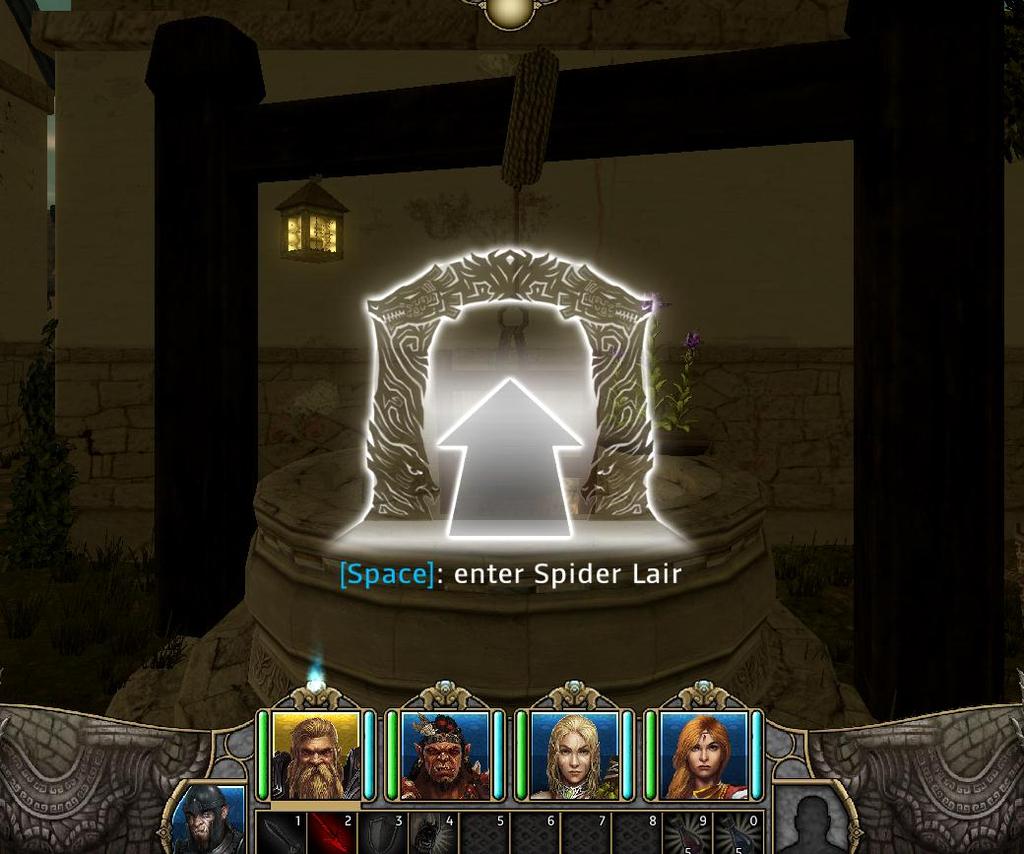
26 25

27 Loot Containers For any lootable object (for example a chest or barrel) you need a container trigger. The visuals of the container are set with the set data command. A series of prefabs are available in the menu. The loot is also defined with set data commands. In the static game data you can define pre-configured loot. This pre-configured loot is referenced in the set data - container generated commands. The game will create the loot when the container is spawned out of the values which are configured in the tables and in the editor. To open the chest you need to add an open container command which is linked to the container trigger. The static game data for loot containers can be configured in the static data of the main game or in your own database. This database can be customized by you to match the needs of your mod. 26


28 NPC containers NPCs are placed in so-called NPC containers. Even if you want to use only one NPC you need to place him into an NPC container. The sample here shows the NPC container of the shrine in Sorpigal. It contains many different configurations. To add an NPC to a container you use the set data npc ids interaction. The NPCs you can select are configured in the static game data. The dialogues are configured in XML files, which you can find in the Dialog folder of the static game data. The start dialogue command is used to open the conversation screen and load the corresponding dialogues. For the target you need to select the NPC container which should be used. With the set data indoor scene you can define which 3D scene should be used for the conversation. 27


29 With these set data commands you can define which transition icon is used when the party stands in front of the NPC container and also which text should be displayed. Below you can see the sample from the shrine in Sorpigal. The text needs to be defined in the localization database. 28


30 Spiders out of a barrel This feature requires the use of several triggers and commands. This sample is good example of how different features can be combined to create new game behaviour. For this sample you need a placeholder trigger for the monster (the position where it should be spawned) and a container trigger for the barrel. In this sample the party is pushed back by one tile to make enough space for the spider. For this we also need a teleporter trigger which is placed on the tile on which the party should be teleported. The entire logic will be triggered when the party interacts with the barrel. So the barrel needs a series of interactions / commands. The first set data command assigns the barrel prefab to the container. The second command is to open the container (to trigger the open animation of the container). 29


31 The teleport command will move the party by one tile. The target teleporter is referenced by Target Spawn ID. The last command spawns the monster on the position of the placeholder we added in the first step. In the monster field you can select all monsters which are configured in the static game data. These commands are all triggered at the same time i.e. with one execute timing, which allows the party to be pushed back at the same time that the spider is spawned. In the static game data you can define your own monsters / enemies with their own values. That way it is possible to add your own opponents to the game. At this time it is not possible to add new creature models and animations to the game with your mod. You can place animated models in the scene but the game will not interact with them. However, you can use all monsters which are part of the main game. So if you create a new monster in the data you can assign a monster model from the main game. Further examples Examples for interactions can be found in the sample dungeon and also in the game levels. The XML files can be accessed in the Might and Magic X Legacy_Data/StreamingAssets/Maps folder of your game installation. Additional documentation for commands, interactions and their values will follow shortly. 30

32 Height tab With the height tab you can configure the height for each tile in the game. The party camera will then be moved by this defined offset. With this functionality we are implementing stairs, ramps and other vertical elements. 31

. To use a mod in the game it needs to be unzipped.")
33 Export mod and load it in MMXL The sample level can be exported directly. You need to open the ModInfo file in the folder "Assets/MMXL_ModKit/ModSample". In the "Inspector" tab you have the Build options available. These two buttons are used for exporting the mod. It will build the asset bundles of the assigned scenes and also copy all data which is required to run the mod. You can decide if you want to export raw files or a zip archive (reduced size makes is easier to exchange the mod). To use a mod in the game it needs to be unzipped. At the export location you will find a folder with the name of the mod. This folder contains all the files which the games needs in order to load the mod. The game requires this folder to be in a specific location, otherwise it will not find it. You need to copy the mod into the mod area of your save game folder (in MyDocuments/MightAndMagicXLegacy/Mods). 32

34 This folder will have been created after you started the game for the first time. Also the save games of your mod will be stored in the Mods folder. After that you can start the game. In the start menu select Extra, then Mods. The following screen will popup showing all of the mods the game was able to find. Here you need to select the mod you want on the left side and press Load. After that the normal game is replaced with the mod (you will see the change in the version number of the game and also in the background graphic if configured). Now you can start your mod as usual, just by pressing start and entering the MMXL party creation screen. You can also load save games which are related to your mod. 33


.")
35 How to: Creating a new level Every level is defined by two components. The first component is the scene, which contains the 3D environment. The second component is the grid data, which contains the game logic. Both components will be created by the Scene Creator tool. To open the Scene Creator you need to select M&M X Legacy MOD in the main menu, then Tools and then Open Scene Creator. Here you need to enter the name of your scene and also the target folder where you want to store your level files. To make the folder selection work you need to click on your folder on the right side of the "Project" tab (see below). After you click on Create Scene your current scene will be closed and the new scene will be opened. From this point you can start to create the 3D environment and configure your grid. 34
RPG CREATOR QUICKSTART
 INTRODUCTION RPG CREATOR QUICKSTART So you've downloaded the program, opened it up, and are seeing the Engine for the first time. RPG Creator is not hard to use, but at first glance, there is so much to
"!" - Game Modding and Development Kit (A Work Nearly Done) '08-'10. Asset Browser
 '08-'10. Asset Browser") "!" - Game Modding and Development Kit (A Work Nearly Done) '08-'10 Asset Browser Zoom Image WoW inspired side-scrolling action RPG game modding and development environment Built in Flash using Adobe Air
"!" - Game Modding and Development Kit (A Work Nearly Done) '08-'10 Asset Browser Zoom Image WoW inspired side-scrolling action RPG game modding and development environment Built in Flash using Adobe Air
NWN ScriptEase Tutorial
 Name: Date: NWN ScriptEase Tutorial ScriptEase is a program that complements the Aurora toolset and helps you bring your story to life. It helps you to weave the plot into your story and make it more interesting
Official Documentation
 Official Documentation Doc Version: 1.0.0 Toolkit Version: 1.0.0 Contents Technical Breakdown... 3 Assets... 4 Setup... 5 Tutorial... 6 Creating a Card Sets... 7 Adding Cards to your Set... 10 Adding your
Annex IV - Stencyl Tutorial
 Annex IV - Stencyl Tutorial This short, hands-on tutorial will walk you through the steps needed to create a simple platformer using premade content, so that you can become familiar with the main parts
The purpose of this document is to help users create their own TimeSplitters Future Perfect maps. It is designed as a brief overview for beginners.
 MAP MAKER GUIDE 2005 Free Radical Design Ltd. "TimeSplitters", "TimeSplitters Future Perfect", "Free Radical Design" and all associated logos are trademarks of Free Radical Design Ltd. All rights reserved.
Spell Casting Motion Pack 8/23/2017
 The Spell Casting Motion pack requires the following: Motion Controller v2.50 or higher Mixamo s free Pro Magic Pack (using Y Bot) Importing and running without these assets will generate errors! Why can
Materials Tutorial. Chapter 6: Setting Materials Defaults
 Setting Materials Defaults Chapter 6: Materials Tutorial Materials display on the surfaces of objects in 3D views and can make a 3D view appear highly realistic. When applied to most objects, material
By Chris Burton. User Manual v1.60.5
 By Chris Burton User Manual v1.60.5 Table of Contents Introduction 7 Chapter I: The Basics 1. 9 Setting up 10 1.1. Installation 1.2. Running the demo games 1.3. The Game Editor window 1.3.1. The New Game
Making Your World - the world building tutorial
 Making Your World - the world building tutorial The goal of this tutorial is to build the foundations for a very simple module and to ensure that you've picked up the necessary skills from the other tutorials.
COMPASS NAVIGATOR PRO QUICK START GUIDE
 COMPASS NAVIGATOR PRO QUICK START GUIDE Contents Introduction... 3 Quick Start... 3 Inspector Settings... 4 Compass Bar Settings... 5 POIs Settings... 6 Title and Text Settings... 6 Mini-Map Settings...
Ball Color Switch. Game document and tutorial
 Ball Color Switch Game document and tutorial This template is ready for release. It is optimized for mobile (iphone, ipad, Android, Windows Mobile) standalone (Windows PC and Mac OSX), web player and webgl.
Shoot It Game Template - 1. Tornado Bandits Studio Shoot It Game Template - Documentation.
 Shoot It Game Template - 1 Tornado Bandits Studio Shoot It Game Template - Documentation Shoot It Game Template - 2 Summary Introduction 4 Game s stages 4 Project s structure 6 Setting the up the project
Materials Tutorial. Chapter 6: Setting Materials Defaults
 Setting Materials Defaults Chapter 6: Materials Tutorial Materials display on the surfaces of objects in 3D views and can make a 3D view appear highly realistic. When applied to most objects, material
Overview. The Game Idea
 Page 1 of 19 Overview Even though GameMaker:Studio is easy to use, getting the hang of it can be a bit difficult at first, especially if you have had no prior experience of programming. This tutorial is
Making Your World with the Aurora Toolset
 Making Your World with the Aurora Toolset The goal of this tutorial is to build a very simple module to ensure that you've picked up the necessary skills for the other tutorials. After completing this
Materials Tutorial. Setting Materials Defaults
 Materials Tutorial Materials display on the surfaces of objects in 3D views and can make a 3D view appear highly realistic. When applied to most objects, material quantities will also be calculated in
Create Or Conquer Game Development Guide
 Create Or Conquer Game Development Guide Version 1.2.5 Thursday, January 18, 2007 Author: Rob rob@createorconquer.com Game Development Guide...1 Getting Started, Understand the World Building System...3
House Design Tutorial
 Chapter 2: House Design Tutorial This House Design Tutorial shows you how to get started on a design project. The tutorials that follow continue with the same plan. When you are finished, you will have
Kings! Card Swiping Decision Game Asset
 Kings! Card Swiping Decision Game Asset V 1.31 Thank you for purchasing this asset! If you encounter any errors / bugs, want to suggest new features/improvements or if anything is unclear (after you have
Battlefield Academy Template 1 Guide
 Battlefield Academy Template 1 Guide This guide explains how to use the Slith_Template campaign to easily create your own campaigns with some preset AI logic. Template Features Preset AI team behavior
welcome to the world of atys! this is the first screen you will load onto after logging.this is the character-generating screen.
 welcome to the world of atys! this is the first screen you will load onto after logging.this is the character-generating screen. Choose an empty slot. This is where your character will be placed after
Experiment 02 Interaction Objects
 Experiment 02 Interaction Objects Table of Contents Introduction...1 Prerequisites...1 Setup...1 Player Stats...2 Enemy Entities...4 Enemy Generators...9 Object Tags...14 Projectile Collision...16 Enemy
Designing in the context of an assembly
 SIEMENS Designing in the context of an assembly spse01670 Proprietary and restricted rights notice This software and related documentation are proprietary to Siemens Product Lifecycle Management Software
NWN Toolset Module Construction Tutorial
 Name: Date: NWN Toolset Module Construction Tutorial Your future task is to create a story that people will not only be able to read but explore using the Neverwinter Nights (NWN) computer game. Before
FMJD Draughts Arbiter Pro page 1
 FMJD Draughts Arbiter Pro page 1 Part A starting the use of the program 1. How do you get a licence and download and install the program: a. Get a licence Click on the Draughts Arbiter logo on the FMJD
Tearing Cloth. In this tutorial we are going to go over another basic use of the cloth modifier. Ripping Cloth based on forces like wind.
 Tearing Cloth In this tutorial we are going to go over another basic use of the cloth modifier. Ripping Cloth based on forces like wind. We will use a starter file that I have put together so we can bypass
House Design Tutorial
 Chapter 2: House Design Tutorial This House Design Tutorial shows you how to get started on a design project. The tutorials that follow continue with the same plan. When you are finished, you will have
Crowd-steering behaviors Using the Fame Crowd Simulation API to manage crowds Exploring ANT-Op to create more goal-directed crowds
 In this chapter, you will learn how to build large crowds into your game. Instead of having the crowd members wander freely, like we did in the previous chapter, we will control the crowds better by giving
For more information on how you can download and purchase Clickteam Fusion 2.5, check out the website
 INTRODUCTION Clickteam Fusion 2.5 enables you to create multiple objects at any given time and allow Fusion to auto-link them as parent and child objects. This means once created, you can give a parent
Fantasy Grounds II: Adventure Module Creation Tutorial (v1.0) by Xorne (Jason Hibdon)
 by Xorne (Jason Hibdon)") Fantasy Grounds II: Adventure Module Creation Tutorial (v1.0) by Xorne (Jason Hibdon) Introduction During my time spent on the Fantasy Grounds II forums, I spent the first few months mostly asking questions,
Fantasy Grounds II: Adventure Module Creation Tutorial (v1.0) by Xorne (Jason Hibdon) Introduction During my time spent on the Fantasy Grounds II forums, I spent the first few months mostly asking questions,
Installation Instructions
 Installation Instructions Important Notes: The latest version of Stencyl can be downloaded from: http://www.stencyl.com/download/ Available versions for Windows, Linux and Mac This guide is for Windows
Save System for Realistic FPS Prefab. Copyright Pixel Crushers. All rights reserved. Realistic FPS Prefab Azuline Studios.
 User Guide v1.1 Save System for Realistic FPS Prefab Copyright Pixel Crushers. All rights reserved. Realistic FPS Prefab Azuline Studios. Contents Chapter 1: Welcome to Save System for RFPSP...4 How to
House Design Tutorial
 House Design Tutorial This House Design Tutorial shows you how to get started on a design project. The tutorials that follow continue with the same plan. When you are finished, you will have created a
Neverwinter Nights Maps
 Neverwinter Nights Maps 5B 6 5 9 13 14 12 1 3 11 10 4 2 8 7 1 INTERIOR MAP 2 1 EXTERIOR MAP EXTERIOR MAP 1 NWN Toolset and ScriptEase Module Construction Tutorial Introduction... 3 Tutorial 1: Loading
The Archery Motion pack requires the following: Motion Controller v2.23 or higher. Mixamo s free Pro Longbow Pack (using Y Bot)
") The Archery Motion pack requires the following: Motion Controller v2.23 or higher Mixamo s free Pro Longbow Pack (using Y Bot) Importing and running without these assets will generate errors! Demo Quick
The Archery Motion pack requires the following: Motion Controller v2.23 or higher Mixamo s free Pro Longbow Pack (using Y Bot) Importing and running without these assets will generate errors! Demo Quick
Getting Started. with Easy Blue Print
 Getting Started with Easy Blue Print User Interface Overview Easy Blue Print is a simple drawing program that will allow you to create professional-looking 2D floor plan drawings. This guide covers the
House Design Tutorial
 Chapter 2: House Design Tutorial This House Design Tutorial shows you how to get started on a design project. The tutorials that follow continue with the same plan. When we are finished, we will have created
This guide provides information on installing, signing, and sending documents for signature with
 Quick Start Guide DocuSign for Dynamics 365 CRM 5.2 Published: June 15, 2017 Overview This guide provides information on installing, signing, and sending documents for signature with DocuSign for Dynamics
1. Setup Output mode. 2. Using a Fixed tile size
 Tutorial Tiling Software version: Asanti 1.0 Document version: February 17, 2014 This tutorial demonstrates how to use tiling with Asanti. Tiling can only be executed on a system where Acrobat Pro X or
Foreword Thank you for purchasing the Motion Controller!
 Foreword Thank you for purchasing the Motion Controller! I m an independent developer and your feedback and support really means a lot to me. Please don t ever hesitate to contact me if you have a question,
Gaia is a system that enables rapid and precise creation of gorgeous looking Unity terrains. Version March 2016 GAIA. By Procedural Worlds
 Gaia is a system that enables rapid and precise creation of gorgeous looking Unity terrains. Version 1.5.3 March 2016 GAIA By Procedural Worlds Quick Start 1. Create a new project and import Gaia. 2. Unity
Deck Tutorial. Decks and Porches. Drawing Decks
 Deck Tutorial The Deck Tutorial continues where the Landscaping Tutorial left off, and explains how to create a deck off the back of the house and connect it to the terrain with an exterior staircase.
Workshop 4: Digital Media By Daniel Crippa
 Topics Covered Workshop 4: Digital Media Workshop 4: Digital Media By Daniel Crippa 13/08/2018 Introduction to the Unity Engine Components (Rigidbodies, Colliders, etc.) Prefabs UI Tilemaps Game Design
Unity Game Development Essentials
 Unity Game Development Essentials Build fully functional, professional 3D games with realistic environments, sound, dynamic effects, and more! Will Goldstone 1- PUBLISHING -J BIRMINGHAM - MUMBAI Preface
Gnome Wars User Manual
 Gnome Wars User Manual Contents Game Installation... 2 Running the Game... 2 Controls... 3 The Rules of War... 3 About the Game Screen... 3 Combat Progression... 4 Moving Gnomes... 5 Fighting... 5 Characters...
House Design Tutorial
 House Design Tutorial This House Design Tutorial shows you how to get started on a design project. The tutorials that follow continue with the same plan. When you are finished, you will have created a
PROJECT HIGHRISE by SomaSim
 PROJECT HIGHRISE by SomaSim Project Highrise Modding, Part 2: Layered Decorations Welcome back! Now that you ve gone through Part 1 and created your own basic decoration, we ll learn how to make more complicated
Converting a solid to a sheet metal part tutorial
 Converting a solid to a sheet metal part tutorial Introduction Sometimes it is easier to start with a solid and convert it to create a sheet metal part. This tutorial will guide you through the process
Heavy Station Kit base 2
 The huge loads are distributed on the strong support pillars, securing space for the bunker or the center of operations. This heavy looking interior/exterior/top-down Kit is made to suit extreme environments
Single Player Commands Schematic Save Format
 Single Player Commands Schematic Save Format 1.1 Singleplayer Commands, 1.2 WorldEdit Singleplayer Commands(Bearbeiten / Quelltext bearbeiten) Sets a period of time (HH:MM format), this will make minecraft
CBCL Limited Sheet Set Manager Tutorial 2013 REV. 02. CBCL Design Management & Best CAD Practices. Our Vision
 CBCL Limited Sheet Set Manager Tutorial CBCL Design Management & Best CAD Practices 2013 REV. 02 Our Vision To be the most respected and successful Atlantic Canada based employeeowned firm, delivering
Learn Unity by Creating a 3D Multi-Level Platformer Game
 Learn Unity by Creating a 3D Multi-Level Platformer Game By Pablo Farias Navarro Certified Unity Developer and Founder of Zenva Table of Contents Introduction Tutorial requirements and project files Scene
MODEL SETUP FOR RENOVATION PROJECTS INSTRUCTIONS AND TUTORIALS
 MODEL SETUP FOR RENOVATION PROJECTS INSTRUCTIONS AND TUTORIALS WHAT S INSIDE INTRODUCTION 1 PART ONE LAYERS AND CLASSES FOR RENOVATION PROJECT 1 OVERVIEW 1 SETTING UP LAYERS AND CLASSES 1 CREATING OBJECT
Beginning 3D Game Development with Unity:
 Beginning 3D Game Development with Unity: The World's Most Widely Used Multi-platform Game Engine Sue Blackman Apress* Contents About the Author About the Technical Reviewer Acknowledgments Introduction
Getting Started Guide
 SOLIDWORKS Getting Started Guide SOLIDWORKS Electrical FIRST Robotics Edition Alexander Ouellet 1/2/2015 Table of Contents INTRODUCTION... 1 What is SOLIDWORKS Electrical?... Error! Bookmark not defined.
Oculus Rift Getting Started Guide
 Oculus Rift Getting Started Guide Version 1.7.0 2 Introduction Oculus Rift Copyrights and Trademarks 2017 Oculus VR, LLC. All Rights Reserved. OCULUS VR, OCULUS, and RIFT are trademarks of Oculus VR, LLC.
Submittals Quick Reference Guide
 This topic provides a reference for the Project Center Submittals activity center. Purpose The Submittals activity center in Newforma Contract Management enables you to effectively log submittals and track
Kodiak Corporate Administration Tool
 AT&T Business Mobility Kodiak Corporate Administration Tool User Guide Release 8.3 Table of Contents Introduction and Key Features 2 Getting Started 2 Navigate the Corporate Administration Tool 2 Manage
Space Invadersesque 2D shooter
 Space Invadersesque 2D shooter So, we re going to create another classic game here, one of space invaders, this assumes some basic 2D knowledge and is one in a beginning 2D game series of shorts. All in
ArbStudio Triggers. Using Both Input & Output Trigger With ArbStudio APPLICATION BRIEF LAB912
 ArbStudio Triggers Using Both Input & Output Trigger With ArbStudio APPLICATION BRIEF LAB912 January 26, 2012 Summary ArbStudio has provision for outputting triggers synchronous with the output waveforms
Oculus Rift Getting Started Guide
 Oculus Rift Getting Started Guide Version 1.23 2 Introduction Oculus Rift Copyrights and Trademarks 2017 Oculus VR, LLC. All Rights Reserved. OCULUS VR, OCULUS, and RIFT are trademarks of Oculus VR, LLC.
Adding in 3D Models and Animations
 Adding in 3D Models and Animations We ve got a fairly complete small game so far but it needs some models to make it look nice, this next set of tutorials will help improve this. They are all about importing
Civ 6 Unit Asset Tutorials Level 2 - Change your behavior! By Leugi
 Civ 6 Unit Asset Tutorials Level 2 - Change your behavior! By Leugi Mixing and tinting ingame assets is usually enough for making Civ6 units, but sometimes you will meet up with some issues. If you wanted
1. Setup Output mode. 2. Using a Fixed tile size
 Tutorial Tiling Software version: Asanti 2.0 Document version: June 23, 2015 This tutorial demonstrates how to use tiling with Asanti. Tiling can only be executed on a system where Acrobat Pro X or later
FOCUS ON REAL DESIGN AUTOMATE THE REST CUSTOMTOOLS BATCH CONVERTING YOUR SOLIDWORKS FILES
 FOCUS ON REAL DESIGN AUTOMATE THE REST CUSTOMTOOLS BATCH CONVERTING YOUR SOLIDWORKS FILES Table of Contents BATCH CONVERTING YOUR SOLIDWORKS DOCUMENTS... 3 Introduction... 3 What does it do?... 3 How does
AS How to Use Dynamo to Visibly Show Navisworks Clashes into Revit
 AS125109 How to Use Dynamo to Visibly Show Navisworks Clashes into Revit Felix Tan Stantec Ryan Wells Stantec Learning Objectives Learn how to simplify a coordination workflow between Navisworks and Revit
Official Documentation
 Official Documentation Doc Version: 1.2.0 Toolkit Version: 1.2.0 Contents Recommended Editor Setup... 3 Technical Breakdown... 4 Assets... 6 Setup... 7 Out-of-the-box Options... 8 Deck Builder Overview...
IPS-ENERGY Module Group: Setting Workflow Management Version 1.92
 IPS-ENERGY Module Group: Setting Workflow Management Version 1.92 2017 This document is the sole property of IPS-Intelligent Process Solutions GmbH and is provided to the recipient for its own use only.
Version 2 Image Clarification Tool for Avid Editing Systems. Part of the dtective suite of forensic video analysis tools from Ocean Systems
 By Version 2 Image Clarification Tool for Avid Editing Systems Part of the dtective suite of forensic video analysis tools from Ocean Systems User Guide www.oceansystems.com www.dtectivesystem.com Page
First Steps in Unity3D
 First Steps in Unity3D The Carousel 1. Getting Started With Unity 1.1. Once Unity is open select File->Open Project. 1.2. In the Browser navigate to the location where you have the Project folder and load
Super HUD- User Guide
 - User Guide From Poker Pro Labs Version - 2 1. Introduction to Super HUD... 1 2. Installing Super HUD... 2 3. Getting Started... 7 3.1 Don t have an Account?... 8 3.2 Super HUD Membership(s)... 9 4. Super
Unity Certified Programmer
 Unity Certified Programmer 1 unity3d.com The role Unity programming professionals focus on developing interactive applications using Unity. The Unity Programmer brings to life the vision for the application
Then click on the "create new" button.
 Welcome to the world of Atys! This is the first screen you will load onto after logging. This is the character-generating screen. Choose an empty slot. This is where your character will be placed after
Objectives Learn how to import and display shapefiles in GMS. Learn how to convert the shapefiles to GMS feature objects. Required Components
 v. 10.3 GMS 10.3 Tutorial Importing, displaying, and converting shapefiles Objectives Learn how to import and display shapefiles in GMS. Learn how to convert the shapefiles to GMS feature objects. Prerequisite
Nighork Adventures: Beyond the Moons of Shadalee
 Manual Nighork Adventures: Beyond the Moons of Shadalee by Warptear Entertainment Copyright in 2011-2016 by Warptear Entertainment. Contents 1 Launcher 3 1.0.1 Resolution.................................
Quest 6: Viking Mythology
 These 3 activities complement classroom work on the topic of Viking mythology: Explore the mythological areas Viking storyteller; and The Nidhogg. Skills and Capabilities These activities offer opportunities
MWF Rafters. User Guide
 MWF Rafters User Guide September 18 th, 2018 2 Table of contents 1. Introduction... 3 1.1 Things You Should Know Before Starting... 3 1.1.1 Roof Panels Structure Orientation... 3 1.1.2 Member Selection...
Meteor Game for Multimedia Fusion 1.5
 Meteor Game for Multimedia Fusion 1.5 Badly written by Jeff Vance jvance@clickteam.com For Multimedia Fusion 1.5 demo version Based off the class How to make video games. I taught at University Park Community
This guide will cover the basics of base building, we will be using only the default recipes every character starts out with.
 Basebuilding Guide Basic base building guide. This guide will cover the basics of base building, we will be using only the default recipes every character starts out with. The base building in Miscreated
CONCEPTS EXPLAINED CONCEPTS (IN ORDER)
") CONCEPTS EXPLAINED This reference is a companion to the Tutorials for the purpose of providing deeper explanations of concepts related to game designing and building. This reference will be updated with
CONCEPTS EXPLAINED This reference is a companion to the Tutorials for the purpose of providing deeper explanations of concepts related to game designing and building. This reference will be updated with
CHEAP GOLF EDITOR MANUAL. v 0.11
 CHEAP GOLF EDITOR MANUAL v 0.11 So you want to make your own levels. Here is how you do it. Open the editor from the title screen. If it is not unlocked yet, you have not done well enough to earn it yet,
MODEL SETUP FOR RENOVATION PROJECTS: INSTRUCTIONS AND TUTORIALS
 MODEL SETUP FOR RENOVATION PROJECTS: INSTRUCTIONS AND TUTORIALS TABLE OF CONTENTS INTRODUCTION 1 PART ONE LAYERS AND CLASSES FOR RENOVATION PROJECT 2 OVERVIEW 2 SETTING UP LAYERS AND CLASSES 2 CREATING
Multiple Quests using the ScriptEase II Story System
 Multiple Quests using the ScriptEase II Story System In this tutorial we will be adding another pirate to our game. This pirate will wander around the world looking for his parrot and refuse to come on
Unity 3.x. Game Development Essentials. Game development with C# and Javascript PUBLISHING
 Unity 3.x Game Development Essentials Game development with C# and Javascript Build fully functional, professional 3D games with realistic environments, sound, dynamic effects, and more! Will Goldstone
Table of Contents. TABLE OF CONTENTS 1-2 INTRODUCTION 3 The Tomb of Annihilation 3. GAME OVERVIEW 3 Exception Based Game 3
 Table of Contents TABLE OF CONTENTS 1-2 INTRODUCTION 3 The Tomb of Annihilation 3 GAME OVERVIEW 3 Exception Based Game 3 WINNING AND LOSING 3 TAKING TURNS 3-5 Initiative 3 Tiles and Squares 4 Player Turn
3.0. GSIS 5.0 Release Notes. NFL GSIS Support: (877) (212)
 (212)") 3.0 NFL GSIS Support: (877) 635-0171 (212) 450-2442 Copyright 2007, The National Football League, All Rights Reserved This document is the property of the NFL. It may not be reproduced or transmitted in
3.0 NFL GSIS Support: (877) 635-0171 (212) 450-2442 Copyright 2007, The National Football League, All Rights Reserved This document is the property of the NFL. It may not be reproduced or transmitted in
3D Top Down Shooter By Jonay Rosales González AKA Don Barks Gheist
 3D Top Down Shooter By Jonay Rosales González AKA Don Barks Gheist This new version of the top down shooter gamekit let you help to make very adictive top down shooters in 3D that have made popular with
Switching to Sub Category and Collapsible Skins
 Switching to Sub Category and Collapsible Skins New programming enhancements and features are not compatible with the older Q-Net skins. If you are using either the original Drop Down skin or the Standard
To experience the new content, go to the VR center in Carceburg after doing the alcohol mission.
 To experience the new content, go to the VR center in Carceburg after doing the alcohol mission. Known Issues: - There is not much story content added this update because of the time required to completely
GAME:IT Junior Bouncing Ball
 GAME:IT Junior Bouncing Ball Objectives: Create Sprites Create Sounds Create Objects Create Room Program simple game All games need sprites (which are just pictures) that, in of themselves, do nothing.
Stratigraphy Modeling Boreholes and Cross Sections
 GMS TUTORIALS Stratigraphy Modeling Boreholes and Cross Sections The Borehole module of GMS can be used to visualize boreholes created from drilling logs. Also three-dimensional cross sections between
Civ 6 Unit Asset Tutorials Level 1 - Hello World
 Civ 6 Unit Asset Tutorials Level 1 - Hello World By Leugi So making units is pretty much a basic and much necessary knowledge for almost all possible Civilization VI mods; whether Leaders, Civilizations
Nighork Adventures: Legacy of Chaos
 Manual Nighork Adventures: Legacy of Chaos by Warptear Entertainment Copyright in 2011-2017 by Warptear Entertainment. Contents 1 Launcher 3 1.0.1 Resolution................................. 3 1.0.2 Fullscreen.................................
A game by DRACULA S CAVE HOW TO PLAY
 A game by DRACULA S CAVE HOW TO PLAY How to Play Lion Quest is a platforming game made by Dracula s Cave. Here s everything you may need to know for your adventure. [1] Getting started Installing the game
with MultiMedia CD Randy H. Shih Jack Zecher SDC PUBLICATIONS Schroff Development Corporation
 with MultiMedia CD Randy H. Shih Jack Zecher SDC PUBLICATIONS Schroff Development Corporation WWW.SCHROFF.COM Lesson 1 Geometric Construction Basics AutoCAD LT 2002 Tutorial 1-1 1-2 AutoCAD LT 2002 Tutorial
Ansible Tower Quick Setup Guide
 Ansible Tower Quick Setup Guide Release Ansible Tower 3.2.2 Red Hat, Inc. Mar 08, 2018 CONTENTS 1 Quick Start 2 2 Login as a Superuser 3 3 Import a License 5 4 Examine the Tower Dashboard 7 5 The Settings
Technical Note. How to Use the Image Studio Software Western and MPX Western Analyses. Developed for: Image Studio Software
 Technical Note How to Use the Image Studio Software Western and MPX Western Analyses Developed for: Image Studio Software Please refer to your manual to confirm that this protocol is appropriate for the
Objectives Learn how to import and display shapefiles with and without ArcObjects. Learn how to convert the shapefiles to GMS feature objects.
 v. 10.1 GMS 10.1 Tutorial Importing, displaying, and converting shapefiles Objectives Learn how to import and display shapefiles with and without ArcObjects. Learn how to convert the shapefiles to GMS
Instructions.
 Instructions www.itystudio.com Summary Glossary Introduction 6 What is ITyStudio? 6 Who is it for? 6 The concept 7 Global Operation 8 General Interface 9 Header 9 Creating a new project 0 Save and Save