Introducing Digital Scrapbooking. Create beautiful books from your photos using Photoshop Elements
|
|
|
- Colin Wood
- 5 years ago
- Views:
Transcription

1 Introducing Digital Scrapbooking Create beautiful books from your photos using Photoshop Elements 1
2 Contents Digital Scrapbooking with Photoshop Elements... 3 Using Photoshop Elements... 4 Saving your Layout... 5 The Tools... 5 Layers Panel Project Bin Quick Photo Fixes Using a Template Saving Files for Printing Photobooks Making Sense of the Jargon About Melissa Want to learn more?
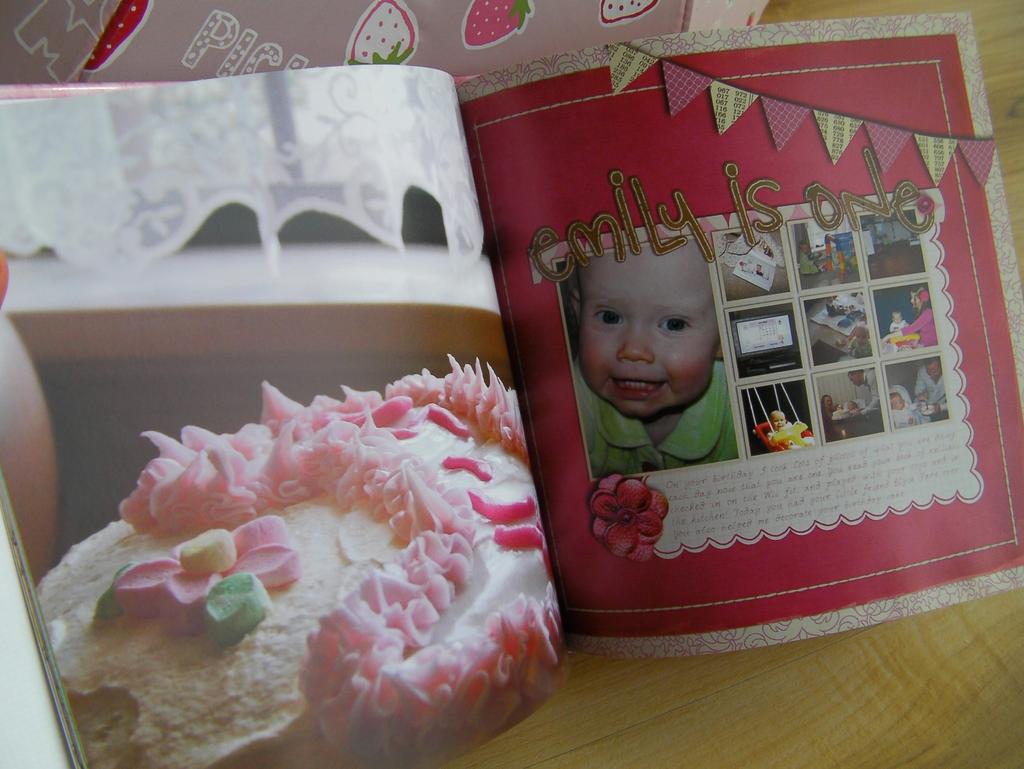
3 Digital Scrapbooking with Photoshop Elements What is digital scrapbooking? A way to keep memories through photos and words A way to share your photos with others A way to indulge your artistic side Why digital scrapbooking? Keep your desk clean Easily give copies to relatives and friends Have perfect journalling Work on your photobook while offline or on the go The basic process Get the photos from your camera Create each page in Photoshop Elements o Drop your photos on the page o Select papers o Add embellishments o Add journaling Print at home, or Upload to a site and order your printed book 3

 These settings will give you a")
4 Using Photoshop Elements When you first open Photoshop Element you are greeted with an empty screen. To start working open any file, or create a new file. File, New, Blank File (Ctrl+N) These settings will give you a high-quality, printable 12x12 size file 4
5 Saving your Layout Shortcut key Ctrl+S Always save your work as a PSD file to retain the layers. The first time you open a file you ll be asked to save it as a new file. When you open a file you ve edited previously, it works a little differently to most programs. If you ve already created a name for your layout, just click OK to the warning message, you don t want 10 copies of the same document! The Tools On the left of the screen there is a tool box. There is a couple of basic tools you will need to get started: the Move tool, the Zoom tool and the Text tool For more details hover over the tool and click on the tooltip that appears. 5

6 Move Tool Shortcut key Press V Hold down the mouse button and drag to move a layer. The layer you are about to move will have a blue box around it. 6

7 Hold down Alt while you move an item to make a copy, the cursor will look like a double arrow. Undo Shortcut Ctrl+Z If you make a mistake, just press Ctrl+Z or click on the large undo button at the top right of the screen. 7
8 Zoom tool Shortcut key Z You can zoom in by clicking on your image. Use the 1:1 Button on the control bar to see your layout at full size. Fit Screen fits the whole layout on your screen. You can also click and drag over your layout to zoom one section to take up the full screen. Eye dropper tool Shortcut key I Click on an area of your image to pick up that colour and put it into the foreground colour. You can then use this for text or brushing onto your layout. Text Tool You can use the text tool to add text anywhere on your layout. Click and drag to draw a text box. Use the tool control bar at the top of the screen to change the font, size and colour. 8
9 Type in your text. Click the green tick when you are finished editing your text. You can use the move tool (v) to move it Use the text tool (t) to edit the text later. Zoom in and click on the text to edit or move. Want a video tutorial on using the vital tools? Check out my post at Layout a Day 9

10 Layers Panel One the right hand side, you can see all the layers in the document. Layers are displayed in the Layers panel to the right of the your screen. The top layer is nearest the top of this table, whilst the background layer sits at the bottom. Layers work as independent 'surfaces' that sit on top of your background layer. Think of this surface like a clear sheet of glass or transparent film. You can drag layers up and down the stack by clicking and dragging on the picture of the layer. If the layer is at the top of the stack like the water droplets it is in front of the other layers. If it is at the bottom of the stack, like the polka-dot paper, it will appear behind the other layers. 10

11 Click the eye icon to switch on or off the visibility of the layer. 11
12 You can also click on the trash can icon to delete a layer. Project Bin When you have a file open in Photoshop Elements you can see its thumbnail in the bottom area of the screen. This is called the project bin. You can drag any open file s thumbnail onto your layout to add it to the page. 12
13 Quick Photo Fixes Here s a quick run through of steps to fix your photos: Open your photo Save your photo as a new PSD file Ctrl+D to duplicate the layer Click on the orange EDIT bar and select Quick Mode Adjust using the sliders, Ctrl+Z to undo or press the little X Save your work Place/drag the photo into your layout For a tutorial on how to fix several common photo problems using Photoshop Elements, pick up my training workshop: Photo Fixes for Real People ($20) This will show you how to Turn your overcast skies blue Clean away food from your baby s face Create a perfect group shot where everyone is smiling & has their eyes open! Get rid of red eyes. 13

14 Using a Template Templates are an easy way to get started digital scrapbooking. Templates are pre-designed pages we can modify to include whatever photos, papers and embellishments we want to use. You can get a free template by signing up to my mailing list: Templates have layers for photos, embellishments, papers and journaling 14

15 Open your template by clicking File, then Open, browse to where your template is located in click Open. When you have opened the template, you need to save it as a new file, so that you can use the original template again later. Click File, then Save As. Choose a name that will help you to remember what the layout is adapt I usually use the date and the name of the subject of the layout For example Hillarys.psd Add Photos Click on a photo layer in the Layers panel (see Layers Panel p 10). Click File, then Place (shortcut Alt+F, L) and browse to the location of the photo you can to use. Resize the photo to the approximate size you need and then click the green tick to apply the changes. Click on the Layer menu, then Create clipping mask (or Press Ctrl+G). This clips the photo to the outline of the photo spot layer in the template. 15
16 Once the photo is clipped, you can still click on the photo to do any further resizing or moving, to be sure that the photo is in the right place. Click on the next photo layer in the Layers panel, and repeat the process to add more photos. If you want to change the photo, just click on the paper and press the trash can icon at the bottom right of the layer panel and repeat the process with a different photo. Adding Papers To add a background paper, click on the paper layer at the bottom of the stack of layers. Click on File, then Open. Browse to the paper you want to use and then open it. Double click on the thumbnail of your layout in the Project Bin to get back to your layout. Drag the thumbnail of the paper onto your layout. 16
17 Press Ctrl+G to clip your paper to the paper layer. Find the next paper layer in the Layers panel and repeat the steps above. If you want to change the paper, just click on the paper and press the trash can icon at the bottom right of the layer panel and repeat the process with a different paper. Don t forget to save your work regularly Ctrl+S Add Embellishments Use the embellishments to add some interest to your layout. Replace placeholder embellishments/ribbons/etc with items from the kit you are using. You can find a digital scrapbooking kit in the Supplies folder on the Workshop CD. To add an embellishment, click on any you want to replace, for example, a layer called ribbon. Click on File, then Open. Browse to the embellishment you want to use and then open it. Double click on the thumbnail of your layout in the Project Bin to get back to your layout. Drag the thumbnail of the embellishment onto your layout. 17
18 Click the eye icon to turn off the placeholder layer as you no longer need it. Adding Journalling Add text (see Text Tool on page 8) You can add text to an existing journalling box, but selecting the text tool (press T) and then click in the journaling area. Adding a Title You can create a sophisticated looking title by using letter images or alphas from your digital scrapbooking kit. An alpha is provided on the Workshop CD in the Supplies folder. Select the layer you want the title to be on. Click File, Open, browse to the alpha and then Ctrl+Click on all the letters you need. Drag in letters to your page from the project bin. You can then drag the letters around to get them just how you like them. You can use the alignment tools to line them up. Shift click on the alpha letters, and then click on align bottom edges to line them all up. You can also resize the letter by shift clicking on them all and dragging the corner of the selection box. 18

19 You can also just use the text tool to create a title. To add texture, clip a paper to the text using Ctrl+G. Add Shadows You can make your layout look more realistic by adding shadows to your layers. Click on the Effects panel and then select the Layer Styles and then select Drop Shadows I suggest using the soft edge shadow. 19


20 You can change the settings by double clicking on the fx icon to the right of the layer name. The following dialogue box will appear. 20

21 Once you are happy with your shadow you can copy the layer style by right mouse button clicking on the name of the layer and clicking copy layer style. Select the layer you want to add it to and then right mouse button click and then paste layer style. Want a video tutorial on using a template? Check out my post at Layout a Day 21


22 Saving Files for Printing To print your layout at home, simply click File, then Print. To get your layout ready for professional printing, you ll need to save it as a JPEG file. Click File, Save As Change the Format to JPEG by clicking on the box at the bottom of the Save As dialogue box. Photoshop Elements will save the file as The Name of the File copy.jpg so you won t save over your layered PSD document. When the JPEG Options dialogue box appears, drag the slider to the right to save your file at maximum quality. When you are ready to print your photobook, you will upload this photo using the instructions on page 3 and following. 22
23 23
24 Photobooks To create a custom book from your photos, you don t need any special tools. 1. Get the photos from your camera 2. Upload to a photobook printing site such as Snapfish or Harvey Norman Photos 3. Order your printed book Snapfish During the workshop I demonstrated how to use Snapfish. To review this, visit: Create an account and log in Follow the site s instructions to create an account for free. Upload your Photos Click on Upload to add photos from your computer 24

25 Type the name for your album (or use the default date based name). Be sure to click Advanced settings Choose the Large Print Upload 25


26 Click Select Photos, then Browse to the photos you want to upload. Click close when the photos are uploaded. 26
")

27 Create your Photobook Click on Create books (Under Create project at the right) Choose the size you want, then click Create Now. I prefer the 20x20cm hardcover books. 27

.")
28 Choose a style, then click Make this Book The photbook interface will load. Close any tip windows. Click on Get Photos Click on the album you want to use (the one you previously uploaded). Click Add all photos 28


29 Click Done Drag and drop your photos in the premade layouts. You can choose Autofill if you want Snapfish to put the photos in your book automatically. Click on the grey box to add text Click Save to save your work 29

30 Preview your book When you are happy with your book order it and enter the coupon MYBOOKS at the checkout to save 20% on your photobook. A photobook is great, but what if we want more options than the pre-built Snapfish system allows? Digital scrapbooking can give you more options and more control over the end result. 30
31 Making Sense of the Jargon Digital scrapbooking uses terms from graphic design, paper scrapbooking, and art. Here are explanations of a few key terms Alpha Layout An alphabet made up of PNG files, one for each letter Refers to the whole scrapbooking page Embellishments/Elements Flatten JPG Paper Photobook PNG A PNG file that looks like a flower, ribbon, button or other decoration To remove all the layers within the file to prepare a layout for printing. Make sure you save your work before doing this! Then save the resulting file as a JPG. A file format set up by the Joint Photographic Experts Group (JPEG). A compressed file format that is used for uploading photos. JPEG compression has a number of different compression rates. Use the highest quality level (low compression) for uploading for printing, and lower quality (higher compression) for uploading to galleries for viewing on screen. A JPG file that looks like scrapbooking pattern paper or cardstock A professionally printed book made from photos or your layouts Portable Network Graphics file format. Used for embellishments in digital scrapbooking. PSD Photoshop Document file. PSD files retain layers and can be edited later. 31


32 About Melissa I m Melissa Shanhun and I ve been using my computer to create beautiful things for about 15 years now. I spent 10 years working in graphic design using a variety of software systems including Photoshop and Photoshop Elements. I ve also taught university units on presentation systems and graphic design. I ve been focusing my skills on digital scrapbooking since October My work has been featured at The Daily Digi, Log your Memory, Scrapbookgraphics, and the Daily Scrapper. On my website I m creating a unique system where you can get your Photoshop questions answered and you can use your computer to do what you want it to! 32
33 Want to learn more? Photoshop Elements Workshops Check out my free Photoshop Elements Workshops: You can also purchase workshop recordings here: 33

34 One-on-one Classes If you want to find out how to create your own pages, with an experienced scrapbooker right by your side, Introducing Digital Scrapbooking is for you. We will cover: The class includes: Where to find and how to open digital scrapbooking supplies Basic Photoshop skills How to put together layouts with templates Clipping Masks Adding text Great websites that can answer your digital scrapbooking questions How to share your work with friends and family How to print your work at home or with a photobook company A look at some completed projects for inspiration Hands on experience building a layout using a Quick Page, including titles and journalling Hands on experience creating layout using a kit and template A question and answer session Phone/Skype and support for all those questions that come up after the class is over A CD with video tutorials and digital scrapbooking resources for you to keep I also provide custom classes. Just let me know what you are looking for. Some suggested topics: Organising your Stash Scrapping with Templates Titles and working with Fonts Photoshop Q&A Photo retouching Creating an album Organising and finding your photos Photoshop Shortcuts Extracting images from Photos 34
35 Contact Information Melissa Shanhun Mobile
digitization station DIGITAL SCRAPBOOKING 120 West 14th Street
 digitization station DIGITAL SCRAPBOOKING 120 West 14th Street www.nvcl.ca techconnect@cnv.org DIGITAL SCRAPBOOKING With MyMemories Suite 6 The MyMemories Digital Scrapbooking software allows you to create
Stone Creek Textiles. Layers! part 1
 Stone Creek Textiles Layers! part 1 This tutorial is all about working with layers. This, to my mind, is one of the two critical areas to master in order to work creatively with Photoshop Elements. So,
Photoshop CS6. Table of Contents. Image Formats! 3. GIF (Graphics Interchange Format)! 3. JPEG or JPG (Joint Photographic Experts Group)!
! 3. JPEG or JPG (Joint Photographic Experts Group)!") Photoshop CS6 Table of Contents Image Formats! 3 GIF (Graphics Interchange Format)! 3 JPEG or JPG (Joint Photographic Experts Group)! 3 PNG (Portable Network Graphics)! 3 Pixels! 3 Resolution! 3 Creating
Photoshop CS6 Table of Contents Image Formats! 3 GIF (Graphics Interchange Format)! 3 JPEG or JPG (Joint Photographic Experts Group)! 3 PNG (Portable Network Graphics)! 3 Pixels! 3 Resolution! 3 Creating
LESSON 04: ORGANIZE IT FOR PSE USERS COMPANION BOOK. Digital Scrapbook Academy. April 2018: Lesson 04 Organize It for Elements Users
 Digital Scrapbook Academy April 2018: Lesson 04 LESSON 04: ORGANIZE IT FOR PSE USERS COMPANION BOOK Page 1 of 15 Table of Contents Table of Contents 2 Welcome to Lesson 04 for Elements Users 3 1: Add Photos,
Adobe Photoshop CC 2018 Tutorial
 Adobe Photoshop CC 2018 Tutorial GETTING STARTED Adobe Photoshop CC 2018 is a popular image editing software that provides a work environment consistent with Adobe Illustrator, Adobe InDesign, Adobe Photoshop,
You ve Been Framed! (Adobe Photoshop)
") You ve Been Framed! (Adobe Photoshop) Tip of the Week by Linda Sattgast on September 28, 2009 Do you have a great photo of someone special that you want to bring into sharp focus the special person, that
You ve Been Framed! (Adobe Photoshop) Tip of the Week by Linda Sattgast on September 28, 2009 Do you have a great photo of someone special that you want to bring into sharp focus the special person, that
Step 1: Open A Photo To Place Inside Your Text
 Place A Photo Or Image In Text In Photoshop In this Photoshop tutorial, we re going to learn how to place a photo or image inside text, a very popular thing to do in Photoshop, and also a very easy thing
The original photo. The final result.
 giving a photo painted edges In this Adobe Photoshop tutorial, we re going to combine a couple of different effects. First, we ll give the photo easy-tocreate painted edges, and then we ll make it look
Photoshop CC 2018 Essential Skills
 Photoshop CC 2018 Essential Skills Adobe Photoshop Creative Cloud 2018 University Information Technology Services Learning Technology, Training, Audiovisual and Outreach Copyright 2018 KSU Division of
GETTING STARTED. 0 P a g e B a s i c s o f A d o b e P h o t o s h o p A g a P r i v a t e I n s t i t u t e f o r c o m p u t e r s c i e n c e
 GETTING STARTED 0 P a g e B a s i c s o f A d o b e P h o t o s h o p Adobe Photoshop: is a popular image editing software that provides a work environment consistent with Adobe Illustrator, Adobe InDesign,
Using Adobe Photoshop
 Using Adobe Photoshop 6 One of the most useful features of applications like Photoshop is the ability to work with layers. allow you to have several pieces of images in the same file, which can be arranged
Adobe Photoshop CS5 Tutorial
 Adobe Photoshop CS5 Tutorial GETTING STARTED Adobe Photoshop CS5 is a popular image editing software that provides a work environment consistent with Adobe Illustrator, Adobe InDesign, Adobe Photoshop
PHOTOSHOP. Introduction to Adobe Photoshop
 PHOTOSHOP You will; 1. Learn about some of Photoshop s Tools. 2. Learn how Layers work. 3. Learn how the Auto Adjustments in Photoshop work. 4. Learn how to adjust Colours. 5. Learn how to measure Colours.
Photoshop: a Beginner s course. by: Charina Ong Centre for Development of Teaching and Learning National University of Singapore
 Photoshop: a Beginner s course by: Charina Ong Centre for Development of Teaching and Learning National University of Singapore Table of Contents About the Workshop... 1 Prerequisites... 1 Workshop Objectives...
ITNP80: Multimedia Adobe Photoshop Practical Weeks commencing 26 January and 2 February 2015.
 ITNP80: Multimedia Adobe Photoshop Practical Weeks commencing 26 January and 2 February 2015. The aims and objectives of this practical are four-fold: To give you some practical experience of some of the
Rendering a perspective drawing using Adobe Photoshop
 Rendering a perspective drawing using Adobe Photoshop This hand-out will take you through the steps to render a perspective line drawing using Adobe Photoshop. The first important element in this process
Introduction.
 Introduction At Photobooks Express, it s our aim to go that extra mile to deliver excellent service, products and quality. Our fresh, dynamic and flexible culture enables us to stand above the rest and
The original image. As I said, we ll be looking at a few different variations on the effect. Here s the first one we ll be working towards:
 DIGITAL PIXEL EFFECT In this Photoshop tutorial, we re going to look at how to create a digital pixel effect, which is often used in ads that sell anything to do with digital. We re going to first pixelate
iphoto Getting Started Get to know iphoto and learn how to import and organize your photos, and create a photo slideshow and book.
 iphoto Getting Started Get to know iphoto and learn how to import and organize your photos, and create a photo slideshow and book. 1 Contents Chapter 1 3 Welcome to iphoto 3 What You ll Learn 4 Before
Creating Photo Borders With Photoshop Brushes
 Creating Photo Borders With Photoshop Brushes Written by Steve Patterson. In this Photoshop photo effects tutorial, we ll learn how to create interesting photo border effects using Photoshop s brushes.
By Washan Najat Nawi
 By Washan Najat Nawi how to get started how to use the interface how to modify images with basic editing skills Adobe Photoshop: is a popular image-editing software. Two general usage of Photoshop Creating
Adobe Photoshop CS5 Layers and Masks
 Adobe Photoshop CS5 Layers and Masks Email: training@health.ufl.edu Web Page: http://training.health.ufl.edu Adobe Photoshop CS5: Layers and Masks 2.0 Hours The workshop will cover creating and manipulating
Digital Scrapbooking, Your First Digital Layout using FotoFusion
 Digital Scrapbooking, Your First Digital Layout using FotoFusion Like paper scrapbooking, digital scrapbooking utilizes a combination of digital kits, papers, alphas, stamps, ribbons, and a variety of
Source photo, sketchbook collage and digital collage
 Source photo, sketchbook collage and digital collage Develop a mixed media project using traditional media, digital camera, scanner and image manipulation software. This technique encourages a creative
Recitation 2 Introduction to Photoshop
 Recitation 2 Introduction to Photoshop What is Adobe Photoshop? Adobe Photoshop is a tool for creating digital graphics either by starting with a scanned photograph or artwork or by creating the graphics
5 Masks and Channels
 5 Masks and Channels Adobe Photoshop uses masks to isolate and manipulate specific parts of an image. A mask is like a stencil. The cutout portion of the mask can be altered, but the area surrounding the
Turn A Photo Into A Collage Of Polaroids With Photoshop
 http://www.photoshopessentials.com/photo-effects/polaroids/ Turn A Photo Into A Collage Of Polaroids With Photoshop Written by Steve Patterson. In this Photoshop Effects tutorial, we ll learn how to take
Photoshop Elements 7.0
 Photoshop Elements 7.0 Photoshop Elements is a powerful software package that lets you create or edit pictures and images. Photoshop works on the principles of layers. Think about an image as a number
Adobe Photoshop CS2 Workshop
 COMMUNITY TECHNICAL SUPPORT Adobe Photoshop CS2 Workshop Photoshop CS2 Help For more technical assistance, open Photoshop CS2 and press the F1 key, or go to Help > Photoshop Help. Selection Tools - The
SURREALISM IN PHOTOSHOP
 SURREALISM IN PHOTOSHOP In this tutorial your aim is to create a surrealist inspired image using Photoshop. You will combine a selection of images in an illogical, non realistic manner. Set up a folder
ITEC185 INTRODUCTION TO DIGITAL MEDIA
 1 ITEC185 INTRODUCTION TO DIGITAL MEDIA ADOBE PHOTOSHOP ITEC185 - Introduction to Digital Media ITEC185 - Introduction to Digital Media 2 What is Adobe Photoshop? Photoshop is the leading professional
The original image. The final rainbow effect.
 ADD A realistic rainbow to a photo In this Photoshop photo effects tutorial, we re going to learn how to easily add a rainbow, even a double rainbow, to a photo. Of course, as with most photo effects,
Retouching Portraits in Photoshop
 Retouching Portraits in Photoshop I Removing Blemishes When removing blemishes, acne or other imperfections on the skin, our goal is to maintain as much of the original skin texture as possible. That way,
11 Advanced Layer Techniques
 11 Advanced Layer Techniques After you ve learned basic layer techniques, you can create more complex effects in your artwork using layer masks, path groups, filters, adjustment layers, and more style
Clipping Masks And Type Placing An Image In Text With Photoshop
 Clipping Masks And Type Placing An Image In Text With Photoshop Written by Steve Patterson. In a previous tutorial, we learned the basics and essentials of using clipping masks in Photoshop to hide unwanted
Key Terms. Where is it Located Start > All Programs > Adobe Design Premium CS5> Adobe Photoshop CS5. Description
 Adobe Adobe Creative Suite (CS) is collection of video editing, graphic design, and web developing applications made by Adobe Systems. It includes Photoshop, InDesign, and Acrobat among other programs.
Photoshop Exercise 2 Developing X
 Photoshop Exercise 2 Developing X X-ray Vision: In this exercise, you will learn to take original photographs and combine them, using special effects. The objective is to create a portrait of someone holding
TECHNOTravel. For Microsoft Word & PowerPoint 2010 Student Workbook. TECHNOeBooks Project-based Computer Curriculum ebooks.
 TECHNOTravel For Microsoft Word & PowerPoint 2010 Student Workbook TECHNOeBooks Project-based Computer Curriculum ebooks www.bepublishing.com Copyright 1993 2010. TechnoKids Inc. in partnership with B.E.
Photo Retouching. Get more model faces from Google
 Get more model faces from Google Part 1 - Basic Model Retouching 1.- Face and Hair... Here we have a very Beautiful lady, but she is not as beautiful as she could be. Here, in this tutorial, you will see
ADOBE PHOTOSHOP CS 3 QUICK REFERENCE
 ADOBE PHOTOSHOP CS 3 QUICK REFERENCE INTRODUCTION Adobe PhotoShop CS 3 is a powerful software environment for editing, manipulating and creating images and other graphics. This reference guide provides
Adobe PhotoShop Elements 3.0 Quick Start Tutorial
 Adobe PhotoShop Elements 3.0 Quick Start Tutorial Introduction When you open Photoshop Elements, you are greeted by the welcome screen which offers you several choices: 1. Product Overview Provides a quick
Learn More about TechnoPhotoshop SAMPLE
 Learn More about TechnoPhotoshop Session 2 Filtering Fun In this session, students are introduced to Photoshop photo editing software. To start, they learn about the program environment. Afterwards, they
Session 3: Getting to Know Photoshop Elements. Keep in mind that there are many others ways of solving the problems.
 Tutorial Session 3: Getting to Know Photoshop Elements Now that you have taken some pictures you might have noticed that some of the images have little problems like red-eye, colorcast, and too dark or
Reveal the mystery of the mask
 Reveal the mystery of the mask Imagine you're participating in a group brainstorming session to generate new ideas for the design phase of a new project. The facilitator starts the brainstorming session
PanosFX CARTOONS User guide PANOSFX CARTOONS. Photoshop actions - for PS CC, CS6, CS5, CS4, CS3. User Guide
 PANOSFX CARTOONS Photoshop actions - for PS CC, CS6, CS5, CS4, CS3 User Guide CONTENTS 1. THE BASICS... 1 1.1. About the effects... 1 1.2. How the actions are organized... 1 1.3. Installing the actions
Car Ad Photoshop Tutorial Miss Van Lenten Tools: Paint brush, Eraser, Quick Selection/Magic Wand, Quick Mask, Layer Mask
 Car Ad Photoshop Tutorial Miss Van Lenten Tools: Paint brush, Eraser, Quick Selection/Magic Wand, Quick Mask, Layer Mask Part One: Google image search for a car of your choosing. Make sure you go to tools
 Introduction At Photobookshop, it s our aim to go that extra mile to deliver excellent service, products and quality. Our fresh, dynamic and flexible culture enables us to stand above the rest and produce
ADD A REALISTIC WATER REFLECTION
 ADD A REALISTIC WATER REFLECTION In this Photoshop photo effects tutorial, we re going to learn how to easily add a realistic water reflection to any photo. It s a very easy effect to create and you can
Introduction to Photoshop
 Introduction to Photoshop Instructional Services at KU Libraries A Division of Information Services www.lib.ku.edu/instruction Abstract: This course covers the basics of Photoshop, including common tools
Photoshop Elements Hints by Steve Miller
 2015 Elements 13 A brief tutorial for basic photo file processing To begin, click on the Elements 13 icon, click on Photo Editor in the first box that appears. We will not be discussing the Organizer portion
WORN, TORN PHOTO EDGES EFFECT
 Photo Effects: CC - Worn, Torn Photo Edges Effect WORN, TORN PHOTO EDGES EFFECT In this Photoshop tutorial, we ll learn how to take the normally sharp, straight edges of an image and make them look all
Basics Pictures Media Bar
 Basics 1 The right pictures can make your publication stand out from the crowd. In this tutorial, we ll show you how to: Add and replace pictures. Use the Media Bar. Pan, zoom, and crop pictures. Apply
PSE 15 Copying a Selection From One Image to Another
 PSE 15 Copying a Selection From One Image to Another In this tutorial, I will make a selection in one image and then copy it to a second image. We will make use of the Quick Selection Tool to make the
Creating Transparent Floors. Creating Transparent Floors. Contents. Introduction. Requirements. By Cyclonesue, 1 July 2006
 Creating Transparent Floors Contents SECTION 1: INSTALLING AND PREPARING YOUR TOOLS SECTION 2: CREATING A FLOOR TILE GRAPHIC SECTION 3: CLONE A FLOOR TILE PACKAGE IN HOMECRAFTER SECTION 4: COMPLETE YOUR
SURREALISM IN PHOTOSHOP
 SURREALISM IN PHOTOSHOP In this tutorial your aim is to create a surrealist inspired image using Photoshop. You will combine a selection of images in an illogical, non realistic manner. Set up a folder
Adobe Illustrator CS6
 Adobe Illustrator CS6 Table of Contents Image Formats 3 ai (Adobe Illustrator) 3 eps (Encapsulated PostScript) 3 PDF (Portable Document Format) 3 JPEG or JPG (Joint Photographic Experts Group) 3 Vectors
Introduction to Photoshop CS6
 Introduction to Photoshop CS6 Copyright 2016, Faculty and Staff Training, West Chester University. A member of the Pennsylvania State System of Higher Education. No portion of this document may be reproduced
SHAPE CLUSTER PHOTO DISPLAY
 SHAPE CLUSTER PHOTO DISPLAY In this Photoshop tutorial, we ll learn how to display a single photo as a cluster of shapes, similar to larger wall cluster displays where several photos, usually in different
Using Adobe Photoshop
 Using Adobe Photoshop 4 Colour is important in most art forms. For example, a painter needs to know how to select and mix colours to produce the right tones in a picture. A Photographer needs to understand
The original image. Let s get started! The final rainbow effect. The photo sits on the Background layer in the Layers panel.
 Add A Realistic Rainbow To A Photo In this Photoshop photo effects tutorial, we ll learn how to easily add a rainbow, and even a double rainbow, to a photo! As we ll see, Photoshop ships with a ready-made
Contents. Introduction
 Contents Introduction 1. Overview 1-1. Glossary 8 1-2. Menus 11 File Menu 11 Edit Menu 15 Image Menu 19 Layer Menu 20 Select Menu 23 Filter Menu 25 View Menu 26 Window Menu 27 1-3. Tool Bar 28 Selection
Managing images with NewZapp
 Managing images with NewZapp This guide is for anyone using the NewZapp Fixed editor as opposed to the Drag and Drop editor. The Image Manager is where images are uploaded and stored in your NewZapp account
LESSON 02: GET STRONGER FOR PS USERS COMPANION BOOK. Digital Scrapbook Academy. February 2018: Lesson 02 Get Stronger for Photoshop Users
 Digital Scrapbook Academy February 2018: Lesson 02 LESSON 02: GET STRONGER FOR PS USERS COMPANION BOOK Page 1 of 19 Table of Contents Table of Contents 2 Welcome to Lesson 02 for Photoshop Users 4 1: Add
Photoshop CS6 Basics. Using Layers to Create a Magazine Cover
 Photoshop CS6 Basics Using Layers to Create a Magazine Cover If you re using Photoshop Elements to do this project, the steps I cover in this tutorial will hopefully be useful to you as a guide Photoshop
METAL TEXT EFFECT. Step 1: Create A New Document. Step 2: Fill The Background With Black
 METAL TEXT EFFECT In this text effects tutorial, we ll learn how to easily create metal text, a popular effect widely used in video games and movie posters! It may seem like there s a lot of steps involved,
ADDING RAIN TO A PHOTO
 ADDING RAIN TO A PHOTO Most of us would prefer to avoid being caught in the rain if possible, especially if we have our cameras with us. But what if you re one of a large number of people who enjoy taking
Google Photos Online Basics
 Google Photos Online Basics Click here to return to the Computer Club s website Adding new photos to your Google Photos - Three Ways Google Photos Uploader From Google Photos website click upload for individual
FLAMING HOT FIRE TEXT
 FLAMING HOT FIRE TEXT In this Photoshop text effects tutorial, we re going to learn how to create a fire text effect, engulfing our letters in burning hot flames. We ll be using Photoshop s powerful Liquify
For all question related to Photoshop that we cannot address in class, start by looking at the excellent Photoshop help: Help > Photoshop Help.
 AD23300 Electronic Media Studio Prof. Fabian Winkler Fall 2013 Adobe Photoshop CS6 For all question related to Photoshop that we cannot address in class, start by looking at the excellent Photoshop help:
NMC Second Life Educator s Skills Series: How to Make a T-Shirt
 NMC Second Life Educator s Skills Series: How to Make a T-Shirt Creating a t-shirt is a great way to welcome guests or students to Second Life and create school/event spirit. This article of clothing could
LESSON 09: THE STYLISH SCRAPPER FOR PS & PSE USERS COMPANION BOOK. Digital Scrapbook Academy
 Digital Scrapbook Academy September 2018: Lesson 09 LESSON 09: THE STYLISH SCRAPPER FOR PS & PSE USERS COMPANION BOOK Page 1 of 12 Table of Contents Table of Contents 2 Welcome to Lesson 09 for Photoshop
Digital Imaging - Photoshop
 Digital Imaging - Photoshop A digital image is a computer representation of a photograph. It is composed of a grid of tiny squares called pixels (picture elements). Each pixel has a position on the grid
A.J. Wood on Instagram
 A.J. Wood http://ajwood.com ajwood@adobe.com @adobewan on Instagram The Photoshop Environment Photoshop's Start Workspace provides info at a glance including recent files, CC files, and presets for starting
Nikon View DX for Macintosh
 Contents Browser Software for Nikon D1 Digital Cameras Nikon View DX for Macintosh Reference Manual Overview Setting up the Camera as a Drive Mounting the Camera Camera Drive Settings Unmounting the Camera
Photo Within A Photo - Photoshop
 Photo Within A Photo - Photoshop Here s the image I ll be starting with: The original image. And here s what the final "photo within a photo" effect will look like: The final result. Let s get started!
An Introduction to Layers, Masks and Channels in Photoshop
 An Introduction to Layers, Masks and Channels in Photoshop Roy Killen, GMAPS, EFIAP, GMPSA (c) 2017 Roy Killen Layers, Masks and Channels Page 1 Two approaches to image editing When images are edited in
Adding Graphics to a Presentation
 8 Adding Graphics to a Presentation LESSON SKILL MATRIX Skill Exam Objective Objective Number Adding a Picture to a Slide Formatting Graphical Elements Resize graphical elements. 3.1.3 Apply styles to
Extreme Makeovers: Photoshop Retouching Techniques
 Extreme Makeovers: Table of Contents About the Workshop... 1 Workshop Objectives... 1 Getting Started... 1 Photoshop Workspace... 1 Retouching Tools... 2 General Steps... 2 Resolution and image size...
Copyright Notice. Trademarks
 Copyright Notice All rights reserved. No part of this publication may be reproduced, stored in a retrieval system, or transmitted in any form or by any means, electronic, mechanical, photocopying, recording,
Digital Design and Communication Teaching (DiDACT) University of Sheffield Department of Landscape. Adobe Photoshop CS5 INTRODUCTION WORKSHOPS
 University of Sheffield Department of Landscape. Adobe Photoshop CS5 INTRODUCTION WORKSHOPS") Adobe INTRODUCTION WORKSHOPS WORKSHOP 1 - what is Photoshop + what does it do? Outcomes: What is Photoshop? Opening, importing and creating images. Basic knowledge of Photoshop tools. Examples of work.
Adobe INTRODUCTION WORKSHOPS WORKSHOP 1 - what is Photoshop + what does it do? Outcomes: What is Photoshop? Opening, importing and creating images. Basic knowledge of Photoshop tools. Examples of work.
PHOTOSHOP PUZZLE EFFECT
 PHOTOSHOP PUZZLE EFFECT In this Photoshop tutorial, we re going to look at how to easily create a puzzle effect, allowing us to turn any photo into a jigsaw puzzle! Or at least, we ll be creating the illusion
ArcSoft PhotoImpression Table of Contents:
 ArcSoft PhotoImpression Table of Contents: 1. Welcome to PhotoImpression 2. Highlights of PhotoImpression 3. System Requirements 4. Installing PhotoImpression 5. Working with PhotoImpression Getting Started
Photoshop Elements for Genealogists Part 1
 Photoshop Elements for Genealogists Part 1 By Barry J. Ewell Topics Covered Photoshop Elements Workspace Exploring the Tools Quick Fix Preview Photoshop Elements Workspace Workspace File Edit Image Enhance
PanosFX CARTOONS User guide PANOSFX CARTOONS. Photoshop actions - for PS CC, CS6, CS5, CS4. User Guide
 PANOSFX CARTOONS Photoshop actions - for PS CC, CS6, CS5, CS4 User Guide CONTENTS 1. THE BASICS... 1 1.1. About the effects... 1 1.2. How the actions are organized... 1 1.3. Installing the actions in Photoshop...
Patterned Paper Christmas Tree (Photoshop)
") Patterned Paper Christmas Tree (Photoshop) Tip of the Week by Sara Horton on November 30, 2009 Did you put up your Christmas tree over the weekend? It s a tradition in our family to decorate the tree while
Patterned Paper Christmas Tree (Photoshop) Tip of the Week by Sara Horton on November 30, 2009 Did you put up your Christmas tree over the weekend? It s a tradition in our family to decorate the tree while
Creating a Watercolor Painting From a Photo. Open the photo you want to appear to be a watercolor painting. I am using the photo below:
 Creating a Watercolor Painting From a Photo Open the photo you want to appear to be a watercolor painting. I am using the photo below: Make any adjustments as needed like cropping the photo before preceding
Now we ve had a look at the basics of using layers, I thought we d have a look at a few ways that we can use them.
 Stone Creek Textiles stonecreektextiles.co.uk Layers Part 2 Now we ve had a look at the basics of using layers, I thought we d have a look at a few ways that we can use them. In Layers part 1 we had a
Photoshop CS2. Step by Step Instructions Using Layers. Adobe. About Layers:
 About Layers: Layers allow you to work on one element of an image without disturbing the others. Think of layers as sheets of acetate stacked one on top of the other. You can see through transparent areas
The final wrap text in 3D result.
 WRAPPING TEXT IN 3D In this Photoshop tutorial, we re going to learn how to easily wrap text around a 3D object in Photoshop, without the need for any 3D software. We re going to be wrapping our text around
The original image. Let s get started! The final light rays effect. Photoshop adds a new layer named Layer 1 above the Background layer.
 Add Rays Of Light To A Photo In this photo effects tutorial, we ll learn how to quickly and easily add rays of sunlight to an image with Photoshop! I ll be using Photoshop CS5 throughout this tutorial
The original image. Let s get started! The final result.
 Miniature Effect With Tilt-Shift In Photoshop CS6 In this tutorial, we ll learn how to create a miniature effect in Photoshop CS6 using its brand new Tilt-Shift blur filter. Tilt-shift camera lenses are
4 layer BASiCS lesson overview 104
 4 layer basics Lesson overview In this lesson, you ll learn how to do the following: Organize artwork on layers. Create, view, hide, and select layers. Rearrange layers to change the stacking order of
Photoshop CC Editing Images
 Photoshop CC Editing Images Rotate a Canvas A canvas can be rotated 90 degrees Clockwise, 90 degrees Counter Clockwise, or rotated 180 degrees. Navigate to the Image Menu, select Image Rotation and then
Photo Effects & Corrections with PhotoFiltre
 Photo Effects & Corrections with PhotoFiltre P 330 / 1 Fix Colour Problems and Apply Stylish Effects to Your Photos in Seconds with This Free Software If you re keen on digital photography, you probably
ADOBE PHOTOSHOP CS TUTORIAL
 ADOBE PHOTOSHOP CS TUTORIAL A D O B E P H O T O S H O P C S Adobe Photoshop CS is a popular image editing software that provides a work environment consistent with Adobe Illustrator, Adobe InDesign, Adobe
Adding Fireworks To A Photo With Photoshop
 Adding Fireworks To A Photo With Photoshop Written by Steve Patterson. In this Photoshop Effects tutorial, we re going to learn how to add fireworks to a photo. What you ll need is a photo of fireworks
Preparing Images For Print
 Preparing Images For Print The aim of this tutorial is to offer various methods in preparing your photographs for printing. Sometimes the processing a printer does is not as good as Adobe Photoshop, so
Outlined Doodle Element
 Outlined Doodle Element digitalscrapper.com/blog/qt-outlined-doodles Jen White Outlined Doodle Element by Jen White Repurpose the doodles in your stash into trendy outlined elements. Important Design Concept:
Introduction to Layers in Photoshop. Layers palette
 Layers: Are an essential element of Photoshop and a tool of every digital darkroom. Allow you to optimize one part of your photograph without affecting other parts. Allow an Undo of everything from minor
TOPAZ LENS EFFECTS QUICK START GUIDE
 TOPAZ LENS EFFECTS QUICK START GUIDE Introduction Topaz Lens Effects is designed to give you the power to direct and focus your viewer s eyes where you want them. With Lens Effects, you get advanced technology