UBC3300XLT OM 5/14/04 3:28 PM Page i UBC3300XLT SCANNER
|
|
|
- Augustus Watkins
- 5 years ago
- Views:
Transcription


1 UBC3300XLT OM 5/14/04 3:28 PM Page i UBC3300XLT SCANNER
2
3 Contents Introduction...1 Front View...2 Icon Display...3 UBC3300XLT SHORTCUTS...4 Important Notice...6 Terminology...7 What is Scanning?...7 What is Searching?...7 What is Trunk Tracking?...7 Feature Highlights...9 Where to Obtain More Information...11 Information on the Internet...11 Included with Your Scanner Package...12 Setup...13 Installing the Battery Pack...13 Charging the Battery Pack...13 Low Battery Indicator...13 Flexible Antenna...14 Beltclip...14 Listening Safely...14 Connecting the (Optional) REMOTE Cable...14 Basic Operation...15 Turn the Scanner On...15 Setting the Squelch...15 Understanding the Menu System...16 Menu Description and Numeric Keypad Equivalents...17 Programming...26 Storing Frequencies into Channels in Menu Mode...26 Deleting a Stored Frequency...27 Editing a Stored Frequency...27 Duplicate Frequency Alert...27 Transfer Frequencies...28 Storing Text Tags...28 Beep Alert...29 Programming Tips...30 Scanning...31 Storing Frequencies During Scanning...31 RF Attenuation Feature...32 Setting the Delay Mode for Frequency...32 Channel Lockout...33 Restoring a Locked-out Channel...34 Restoring All Locked-out Channels...34 Priority Scan...34 Changing the Priority Channel...35 Priority Channel Plus Scan...35 Searching...36 Setting a Search Range...36 Starting Chain Search...37 Search Hold Feature...37 Data Skip...37 Frequency Skip...38 Storing Search Frequencies...38 Auto Storing...39 Squelch (SQ) Mode...40 Additional Menu Options for Searching...42 Air Service Search...43 Air Service Search Skip...43
4 Programming and Receiving Trunked Systems...45 STEP1: Selecting or Changing Trunking System Type...45 STEP2: Programming Trunking Frequencies...46 STEP3: Programming ID Scan List Manually...47 Scan Lists...47 Setting the Squelch...50 Receiving Trunked Systems...50 ID Scan Mode...51 ID Scan Hold Feature...52 Trunked Search...52 ID Monitor Mode...52 ID Search Hold and Direct Entry ID Hold Mode...53 ID Lockout...53 Review ID Lockout...54 Restoring Locked-out IDs...54 Setting the Delay Mode for Trunking Mode...55 Setting Priority in Trunking Mode...56 Programming Scan Lists During Search...56 Deleting a Stored ID...56 Moving between Scan List Memories...57 I-Call (Motorola/EDACS)...57 Multi-Track...58 EDACS Reception...60 EDACS Tracking...60 Programming EDACS System Frequencies...60 An EDACS Trunked system...61 Special EDACS Features...62 EDACS SCAT...63 LTR Reception...64 LTR Tracking...64 Motorola Reception...65 Motorola Tracking...65 Fleet Map Programming...66 Selecting Preset Fleet Map...66 Programming a Fleet Map...67 Programming a Hybrid System...67 Setting the Base, Spacing Frequencies and Offset Channel for Motorola VHF/UHF Trunked Systems...68 Toggling the Status Bit...69 Control Channel Only Mode...69 Disconnect Tone Detect Option (End Code)...71 Remote Interface...72 PC Control Mode...72 Clone Mode...73 Additional Features...76 Care and Maintenance...79 Troubleshooting...80 Specifications...82 Glossary of Terms...83 Appendix...86 Declaration of Conformity...94
5 Introduction The UBC3300XLT is a state-of-the-art radio with TrunkTracker III and automatic scanning capabilities. It can store frequencies such as police, fire/emergency, marine, railroad, air, amateur, and other communications into 10 banks of 100 channels for a total of 1000 channels. Use your new scanner to monitor: Police and Fire Departments (including rescue and paramedics) Trunked for: Motorola Type I Type II Type I,II (Hybrid) EDACS Wide band Narrow band Scat LTR Business/Industrial Radio Utilities Marine and Amateur (ham radio) Bands Air Band And much more... The chart below identifies the scanner band numbers, the frequency range, the modulation mode and the default step size settings. To change the Band Plan, press and hold the Band Plan number 1, 2, or 3 while turning ON the scanner. Note: This scanner remembers the last Band Plan selected in each mode. Band Plan 1 No. Range (MHz) Mode (khz) Step FM FM FM FM WFM WFM AM 12.5/ FM FM FM FM FM WFM FM AM FM FM FM FM FM FM FM 12.5 Band Plan 2 No. Range (MHz) Mode Step (khz) FM FM FM FM WFM WFM AM 12.5/ FM FM FM FM FM WFM FM AM FM FM FM FM FM FM FM Band Plan 3 No. Range (MHz) Mode Step (khz) FM FM with FM 15kHz Offset WFM AM 12.5/ FM FM FM FM FM FM FM WFM FM AM FM FM FM FM FM FM 12.5
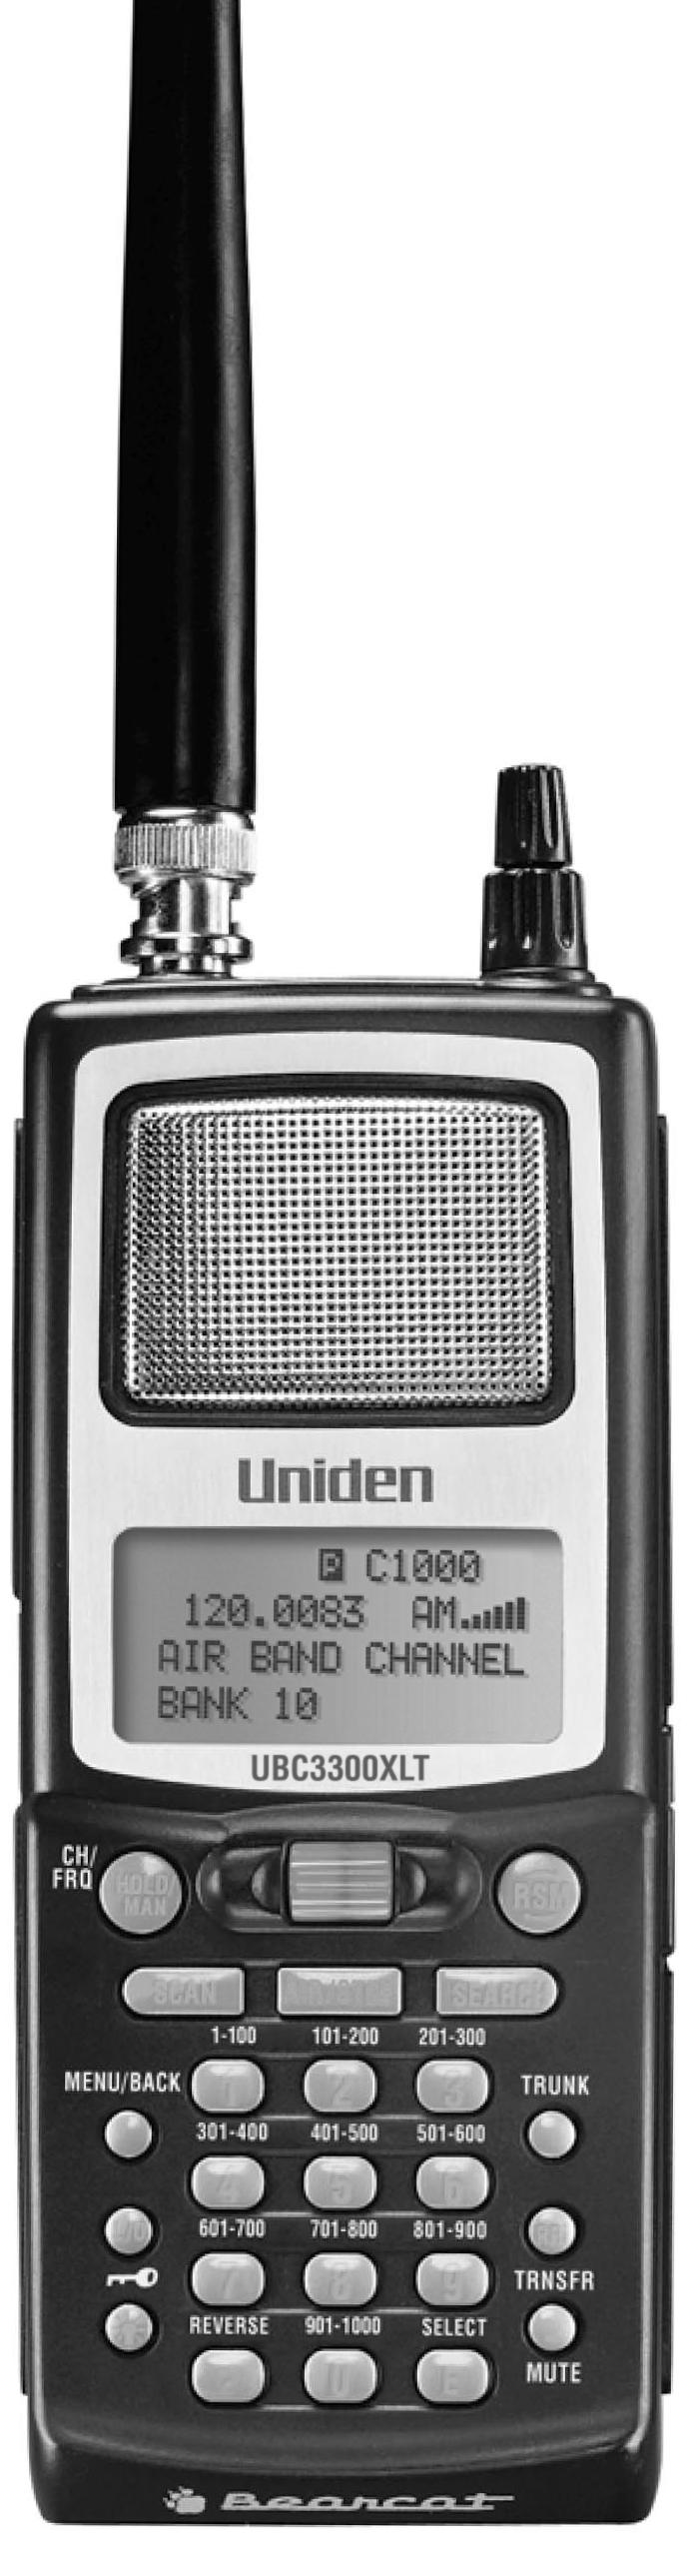
6 Front View CH/ FRQ HOLD/ MAN MENU/BACK L/O SCAN UBC3300XLT AIR/STEP RSM SEARCH TRUNK REVERSE. SELECT E Antenna Connector 2. Speaker 3. Display 4. DC Power Jack 5. Hold/Manual/Channel/Frequency Key (HOLD/MAN) 6. Scan Key (SCAN) 7. Menu/Back Key (MENU/BACK) 8. Lockout Key (L/O) 9. Light/Keypad Lock Key ( / ) 10. Decimal/Reverse Key (. ) 11. Earphone Jack 12. Volume/ON/OFF Control 13. Squelch Control 14. Remote Jack 15. VFO Control 16. Resume Key ( RSM ) 17. AIR/STEP Key 18. Search Key (SEARCH) 19. Numeric Keypad 20. Trunk Key (TRUNK) 21. Priority Key (PRI) 22. Transfer/Mute Key (TRNSFR/MUTE) 23. Enter/Select Key (E) 2
7 Icon Display ICON P L / O SRCH SRVC SCAN ID SCAN ID SEARCH C M L E AM,FM WFM,NFM DESCRIPTION Priority Channel Indicator Lock Out Mode Indicator Scan/Search Direction Indicator Chain Search Mode Indicator Air Service Search Mode Indicator Scan Mode Indicator ID Scan Mode Indicator ID Search Mode Indicator Channel Type Conventional Type Trunk Type Morola Tracking Type LTR Tracking Type EDACS Tracking Type Receiving Mode Indicators Signal Meter Battery Indicator Uniden and Bearcat are registered trademarks of Uniden America Corporation. TrunkTracker is a proprietary trademark of Uniden America Corporation. 3
8 UBC3300XLT SHORTCUTS MENU/ BACK MENU/ BACK MENU/ BACK MENU/ BACK the neat entry Programming. MENU/ BACK (for example; replace the frequency on channel 5 to ) SCAN HOLD/ MAN 5 HOLD/ MAN E To receive an alert for activity on a specific channel, turn on the "Beep Alert" for that channel. MENU/ BACK MENU/ BACK E Rotate the VFO control to enter the text and using RSM or HOLD/MAN to move the cursor. After the text is entered, press E To receive an alert for activity on specific IDs while trunk tracking, turn on the "Beep Alert" for that ID. E select ID MEMORY 1 MENU/ BACK E
9 UBC3300XLT SHORTCUTS To set up a system for trunk tracking, select a bank, then enter the trunk type. MENU/ BACK 1 2 select bank 6 1 SEARCH MENU/ BACK E 2 Then enter the trunk type you want to track. Press E MENU/ BACK 2 select range 1 2 E 1 To change the alpha tag on the specific search range of frequencies that you set, do the following: MENU/ BACK select range E 4 E To begin searching between the Range press SEARCH. Rotate the VFO control to enter the tag and use RSM or HOLD/MAN to move the cursor forward or back and then press E. MENU/ BACK E MENU/ BACK 2 1 E 1 E Rotate the VFO control to enter the tag and use RSM or HOLD/MAN to move the cursor and then press E. To silence the scanner's audio output, set the scanner to "Mute On". Press and hold MUTE. 5
10 Important Notice The installation, possession, or use of this scanning radio in a motor vehicle may be prohibited, regulated, or require a permit in certain states, cities, and/or local jurisdictions. Your local law enforcement officials should be able to provide you with information regarding the laws in your community. Changes or modifications to this product are strictly prohibited, or operation of this product in any way other than as detailed by this Owner's manual. Could void your authority to operate this product. The screen displays used in this manual are representations of what might appear when you use your scanner. 6
11 Terminology What is Scanning? Unlike standard AM or FM radio stations, most two-way communications do not transmit continuously. The UBC3300XLT scans the Frequencies you have programmed into the Scanner s channels until it finds an active frequency. Scanning stops on an active frequency and remains on that channel as long as the transmission continues. When the transmission ends, the scanning cycle resumes until another transmission is received. What is Searching? The UBC3300XLT can search each of its 22 bands to find active frequencies. This is different from scanning because you are searching for frequencies that have not been programmed into your Scanner s channels. The scanner automatically chooses between two speeds while searching. Turbo Search, can search the VHF FM bands at up to 300 steps per second. What is Trunk Tracking? Conventional scanning is a simple concept. You enter a radio frequency in your scanner s memory which is used by someone you want to monitor. For example, the police in your area may broadcast on MHz, the fire department on MHz, the highway department on MHz, etc. So when your scanner stops on a frequency, you usually know who it is, and more importantly, you can stop on a channel and listen to an entire conversation. This type of scanning is easy and fun. As the demand for public communications has increased, many public radio users don't have enough frequencies to meet their needs, and this has created a serious problem. Trunking radio systems solve this problem. In a trunked radio system, which contains up to 28 different frequencies, radio users are divided into groups, often called talkgroups, and these talkgroups are assigned specific IDs. When someone in a talkgroup uses their radio, a brief burst of data is broadcasted before each transmission. The trunking system computer uses this data to temporarily assign each radio in a talkgroup to an available frequency. If the group using a frequency stops broadcasting or pauses between 7
12 replies for a few seconds, they are removed from the frequency so another talkgroup can use it. Sharing of the available public service frequencies, or trunking, allows cities, counties, or other agencies to accommodate hundreds of users with relatively few frequencies. Following a conversation on a trunked system using a scanner is difficult, if not impossible. Because when there's a short break during the conversation you're monitoring, it s possible that the talkgroup will be assigned to a completely different frequency in the trunked system. This type of scanning is difficult and frustrating. TrunkTracker III changes this! Not only does your new UBC3300XLT scan channels like a conventional scanner, it actually follows the users of a trunked radio system. Once you know a talkgroups ID, you won t miss any of the action. If you're a new scanner enthusiast, you may want to read the first part of this manual and use your scanner in conventional mode before you begin trunk tracking. Understanding scanning fundamentals and its terminology will make trunk tracking much easier. A glossary of other commonly used terms is provided in the back. (Refer to the "Glossary of Terms" section.) But if you're already an experienced scanner operator, you may want to skip to Programming and Receiving Trunked Systems on page 45. 8
13 Feature Highlights Trunk Tracking Follow VHF High Band UHF 800/900MHz trunked public safety and public service systems just as if conventional two-way communications were used. Multi-Track Track more than one trunking system at a time. Scan conventional and trunked systems at the same time Channels Program one frequency into each channel. You must have at least one channel programmed to use the Scan mode. 22 Bands Includes 22 bands, with aircraft and 800 MHz. 10 Banks 10 banks with 100 channels each are useful for storing similar frequencies to maintain faster scanning cycles or for storing all the frequencies of a trunked system. 25 MHz-1300 MHz Indicates the range of frequencies that can be searched within the bands of your scanner. Note: The frequency coverage is not continuous. 10 Priority Channels You can assign one priority channel in each bank. Assigning a priority channel allows you to keep track of activity on your most important channel(s) while monitoring other channels for transmissions. You can also assign Trunking priority Talkgroups. Priority Plus Scan Allows you to scan only priority channels. Unique Data Skip Allows your scanner to skip unwanted data transmissions and reduces birdies. Memory Backup If power is disconnected, the frequencies programmed in your scanner are retained in memory. Direct Channel Access Go directly to any channel without entering the Menu mode. Attenuator Reduces the signal strength on a per frequency basis. PC Programmable Allows you to easily program all frequencies and Trunking Talk Groups into your UBC3300XLT from your PC. Remote cable is optional. Turbo Search Increases the search speed to 300 steps per second. This applies only to transmission bands with 5 khz steps. 9
14 Text Tags You can customize your scanner by storing text tags (up to 16 characters). Auto Store The scanner automatically stores found active frequencies into an assigned bank. CTCSS/DCS The scanner can receive and search for subaudible tones. LCD Back-Light LCD illuminates when you press the Light/Lock ( ) key. You can select the lighting length of time in the Menu mode. Battery Save In Scan Hold mode and no transmission, your scanner automatically reduces its power requirements to extend the battery life. 10
15 Where to Obtain More Information Before using your scanner, you must program frequencies into available channels. To obtain frequency information for your area, contact your local dealer. Information on the Internet If you have access to the internet, you may want to visit the following website for additional information: 11
16 Included with Your Scanner Package If any of these items are missing or damaged, immediately contact your place of purchase. UBC3300XLT Hand held Scanner AC Adapter/Charger (AD-629) Ni-MH Battery (BP-250) Rubber Antenna Beltclip Operating Guide 12
17 L/O TRUNK MUTE Setup Installing the Battery Pack 1. Open the cover. 2. Connect the battery pack connector observing the correct polarity. 3. Replace the cover and press down until it clicks into place. Charging the Battery Pack Use the AC Adapter/Charger to power the UBC3300XLT from an AC outlet. You can use your scanner while the battery charges. To fully charge the battery, leave the AC Adapter/Charger Use only the supplied AC Adapter connected for hours. Note: Disconnect the AC Adapter/Charger from the unit when charging is complete. Low Battery Indicator When the battery pack is low and needs to be charged, appears on the display. You will also hear a beep every 15 seconds as an audible alert. CH/ FRQ HOLD/ MAN MENU/BACK RSM SCAN AIR/STEP SEARCH REVERSE SELECT 13
18 Flexible Antenna Attach the flexible antenna to the antenna connector. Beltclip The beltclip is designed to fit snugly on the back of the scanner. Line up the four arms on the beltclip with the four tabs on the scanner and slide the beltclip into place, as shown on the right. Listening Safely To protect your hearing, follow these guidelines when you use an earphone or headphones. Do not listen at extremely high volume levels. Extended high volume listening can lead to permanent hearing loss. Set the VOLUME to the lowest setting before you begin listening. After you begin listening, adjust the VOLUME to a comfortable level. Once you set the VOLUME, do not increase it. Over time, your ears adapt to the volume level, so a volume level that does not cause discomfort might still damage your hearing. Connecting the (Optional) REMOTE Cable You can transfer the programmed channels, talk group ID s, etc. to and from another UBC3300XLT scanner using a remote cable. See "Clone Mode" on page 73. You can also upload or download the programmed data to or from a PC. See "PC Control mode" on page
19 Basic Operation Turn the Scanner On Turn the VOLUME control clockwise out of the detent position. The scanner automatically starts scanning. Since there are no frequencies programmed in your scanner initially, you may not receive any signals. Once you set the squelch and program some frequencies, you will begin hearing conversations regularly.you can select the type of the frequency when you turn the unit ON. Setting the Squelch To set the squelch, you must be in the hold mode, and you should not be receiving a signal on your scanner. 1. Press HOLD/MAN until STRONG SIGNALS you do not hear a signal. MEDIUM SIGNALS 2. Make sure that the WEAK SIGNALS VOLUME is set to a comfortable listening level. NOISE 3. Think of the Squelch Control as a gate. Turn the SQUELCH control fully counterclockwise. This raises the STRONG SIGNALS "Squelch Gate" so high MEDIUM SIGNALS that only very strong WEAK SIGNALS signals can get through. NOISE 4. Turn SQUELCH clockwise until you hear a hiss. This lowers the "Squelch Gate" so that everything gets through noise, weak STRONG SIGNALS signals, medium signals MEDIUM SIGNALS and strong signals. WEAK SIGNALS 5. Turn SQUELCH back NOISE counter-clockwise just until the hiss stops. Now the "Squelch Gate" allows only clear signals through. 15
20 Next you must program some frequencies (page 26). It is recommended that you read the next part "Understanding the Menu System" because it will assist you in accessing and understanding many of the features. Later in a section called "Additional Features", you will find explanations on how to disable the keypad acknowledgement tones, mute the audio, change the appearance of the display and other general features. Understanding the Menu System It is very important for you to understand the Menu screen. To navigate through the Menu screen is really quite simple. Many of the features of this scanner, can only be accessed by the Menu screens. There are several ways to get through the screens. First of all, press MENU/BACK to get started. Anytime you want to exit this mode or simply quit from where you are, repeatedly press MENU/BACK until the scanner returns to the original state or you can press SCAN or SEARCH to exit directly out of Menu mode. Anytime you are in the Menu mode, the audio will be muted. To assist you in understanding the Menu screen, flow charts are provided towards the back of the manual so you can follow along. Two things to remember are rotate the VFO through the menu and press E to execute the command. For simplicity, we have chosen to rotate the VFO control up or down in order to scroll through the menu and the E key for entering or executing a command. Once you have pressed the E key and executed the final choice (for instance, ON or OFF), the display backs up to the previous level of options. Also direct entry of the numbers in the flow chart will get you through the screens, but the other screen options are not visible. This method should be used only after you have gone through the manual at least once. Tearout shortcut cards (see pages 4 and 5) are provided to assist you in the direct entry methods for commonly used features. The illustration on the next page shows the first level of the Menu screen. These levels are then provided in a flow chart on pages 91 to 93. You will find a description section to explain the meanings of these functions on the next pages. Then, you will be walked through all the steps of programming, scanning, searching, and trunktracking. Hint: You can check the various options you programmed on the display when you press and hold MENU/BACK for 2 seconds in the following modes. Scan mode/scan Hold mode (as well as Trunk mode). Chain Search mode/chain Search Hold mode 16
21 ID Search mode/id Search Hold mode MENU MODE 1:SERVICE OPTION 2:SCAN OPTION 3:SYSTEM OPTION Menu Description and Numeric Keypad Equivalents Below are the Menu screens and a brief description or purpose of the feature. 1:SERVICE OPTION 1:AIR The Air Service Search feature allows you to scroll through the preprogrammed services. 2:CHAIN SEARCH You can program up to 10 search ranges. The first time you program a range you will need to do so through the Menu. After the first time you can program a range as you do on most any other scanner, using the numeric keypad or VFO control. Use this Menu item to select the search range that you want to program. You can program range 1 through 10, one at a time. For each of the ranges, the following options can be modified. 1:CHAIN SEARCH You must turn Chain Search feature ON, in order to use the Chain Search feature. 2:SEARCH RANGE 1:RANGE Enter the upper and lower frequency limits of the Search Range. 2:STEPS You can assign a variety of step sizes to the search range. Note: The default step is usually acceptable and is listed on page 1. 3:MODE You can change the Auto receive mode to AM, FM, WFM, NFM. 17
22 4:ALPHA TAG You can enter an Alpha Tag for any or all of the search ranges. 5:TRUNK During Chain Search mode, when the scanner finds an active frequency. The trunk tracking system will be active. Four frequency plans apply to the Control Channel Only feature (for details see page 69). 3:DELAY Set the delay for the search ranges to 1:ON or 2:OFF. This applies to Search mode (See 2:SCAN OPTION / 1:CONVENTIONAL / 2:DELAY for details). 4:ATTENUATOR Set attenuation for all search ranges. (See 2:SCAN OPTION/1:CONVENTIONAL / 5:ATTENUATOR for details). 5:TONE DATA The default mode is 2:OFF. This means that you will receive all transmissions on any frequencies that are active within your search range(s). By selecting CTCSS or DCS you can set the radio to receive only a particular subaudible tone to be received during your search. You can also lockout a particular CTCSS or DCS tone. You may wish to do this if you want to search a range but not hear transmissions on any frequency that has a particular subaudible tone. Note: Through the System Menu you can set the radio to operate in Tone Search mode during Search as well. In this mode, the radio will automatically determine the active subaudible tone on any frequency received during the search. 6:AUTO STORE You can automatically store active frequencies found during a search into the memory. You can select which bank you want to program the found frequencies. The audio will be muted during Auto Store. 18
23 2:SCAN OPTION 1:CONVENTIONAL Choose the channel number. The following options are available for the selected channel only. Repeat using a different channel number, if necessary. 1:FREQUENCY Allows you to edit or enter a frequency in each channel you select. Also you can set an alphanumeric text tag for each programmed frequency. 2:DELAY The delay for all programmed channels is 2 seconds. At the end of any transmission the scanner will remain on the frequency for 2 seconds before resuming scanning. This will allow you to catch most replies. 3:TONE DATA You can set a CTCSS (analog) or DCS (digital) subaudible tone for a frequency. To do so you must have the SQ Mode in the System Menu set to Tone SQ. You can also program a subaudible tone easily by pressing the E key in Scan Hold mode after programming a frequency. This will bring up the Tone Data menu without having to navigate the Menu. By doing this you will receive all transmissions on the frequency, regardless of the subaudible tone, except the one which you have locked. Any transmissions with that tone will not be received. 4:BEEP ALERT You can set a Beep Alert on a per-channel basis to alert you when specific frequencies are active. For example, you may wish to be alerted anytime a mutual aid fire frequency is active. With Beep Alert, you will hear three beeps at the start of each transmission that you have flagged as such. You will also notice that as you scroll pass the flagged channel(s), you will hear three beeps. 5:ATTENUATOR The UBC3300XLT comes with an RF Attenuation feature. If you are near an unusually strong signal source, the signal may overload the scanner. The scanner may stop repeatedly on that signal and miss other transmissions. 19
24 The RF Attenuation feature works in all modes and attenuates (reduces) the incoming signal strength to prevent stronger signals from overloading the scanner. 6:STEPS Your UBC3300XLT is programmed with default step sizes for each frequency range (see page 1). Steps are important if you are interested in using the VFO to tune off from a frequency programmed into memory or if you wish to program a frequency that the default step size will not accept. 7:MODE Default Auto receive modes are also programmed into memory. AM for aircraft, for example. You can change the default settings on a per-channel basis with this Menu item. 2:TRUNK Choose the Trunk bank. The following options are available for the selected trunk bank only. Repeat using a different trunk bank, if necessary. 1:TRUNK TYPE You will need to assign the correct trunking type for the bank you are about to program. If you want to listen to a Motorola Type I system, you will need to use this Menu option to assign the same. If you do not know the type of trunking system you are about to monitor, refer to the guide included with the scanner or check out Note: Some trunking systems require that you know the channel order. In these cases you will also need to start programming the trunked system at the start of the bank. The scanner defaults to the most common type of trunking system, Motorola Type II
25 2:TRUNK CHANNEL 1:FREQUENCY To use Trunk Tracking, you need to program a frequency for at least one channel. Also you can enter an alpha tag for each channel in this Menu. 2:STEPS You can assign a variety of step sizes to the channel. 3:TALK GROUP You can program IDs into the Scan List memory either during Trunk Scan or Search without going into the Menu. However, you can also use the Menu to program IDs. This is particularly helpful when you are not near the trunked system you wish to later monitor. You can set it up and have it ready to go at some later time. After you have selected the Scan List location (1-10), you can then do the following: 1. Program ID number 2. Set an alpha tag 3. Assign a Beep Alert to the ID. Whenever that ID is active, you will hear three beeps at the start of the transmission. 4:DELAY You can set a delay for a trunk system on a bank by bank basis. The delay time is 2 seconds, and this setting can not be changed. 5:ID LIST TAG Assign an alphanumeric tag to any or all of the 10 Scan Lists for the system. During ID Scan Mode, you will see the ID List Tag (on the bottom text line) along with any alpha tag you may have set for an ID. In Search mode, you will see any Bank Tag you have set. 6:L/O ID REVIEW Use this Menu item to review the IDs that you have locked out during Search and Scan. Rotate the VFO up or down to view the IDs that have been locked out. To leave the lockout IDs unchanged, press MENU/BACK to back out of the Menu. To unlock an ID, press the L/O key. To unlock all the IDs that have been locked out, press and hold the L/O key for about 2 seconds. 21
26 7: ACTIVITY ID When activity ID is set to ON, your scanner receives any transmissions on the ID every 0.5 seconds while scanning. 8:I-CALL (MOTOROLA/EDACS) Most communications within a trunked system are group calls where one unit (such as a dispatcher) communicates with all the units within his/her group (all the patrol vehicles on the east side of town, for example). The units within this group comprise what is typically known as a talkgroup. There are some communications which are direct unit-to-unit conversations where one individual converses with another individual. The call is initiated by a radio and is directed to another single radio. Within the system, no one outside of these two users hears the conversation. Your UBC3300XLT defaults to I-CALL OFF mode. You can hear these conversations by using this Menu item to turn the I-CALL function to ON. In Search mode, with I-CALL ON, you will hear both talkgroup calls and I- CALLs. You can also set I-CALLs to I-CALL ONLY during which you will monitor only I- CALLs in Search mode. You can also program I-CALL IDs into Scan List memory. OR 8:ID SCAN LIST (LTR) When scanning an LTR system you can only turn Scan Lists OFF and ON when an LTR talk group that you have entered into memory is active. To provide you with another method to turn Scan Lists ON and OFF, you can use this Menu item which only appears when you have selected LTR in trunk type. 9:EMERGENCY ALT (EDACS) In EDACS trunked systems, you can set an alert for an EDACS transmission received. Set Emergency Alert to ON, EMERGENCY flashes on the display and you will hear beep alerts when you receive an EDACS emergency transmission. 22
27 9:STATUS BIT (MOTOROLA) On Type 2 trunking systems there is a method by which specialized types of communications utilize unique talkgroup numbers. An emergency call will occur on a unique talkgroup from its primary assignment, for example. Because the UBC3300XLT defaults to Status-Bit ON mode, you never need to worry about missing these transmissions. If you've programmed talkgroup into Scan List memory, for example, and there is an emergency call within the group, you will hear it on :EDACS ID FORM (EDACS) You can change to display the talkgroups in decimal mode, but this mode does not provide you with the flexibility that you get with AFS. The UBC3300XLT defaults to show the talkgroup number in AFS mode (Agency- Fleet-Subfleet). For details on AFS see pages 61~63. OR 0:END CODE (MOTOROLA) When this function is disabled, the radio looks for squelch before returning to the control channel instead of waiting for the disconnect tone. Only in rare instances will you need to adjust the default settings. The condition to return to control channels depends on whether a signal is present or not. :CNTRL CH ONLY (TYPE 1/TYPE 2 800, 900) With this mode you will be able to track Motorola Type I and II 800 and 900 MHz trunked systems by simply entering the control channel which manages the trunked system. You will not have to program the voice channels. There are 4 channel plans which you can select from. 23
28 3:SYSTEM OPTION 1:DIMMER Allows you to change the brightness of the display. Also you can change the lighting length of time. 2:SCREEN MASK Screen Mask allows you to limit what appears on the display to the alpha tags that you have set for a channel along with a few function icons. Screen Mask removes the frequency, receiving mode tone data and signal strength bars. This mode is particularly useful in public safety vehicles where "information overload" is already a problem. Screen Mask does not work in Search mode. 3:KEY BEEP Use this function to turn 2:OFF the keypad acknowledgement beep. The default setting is 1:ON. 4:ENTER LOCK Use Enter Lock to prevent accidental re-programming of channels, tone (CTCSS/DCS) and talkgroups entered into memory. The default setting is 2:OFF. 5:PC CONTROL Use this function to set the transfer speed (baud rate) at which your personal computer (PC) communicates with the scanner when downloading information into your scanner. See page 72 for details. 6:CLONE You can clone all the programming, including frequencies, talkgroups and alpha tags as well as bank settings and other parameters from one UBC3300XLT to another UBC3300XLT. 7:DATA SKIP A scanner will normally stop on any transmission it receives. This means the UBC3300XLT will occasionally stop on data signals and unmodulated transmissions. You can automatically skip many of these types of transmissions with data skip turned ON. 8:SQ MODE The SQ Mode allows you to set at your option, whether the scanner will stop on all active transmissions on a particular frequency or it will only respond to transmissions with a pre-set subaudible tone. This applies to both Conventional Search and Scan modes. The options are as follows: 24
29 1. CSQ - The default setting is CSQ (carrier squelch). In this mode the scanner will stop on any transmission on a programmed frequency (Squelch mode does not apply to trunking). 2. TONE SQ - In Tone Squelch mode, if you have set a subaudible tone (CTCSS or DCS) for a frequency, the scanner will only stop on that frequency if the transmission includes the prescribed tone. 3. TONE SEARCH - In this mode, as soon as the scanner stops on any (non-trunked) channel, the scanner will begin to search for any subaudible tone that is being used on a transmitted frequency. The scanner will check each CTCSS tone sequentially and it will find DCS tones instantly. 9:BANK TAG Allows you to set an alphanumeric text tag for individual banks in the scanner (1-10). (The "0" key represents bank number 10.) For example, you may wish to set the bank one text tag as Law Enforcement, the second bank as Fire, etc. 0:P-25 CARD Select 2:DISABLE in this mode. :BATTERY SAVE When you set Battery Save to ON in this Menu, Battery Save is active in Scan Hold mode (except Priority Scan mode). 25
30 Programming Before the UBC3300XLT can begin conventional scanning, you must program a frequency into at least one channel. Repeat this procedure for each channel you want to program. Storing Frequencies into Channels in Menu Mode 1. Select frequencies you received from your dealer, from various sources on the internet, or from one of the guides listed on page Press MENU/BACK. 3. Select 2:SCAN OPTION / 1:CONVENTIONAL by rotating the VFO and pressing E. 4. Select a channel. a. Enter the channel number using the keypad. b. Then press E. CH/ FRQ HOLD/ MAN MENU/BACK L/O SCAN REVERSE. AIR/STEP SEARCH SELECT E RSM TRUNK C 001 1:FREQUENCY 2:DELAY 3:TONE DATA 5. Select 1:FREQUENCY, and press E. a. Enter the frequency number using. (decimal key) and the keypad. b. Then press E. 6. Enter the alpha tag and press E. (See page 28.) C FREQUENCY C FM ALPHA TAG 7. The following display appears, select the location you want. 1:OTHER CHANNEL 2:CHANNEL OPTION 3:DONE Note: To clear a mistake while entering the frequency,. press (decimal key) repeatedly until the display is cleared. 26
31 If you enter a channel or frequency which is out of the scanner s range, a beep will sound and ERROR appears on the display. For each channel, you can also change the step size or the mode. (See page 92.) Deleting a Stored Frequency To delete a stored frequency: a. Select a channel. b. Press 0. c. Then press E. Note: Channels with no frequencies are automatically locked out. C FM ERROR OUT OF CHANNEL C FM ERROR OUT OF BAND C Editing a Stored Frequency 1. Press MENU/BACK. 2. Select 2:SCAN OPTION / 1:CONVENTIONAL by rotating the VFO and pressing E. 3. Select the channel number you want to edit by rotating the VFO and pressing E. 4. Select 1:FREQUENCY by rotating the VFO and pressing E.. 5. Edit the frequency by using (decimal key) and the keypad and pressing E. Duplicate Frequency Alert If you enter a frequency which has been C 010 stored in another channel, you will hear FM a beep and the channel stored displays WARNING WARNING. DUPLICATE 017. Press (decimal key) to clear and start again. OR Press E again to store the frequency in both channels. 27
32 Transfer Frequencies You can transfer a frequency that has been stored in a channel to another channel. 1. Press HOLD/MAN. 2. Press TRANSFR, and the smallest empty channel number along with the frequency will flash on the display. 3. Press E and the frequency can be stored in this channel. 4. If you want to enter it into another channel, select another channel by rotating the VFO and pressing E. Note: When the frequency is transferred, channel data along with the frequency is also transferred. For trunked frequency, data related to trunking, such as Trunk Type or Fleet Map will not be transferred. You will need to input the data manually. Storing Text Tags You can customize your scanner by storing text tags for easy identification of banks, channel transmissions, trunking talkgroup IDs, etc. The text tags can be set at the Menu mode. (Refer to Understanding the Menu System on page 16.) For programming text tags for trunked talk group ID s, please refer to page 49. Assigning a Bank Tag to a Bank 1. Press MENU/BACK. 2. Select 3:SYSTEM OPTION / 9:BANK TAG by rotating the VFO and pressing E. 3. Select the bank number by rotating the VFO and pressing E. 4. The cursor appears on the display. Scroll the VFO to change the letters, and then press HOLD/MAN or RSM to move right or left. Both capital and lower case letters are available, as well as numbers and punctuation marks. 5. After entering the desired text, press E. Assigning a Text Tag to a Channel 1. Press MENU/BACK. 2. Select 2:SCAN OPTION / 1:CONVENTIONAL by rotating the VFO and pressing E. 28 BANK TAG 1 BANK TAG 1 Uniden Group
33 3. Select the channel number by rotating the VFO and pressing E. You can also enter the channel number by using the keypad and then press E. 4. Select 1:FREQUENCY and ALPHA TAG by rotating the VFO and pressing E. Note: You can only assign a text tag to the channel where the frequency is stored. 5. The cursor appears on the display. Rotate the VFO to change letters, and press HOLD/MAN or RSM to move right or left. Both capital and lower case letters are available, as well as numbers and punctuation marks. 6. After entering the desired text, press E. Remember! To clear a mistake while entering the letters,. press HOLD/MAN, RSM or (decimal key) repeatedly until the display is cleared. Beep Alert C FM ALPHA TAG The scanner can alert you with three beeps at the beginning of a transmission on an assigned frequency. Assigning the Beep Alert to a Channel This alert can be set ON/OFF for every channel in Conventional mode. In conventional mode - 1. Press MENU/BACK. 2. Select 2:SCAN OPTION / 1:CONVENTIONAL by rotating the VFO and pressing E. 3. Select the channel number by rotating the VFO and then pressing E. (You can also enter the channel number by using the keypad and then press E.) 4. Select 4:BEEP ALERT by rotating the VFO and pressing E. 5. Select 1:ON or 2:OFF by rotating the VFO and pressing E. Note: If NOT REGISTERED appears, make sure a frequency is stored in the channel. 29
34 Programming Tips Group similar services into a bank. For example, program police frequencies in channels 1 through 10 and fire/emergency into channels 51 through 60, and so on. Put the frequency that you listen to the most or the most important frequency into a Priority channel. To quickly program a series of channels, start with the lowest number channel. For example, when you are programming five new frequencies into channels 4 through 8, start with channel 4. After you finish programming a channel, rotate the VFO up to go to the next higher channel. Write down your programmed channels and frequencies and put them in a convenient place in case of accidental reprogramming. Frequencies are rounded off according to the step of each channel. When you are overwriting a tagged channel with a new frequency, the previous alpha tag will be deleted. You must re-enter the alpha tag. When programming frequencies, a 2 second delay is set automatically and can not be changed. 30
35 Scanning 1. After programming frequencies, simply press SCAN to begin scanning. During scanning, when you rotate the VFO, you can select the direction ( or ) you want to scan. 2. The bank indicators selected for scanning appear on the display, and the bank being currently monitored flashes. You can deselect banks from active scanning by entering their number on your keypad. The indicator for each deselected bank disappears, and the bank s channels are not scanned. Note: One bank must always be active. You cannot deactivate all ten banks at the same time. If you try to deselect all the banks, the first bank is automatically selected. To restore a bank to active scanning, enter the bank s number on your keypad. The bank s indicator will display again. 3. During normal scanning the scanner skips unprogrammed or locked out channels. 4. When a transmission is received, the scanner stops on that channel. When the transmission ends, scanning resumes automatically. Another method is as follows: 1. Press HOLD/MAN. 2. While the VFO setting is in the channel mode, rotate the VFO until the desired channel is displayed. Note: When in Hold mode, you can use the VFO to step up or down through the channels. You can also switch from stepping up/down through channels to stepping up/down through frequencies by pressing the HOLD/MAN button for 2 seconds. Storing Frequencies During Scanning During Scanning 1. Press HOLD/MAN. 31 CHANNELS Frequency Locked Out (L/O) C 001 SCAN Bank SCAN Frequency not entered
36 2. Press TRNSFR, and the smallest empty channel number flashes on the display. 3. Press E. Note: If you want to change the channel, rotate the VFO. If the frequency you want to store exists already, WARNING appears on the display and you will hear a beep. (See Duplicate Frequency Alert on page 27). RF Attenuation Feature The UBC3300XLT comes with an RF Attenuation feature. If you're near an unusually strong signal source, the signal may overload the scanner. The scanner may stop repeatedly on that signal and miss other transmissions. The RF Attenuation feature works in all modes and attenuates (reduces) the incoming signal strength to prevent stronger signals from overloading the scanner. The RF attenuation is set at the Menu mode. 1. Press MENU/BACK. 2. For Search mode, select 1:SERVICE OPTION / 2:CHAIN SEARCH/4:ATTENUATOR / 1:ON by rotating the VFO and pressing E. OR For Scan mode, select 2:SCAN OPTION / 1:CONVENTIONAL by rotating the VFO and pressing E. Then select the channel number by rotating the VFO and pressing E. Select 5:ATTENUATOR by rotating the VFO and pressing E. 3. Select 1:ON by rotating the VFO and pressing E. Note: Attenuation will only be active for the specified channel. In Search mode, it is applied to the search ranges in all banks. Setting the Delay Mode for Frequency The delay of 2 seconds is automatically set for each frequency. To set the delay feature, enter into the Menu mode. 1. Press MENU/BACK. 2. For Scan mode, select 2:SCAN OPTION / 32 CH/ FRQ HOLD/ MAN MENU/BACK L/O SCAN REVERSE. AIR/STEP SELECT E RSM SEARCH TRUNK
37 1:CONVENTIONAL by rotating the VFO and pressing E. 3. Select the channel number of the stored frequency to be delayed by rotating the VFO and pressing E. 4. Select 2:DELAY and press E. 5. Rotate the VFO to select 1:ON or 2:OFF and press E. 6. For Search mode, select 1:SERVICE OPTION / 2:CHAIN SEARCH/3:DELAY by rotating the VFO and pressing E, then set to 1:ON or 2:OFF the same way as the Scan mode setting. Channel Lockout You can lockout any channel so it is not checked during normal scanning. You can restore the channel to scanning when you wish. CH/ Lockout in Hold Mode FRQ HOLD/ MAN RSM SCAN AIR/STEP SEARCH 1. Press HOLD/MAN. MENU/BACK TRUNK 2. Select a channel. L/O a. Enter the channel number using REVERSE SELECT the keypad.. E b. Press HOLD/MAN again. OR C FM Rotate the VFO up or down to change the channel. UNIDEN Group A 3. Press L/O to lockout the channel. L/O appears on the display. Lockout in Scanning Mode If the scanner keeps stopping on a particular channel due to noise or frequent transmissions, you may want to keep that channel from scanning. 1. Wait until the scanner stops on the channel. 2. Then press L/O. 3. The scanner immediately resumes scanning because the locked out channel is no longer in the scanning sequence. Lockout Tips Write down your locked-out channels and put in a convenient place in case you need to restore them. 33
38 Restoring a Locked-out Channel 1. Press HOLD/MAN. 2. Select a locked out channel. a. Enter the channel number using the keypad. b. Then press HOLD/MAN again. 3. Press L/O to unlock the channel. The L/O icon disappears. CH/ FRQ HOLD/ MAN MENU/BACK L/O SCAN REVERSE. AIR/STEP SELECT E RSM SEARCH TRUNK Restoring All Locked-out Channels You can restore all locked-out channels in a bank only when a bank is selected for scan. If you have deselected a bank and you want to restore all of its locked-out channels using the steps below, you must press SCAN and then enter the number of the bank on your keypad. 1. Press HOLD/MAN. Note: You must be in Hold mode before restoring all lockedout channels. 2. Press and hold L/O for about 2 seconds. You will hear two beeps when all the channels have been restored. Priority Scan When Priority Scan is turned ON, your scanner checks the priority channel in the banks you selected every 2 seconds for activity. If a signal is present on the priority channel, your scanner monitors the channel until the transmission ends, then resumes normal scanning. You can designate one channel in each bank as a Priority Channel. By default, the first channel in each bank is the Priority Channel, but you can change this. To activate Priority Scan (in either the Hold or Scan Mode): 1. Press PRI to select PRIORITY ON. PRIORITY ON Note: If you have locked out the priority channel, ERROR appears when you select Priority mode. 2. Press PRI to select PRIORITY OFF to deactivate Priority Scan. C FM ERROR PRI CH LOCKOUT 34
39 Changing the Priority Channel You cannot eliminate the Priority Channel, but you can change it to any one of the 100 available channels in each bank. 1. Press HOLD/MAN. 2. Select a new Priority Channel: a. Enter the channel number using the keypad. b. Then press HOLD/MAN again. 3. Press and hold PRI for 2 seconds to designate this channel as your new Priority Channel. Two beeps indicates that the Priority Channel has been changed. The P icon appears on the display. Note: Priority in Trunking mode works just the same, except you set them for talkgroup IDs, instead of setting priorities for channels. The scanner only checks priority talkgroups between transmission, in 4 second intervals. Priority Scan is disabled while M, E or L (Trunking type) icons are illuminated (a beep will sound if you try to scan). To make it possible, turn OFF each function then press PRI to select PRIORITY ON. Priority Channel Plus Scan You can scan only the Priority Channels (except for the lock out channels) in the banks you selected. To activate Priority Channel Plus (Only in Scan mode): 1. Press PRI to select PRIORITY PLUS. 2. Press PRI to select PRIORITY ON or PRIORITY OFF on the display to deactivate Priority Channel Plus Scan. Note: Priority or Priority Plus Scan are disabled while Search mode is selected. CH/ FRQ HOLD/ MAN MENU/BACK L/O SCAN REVERSE. AIR/STEP SELECT E RSM SEARCH TRUNK C FM UHF TV 1 UNIDEN Group A 35
40 Searching Setting a Search Range Note: First you must set the search ranges through the Menu screen prior to any searching. The UBC3300XLT can search up to 10 separate frequency ranges to help you discover new stations in your area. To set a Search Range, enter into the Menu mode. 1. Press MENU/BACK. 2. Select 1:SERVICE OPTION / 2:CHAIN SEARCH / 2:SEARCH RANGE - by rotating the VFO and pressing E. 3. Select a range number by rotating the VFO and pressing E. 4. Select 1:RANGE by rotating the VFO and pressing E. Enter the lowest frequency using the keypad and then press E, then repeat the same for the highest frequency. Then press SEARCH. OR Another method is as follows: 1. Press and hold SEARCH for 2 seconds. 2. Select -range number-1:range and program the lowest and highest frequencies the same way as step 3 and 4 above. Note: The scanner can continuously search up to 10 ranges. (Chain Search) You can select or deselect the search range freely by pressing the corresponding number with the keypad. The scanner automatically increases its search speed from 100 to 300 steps per second for the bands having 5 khz steps. (Turbo Search) After you have set the search range through the Menu the first time for a range, you will be able to set new ranges for the same range by using the keypad and the standard direct entry method. Searching feature is applied to Control Channel Only mode (see page 69). 36 SRCH 12.5k FM Range
41 Caution: After you have entered the search range while still in the Menu mode, you can set your alpha tag (see page 28), change the step size of the search, change the mode or change the trunk set. Once the lower and upper parameters of your search are edited, the Menu screen backs up one level to allow you to modify the step size, receive mode, and alpha tag. Select 2:STEPS for your step size choices and then press E. Select 3:MODE for the receiver mode choices and then press E. Select 4:ALPHA TAG to enter an alpha tag using the VFO and then pressing E. Select 5:TRUNK to switch ON or OFF for trunk search. Starting Chain Search 1. After setting the search ranges, select 1:SERVICE OPTION / 2:CHAIN SEARCH / 1:CHAIN SEARCH by rotating the VFO and pressing E. 2. Select 1:ON by rotating the VFO and pressing E. 3. Press SEARCH to search up to 10 ranges continuously. Note: If CHAIN SEARCH is OFF, only 1 range can be searched. When searching stops, press RSM to resume searching. When you rotate the VFO while searching, you can change the search direction to up or down. When searching in WFM, it will stop before reaching the desired frequency if the step is other than 50 khz or 100 khz. Search Hold Feature 1. Press HOLD/MAN at anytime to stop the search. 2. Press RSM or SEARCH to resume searching. SRCH 12.5k FM Range 1 25cm Amateur Grp Data Skip A scanner will normally stop on any transmission it receives. This means the UBC3300XLT will occasionally stop on data signals and unmodulated transmissions. You can automatically skip many of these types of transmissions during search. To activate the Data Skip feature, enter into the Menu mode. 37
Service Search Skip...44 NWR-SAME Alert...44 Testing the Alert Siren...45 Programming FIPS Code...45 Digital and Trunked Systems...
 Contents Introduction...1 Front View...2 Icon Display...3 BC250D SHORTCUTS...4 Important Notice...6 Terminology...7 What is Scanning?...7 What is Searching?...7 What is Trunk Tracking?...7 What is APCO
UBCT9 Scanner. 250 Channels 12 Bands Programmable Trunk Tracker lll with Close Call RF Capture
 UBCT9 Scanner 250 Channels 12 Bands Programmable Trunk Tracker lll with Close Call RF Capture Precautions Before you use this scanner, please observe the following: WARNING! Uniden does not represent this
Searching a Trunked Bank...39 ID Hold Mode...41 ID Lockout...42 Restore a Single ID...42 Restore all IDs...43 Searching Tips...43 Channel Activity
 CONTENTS Introduction................................... 3 Important Notice............................... 4 Terminology.................................. 5 What is Scanning?...........................
UBC3500XLT OWNER S MANUAL
 UBC3500XLT OWNER S MANUAL OWNER S MANUAL Precautions Before you use this scanner, please read and observe the following. 2 EARPHONE WARNING! Be sure to use only a monaural earphone with this scanner. You
UBCD396T Owner's Manual OWNER'S MANUAL. Vicradio Zone
 UBCD396T Owner's Manual OWNER'S MANUAL Precautions Before you use this scanner, please read and observe the following. EARPHONE WARNING! Be sure to use only a monaural earphone with this scanner. You can
UBC360CLT OWNER S MANUAL OWNER'S MANUAL. UB355ZH(UBC360CLT).indd /04/08 15:55:49
.indd /04/08 15:55:49") UBC360CLT OWNER S MANUAL OWNER'S MANUAL UB355ZH(UBC360CLT).indd 1 2008/04/08 15:55:49 Precautions Before you read anything else, please observe the following: Changes or modifications to this product not
UBC360CLT OWNER S MANUAL OWNER'S MANUAL UB355ZH(UBC360CLT).indd 1 2008/04/08 15:55:49 Precautions Before you read anything else, please observe the following: Changes or modifications to this product not
BC246T OWNER S MANUAL
 BC246T OWNER S MANUAL OWNER S MANUAL Precautions Before you use this scanner, please read and observe the following. IMPORTANT! This scanning radio has been manufactured so that it will not tune to the
UBC93XLT SCANNER. 200 Channels 6 Pre-Programmed Service Banks. with Close Call RF Capture. Vicradio Zone
 UBC93XLT SCANNER 200 Channels 6 Pre-Programmed Service Banks with Close Call RF Capture For more exciting new products please visit our website: Australia: www.uniden.com.au New Zealand: www.uniden.co.nz
UBC370CLT Owner s Manual
 UBC370CLT Owner s Manual Printed in Vietnam U01UB380ZZZ(0) PRECAUTIONS Before you use this scanner, please read and observe the following. IMPORTANT! Changes or modifications to this product not expressly
PSR Channel VHF/Air/UHF Handheld Scanner. Owner s Manual. Add photograph
 PSR-282 200-Channel VHF/Air/UHF Handheld Scanner Owner s Manual Add photograph 1 INTRODUCTION Your new 200 Channel VHF/Air/UHF Handheld Scanner lets you scan conventional transmissions, and is preprogrammed
TX4400 UHF CB RADIO INSTRUCTION MANUAL TX4400 INSTRUCTION MANUAL PAGE 1
 TX4400 UHF CB RADIO INSTRUCTION MANUAL TX4400 INSTRUCTION MANUAL PAGE 1 TABLE OF CONTENTS GENERAL................................... 3 FEATURES.................................. 3 BASIC OPERATION...4 Front
SC230 SC230 OWNER S MANUAL OWNER S MANUAL
 SC230 SC230 OWNER S MANUAL MANUAL OWNER S MANUAL Precautions Before you use this scanner, please read and observe the following. IMPORTANT! This scanning radio has been manufactured so that it will not
230-E. UB356ZH.fm Page 1 Wednesday, December 19, :28 AM UBC800XLT OWNER S MANUAL OWNER S MANUAL
 230-E UB356ZH.fm Page 1 Wednesday, December 19, 2007 11:28 AM UBC800XLT OWNER S MANUAL OWNER S MANUAL UB356ZH.fm Page 2 Wednesday, December 19, 2007 11:28 AM Precautions Before use this scanner, please
UBC126AT. Scanning Receiver. For more exciting new products please visit our website: Australia: New Zealand:
 UBC126AT Scanning Receiver For more exciting new products please visit our website: Australia: www.uniden.com.au New Zealand: www.uniden.co.nz Precautions Before you use this scanner, please read and observe
BC 278CLT. Reference Guide 10 BAND, 100 CHANNEL SCANNER
 BC 278CLT 10 BAND, 100 CHANNEL SCANNER FULLY PROGRAMMABLE FULL FREQUENCY LCD READOUT ALARM CLOCK AM/FM RADIO SERVICE SCAN CHANNEL LOCKOUT PRIORITY CHANNEL SCAN DELAY MEMORY BACKUP EMERGENCY WEATHER ALERT
AE180H. 100-Channel Programmable Twin Turbo Hand-Held Sports Scanner OPERATING GUIDE. Color profile: Disabled Composite Default screen
 AE180H 100-Channel Programmable Twin Turbo Hand-Held Sports Scanner OPERATING GUIDE 1 Tue Jul 08 16:22:31 2003 Precautions Before you use this scanner, please read and observe the following: WARNING! Albrecht
UBC72XLT SCANNER UBC72XLT OWNER S. 100 Channels 6 Pre-Programmed Service Banks. with Close Call TM RF Capture OWNER S MANUAL
 UBC72XLT SCANNER UBC72XLT OWNER S 100 Channels 6 Pre-Programmed Service Banks with Close Call TM RF Capture OWNER S MANUAL Precautions Before you use this scanner, please read and observe the following.
Introduction. What is Scanning? What is Chain Searching?
 TABLE OF CONTENTS Introduction................................... 2 What is Scanning?........................... 2 What is Searching?.......................... 2 Types of Communications.....................
BC 248CLT. Reference Guide 10 BAND, 50 CHANNEL SCANNER
 BC 248CLT 10 BAND, 50 CHANNEL SCANNER FULLY PROGRAMMABLE FULL FREQUENCY LCD READOUT ALARM CLOCK AM/FM RADIO ONE TOUCH WEATHER CHANNEL LOCKOUT PRIORITY CHANNEL SCAN DELAY MEMORY BACKUP EMERGENCY WEATHER
PSR-295. Portable Scanner OWNER S MANUAL
 PSR-295 Portable Scanner OWNER S MANUAL 1 Contents FEATURES... 3 PREPARATION... 5 Power Sources... 5 Connecting the Supplied Antenna... 8 Connecting an Earphone/Headphones... 8 Connecting an Extension
UBC355CLT Scanner UB367ZV_UBC355CLT_1208.indd 1 UB367ZV_UBC355CLT_1208.indd /12/08 19:55: /12/08 19:55:56
 UBC355CLT Scanner IMPORTANT INFORMATION PRECAUTIONS Before you use this scanner, please observe the following: Warning Uniden does not represent this unit to be waterproof. To reduce the risk of fire,
TX3420 REMOTE MOUNT UHF RADIO
 TX3420 REMOTE MOUNT UHF RADIO Introduction........................... 2 Important information concerning uhf cb radio................. 2 Emergency channels.................... 3 telemetry channels.....................
SECTION III OPERATION
 SECTION III OPERATION 3.1 INTRODUCTION This section contains information concerning the operation procedures for the BK Radio GPH Flex Mode Series handheld VHF radios. Information on installation and programming
SEE QUICK START ON PAGE 3
 SEE QUICK START ON PAGE 3 Precautions Before you use this scanner, please read and observe the following. IMPORTANT! This scanning radio has been manufactured so that it will not tune to the radio frequencies
Owner s Manual Cat. No
 Owner s Manual Cat. No. 20-196 A PRO-2067 500-Channel Mobile Trunk-Tracking Scanner Please read before using this equipment. INTRODUCTION Your new RadioShack 500-Channel Mobile Trunk-Tracking Scanner is
I.D.A. Operation manual
 TRX-200 Wide ide Band Receiver Operation manual Thank you for purchasing the TRX-200 all modes wide band monitoring receiver. Please read this operating manual carefully to avoid miss operation of the
BC92XLT OWNER S MANUAL
 BC92XLT Paper OM.fm Page 1 Tuesday, August 24, 2004 3:56 PM BC92XLT OWNER S MANUAL OWNER S MANUAL BC92XLT Paper OM.fm Page 2 Tuesday, August 24, 2004 3:56 PM Precautions Before you use this scanner, please
UBCD996T. Owner's Manual OWNER'S MANUAL. Vicradio Zone
 UBCD996T Owner's Manual OWNER'S MANUAL Precautions Before you use this scanner, please read and observe the following. EARPHONE WARNING! Be sure to use only a monaural earphone or 32 stereo headset. Use
Precautions. Before you use this scanner, please read and observe the following.
 Precautions Before you use this scanner, please read and observe the following. IMPORTANT! This scanning radio has been manufactured so that it will not tune to the radio frequencies assigned by the FCC
20-524A.fm Page 1 Tuesday, June 27, :41 PM. Owner s Manual. PRO Channel Handheld Trunking Scanner
 20-524A.fm Page 1 Tuesday, June 27, 2000 3:41 PM Owner s Manual PRO-94 1000-Channel Handheld Trunking Scanner Please read before using this equipment. 20-524A.fm Page 2 Tuesday, June 27, 2000 3:41 PM ˆ
Cat. No OWNER S MANUAL. HTX-212 Two-Meter Mobile Transceiver. Please read before using this transceiver.
 19-1125.fm Page 1 Tuesday, August 3, 1999 9:47 AM Cat. No. 19-1125 OWNER S MANUAL HTX-212 Two-Meter Mobile Transceiver Please read before using this transceiver. 19-1125.fm Page 2 Tuesday, August 3, 1999
9/14/2017. APX 4000 Portable Radio. Before You Begin. APX 4000: Introduction. Rensselaer County Bureau of Public Safety 800 MHz Radio User Training
 9/14/2017 Rensselaer County Bureau of Public Safety 800 MHz Radio User Training Portable Radio Before You Begin View the Operations Training Presentation first, it covers: Overview of Rensselaer County
RX1300 MULTIBAND SCANNING RECEIVER INSTRUCTION MANUAL
 RX1300 MULTIBAND SCANNING RECEIVER INSTRUCTION MANUAL CAUTION Please read these instructions carefully before operating your receiver. Your scanner is a complex and powerful unit with many functions. Please
RMV25 / RMV50 RMU25 / RMU45
 RMV25 / RMV50 RMU25 / RMU45 Owner's Manual TABLE OF CONTENTS INTRODUCTION... 3 FCC Requirements... 3 SAFETY WARNING INFORMATION... 3 CONTROLS and INDICATORS... 5 FRONT PANEL... 5 LCD Icons and Indicators...
TABLE OF CONTENTS. Keypad Programming Manual 1
 TABLE OF CONTENTS How To Program Radios...2 Keypad Programming...2 A. Navigation...3 1. Group Parameters (CH 00)...4 2. Channel Parameters (CH 01 - CH20)...4 3. Global Parameters (GRP 00)...5 B. Group
BC346XT. The Complete Reference
 BC346XT The Complete Reference This document provides a complete reference to all menus, functions, and features of the BC346XT Handheld Trunk Tracker Scanner from Uniden. It is based on the Operation
MULTIBAND SCANNING RECEIVER INSTRUCTION MANUAL
 TSC-000R MULTIBAND SCANNING RECEIVER INSTRUCTION MANUAL Manufactured by www.ttikorea.co.kr CONTENTS CAUTIONS... 5. SUPPLIED ACCESSORIES... 6. FITTING AND REMOVING THE BATTERY PACK... 6. INSTALLING THE
PRO Channel Desktop Trunk-Tracking Scanner
 PRO-2053 300 Channel Desktop Trunk-Tracking Scanner Owner s Manual Please read before using this equipment. ˆ The FCC Wants You to Know This equipment has been tested and found to comply with the limits
PSR ,000 Channel Triple Trunking Hand Held Scanner. Owner s Manual
 PSR-300 1,000 Channel Triple Trunking Hand Held Scanner Please read this user s guide before installing, setting up and using your new product. Owner s Manual 1 CONTENTS FEATURES... 4 PREPARATION... 7
PRO Channel compact scanner w/signal stalker search and lighted keypad. Read this user s guide completely before using your scanner
 20-501.fm Page 1 Friday, July 9, 2004 3:23 PM 20-501 PRO-83 200 Channel compact scanner w/signal stalker search and lighted keypad Read this user s guide completely before using your scanner 20-501.fm
TSC-100RA INSTRUCTION MANUAL. MULTIBAND SCANNING RECEIVER. Manufactured by
 MULTIBAND SCANNING RECEIVER Manufactured by www.ttikorea.co.kr CONTENTS. CAUTIONS.... SUPPLIED EQUIPMENT... 5. INSTALLING THE BATTERIES... 5. CONTROLS... 6 Power On/Off Lock Button... 7 Antenna... 7 Squelch
Rensselaer County Bureau of Public Safety 800 MHz Radio User Training. APX 4500 Mobile Radio APX 6500 Mobile Radio 02 Control Head
 Rensselaer County Bureau of Public Safety 800 Mz Radio User Training APX 4500 Mobile Radio APX 6500 Mobile Radio 02 Control ead Before You Begin View the Operations Training Presentation first, it covers:
Programming Alinco -135T, 235T, and 435T VHF/UHF Radios. RADIO DISPLAYS and CONTROLS: The front panel of the radio is shown in Figure 1.
 06/01/2011 Programming Alinco -135T, 235T, and 435T VHF/UHF Radios RADIO DISPLAYS and CONTROLS: The front panel of the radio is shown in Figure 1. Figure 1 Turning The Radio On: The power switch [1] is
BC125AT Owners Manual
 BC125AT Owners Manual 2012 Uniden America Corporation Printed in Vietnam Fort Worth, Texas U01UB370ZZZ(0) PRECAUTIONS Before you use this scanner, please read and observe the following. EARPHONE WARNING!
DJ-MD5 PC Software Guidance
 DJ-MD5 PC Software Guidance Ver, 1.00 2018/08/16 1 Appendix I Public... 4 1. Channel... 4 1 Frequency, call type, power... 4 2 Digital Channel Setting... 5 3 Analog Channel Setting... 6 2. Zone... 7 3.
DECLARATION BY MANUFACTURER
 FCC IMPORTANT NOTICE It is a federal crime to intentionally intercept cellular or cordless telephone transmissions. This scanner has been manufacture to lockout those frequencies assigned by the FCC for
OPERATING MANUAL Series. FM Portable Radio. Intrinsically-Safe SMARTNET, SmartZone Conventional
 7700 Series OPERATING MANUAL FM Portable Radio Intrinsically-Safe SMARTNET, SmartZone Conventional 1 LAND MOBILE PRODUCT WARRANTY - The manufacturer s warranty statement for this product is available
OPERATING GUIDE OPERATING GUIDE FOR IC-F5060/F6060 SERIES BIIS 1200/MDC 1200 SYSTEM/ LTR /IDAS OPERATION
 OPERATING GUIDE OPERATING GUIDE FOR IC-F060/F6060 SERIES BIIS 100/MDC 100 SYSTEM/ LTR /IDAS OPERATION IMPORTANT Thank you for purchasing this Icom transceiver. The BIIS 100/MDC 100 system/ltr /IDAS (Icom
APX 4500 Mobile Radio APX 6500 Mobile Radio 02 Control Head
 Rensselaer County Bureau of Public Safety 800 Mz Radio User Training APX 4500 Mobile Radio APX 6500 Mobile Radio 02 Control ead Before You Begin View the Operations Training Presentation first, it covers:
AX400 / AE 500 H First Edition Owner s Manual
 AX400 / AE 500 H First Edition Owner s Manual Thank you for purchasing our receiver For proper use of this receiver, please read this manual thoroughly. Keep this manual in a safe place for future reference.
INSTRUCTION MANUAL TX3400 UHF TRANSCEIVER
 INSTRUCTION MANUAL TX3400 UHF TRANSCEIVER CONTENTS Contents................................... 2 Introduction................................ 2 Features.................................... 2 Operation..................................
200-Channel plus 20 FM Channel VHF/Air/UHF Desktop Scanner. Please read this user's guide before installing, setting up and using your new product.
 PSR-200U 200-Channel plus 20 FM Channel VHF/Air/UHF Desktop Scanner Please read this user's guide before installing, setting up and using your new product. Owner s Manual 1 PSR200U-OM.indd 1 2010/02/22
5 watt super compact UHF CB remote LCD mic INSTRUCTION MANUAL
 5 watt super compact UHF CB remote LCD mic INSTRUCTION MANUAL CONTENTS ACCESSORIES SUPPLIED...3 IMPORTANT INFORMATION...3 EMERGENCY CHANNELS...3 TELEMETRY CHANNELS...3 FEATURES...4 GENERAL OPERATION...5
(stolen from the wiki NumberTags#Programming_Number_Tags )
") Introduction This is intended to be a supplementary manual for the use of the Uniden BCD396XT and BCD996XT scanners that have been introduced. Since introduction, there has been a wide observance that
Introduction This is intended to be a supplementary manual for the use of the Uniden BCD396XT and BCD996XT scanners that have been introduced. Since introduction, there has been a wide observance that
OPERATING GUIDE OPERATING GUIDE FOR IC-F5060/F6060 SERIES BIIS 1200/MDC 1200 SYSTEM/ LTR /IDAS NXDN OPERATION
 OPERATING GUIDE OPERATING GUIDE FOR IC-F060/F6060 SERIES BIIS 100/MDC 100 SYSTEM/ LTR /IDAS NXDN OPERATION IMPORTANT Thank you for purchasing this Icom transceiver. The BIIS 100/MDC 100 system/ltr /IDAS
Content. Maintenance. Features ENGLISH. 1 transceiver 1 antenna 1 battery pack 1 belt clip 1 fast desktop charger User manual
 ENGLISH Content 1 transceiver 1 antenna 1 battery pack 1 belt clip 1 fast desktop charger User manual If any items are missing, contact your dealer. Maintenance Your Two Way Radio is an electronic product
IMPORTANT INFORMATION
 UBC355XLT Scanner IMPORTANT INFORMATION PRECAUTIONS Before you use this scanner, please observe the following: Warning Uniden does not represent this unit to be waterproof. To reduce the risk of fire,
PSR Channel VHF/Air/UHF FM/AM/WFM Handheld Scanner Owner s Manual. Page 1
 PSR-120 300 Channel VHF/Air/UHF FM/AM/WFM Handheld Scanner Owner s Manual Page 1 CONTENTS FEATURES...4 THE FCC WANTS YOU TO KNOW...5 SCANNING LEGALLY...6 PREPARATION...7 Powering The Scanner...7 Installing
OPERATING GUIDE VHF DIGITAL TRANSCEIVERS. if1000d. series UHF DIGITAL TRANSCEIVERS. if2000d series. The photo shows the VHF transceiver.
 OPERATING GUIDE VHF DIGITAL TRANSCEIVERS if1000d UHF DIGITAL TRANSCEIVERS series if2000d series The photo shows the VHF transceiver. TABLE OF CONTENTS 1. PANEL DESCRIPTION Front, top and side panels 1-2
DECLARATION BY MANUFACTURER
 1 FCC IMPORTANT NOTICE It is a federal crime to intentionally intercept cellular or cordless telephone transmissions. This scanner has been manufacture to lockout those frequencies assigned by the FCC
BCH-270 Owner s Manual
 BCH-270 Owner s Manual By BridgeCom Systems, Inc. TABLE OF CONTENTS CHAPTER 1: INTRODUCTION... 4 WELCOME... 4 SPECIFICATIONS... 4 CHAPTER 2: UNPACKING AND PREPARATION... 5 PARTS LIST... 5 CHARGING THE
TK-D740 TK-D740H TK-D740HV TK-D840 TK-D840H TK-D840HU
 TK-D740 TK-D740H TK-D740HV TK-D840 TK-D840H TK-D840HU VHF DIGITAL TRANSCEIVER UHF DIGITAL TRANSCEIVER USER MANUAL B5A 0925-00/01 Contents PREPARATION... 4 Connecting the power cable... 4 Installing the
PMR446 Radio Instruction Manual
 Tectalk PRO PMR446 Radio Instruction Manual Thank you for purchasing this radio. All our products are built to offer excellent value by combining advanced features, great design and manufacturing quality.
APX 6000 Portable Radio
 Montgomery County Emergency Services 800 MHz Rebanding Training Portable Radio Before You Begin View the main training video first, it covers: General Radio Review Overview of Montgomery County s Radio
OPERATING GUIDE OPERATING GUIDE FOR IC-F3160/F4160 SERIES BIIS 1200/MDC 1200 SYSTEM/ LTR /IDAS NXDN OPERATION
 OPERATING GUIDE OPERATING GUIDE FOR IC-F160/F4160 SERIES BIIS 100/MDC 100 SYSTEM/ LTR /IDAS NXDN OPERATION IMPORTANT Thank you for purchasing this Icom transceiver. The BIIS 100/MDC 100 system/ltr /IDAS
DC-1122 Compact 5W UHF CB Radio
 DC-1122 Compact 5W UHF CB Radio Instruction Manual Introduction! NOTE Use of the citizen band radio service is licensed in Australia by ACMA Radio communications (Citizen Band Radio Stations) Class Licence
AR-ONE. Ultra Wide Band Communications Receiver. Operating manual v.2.1 AOR, LTD.
 AR-ONE Ultra Wide Band Communications Receiver Operating manual v.2.1 AOR, LTD. March 1, 2010 Table of contents 1 Introduction ------------------------------------------------------------------------------------------------
Dear Valued Customer,
 Dear Valued Customer, Thank you for choosing Listen! All of us at Listen are dedicated to provide you with the highest quality products available. We take great pride in their outstanding performance because
MobileRadio. Owner'sManual
 EMH MobileRadio Owner'sManual TABLE OF CONTENTS Introduction... 1 Basic Operation... 2 Code Guard Operation... 3 EMH Radio Controls... 4 Button Functions... 4 Built-in Features... 7 Keypad Microphone Operation...
Diese und weitere PDF Dateien finden Sie im Internet unter und
 THIECOM Informiert Diese und weitere PDF Dateien finden Sie im Internet unter http://www.thiecom.de/ftp und http://www.thiecom.com/ftp Sie finden bei uns im Shop unter http://www.thiecom.de ebenfalls weitere
Pro ,000-Channel Triple Trunking Mobile/Base Scanner
 20-426 Pro-2051 1,000-Channel Triple Trunking Mobile/Base Scanner Please read this user s guide before installing, setting up and using your new product www.radioshack.com Contents Thank you for purchasing
PSR Channel VHF/Air/UHF Handheld Scanner. Owner s Manual
 PSR-100 200 Channel VHF/Air/UHF Handheld Scanner Owner s Manual 1 CONTENTS Features... 4 Preparation... 6 Power Sources... 6 Using Batteries... 6 Charging Rechargeable Batteries... 8 Using AC Power...
DE1103 PLL FM STEREO/SW.MW.LW DUAL CONVERSION SYNTHESIZED WORLD RECEIVER OPERATION MANUAL
 DE1103 SYNTHESIZED WORLD RECEIVER SYNTHESIZED WORLD RECEIVER DE1103 OPERATION MANUAL INDEX POWER SUPPLY POWER SUPPLY... 1 POWER INDICATION... 3 BATTERY CHARGER... 4 BEFORE OPERATION..... 6 SET THE CLOCK...
INSTRUCTION MANUAL VHF FM TRANSCEIVER TK-7102H UHF FM TRANSCEIVER TK-8102H KENWOOD CORPORATION B (M)
") INSTRUCTION MANUAL VHF FM TRANSCEIVER TK-7102H UHF FM TRANSCEIVER TK-8102H KENWOOD CORPORATION B62-1596-00 (M) 09 08 07 06 05 04 03 02 01 00 THANK YOU! We are grateful you chose KENWOOD for your personal
INSTRUCTION MANUAL VHF FM TRANSCEIVER TK-7102H UHF FM TRANSCEIVER TK-8102H KENWOOD CORPORATION B62-1596-00 (M) 09 08 07 06 05 04 03 02 01 00 THANK YOU! We are grateful you chose KENWOOD for your personal
Montgomery County Emergency Services 800 MHz Rebanding Training. MTS 2000 Type II & III. Portable Radio
 Montgomery County Emergency Services 800 MHz Rebanding Training Portable Radio Before You Begin View the main training video first, it covers: General Radio Review Overview of Montgomery County s Radio
OWNER S MANUAL FRS RADIO
 OWNER S MANUAL FRS RADIO 21-1860 INTRODUCTION Your RadioShack FRS radio is a portable, easy-to-use, two-way radio that you can carry almost anywhere. Use it at shopping malls, amusement parks, sports events,
OPERATING GUIDE OPERATING GUIDE FOR IC-F3160/F4160 SERIES BIIS 1200/MDC 1200 SYSTEM/ LTR /IDAS OPERATION
 OPERATING GUIDE OPERATING GUIDE FOR IC-F160/F4160 SERIES BIIS 100/MDC 100 SYSTEM/ LTR /IDAS OPERATION IMPORTANT Thank you for purchasing this Icom transceiver. The BIIS 100/MDC 100 system/ltr /IDAS (Icom
Uniden BCD396T Firmware Revision Notes
 Uniden BCD396T Firmware Revision Notes 1.20.13 As part of Uniden s commitment to the continued support of the BCD396T, Uniden has, from time to time, issued firmware updates. These updates contain major
RPS-9000 Programming Software for the TYT TH-9000
 for the TYT TH-9000 Memory Types Memories Limit Memories VFO Channels Receive Frequency Transmit Frequency Offset Frequency Offset Direction Channel Spacing Name Tone Mode CTCSS Rx CTCSS DCS Rx DCS Memory
PRO Channel Dual Track-Trunking Handheld Scanner. Owner s Manual. Please read before using this equipment.
 PRO-93 300 Channel Dual Track-Trunking Handheld Scanner Owner s Manual Please read before using this equipment. ˆ Contents Features... 5 Scanning Legally... 9 Preparation... 10 Power Sources... 10 Using
GETTING STARTED. Radio layout. LCD display with icons
 GETTING STARTED Radio layout LCD display with icons 1. Key lock button 2. Battery meter 3. Main channel indicator 4. Scan icon 5. Roger beep indicator 6. CTCSS sub-channel indicator 7. VOX indicator 1
DP 3600 / DP 3601 Display Portable
 Professional Digital Two-Way Radio System DP 3600 / DP 3601 Display Portable User Guide Contents This User Guide contains all the information you need to use the MOTOTRBO Series Portables. Important Safety
Rotary tuning knob /Fine tuning Clarify. Music/Normal /News Tone control SSB fine tune. Telescopic Antenna Earphones socket
 Control Locations Power/Sleep Power On/off/Alarm off/sleep function Display Switch between radio frequency and time while radio is power on Mode Mode set up (please see below mode button set up) Radio
FEATURE FUNCTION BENEFIT. The IC-F1721D/F1821D series comes in 2 styles: the simple version and the 10-key version
 P25 ICOM F1721D/F1821D SERIES YOUR ANALOG TO DIGITAL CONVERSION GENERAL Two Versions Rugged Construction The IC-F1721D/F1821D series comes in 2 styles: the simple version and the 10-key version Heavy "heat
Pair of PMR446 Two-Way Personal Radios Model: TP391
 Pair of PMR446 Two-Way Personal Radios Model: TP391 USER MANUAL MANUALE D USO MANUEL DE L UTILISATEUR BEDIENUNGSANLEITUNG MANUAL DE USUARIO MANUAL DO USUÁRIO HANDLEIDING BRUKSANVISNING P/N:086L004722-016
AE355M Scanner. Owner s Manual
 AE355M Scanner Owner s Manual 1 Important Information Precautions Before you use this scanner, please observe the following: Warning Albrecht does not guarantee this unit to be waterproof. To reduce the
UNIDEN uh088sx CB RADIO
 UNIDEN uh088sx CB RADIO Contents Controls/Indicators/Connections Controls... 3 Indicators... 4 Connections... 5 Introduction Features... 6 Preventative Maintenance... 6 Troubleshooting... 6 Memory Backup...
BX SERIES HANDHELD RADIOS COMMERCIAL INSTRUCTION MANUAL BX SERIES HANDHELD INSTRUCTION MANUAL PAGE 1. Instruction manual includes models:
 COMMERCIAL BX SERIES HANDHELD RADIOS Instruction manual includes models: BX710 BX720 BX730 INSTRUCTION MANUAL BX SERIES HANDHELD INSTRUCTION MANUAL PAGE 1 WARNING - SAFETY INFORMATION The BX Series are
AE 92 H. Scanning Receiver. ALAN Electronics GmbH
 AE 92 H Scanning Receiver ALAN Electronics GmbH 1 AE92H Controls and Display Antenna (See Connecting the Antenna on Page 11-12) Headphone Jack Squelch Volume Display Keypad DC 6V Jack Power 2 Contents
INSTRUCTION MANUAL VHF FM TRANSCEIVER TK-7100 UHF FM TRANSCEIVER TK-8100 B (K,M,M2)
") INSTRUCTION MANUAL VHF FM TRANSCEIVER TK-7100 UHF FM TRANSCEIVER TK-8100 B62-1778-00 (K,M,M2) 09 08 07 06 05 04 03 02 01 00 THANK YOU! We are grateful you chose KENWOOD for your personal mobile applications.
INSTRUCTION MANUAL VHF FM TRANSCEIVER TK-7100 UHF FM TRANSCEIVER TK-8100 B62-1778-00 (K,M,M2) 09 08 07 06 05 04 03 02 01 00 THANK YOU! We are grateful you chose KENWOOD for your personal mobile applications.
Reference for UV-5R Menus by Jim Unroe - KC9HI 2-April-2014
 Long Name / Description / / Notes / 0 SQL Carrier Squelch Mutes the speaker of the transceiver in the absence of a strong signal. VHF squelch is either OFF or ON. UHF squelch is either OFF or one of 9
TH-78A 144/430MHz FM Dual Bander TH-78E INSTRUCTION MANUAL. 144/430 MHz FM Dual Bander 144/440 MHz FM Dual Bander KENWOOD CORPORATION
 144/430 MHz FM Dual Bander 144/440 MHz FM Dual Bander TH-78A 144/430MHz FM Dual Bander TH-78E INSTRUCTION MANUAL KENWOOD CORPORATION @PRINTED IN JAPAN B62-0248-30(W)(MC) 94/654321 93/1211 1098765432 ACCESSORIES...
WORLD BAND RADIO. AM/FM/SW/L W/AIR Band /SSB radio with LCD backlight OWNER S MANUAL
 WORLD BAND RADIO AM/FM/SW/L W/AIR Band /SSB radio with LCD backlight display and keypad direct entry OWNER S MANUAL WARNING Do not expose this appliance to rain or moisture Do not submerge or expose to
FT-991. (WIRES-X Edition)
") HF/VHF/UHF All Mode Transceiver FT-991 Instruction Manual (WIRES-X Edition) Thank you for purchasing this Yaeau product. This instruction manual explains operations and settings associated with the WIRES-X
HF/VHF/UHF All Mode Transceiver FT-991 Instruction Manual (WIRES-X Edition) Thank you for purchasing this Yaeau product. This instruction manual explains operations and settings associated with the WIRES-X
! IMPORTANT! If an icon appears at the end of a paragraph, go to the box on that page with the corresponding icon for pertinent information.
 www.radioshack.com SM PRO-89 200 Channel VHF/Air/UHF/800MHz Handheld Race Scanner OWNER S MANUAL Please read before using this equipment. Five Service Banks Search preset frequencies in separate fire/police,
Super compact 5 watt UHF CB radio with ergonomic speaker control microphone INSTRUCTION MANUAL
 Super compact 5 watt UHF CB radio with ergonomic speaker control microphone INSTRUCTION MANUAL CONTENTS ACCESSORIES SUPPLIED... 3 INTRODUCTION... 3 IMPORTANT INFORMATION... 3 Possible issues... 3 Emergency
AIR BAND TRANSCEIVER. Operating Manual
 AIR BAND TRANSCEIVER Operating Manual Important Notice!... 1 Introduction... 2 Control & Connectors... 3 Top Panel... 3 Front Panel... 4 Side Panel... 5 Keypad... 6 Before You Begin... 8 Precautions...
BC355C SCANNER OWNER S MANUAL
 BC355C SCANNER OWNER S MANUAL IMPORTANT INFORMATION PRECAUTIONS Before you use this scanner, please observe the following: Warning Uniden America Corporation does not represent this unit to be waterproof
OPERATING GUIDE VHF TRANSCEIVER. Iç-G88
 OPERATING GUIDE VHF TRANSCEIVER Iç-G88 INTRODUCTION PREFACE We appreciate you choosing Icom for your communication needs. The MDC 1200 signaling system is built into your IC-G88 vhf transceiver. IMPORTANT
Field Software Notice
 To: Subject: Field Software Notice Users of 5100 ES, 51SL ES and Ascend ES Portable Radios Software Release Platform: 5100 ES Portable Protocol: All Version Release #: 6.14.5 (part number 039-5757-222)