MOMENTUM MONOBLOCK AMPLIFIER OWNER S MANUAL
|
|
|
- Abner Wells
- 6 years ago
- Views:
Transcription


1 MOMENTUM MONOBLOCK AMPLIFIER OWNER S MANUAL
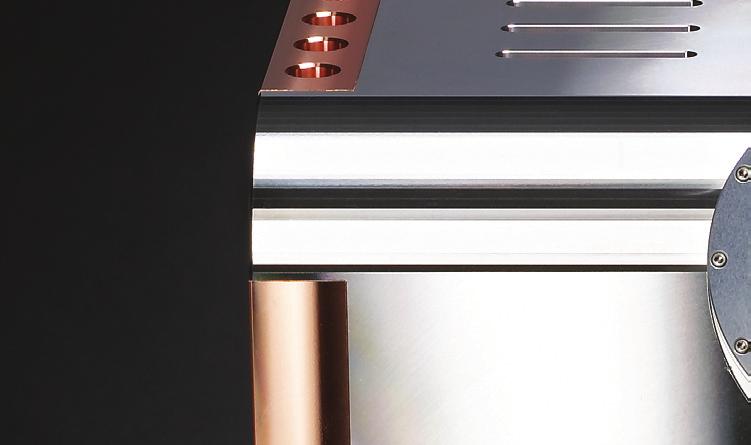
2 A note from Dan D Agostino FOUNDER, CEO, AND CHIEF DESIGNER OF DAN D AGOSTINO MASTER AUDIO SYSTEMS I would like to thank you for purchasing the Momentum monoblock amplifiers. This is a very special product the first I have produced under my own name and the faith that you have shown in my efforts means a lot to me. I m proud to say your amplifier was built by hand at our Connecticut factory, using the best manufacturing techniques I know of (and I ve tried them all) and the best parts I can find (and I ve tried most of those, too). This amplifier reflects two profound beliefs I ve come to in my decades of designing audio electronics. First, I believe that audio electronics should be able to deliver true state-of-the-art performance without using bulky components and unwieldy designs. When I started Dan D Agostino Master Audio Systems, one of my main goals was to make my components like Ferraris: products that perform at the top of their field yet are also the most beautiful produced in their industry. I hope you agree that we ve achieved this with the Momentum amplifier. Second, I believe that the audio industry should do its part to conserve energy and help preserve our environment. This is why the Momentum amplifier consumes less than 1 watt of power at idle. Your cell phone charger probably uses more energy. It took a lot of work to achieve this spec without affecting the sound quality of the Momentum amplifier in any way, but I think the result was well worth the effort. I believe so much in this amplifier that I put my signature on the front of it the first time in my long career that I ve done this. I hope you enjoy the Momentum amplifier as much as I enjoyed designing and building it, and I hope you ll keep an eye out for our future designs, too. Sincerely,


3 LegaL notifications Dan D Agostino Master Audio Systems is a registered trademark of D Agostino LLC. The information in this owner s manual is subject to change without notice. Current Version 1.1 of this manual was produced by the Dan D Agostino LLC engineering, sales and marketing departments. The information in this manual is the sole property of D Agostino LLC. Any reproduction in whole or part without the expressed written permission of D Agostino LLC is prohibited. No material herein may be transmitted in any way including either electronic or mechanical methods for any purpose without expressed written permission of D Agostino LLC. CAUTION: NO USER SERVICEABLE PARTS INSIDE. Do not open the amplifier s chassis or remove any of its screws. Contact D Agostino LLC or your dealer if you have service needs. WARNING: Do not expose this amplifier to moisture or excessive humidity, and do not use it outdoors. Fire hazard may result. The lightning flash with arrowhead, within an equilateral triangle, is intended to alert the user to the presence of uninsulated dangerous voltage within the product s enclosure that may be of sufficient magnitude to constitute a risk of electrical shock to persons. The exclamation point within an equilateral triangle is intended to alert the user to the presence of important operating maintenance (servicing) instructions in the literature accompanying the appliance.
4 Package contents Package contents If any of the following items are missing, please contact your dealer: ü 1 Momentum monoblock amplifier encased in protective vinyl sleeve ü 1 owner s manual ü 1 pair of white lifting gloves ü 1 microfiber cleaning cloth ü 1 AC power cord ü 1 single-ended RCA-to-balanced XLR adapter connection Unpacking the Momentum monoblock amplifier from the Pelican case Two adults are recommended for lifting the nearly 100-pound amplifier from the Pelican case. When the amplifier is still in its case, please move it to a location near the place where it will be installed. Remove all jewelry including watches, rings and belts from your person to avoid damage to the exterior of the amplifier during the removal and installation. Installation requirements The surface that will support the Momentum monoblock amplifier must be capable of safely supporting the nearly 100-pound weight of each amplifier. Adequate ventilation must be provided for the amplifier. There should be at least 3 inches of clearance on each side of the amplifier and 3 inches of clearance at the top, and the bottom vents of the amplifier must not be obstructed by thick carpet, dust, etc. We recommend that the amplifier be installed in an open equipment rack or on amplifier stands to assure proper ventilation. The amplifier may be installed in a closed cabinet on in an equipment closet, but the cabinet or closet must be designed with substantial ventilation at top and bottom; active ventilation (i.e., powered fans) is preferred. Do not place the amplifier directly on a carpeted floor. For best possible sound quality and maximum output, we recommend you connect each pair of Momentum monoblock amplifiers to a dedicated 20-amp outlet.

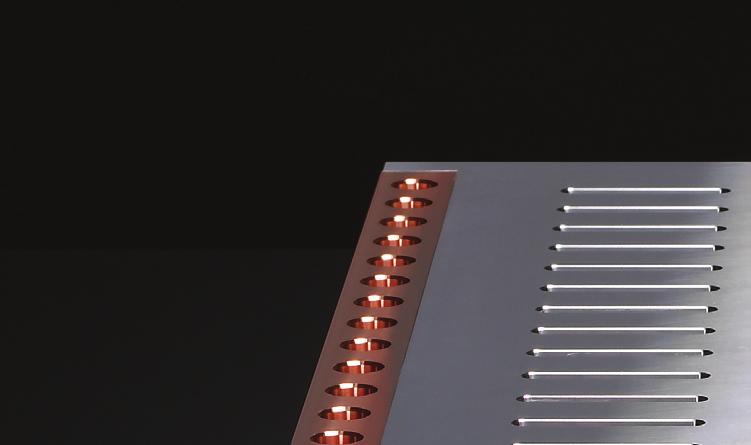
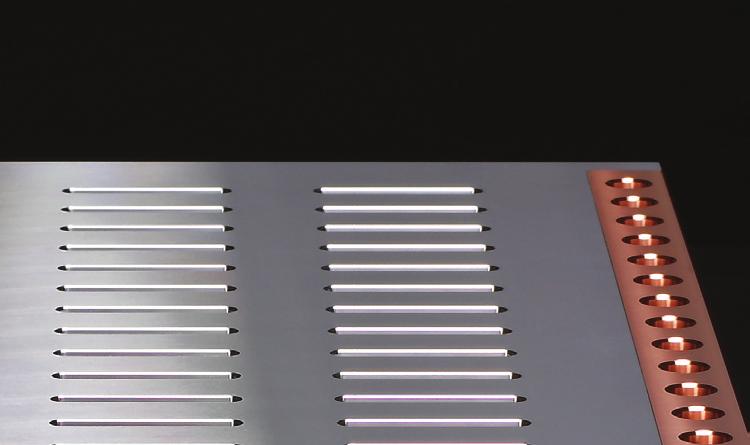
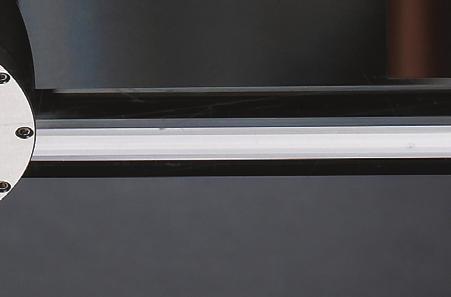
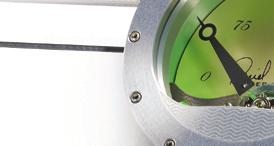
5 Power meter 24 FRONT PANEL 2. Heat sink venturis 3. Top panel vents 4. Power button volt on/off trigger input volt trigger output 3. Three-position toggle switch for power meter brightness 4. Three-position toggle switch for power meter sensitivity and on/off 5. Speaker cable binding posts 6. XLR audio input 7. Fuse holder drawer 8. IEC AC power connector 9. Serial number REAR PANEL
6 Making connections to the Momentum monoblock amplifier Speaker cables Install the speaker cables first. We recommend the use of high-quality cables terminated with spade or ring lugs that will fit the Momentum s binding posts. We advise against the use of bare-wire connections. Note that the positive (+) binding post has a red ring and the negative (-) binding post has a black ring. Double check to confirm that you are connecting your speaker cable s conductors to the appropriate binding posts red to positive, black to negative. If your cables are marked to show desired signal flow, orient the cable so that the installation conforms to the cable manufacturer s instructions. Carefully loosen each speaker binding post to install speaker cables tipped with spade lugs or rings. Turn counter-clockwise to loosen. If using spade lugs, insert each spade lug so that its two tines straddle the binding post, then tighten the binding post nut with a binding post wrench. If using rings, remove the binding post nut entirely, place the ring on the binding post, then replace the nut and tighten it securely. A firm connection, tight enough that the spade lug or ring cannot move, is all that s needed. Do not use a conventional wrench to tighten the binding posts. Be sure the wires are not in contact with one another. Interconnect cables We recommend the use of high-quality balanced XLR audio interconnect cables with the Momentum amplifier. If your preamp does not offer XLR output, use the high-quality RCAto-XLR adapter provided with the Momentum amplifier. Connect the XLR cable to the input by pushing the cable onto the jack. To release the XLR cable, push on the small tab on the end of the jack then grasp the cable by the plug and gently pull it out. Never grasp interconnect cables by the cable itself you could damage the cable. AC cord The Momentum amplifier is supplied with a high-quality AC cord tipped with a 15-amp IEC connector at the amplifier end and a three-conductor AC plug at the other end. You may use a different power cord with the Momentum amplifier if you wish, as long as it is tipped with a 15-amp IEC connector and a three-conductor AC plug. After the speaker and interconnect cables are connected, push the IEC connector on the power cord into the IEC jack on the Momentum amplifier.
7 Operation Initial power-up of the amplifier The power button is located on the front underside edge of the amplifier. Pressing the button will power up the amplifier. After power is switched on, the Momentum amplifier requires approximately 30 minutes to reach optimal operating temperature. Although the amplifier will sound excellent upon initial listening, the sound quality will improve as it warms up, much as the flavor of a fine red wine improves if it is allowed to breathe for a few minutes. During operation The Momentum amplifier requires no adjustments during normal operation. If there is no sound or the sound quality is in some way impaired, consult the Troubleshooting section in this manual. Power meter settings Two toggle switches on the back panel control the brightness and sensitivity of the power meter. In order to prevent accidental operation, these switches are partially recessed. Use your finger to gently move the switches. Brightness switch: This switch has three positions. Move it to the left (when looking at the amp from the rear) for high brightness and to the right for low brightness. If the switch is in the center position, the meter will be turned off. Sensitivity/meter off switch: If you listen at low levels, the needle on the meter will not move dramatically; this switch allows you to get more action out of the meter. Move the switch to the left (when looking at the amp from the rear) for 30-watt sensitivity and to the right for 150-watt sensitivity. In the center position, the meter will read 300-watt sensitivity. Maintenance The Momentum amplifier requires no user maintenance other than to keep it clean and ensure that the vents remain unobstructed. To clean the amplifier, first disconnect the AC plug. Spray a small amount of the supplied cleaning solution onto the supplied microfiber cloth and gently wipe the amplifier s surface. Do not spray the cleaner directly onto the amplifier. If dust or other contaminants or objects collect around the heat sink venturis or the vents at the top and bottom of the amplifier, remove small objects by hand and use a shop vacuum or hand vacuum to remove the dust. Use a brush attachment on the vacuum to avoid scratching the amplifier s surface.
8 Troubleshooting Amplifier will not power up If the front meter is not illuminated, follow the procedure outlined below. If one step succeeds in activating the power, stop there and ignore the other steps. 1. Push the power switch on the front underside edge of the amplifier. 2. Check to make sure the AC cord is plugged into the wall outlet. 3. Check at the back of the amplifier to make sure the 15-amp IEC connector is pushed all the way into the jack on the back of the amplifier. 4. Check to see that the fuse is blown. Replace with same type and rating only. (In US, use only a 10 amp, slow-blow fuse.) 5. Check your household electrical box to make sure the circuit breaker has not been tripped. If it has, flip the breaker back on. 6. If the breaker trips again, check the speaker cable connection on the amplifier and the speaker to make sure that the terminals are not shorted, and check the entire length of the cable to ensure there has been no damage to it. 7. If all of these steps fail to return power to the amplifier, consult your dealer for service. Front meter is illuminated but you hear no sound Follow these steps in order. If one step succeeds in restoring the sound, stop there and ignore the other steps. 1. Check your preamp and source device to make sure they are both turned on. 2. Check the source device to make sure it is playing, i.e., if it s a record player, make sure it s spinning and the tonearm is lowered, or if it s a CD player, make sure it s in play mode and not in pause. 3. Make sure your preamp is not muted and that the desired source is selected. 4. Check the line-level connections between the source device and the preamp, and between the preamp and the amplifiers. Reconnect any cables that may have become disconnected. 5. Check the cables between the amplifiers and the speakers to make sure they are properly connected and that the cables have not become damaged.
9 Front meter is illuminated but you hear no sound (cont.) 6. If you have a spare pair of interconnect cables (even cheap ones will work temporarily), try using them instead of the interconnect cables between the source device and the preamp and between the preamp and the amplifier. If this restores sound, replace the defective cables. 7. If all of these steps fail to restore sound, consult your dealer for service. Sound comes from only one channel Follow the below steps in order. If one of these steps succeeds in restoring the sound, stop there and ignore the other steps. 1. Check to make sure the power meters on both amplifiers are illuminated. If one amplifier s meter is not illuminated, follow the troubleshooting steps under Amplifier will not power up to restore power to that amplifier. 2. Check speaker cable connections for the malfunctioning channel. Reconnect any cables that may have become disconnected. Inspect the cable to make sure it has not been damaged. If it has been damaged, replace it. 3. Swap the left-channel interconnect cable from the preamp to the amplifier with the right-channel interconnect cable. If the malfunctioning channel now works but the other channel does not, replace the defective interconnect cable with one of the exact same type. You may have to replace both right and left cables to make sure they match. 4. Swap the left-channel interconnect cable from the source device to the preamp with the right-channel interconnect cable. If the malfunctioning channel now works but the other channel does not, replace the defective interconnect cable with one of the exact same type. You may have to replace both right and left cables to make sure they match. 5. Try using a different source device. If the alternate source device delivers sound in both channels, it is likely the original source device is defective. Consult the manufacturer of that source device or your dealer for further information. 6. If possible, try using a different preamp. If the alternate preamp delivers sound in both channels, it is likely the original preamp is defective. Consult the manufacturer of the preamp or your dealer for further information. 7. If all of these steps fail to restore sound, consult your dealer for service.
10 Sound seems unclear or unfocused Follow the below steps in order. If one of these steps fixes the problem, stop there and ignore the other steps. 1. Play a CD (not a record) of a vocalist and sit in your usual listening position, which should be equidistant from each speaker and typically 8 to 15 feet away from them. If the vocal image appears centered between the speakers, they are connected correctly and your system is probably operating properly. 2. If the vocal image is unfocused and the vocal seems to come from all the room, your speakers are probably wired out of phase. Make sure that the speaker cables on both of your amplifiers are connected correctly. The cable connector marked + or colored red should be connected to the speaker binding post with the red ring. The cable connector marked - or colored black should be connected to the speaker binding post with the black ring. 3. If the sound is still unclear or unfocused, consult your dealer. Your system may have a setup problem outside the scope of this manual.
11 Momentum monoblock amplifier limited warranty D Agostino LLC warrants the Momentum monoblock amplifier against manufacturing defects and defects in materials for five years from the date of purchase from an authorized Dan D Agostino Master Audio Systems dealer, subject to the conditions listed below: 1. The warranty covers only new products purchased from an authorized D Agostino LLC dealer. 2. The warranty is non-transferable and is valid only for the original purchaser. 3. The warranty is valid only if the product has been used according to the instructions in the owner s manual. Damage due to accidents or owner abuse or neglect is not covered under this warranty. 4. All service must be performed by an authorized Dan D Agostino Master Audio Systems dealer. Damage resulting from service by other parties is not covered under this warranty. 5. All products returned for service must be packaged in the original container and must include a photocopy of the original purchase receipt. If the original container has been lost or discarded, contact D Agostino LLC for a replacement. 6. If the product must be shipped back to D Agostino LLC for warranty service, the customer shall pay shipping costs. D Agostino LLC will pay for return shipping. 7. Before shipping the product to D Agostino LLC for service, the customer must first obtain a Return Authorization (RA) number by calling D Agostino LLC. The RA number must be marked clearly on the side of the package. 8. This warranty covers only defects in products made by D Agostino LLC. It does not cover incidental or consequential damages, or damages to other products resulting from defects in D Agostino LLC products. 9. U.S. residents: Depending on which state you live in, you may have other rights not elaborated in this document. For further information, contact D Agostino LLC. 10. Residents of other countries: Your authorized importer or dealer bears the direct responsibility for warranty coverage of your amplifier. Please contact your importer or dealer with requests for service under warranty. D Agostino LLC will work with your importer or dealer to assure that the terms of the warranty are fulfilled.


")


12 S P E C I F I C A T I O N S Power Frequency Response Distortion (300 8Ω) Signal-to-Noise Ratio Gain Power Consumption at Standby Inputs Outputs Weight Chassis Dimensions Overall Dimensions 300 8Ω / 600 4Ω / 1,200 2Ω 1 Hz to 200 khz, -1 db / 20Hz to 20 khz, ±0 1 khz 105 db, A-weighted 26.5 db <1 watt 1 balanced XLR / 1 unbalanced RCA (adapter supplied) High-quality binding posts 90 lbs / 40.8 kg 4.3 x 12.5 x 18.5 inches (hwd) / 10.9 x 31.8 x 47 cm (hwd) 5 x 12.5 x 21 inches (hwd) / 12.7 x 31.8 x 53.3 cm (hwd) (Including meter, feet and binding posts)
MOMENTUM STEREO AMPLIFIER OWNER S MANUAL
 MOMENTUM STEREO AMPLIFIER OWNER S MANUAL A note from Dan D Agostino FOUNDER, CEO, AND CHIEF DESIGNER OF DAN D AGOSTINO MASTER AUDIO SYSTEMS I would like to thank you for purchasing the Momentum Stereo
PROGRESSION MONOBLOCK & STEREO AMPLIFIERS OWNER S MANUAL
 PROGRESSION MONOBLOCK & STEREO AMPLIFIERS OWNER S MANUAL A note from Dan D Agostino FOUNDER AND CHIEF DESIGNER OF DAN D AGOSTINO MASTER AUDIO SYSTEMS Thank you for purchasing one of our Progression amplifiers.
WARNING: Do not expose this amplifier to moisture or excessive humidity, and do not use it outdoors. Fire hazard may result.
 power amplifier 2 Legal notifications Dan D Agostino Master Audio Systems is a registered trademark of D Agostino LLC. The information in this owner s manual is subject to change without notice. Current
PROGRESSION MONOBLOCK AMPLIFIER OWNER S MANUAL
 PROGRESSION MONOBLOCK AMPLIFIER OWNER S MANUAL A note from Dan D Agostino FOUNDER AND CHIEF DESIGNER OF DAN D AGOSTINO MASTER AUDIO SYSTEMS Thank you for purchasing the Progression monoblock amplifiers.
MoMentuM preamplifier owner s Manual
 Momentum preamplifier Owner s MANUAL A note from Dan D Agostino Founder, CEO, and Chief Designer of Dan D Agostino Master Audio Systems Thank you very much for purchasing the Momentum preamplifier. The
WARNING: Do not expose this amplifier to moisture or excessive humidity, and do not use it outdoors. Fire hazard may result.
 power amplifiers 2 Legal notifications Dan D Agostino Master Audio Systems is a registered trademark of D Agostino LLC. The information in this owner s manual is subject to change without notice. Current
MoMentuM preamplifier owner s Manual
 Momentum preamplifier Owner s MANUAL A note from Dan D Agostino FOUnDeR, CeO, AnD CHieF DeSiGneR OF DAn D AGOSTinO MASTeR AUDiO SYSTeMS Thank you very much for purchasing the Momentum preamplifier. The
WARNING To reduce risk of fire or electric shock, do not expose this amplifier to moisture, rain, or excessive humidity.
 CAUTION To reduce risk of electric shock, do not remove any of the amplifier s cover plates or screws. There are no user serviceable parts inside. Contact qualified service personnel. WARNING To reduce
Before you install the Taurus
 Thank you for purchasing the Constellation Taurus power amplifier. You are now the owner of one of the finest amplifiers ever built. Please take a few minutes to read this manual before you use the amplifier.
CAUTION: NO USER SERVICEABLE PARTS INSIDE.
 Thank you for purchasing the Constellation Taurus power amplifier. You are now the owner of one of the finest amplifiers ever built. Please take a few minutes to read this manual before you use the amplifier.
Opus 21 s80 Integrated Amplifier Owner's Manual
 Opus 21 s80 Integrated Amplifier Owner's Manual r e s o l u t i o n From all of us at Resolution Audio, thank you for choosing the Opus 21 s80 amplifier. We went to great lengths to design and produce
ECA COMMERCIAL AMPLIFIER OWNER S MANUAL ECA-70MIXAMP V / 70V / 4Ω Amplifier ECA-70MIXAMP-1-60 OUTPUT LEVEL POWER MASTER MIC 1
 OWNER S MANUAL ECA COMMERCIAL AMPLIFIER ECA-MIXAMP--6 V / V / Ω Amplifier TEMP PROT OUTPUT LEVEL ECA-MIXAMP--6 6 POWER MIC MIC MIC MIC AUX AUX BASS TREBLE 5 5 5 5 5 6 6 6 6 6 MASTER 5 6 ON OFF + - + -
léìë=on ëpm=fåíéöê~íéç=^ãéäáñáéê lïåéêdë=j~åì~ä êéëçäìíáçå
 léìë=on ëpm=fåíéöê~íéç=^ãéäáñáéê lïåéêdë=j~åì~ä êéëçäìíáçå From all of us at Resolution AV, thank you for choosing the Opus 21 s30 amplifier. We went to great lengths to design and produce an integrated
A Channel Amplifier
 Installation Manual A2150 2 Channel Amplifier Table of Contents Installation Requirements and Recommendations 1 What s included 1 Speaker Wire Recommendations 1 Setup 2 Rack Mounting 2 Individually Protected
Big Bang. B B O w n e r s M a n u a l. Power Amplifiers. SpeakerCraft BB2125 POWER ACTIVE PROTECTION L
 Big Bang Power Amplifiers SpeakerCraft BB2125 ACTIVE POWER PROTECTION L R B B 2 1 2 5 O w n e r s M a n u a l SAFETY INSTRUCTIONS APPLICABLE FOR USA, CANADA OR WHERE APPROVED FOR USAGE CAUTION: To reduce
plifier D-501 otion Am Tactile M
 Tactile Motion Amplifier D-501 IMPORTANT SAFETY INSTRUCTIONS WARNING: 1. Read and keep these instructions for future reference. 2. Do not use this apparatus near water. 3. Clean only with a dry cloth.
CANARY AUDIO. EL34 Stereo Power Amplifier. Handcrafted in California CA-770 OWNER S MANUAL MADE IN USA
 CANARY AUDIO EL34 Stereo Power Amplifier Handcrafted in California CA-770 OWNER S MANUAL MADE IN USA Dear Customer: Please allow us to take this opportunity to thank you for purchasing this CANARY AUDIO
2BSST POWER AMPLIFIER OWNER S MANUAL
 2BSST POWER AMPLIFIER OWNER S MANUAL IMPORTANT SAFETY INSTRUCTIONS The lightning flash with arrowhead symbol within an equilateral triangle, is intended to alert the user to the presence of un-insulated
HTA125A/250A. Power Amplifiers. Installation & Use Manual
 HTA125A/250A Power Amplifiers Installation & Use Manual Specifications subject to change without notice. 2010 Bogen Communications, Inc. All rights reserved. 54-5832-04B 1011 NOTICE: Every effort was made
AV30MX-2 Operation Manual
 AV30MX-2 Operation Manual 1 Important safety instructions 1. Please read carefully prior to product installation or operation. 2. Read these instructions. 3. Keep these instructions. 4. Heed all warnings.
Professional Power Amplifier HORIZON SERIES USER MANUAL. Content
 Professional Power Amplifier HORIZON SERIES USER MANUAL Thank you for buying this W Audio product. To take full advantage of this product, please keep this manual and read the operating instructions carefully.
M-300 Mono power amplifier User s guide
 M-300 Mono power amplifier User s guide M-300 Mono power amplifier User s guide Specifications: Contents: Power output: 8Ω: 290W, 0.01% THD SPECIFICATIONS Page 2 Input impedance: Gain: 4Ω: 580W, 0.01%
Classic Series Public Address Amplifiers C10 & C20 Models
 Classic Series Public Address Amplifiers C10 & C20 Models Installation and Use Manual 2009 Bogen Communications, Inc. All rights reserved. Specifications subject to change without notice. 54-5978-01B 0901
GUITAR POWER AMPLIFIER U S E R ' S M A N U A L
 GUITAR POWER AMPLIFIER U S E R ' S M A N U A L May be covered by one or more of the following: U.S. Patents #4538297, 4647876, 4696044, 4745309, 4881047, 4893099, 5124657, 5263091, 5268527, 5319713 and
CANARY AUDIO. Power Amplifier CA-309 OWNER S MANUAL. Handcrafted in California MADE IN USA
 CANARY AUDIO 300B Push-Pull Parallel Power Amplifier Mono Block Handcrafted in California CA-309 OWNER S MANUAL MADE IN USA Dear Customer: Please allow us to take this opportunity to thank you for purchasing
R-Series R235LS 2-Channel Power Amplifier with Local Source Switching
 R-Series R235LS 2-Channel Power Amplifier with Local Source Switching User s Manual On Off R235LS POWER A MPLIFIER IMPORTANT SAFEGUARDS WARNING TO REDUCE THE RISK OF FIRE OR ELECTRIC SHOCK, DO NOT EXPOSE
A32. f u l l y b a l a n c e d p o w e r a m p l i f i e r. user guide
 A32 f u l l y b a l a n c e d p o w e r a m p l i f i e r user guide Welcome! Welcome to the Primare A32 Amplifier! The A32 is a modular power amplifier designed as the ideal output stage in a home theatre
Classic Series Public Address Amplifiers C10 & C20 Models
 Classic Series Public Address Amplifiers C10 & C20 Models Installation and Use Manual 2009 Bogen Communications, Inc. All rights reserved. Specifications subject to change without notice. 54-5978-01C 1106
STEREO POWER AMPLIFIER OWNER MANUAL PR-150 DESIGNED IN U.K. PDF created with FinePrint pdffactory trial version
 STEREO POWER AMPLIFIER OWNER MANUAL PR-150 DESIGNED IN U.K. INTRODUCTION Congratulations on your purchase of MA PR-150 Stereo Power Amplifier. The performance of PR-150 is perfect for any audio application,
Owner s Manual B 300 B 600 B 900 B 1200 B 1500 B 902 B 1202 B 1802 B300 B1802
 Owner s Manual B 300 B 600 B 900 B 1200 B 1500 B300 B 902 B 1202 B 1802 B1802 WARNING B 300 / B 600 / B 900 / B 1200 / B 1500 / B 902 / B 1202 / B 1802 Table of Contents Table of Contents Introduction
Broadband Step-Up Transformer. User Manual
 Broadband Step-Up Transformer User Manual 990-1930 09/2004 Introduction Introduction About this unit The APC Step-Up Transformer provides 220 V power from 60 VAC Broadband cable systems. Safety Electrical
RELENTLESS. Dan D Agostino, Founder and Chief Engineer, Dan D Agostino Master Audio Systems
 ELENTLESS RELENTLESS When you have nearly 40 years of experience designing high-end amplifiers, surpassing your previous work requires an extraordinary effort: innovative technical leaps, a stubborn refusal
Primare A33.2 Amplifier User Guide
 > Primare A33.2 Amplifier User Guide > Preface CAUTION RISK OF ELECTRIC SHOCK DO NOT OPEN CAUTION: To reduce the risk of electrical shock do not remove cover (or back). No user serviceable parts inside.
PA WATT PORTABLE PA SYSTEM PRODUCT MANUAL
 PA-5150 5 150-WATT PORTABLE PA SYSTEM PRODUCT MANUAL THANK YOU FOR CHOOSING POLSEN. The Polsen PA-5150 is an active PA system that s ideal for solo performers or vocalists. It can be used as a PA system
3050 Stereo Power Amplifier
 3050 Stereo Power Amplifier Owners Manual 10/26/2016 Boulder Amplifiers, Inc. 255 Taylor Ave. Louisville, CO 80027 (303) 449-8220 www.boulderamp.com Fault Conditions Boulderlink Appendix Remote Control
Model CC4041. CC Series Amplifier. Installation and Use Manual
 BASS 0 TREBLE 0-12 +12-12 +12 INPUT 1 INPUT 2 INPUT 3 INPUT 4 PEAK SIGNAL POWER POWER CC Series Amplifier Model CC4041 Installation and Use Manual 2012 Bogen Communications, Inc. All rights reserved. Specifications
Important Safety Information
 USER MANUAL Important Safety Information Before using Zuma R300, please be sure to read all operating instructions carefully. Read, follow, and keep these instructions. Heed all warnings. Do not expose
User Manual (English)
") Psvane TC5 Integrated KT120 Tube Amplifier User Manual (English) 1 P a g e Exclusively available at www.grantfidelity.com All copy rights reserved by Psvane Audio & Grant Fidelity page I Warnings: 1. Before
Psvane TC5 Integrated KT120 Tube Amplifier User Manual (English) 1 P a g e Exclusively available at www.grantfidelity.com All copy rights reserved by Psvane Audio & Grant Fidelity page I Warnings: 1. Before
ECI 6D. Balanced Integrated Amplifier. Owner's Manual. (with a built-in DAC) ENGLISH
 ENGLISH") ECI 6D Balanced Integrated Amplifier (with a built-in DAC) Owner's Manual EN ENGLISH Unpacking the ECI 6D Immediately upon receipt of the ECI 6D, inspect the carton for possible damage during shipment.
ECI 6D Balanced Integrated Amplifier (with a built-in DAC) Owner's Manual EN ENGLISH Unpacking the ECI 6D Immediately upon receipt of the ECI 6D, inspect the carton for possible damage during shipment.
AV25-2 User Manual. 1 Important safety instructions
 AV25-2 User Manual 1 Important safety instructions 1. Please read carefully prior to product installation or operation. 2. Read these instructions. 3. Keep these instructions. 4. Heed all warnings. 5.
FORTE MONO POWER AMPLIFIER OWNER S MANUAL
 --------------------------------------------------------------------------- FORTE MONO POWER AMPLIFIER OWNER S MANUAL ------------------------------------------------------------------------------- Viola
MZ2 HEADPHONE AMPLIFIER, PREAMP, & STEREO AMPLIFIER USER GUIDE
 MZ2 HEADPHONE AMPLIFIER, PREAMP, & STEREO AMPLIFIER USER GUIDE Linear Tube Audio Takoma Park, MD, USA WARNING: For safety, the cover of this amplifier should be secured at all times. DC voltages as high
MC75 Tube Power Amplifier Owner s Manual
 McIntosh Laboratory, Inc. 2 Chambers Street Binghamton, New York MC75 Tube Power Amplifier Owner s Manual 13903-2699 Phone: 607-723-3512 www.mcintoshlabs.com 2 The lightning flash with arrowhead, within
INTEGRATED HYBRID TUBE AMPLIFIER VT Model HYBRID TUBE AMPLIFIER
 INTEGRATED HYBRID TUBE AMPLIFIER Model VT-40.2 HYBRID TUBE AMPLIFIER OWNER S MANUAL Safety Instructions The lightning flash with the arrowhead symbol within an equilateral triangle is intended to alert
DPA-1.2. Instruction Manual. 2 Channel Amplifier with Auto A/B Selector DPA-1.2 DPA-1.2 POWER SERIAL # LINE INPUT SENSING SPEAKER B OUT
 POWER Russound DPA-1.2 Instruction Manual 2 Channel Amplifier with Auto A/B Selector NEWMARKET, NH USA DPA-1.2 Russound 68835 Conforms to UL 6500 Certified to CSA C22.2 No1-94 DPA-1.2 Tested to Comply
American Audio. User Instructions. American Audio 4295 Charter Strret Los Angeles Ca Revised 5/01
 American Audio User Instructions American Audio 4295 Charter Strret Los Angeles Ca. 90058 Revised 5/01 CAUTION Do not open - risk of electric shock CAUTION: TO REDUCE THE RISK OF ELECTRIC SHOCK, DO NOT
S 1500 MULTI-CHANNEL INSTRUCTIONS FOR USE AMPLIFIER. Owner s Reference
 S 1500 MULTI-CHANNEL AMPLIFIER Owner s Reference INSTRUCTIONS FOR USE S 1500 Multi-channel Amplifier Instructions for Use v 07.0 CONTACT INFORMATION Krell Industries, Inc. 45 Connair Road Orange, CT 06477-3650
HT Watt 6 Channel Class D amplifier OWNER S MANUAL
 HT-6 900 Watt 6 Channel Class D amplifier OWNER S MANUAL Congratulations! Thank you for purchasing the Wet Sounds Hydro-Tech TM series amplifier. Wet Sounds represents the ultimate in high performance
1160 Stereo Power Amplifier
 1160 Stereo Power Amplifier 03/01/2018 Rev. 1.0 P/N: 91055 Boulder Amplifiers, Inc. 255 S. Taylor Ave. Louisville, CO 80027 (303) 449-8220 www.boulderamp.com About About Boulder Amplifiers, Inc. Boulder
REVAMP4120T Instruction manual
 REVAMP4120T Instruction manual REVAMP4120T Instruction manual 3 REVAMP4120T manual 4 CLASS-D POWER AMPLIFIER IMPORTANT SAFETY INSTRUCTIONS 1. Read these instructions 2. Keep these instructions 3. Pay
KeyPre KP6 - Electronic Instrument Preamplifier
 ! USE ONLY WITH 250V FUSE KeyPre KP6 - Electronic Instrument Preamplifier USER S GUIDE 0 10dB 0 10dB 0 10dB 0 10dB 0dB 10dB 0 10dB AVEDIS AUDIO E L E C T R O N I C S AC INPUT 100-240VAC 50/60 Hz 1.1" 1.225"
Model CC4052. CC Series Amplifier. Installation and Use Manual
 CC Series Amplifier Model CC4052 Installation and Use Manual 2012 Bogen Communications, Inc. All rights reserved. Specifications subject to change without notice. 54-2216-01A 1303 NOTICE: Every effort
Classic Series Amplifiers C35, C60, & C100 Models
 Classic Series Amplifiers C35, C60, & C100 Models Installation and Use Manual 2009 Bogen Communications, Inc. All rights reserved. Specifications subject to change without notice. 54-5979-02E 1203 Notice:
POWERED MIXER DIGITAL ECHO EFFECT ECHO LEVEL ECHO LEVEL ECHO LEVEL ECHO LEVEL ECHO VOL REPEAT MPM CHANNEL POWERED MIXER OWNER S MANUAL
 POWERED MIXER DIGITAL ECHO EFFECT ECHO LEVEL ECHO LEVEL ECHO LEVEL ECHO LEVEL ECHO VOL REPEAT MPM 480 4-CHANNEL POWERED MIXER OWNER S MANUAL MPM 480 4-CHANNEL POWERED MIXER Congratulations! You have just
FOUNTEK ALTITUDE Integrated Amplifier OWNERS MANUAL. A3500 ( Version -V1) 240V AC
 240V AC") FOUNTEK ALTITUDE 3500 Integrated Amplifier OWNERS MANUAL A3500 ( Version -V1) 240V AC 24-10-05 CONTENTS 3. INTRODUCTION 4. IMPORTANT NOTES ( WARNING!) 5. POWER INPUT CONNECTION 6. CONNECTING SPEAKERS 7.
FOUNTEK ALTITUDE 3500 Integrated Amplifier OWNERS MANUAL A3500 ( Version -V1) 240V AC 24-10-05 CONTENTS 3. INTRODUCTION 4. IMPORTANT NOTES ( WARNING!) 5. POWER INPUT CONNECTION 6. CONNECTING SPEAKERS 7.
S 275 Stereo Power Amplifier THE LEADER IN AUDIO ENGINEERING. Instructions for Use. Owner s Reference
 THE LEADER IN AUDIO ENGINEERING S 275 Stereo Power Amplifier Instructions for Use Owner s Reference Introduction Thank you for your purchase of the Krell S-275 Stereo Power Amplifier. This configurable
HT Watt 4 Channel Class D amplifier OWNER S MANUAL
 HT-4 600 Watt 4 Channel Class D amplifier OWNER S MANUAL Congratulations! Thank you for purchasing the Wet Sounds Hydro-Tech TM series amplifier. Wet Sounds represents the ultimate in high performance
Owner s Manual.
 P Z R 6 0 0 A m p l i f i e r P Z R 1 0 0 0 A m p l i f i e r Owner s Manual www.pyleaudio.com Your New Pyle Pro PZR series P.A. Amplifier gives you the power and versatility you need in a professional
CLASS D STEREO AMPLIFIER 60 WPC. Model: APA102 User Manual
 CLASS D STEREO AMPLIFIER 60 WPC Model: APA102 User Manual CAUTION RISK OF ELECTRICAL SHOCK DO NOT OPEN CAUTION: TO REDUCE THE RISK OF ELECTRIC SHOCK, DO NOT REMOVE THE COVER. NO USER SERVICABLE PARTS INSIDE.
AV Series AV-25-2 AV-25 Owner s Manual February 2010
 AV Series AV-25-2 AV-25 Owner s Manual February 2010 www.stewartaudio.com Important Safety Instructions Before using your Stewart Audio Inc. Power Amplifier, please read this Owner s Manual carefully to
INTEGRATED VACUUM TUBE AMPLIFIER LM-508IA
 INTEGRATED VACUUM TUBE AMPLIFIER LM-508IA Table of Contents Thanks for choosing our Line Magnetic LM-508IA Integrated Amplifier as an important part of your music system and please read the manual carefully
a u d i o p h i l e p r e a m p l i f i e r user guide
 PRE32 a u d i o p h i l e p r e a m p l i f i e r user guide Welcome! Welcome to the Primare PRE32! Your PRE32 is a high-quality audiophile preamplifier, designed as the ideal centrepiece of a home hi-fi
RM4 MODULAR TUBE PREAMP OWNERS MANUAL
 A M P L I F I E R S RM4 MODULAR TUBE PREAMP OWNERS MANUAL Dear Randall Owner, Congratulations on the purchase of your new Randall Amplifier, and thank you for the support of our product line. Randall amps
a315 power amplifier Owner s Manual
 Wadia Digital, LLC. 2 Chambers Street Binghamton, New York 13903-2699 Phone: 607-723-3539 Fax: 607-724-0549 www.wadia.com a315 power amplifier Owner s Manual 2 The lightning flash with arrowhead, within
SAGA PRO SERIES STEREO POWER AMPLIFIER OPERATION MANUAL
 SAGA PRO SERIES STEREO POWER AMPLIFIER OPERATION MANUAL INSTALLATION Use care in unpacking the amplifier, and be sure to save the carton and packing materials so that you can use them for moving, storing,
i3speakers LX503 MK2 User Manual
 i3speakers LX503 MK2 User Manual Index Introduction 5 Precautions 6 Safety requirements 6 Caution servicing 7 EC Declaration of Conformity 7 Waste of Electrical and Electronic Equipment (WEEE) 7 Chapter
Dan D Agostino s MOMENTUM achieves what was once thought to be impossible:
 INCREDIBLE POWER AWARD-WINNING INDUSTRIAL DESIGN Dan D Agostino s MOMENTUM achieves what was once thought to be impossible: INCREDIBLE POWER AND INCOMPARABLE FINESSE IN A COMPACT CHASSIS. S P E C I F I
CAUTION : TO PREVENT ELECTRIC SHOCK, MATCH WIDE BLADE OF PLUG TO WIDE SLOT, FULLY INSERT.
 BSR-1 The Lightning flash with arrowhead symbol, with an equilateral triangle is intended to alert the user of the presence of uninsulated dangerous voltage within the product s enclosure that may be of
The ART SLA-2 Studio Linear Amplifier
 TABLE OF CONTENTS The ART SLA-2 Studio Linear Amplifier Safety Precautions... 2-3 Introduction... 4 Installation... 5 AC Power Hookup... 5 Audio Connections... 5 Security Cover... 6 Controls and Indicators...
Professional UHF Rechargeable Wireless Microphone System POWER ON/OFF BATTERY CHARGE. Green Light (Full) Better Music Builder DOWN VOLUME
 Better Music Builder DOWN VOLUME") Green Light (Full) KARAOKE Professional UHF Rechargeable Wireless Microphone System VM-93C Operating Instructions UHF Frequency 64 Selectable POWER ON/OFF CHARGE Better Music Builder VM-93C CHARGER UHF
Green Light (Full) KARAOKE Professional UHF Rechargeable Wireless Microphone System VM-93C Operating Instructions UHF Frequency 64 Selectable POWER ON/OFF CHARGE Better Music Builder VM-93C CHARGER UHF
VOLUME TREBLE MIDDLE BASS REVERB HYBRID-MASTER
 SPANKY MKII MODEL VOLUME TREBLE MIDDLE BASS G U I T A R REVERB HYBRID-MASTER A M P L I F I E R U S E R S G U I D E Your 3RD POWER Amplifier is a professional musical instrument amplifier. The information
USER MANUAL GOLDMUND MIMESIS 29M Millennium Edition Power Amplifier
 USER MANUAL GOLDMUND MIMESIS 29M Millennium Edition Power Amplifier CONGRATULATIONS Thank you for purchasing the Goldmund Mimesis 29M Millennium Edition. You have acquired the best Analogue Power Amplifier
USER MANUAL. GOLDMUND TELOS 2500 NextGen Universal Power Amplifier
 USER MANUAL GOLDMUND TELOS 2500 NextGen Universal Power Amplifier Thank you for purchasing the GOLDMUND TELOS 2500 NextGen. You have acquired the best Universal Power Amplifier ever made for professional
875HT OWNER S MANUAL
 875HT OWNER S MANUAL 875HT EIGHT CHANNEL POWER AMPLIFIER Table of Contents Important Safety Instructions General Introduction Page 1 Introduction Description Shipping Box & Packing Materials Installation
On-Line Cardio Theater Wireless Digital Transmitter Installation and Instruction Manual
 On-Line Cardio Theater Wireless Digital Transmitter Installation and Instruction Manual Full installation instructions accompany your Cardio Theater equipment order. This On-Line version of our Installation/Instruction
TOA 500 SERIES MIXER POWER AMPLIFIER
 TOA 500 SERIES MIXER POWER AMPLIFIER Operation Instruction Manual A-503A A-506A A-512A Features General Description 1. High quality design and construction. 2. Full frequency response: 50-15,000Hz, ±3dB.
W-6. Mono Power Amplifier. Owner s Manual
 W-6 Mono Power Amplifier Owner s Manual Table of Contents Congratulations... 3 Introduction... 4 Unpacking and Warnings... 5 Installation Tips... 6 Rear Panel... 7 Connecting the W-6... 8 Balanced Operation...
INSTALLATION MANUAL ECA-70VMINI-60W ECA-70VMINI-60W L VOLUME SPEAKER OUTPUTS 12VDC IN + L+ L- GND R+ R- S GND GND Tx Rx
 INSTALLATION MANUAL ECA-70VMINI-60W ECA-70VMINI-60W L VOLUME R 12VDC IN BALANCED IN STEREO IN UNBALANCED IN SERVICE STATUS IR RS-232 + L+ L- GND R+ R- S GND GND Tx Rx SPEAKER OUTPUTS + page 2 CAUTION Risk
forte Owner s Manual
 forte Owner s Manual Table of Contents Important Safety Instructions... 3 Introduction... 4 Quick Start... 5 Front Panel Controls and Operation... 6 Rear Panel Controls and Operation... 8 Installation
a u d i o p h i l e i n t e g r a t e d a m p l i f i e r user guide
 I22 a u d i o p h i l e i n t e g r a t e d a m p l i f i e r user guide Welcome! Welcome to the Primare I22! Your I22 is a high-quality integrated amplifier, designed as the ideal centrepiece of a home
AV Series AV30MX-2 AV30MX-2 Owner s Manual October 2010
 AV Series AV30MX-2 AV30MX-2 Owner s Manual October 2010 www.stewartaudio.com Important Safety Instructions Before using your Stewart Audio Inc. Power Amplifier, please read this Owner s Manual carefully
SI-125 Power Amplifier Manual 6205 Kestrel Road; Mississauga, Ontario; Canada; L5T 2A1 November 2016, Rev 0.5
 SI-125 Power Amplifier Manual 6205 Kestrel Road; Mississauga, Ontario; Canada; L5T 2A1 November 2016, Rev 0.5 Phone: (905) 564-0801 Fax: (905) 564-0806 www.telecor.com E:\T2-108\T2-M108-ABC\T2-M108-B.doc/AD
OWNER S MANUAL THE SONIC FRONTIERS SFL-1 & SFL-1 SIGNATURE PREAMPLIFIER
 OWNER S MANUAL THE SONIC FRONTIERS SFL-1 & SFL-1 SIGNATURE PREAMPLIFIER OPERATION, CONNECTIONS AND CONTROL FUNCTIONS A B C D E F G H I A-Selector Switch - This knob is turned to select an Input (P) through
POWER AMPLIFIER. Owner s Manual POWER AMPLIFIER R 20 CLIP POWER TEMP PROTECTION 6 POWER. Keep This Manual For Future Reference.
 POWER AMPLIFIER Owner s Manual POWER AMPLIFIER POWER 20 5 L CLIP R 20 5 TEMP 25 0 25 0 PROTECTION 0 LEVEL 0 6 6 POWER 40 40 ON OFF L 0 db R 0 Keep This Manual For Future Reference. E WARNING: THIS APPARATUS
Cover for IPA 75/150T II
 Cover for IPA 75/150T II 1 Intended to alert the user to the presence of uninsulated "dangerous voltage" within the product's enclosure that may be of sufficient magnitude to constitute a risk of electric
MANLEY LABORATORIES, INC. OWNER'S MANUAL MANLEY 50 WATT MONOBLOCK AMPLIFIER
 MANLEY LABORATORIES, INC. OWNER'S MANUAL MANLEY 50 WATT MONOBLOCK AMPLIFIER Manley Laboratories, Inc. 13880 Magnolia Ave. Chino, CA. 91710 tel: (909) 627-4256 fax: (909) 628-2482 CONTENTS SECTION PAGE
Owner s Manual. MOON Series W5.3 SE. Stereo Power Amplifier
 Owner s Manual MOON Series W5.3 SE Stereo Power Amplifier Important Safety Instructions 1. Read these instructions. 2. Keep these instructions. 3. Heed all warnings. 4. Follow all instructions. 5. Do not
INSTRUCTION MANUAL. MODEL: Vintage 60R. Vintage Series Guitar Amplifi er
 INSTRUCTION MANUAL MODEL: Vintage 60R Vintage Series Guitar Amplifi er 2 INTRODUCTION Thank you for choosing this Johnson amplifier. Please read this manual carefully and completely before operating your
Installation & User Guide. For Powering Distributed Audio Systems A45-X2 TWO CHANNEL AMPLIFIER
 Installation & User Guide For Powering Distributed Audio Systems TWO CHANNEL AMPLIFIER A45-X2 A45-X2 TWO CHANNEL AMPLIFIER TABLE OF CONTENTS Features...1 Product Overview...2 Package Contents...4 Preparing
FS-7006PA FS-7012PA YA-7000 POWER AMPLIFIERS. AMPLIFIER AUTO SWITCHING MODULE (Optional) OPERATING INSTRUCTIONS
 OPERATING INSTRUCTIONS") OPERATING INSTRUCTIONS POWER AMPLIFIERS AMPLIFIER AUTO SWITCHING MODULE (Optional) FS-7006PA FS-7012PA YA-7000 Thank you for purchasing TOA's Power Amplifiers. Please carefully follow the instructions
OPERATING INSTRUCTIONS POWER AMPLIFIERS AMPLIFIER AUTO SWITCHING MODULE (Optional) FS-7006PA FS-7012PA YA-7000 Thank you for purchasing TOA's Power Amplifiers. Please carefully follow the instructions
PDB4. Four Channel Passive Direct Box USER'S GUIDE
 PDB4 Four Channel Passive Direct Box USER'S GUIDE IMPORTANT SAFETY INSTRUCTIONS - READ FIRST This symbol, wherever it appears, alerts you to important operating and maintenance instructions in the accompanying
Boulder W Mono Power Amplifier
 Boulder 1050 500 W Mono Power Amplifier Owners Manual 4/11/04 Boulder Amplifiers, Inc. 3235 Prairie Ave. Boulder, CO 80301 www.boulderamp.com APPENDIX BOULDER LINK REMOTE CONTROL OPERATION GETTING STARTED
Model 2200 M-Block Power Amplifier
 Model 2200 M-Block Power Amplifier Owner s Manual Version 1.0 Warnings Please Read First CAUTION: To reduce the risk of electric shock, do not remove the cover (or back). No user serviceable parts inside.
INSTRUCTION MANUAL LCS TX
 INSTRUCTION MANUAL LCS TX 4 Channel Transmitter LCS1 Single Channel Transmitter Cardio Theater Inc Service 1-800-776-6695 Sales 1-800-CARDIO-1 1 Introduction CONGRATULATIONS on your choice of this product
E-400 power amplifier. user manual
 E-400 power amplifier user manual Musikhaus Thomann e.k. Treppendorf 30 96138 Burgebrach Germany Telephone: (09546) 9223-0 E-mail: info@thomann.de Internet: www.thomann.de 07.03.2014, ID: 173888 Table
w i t h T A B L E O F C O N T E N T S Safety Information 2 Certifications/Standards 3
 M ono Pow er Amplifier w i t h Information T A B L E O F C O N T E N T S Safety Information 2 Certifications/Standards 3 Warranty 4 Unpacking 4 Setup and Placement 4 Rear Panel Connections 5 Tips for Operation
Block-800B bass head. user manual
 Block-800B bass head user manual Musikhaus Thomann Thomann GmbH Hans-Thomann-Straße 1 96138 Burgebrach Deutschland Telephone: +49 (0) 9546 9223-0 E-mail: info@thomann.de Internet: www.thomann.de 08.03.2018,
EPA152/252/502. User Manual.
 EPA152/252/502 User Manual www.audac.eu ADDITIONAL INFORMATION This manual is put together with much care, and is as complete as could be on the publication date. However, updates on the specifications,
CR31. Companion. Instruction Manual
 CR31 Companion Instruction Manual 910-244700-001 IMPORTANT SAFETY INSTRUCTION PLEASE READ CAREFULLY ALL THE FOLLOWING IMPORTANT SAFEGUARDS THAT ARE APPLICABLE TO YOUR EQUIPMENT 1. Read Instructions - All
REVAMP4100 Instruction manual
 REVAMP4100 Instruction manual REVAMP4100 Instruction manual 3 REVAMP4100 manual 4 CLASS-D POWER AMPLIFIER IMPORTANT SAFETY INSTRUCTIONS 1. Read these instructions 2. Keep these instructions 3. Heed all