|
|
|
- Isabella Moore
- 6 years ago
- Views:
Transcription
1
2
3 TABLE OF CONTENTS 3 Introduction 4 Important Notice, FCC Licensing 5 LCD Display 6 Controls 7 Battery Installation 8 Installing the Shoulder Strap 8 Charging the Battery Pack 9 Low Battery Level Indicator 9 Selecting the Power Source 9 Operating Your Radio External Speaker/Microphone Jack 17 USB Jack 17 Troubleshooting Guide 18 Use and Care 18 Specifications and Frequency Charts Warranty Information 21 MIDLAND Family Products 22 Accessories Accessories Order Form 25 Page 3
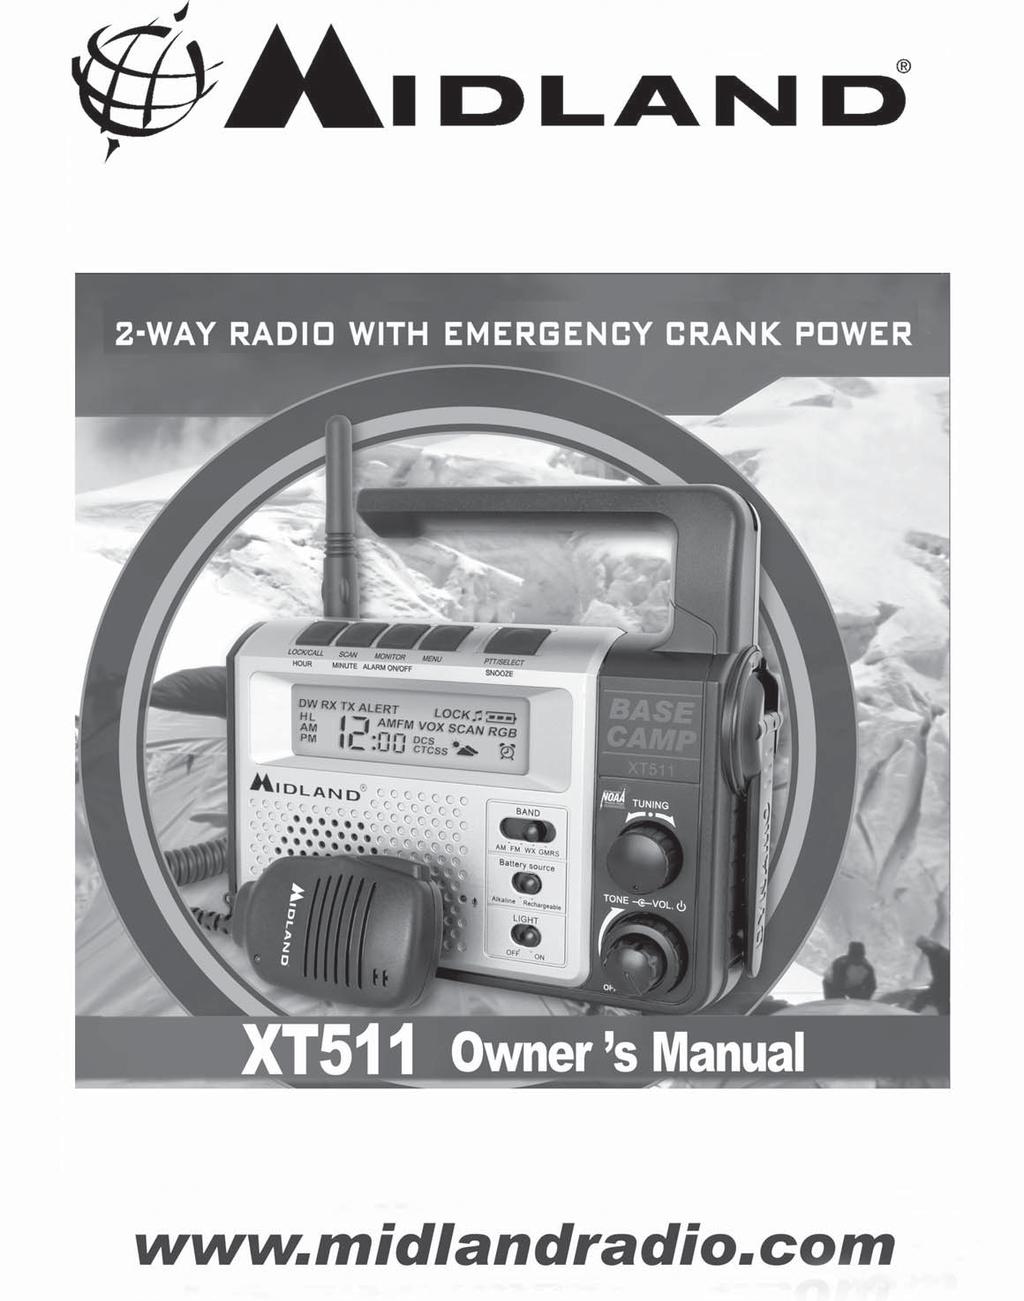
4 Welcome to the world of Midland electronics Congratulations on your purchase of a high quality MIDLAND product. Your 2-way radio represents the state-of-the-art in high-tech engineering. Designed for GMRS (General Mobile Radio Service) operation, this compact package is big in performance. It is a quality piece of electronic equipment, skillfully constructed with the finest components. The circuitry is all solid-state and mounted on a rugged printed circuit board. Your two-way radio is designed for reliable and trouble-free performance for years to come. Features - 22 GMRS/FRS Channel Privacy Codes (38 CTCSS / 83 DCS) - AM/FM Receiver - VOX - Selectable Call Alert - NOAA Weather Radio - NOAA Weather Alert - Scan Function - MONITOR Function - Dual Watch Function - Roger Beep Tone - Silent Operation - Keypad Lock - Power HI/LO Settings - Flashlight - Clock/Alarm Clock Function - Dynamo Crank Battery Charge Capability - USB Jack (For Mobile Phone Charging) - Speaker / Microphone Jacks - Battery Meter / Battery Low Indicator This device complies with Part 15 of the FCC Rules. Operation is subject to the following two conditions : (1) this device does not cause harmful interference, and (2) this radio must accept any interference that may cause undesired operation. To maintain compliance with FCC s RF exposure guidelines, for body-worn operation, this radio has been tested and meets the FCC RF exposure guidelines when used with Midland Radio Corp. accessories supplied or designated for this product. Use of other accessories may not ensure compliance with FCC RF exposure guidelines. (Tested with Headset Model: AVP-1) Page 4
5 IMPORTANT NOTICE, FCC LICENSE REQUIRED FOR GMRS OPERATION The XT511 Series operates on GMRS (General Mobile Radio Service) frequencies which require an FCC (Federal Communications Commission) license. You must be licensed prior to operating on channels 1-7 or 15-22, which comprise the GMRS channels of the XT511 Series. Serious penalties could result for unlicensed use of GMRS channels, in violation of FCC rules, as stipulated in the Communications Act's Sections 501 and 502 (amended). You will be issued a call sign by the FCC which should be used for station identification when operating the radio on GMRS channels. You should also cooperate by engaging in permissible transmissions only, avoiding channel interference with other GMRS users, and being prudent with the length of their transmission time. To obtain a license or ask questions about the license application, contact the FCC at CALL FCC or go to the FCC's website: and request form 605. Exposure To Radio Frequency Energy Your Midland radio is designed to comply with the following national and international standards and guidelines regarding exposure of human being to radio frequency electromagnetic energy: - United States Federal Communications Commission, Code of Federal Regulations: 47 CFR part 2 sub-part J - American National Standards Institute (ANSI)/Institute of Electrical & Electronic Engineers (IEEE) C Institute of Electrical and Electronic Engineer (IEEE) C Edition - National Council on Radiation Protection and Measurements (NCRP) of the United States, Report 86, International Commission on Non-lonizing Radiation Protection (ICNIRP) 1998 To control your exposure and ensure compliance with the general population or uncontrolled environment exposure limits, transmit no more than 50% of the time. The radio generates measurable RF energy exposure only when transmitting. IMPORTANT: Changes or modifications to this unit not expressly approved by MIDLAND RADIO CORP. could void your right to operate this unit. Your radio is set up to transmit a regulated signal on an assigned frequency. It is against the law to alter or adjust the settings inside the COMMUNICATOR to exceed those limitations. Any adjustment to your radio must be made by qualified technicians. Page 5
6 LCD DISPLAY NOAA WEATHER (WX) ALERT ICON Indicates the NOAA Weather Alert function is on. 2. TRANSMIT (TX) ICON Indicates radio is transmitting a signal. 3. RECEIVE (RX) ICON Indicates radio is receiving a transmission. 4. DUAL WATCH ICON Indicates the Dual Watch function is on. 5. TRANSMIT POWER LEVEL ICON Indicates TX Power setting (H/L) 6. CLOCK AM/PM ICON Indicates the clock is set in AM or PM. 7. CHANNEL NUMBER Changes from 1~22 on GMRS/FRS band (1~7 on WX band). This is also used to indicate in part the current AM/FM receiver frequency setting and the current clock setting. 8. AM/FM RECEIVER ICON Indicates radio is in AM or FM receiver mode. 9. PRIVACY CODE Indicates Privacy Code selected by user (of~38/of~83). This 2 digit readout is also used to display AM/FM receiver frequency and for the clock function VOX ICON Indicates when VOX mode is active. 11. KEY LOCK ICON Indicates KEY LOCK mode is on. 12. SCAN ICON Indicates when the radio is in Scan mode. 13. KEY TONE ICON Indicates radio s Key Beep Tone is on. 14. BATTERY METER Indicates the battery level. 15. ROGER BEEP ICON Indicates radio s Roger Beep Tone is on. 16. ALARM CLOCK ICON Indicates when the Alarm Clock is on. 17. NOAA WEATHER (WX) BAND ICON Indicates when the radio is in Weather Band mode. 18. PRIVACY CODE ICON Indicates Privacy Code setting (CTCSS/DCS). Page 6
7 NOAA s National Weather Service Model XT511 Series CONTROLS ANTENNA 20. MONITOR / ALARM ON/OFF Button Press to turn on the Monitor function in GMRS mode. Press and hold to turn alarm on/off in Clock mode. 21. SCAN/MINUTE Button Press to set the Scan mode on/off in GMRS mode. Press to change the Minute setting in Clock mode. 22. LOCK/CALL / HOUR Button Press and hold to set the key pad lock on/off in GMRS mode. Press to send a CALL Alert signal in GMRS mode. Press to change the Hour setting in Clock mode. 23. FLASHLIGHT Built-in flashlight. 24. USB JACK used for charging mobile phone thru the Dynamo Crank. 25. EXTERNAL SPEAKER/MIC JACK 26. EXTERNAL CHARGER JACK 27. SPEAKER Built-in speaker. 28. MENU Button Press to access Menu mode in GMRS/FRS and WX mode. 29. PTT/SELECT/SNOOZE Button Press and hold to transmit voice communication in GMRS mode. Press to confirm the selection in MENU and Clock mode. Press to activate SNOOZE function in Clock mode. 30. DYNAMO CRANK HANDLE Rotate clockwise or counter-clockwise to charge the NiMH battery pack. 31. BAND SWITCH used to switch between AM/FM/WX/GMRS mode. 32. TUNING KNOB Rotate clockwise/counterclockwise to make adjustment in the MENU mode. It can also make adjusment in the Clock and AM/FM receiver mode. 33. BATTERY SOURCE SWITCH used to switch between Alkaline and Rechargeable NiMH batteries. 34. LIGHT ON/OFF SWITCH used to turn the FLASHLIGHT on/off. 35. TONE CONTROL KNOB Turn clockwise / counter-clockwise to increase/decrease the tone. 36. POWER/VOLUME KNOB Turn clockwise to turn the power on and increase the volume level. Turn counter-clockwise to decrease the volume level and turn the power off. 37. MIC Built-in microphone. Page 7
8 BATTERY INSTALLATION Your XT511 Series radio operates with either 4 AA alkaline batteries or an optional NiMH battery pack. To install the batteries: 1. With the back of the radio facing you, remove the Battery Cover by pressing down the Battery Cover Lock Tab until it unlocks and lifting it out from the radio. 2. Insert 4 AA batteries observing the polarity as shown. Installing the batteries incorrectly will prevent the unit from operating or may damage the unit. Also install the NiMH battery pack as shown below. 3. Return the Battery Cover by pushing it down into the back of the radio until the Battery Cover Lock Tab locks into place. Battery Compartment Battery Cover Lock Tab Alkaline Batteries INSTALLING THE SHOULDER STRAP To install the SHOULDER STRAP, slide the SHOULDER STRAP CLIP down into the metal pins on the top of the radio until it locks into place. To remove the SHOULDER STRAP, press the SHOULDER STRAP CLIP tab down, then remove it from the radio. Shoulder Strap Clip NiMH Battery Pack Shoulder Strap Battery Cover Metal Pin Shoulder Strap Clip Metal Pin Page 8
9 CHARGING THE BATTERY PACK Your XT511 Series is equipped for using an rechargeable NiMH battery pack which can be recharged using an AC wall adapter (included) or a DC adapter (included). Initial charge time is 24 hours with a charge time of 12 hours thereafter. For maximum battery life, we recommend charging the battery pack when the low battery icon comes on. Remove the radios from the charger when the charge time expires. For the location of the CHARGING JACK see page 17. In order to ensure that the battery pack is fully charged, it is recommended that the battery pack be charged for at least 12 hours with the radio turned OFF. You can also charge the rechargeable NiMH battery pack using the Dynamo Crank. To charge using the Dynamo Crank rotate rapidly the Dynamo Crank handle clockwise or counter-clockwise. To get the best charging condition, it is recommended to charge the battery pack thru the Dynamo Crank with the radio turned OFF.! 1. Only use our NiMH battery pack. 2. Do not attempt to charge alkaline batteries or any batteries or battery packs other than the one indicated in the manual. This may cause leakage and damage to the radio. 3. For long term storage of the radio, turn the radio OFF and remove the batteries from the radio. BATTERY LEVEL INDICATOR Your XT511 Series has a BATTERY LEVEL METER that shows the battery power level. The greater the number of bars visible, the stronger the battery level. When the battery level is low, the Battery Shell icon will flash in the display indicating your batteries should be replaced or recharged if using a rechargeable battery pack. SELECTING THE POWER SOURCE Your XT511 Series can use either an Alkaline battery or the rechargeable NiMH battery pack. Just set the BATTERY SOURCE switch to either Alkaline or Rechargeable (for NiMH battery pack) mode. Page 9
10 OPERATING YOUR RADIO SETTING THE RADIO TO GMRS/FRS MODE To set the XT511 to GMRS/FRS mode, move the BAND switch in GMRS/FRS position. The LCD will show the current GMRS/FRS channel setting. POWER ON/OFF AND VOLUME Rotate the POWER/VOLUME knob clockwise to turn the radio on and increase the volume level. Rotate the control counter-clockwise to reduce the volume level and to turn the radio off. During Power On, the LCD will display all icons for 1 second and the LCD display will indicate the last channel/frequency selected. TRANSMITTING AND RECEIVING A CALL To communicate, all radios in your group must be set to the same channel and Privacy Code. 1. Press and hold the PTT button and speak in a normal voice into the microphone. The TX icon will appear continuously on the LCD Display while transmitting. When using a HAND MIC, press and hold the PTT button on the side of the HAND MIC and speak in a normal voice. For maximum clarity, hold the HAND MIC 2 to 3 inches from your mouth. 2. To receive a call, release the PTT button. The RX icon will appear on the display when your radio is receiving a transmission. ABOUT RANGE Your XT511 Series radios are designed to give you maximum range under optimum conditions. Optimum Conditions are: l Over water l Open rural areas without obstructions l Flat areas where you can see the other person To ensure you get maximum range: l Be sure to use fresh or fully charged batteries - low batteries will cause low power conditions l Be sure you are on a GMRS channel - FRS channels are restricted by the FCC to low power l Be sure to set your radio to use Hi power. l Be sure to point the ANTENNA upward. Page 10
11 XT511 QUICK REFERENCE CHART Channel MENU Privacy Power VOX Call Alert Roger Beep Silent Operation Dual Watch Privacy 1~22 H/L of/1/2/3 of/1~5 On/Off On/Off 1~22 WX Channel WX Alert CTCSS of~38 CTCSS of~38 1~10 On/Off DCS of~83 DCS of~83 Only when Dual Watch is ON Hour Setting Minute Setting Alarm Setting Minute Setting 12hr AM/PM 0~60 0~60 Clock/Alarm Clock Function 0~60 CHANNEL SELECTION (GMRS/FRS BAND) Turn the TUNING knob clockwise or counter-clockwise to select one of the 22 GMRS/FRS channels. MONITOR Pressing the MONITOR button will let you check activity on your current channel before transmitting. This could also be used to adjust the volume level of the radio when it is not receiving a signal. Press the MONITOR button again to get out of MONITOR mode. SCAN Your XT511 Series can scan all 22 channels for any activity. To enter, quickly press the SCAN button. Repeat the same procedure to exit. Your radio will rapidly scan each of the 22 channels and stop on any active channel. Your radio will stay on the active channel as long as the signal is present and will resume scanning 5 seconds after the signal is no longer present. When you press the PTT button to transmit on an active channel, the scanning function will stop and remain on the active channel. To resume scanning, quickly press the button. CALL ALERT Your XT511 Series can transmit a call alert for a fixed length of time. To send a call alert, press the CALL/LOCK button. The TX icon will appear while transmitting a call alert and a tone can be heard on the speaker for confirmation. The XT511 has 5 call alert selections. Page 11
12 KEYPAD LOCK To avoid accidentally changing the radio setting, press and hold the CALL/LOCK button for about 4 seconds. The KEY LOCK icon will appear on the display. The PTT, CALL, and MONITOR function will still be active. Repeat the same procedure to unlock the keypad. DISPLAY ILLUMINATION During Power on, the display illumination will activate for approx. 5 seconds. The display illumination can also be activated when the MENU, SCAN button is pressed. It can also be activated if the TUNING knob is turned. Note: In Clock Mode (Power Off) the display illumination can be activated by pressing any button, or when the TUNING knob is turned. SETTING PRIVACY CODES Your XT511 Series has 121 Privacy Codes available. The selected Privacy Code may be different for each channel. To select a Privacy Code for the current channel press the MENU button once, and then turn the TUNING knob to select one of the 38 CTCSS Privacy Code. Press again the MENU button and turn the TUNING knob to select one of the 83 DCS Privacy Code. The Privacy Code icon on the display will indicate whether you set your Privacy Code in CTCSS or DCS mode. To confirm the selection, press the PTT button or press MENU button again to move to the next feature setting.! Note : If you select any CTCSS Privacy Code, any pre-selected DCS Privacy Code will be cancelled and vice-versa. Selecting a Privacy Code of "of" will disable the Privacy feature. To communicate between two XT511 Series radios, all radios in your group must be set to the same channel and Privacy Code selections. TRANSMIT (TX) POWER LEVEL SELECTION Your XT511 Series has 2 power level settings. To select the power level on channels 1~7 and 15~22, press the MENU button until a Pr icon will appear on the display. Then turn the TUNING knob to select TRANSMIT POWER LEVEL icon (H: Hi/L: Lo). To confirm, press the PTT button or press MENU button again to move to the next feature setting. When the Battery Meter drops to 1 bar, the TX Power will automatically switch from Hi(H) to Lo(L) level.! Note : You cannot adjust the power setting on the FRS channels (8~14). They are set to Low power per FCC regulations. Page 12
13 VOX (Hands-free Transmission) Your radio has 3 VOX level settings: (of/1/2/3). To set VOX, press the MENU button until the display shows Vo while on the right, an of icon appears. Select 1, 2, or 3 by turning the TUNING knob and push the PTT key, or press MENU button again to move to the next feature setting. VOX will be more sensitive on the 1 setting than on the 3 setting. To turn VOX off, press the MENU button until the display shows Vo while on the right, a 1, 2 or 3 icon appears. Select of by turning the TUNING knob and push the PTT key, or press MENU button again to move to the next feature setting. Note: For VOX Hands-free operation use Midland headset accessories or built-in internal microphone. The accessory hand mic is not intended for VOX mode use. CALL ALERT SELECTION Your XT511 Series has 5 selectable CALL ALERTS (of/1~5). To select, press the MENU button until a CA icon appears and to the right of the CA icon the current CALL ALERT setting is displayed. Then turn the TUNING knob to make the CALL ALERT selections - the radio will emit a corresponding tone for each selection. To confirm, press the PTT button or press MENU button to move to the next feature setting. Note: Setting the CALL Alert to of will disable the CALL Alert function. ROGER BEEP (end of transmission) TONE When the PTT button is released, the radio will beep to confirm to other users that your transmission has finished. To turn the ROGER BEEP tone on, press the MENU button until the display shows an rb icon while on the right of the rb display, an of icon appears. Select on by turning the TUNING knob and push the PTT key, or press MENU button to move to the next feature setting. The ROGER BEEP icon will appear on the display. To turn the ROGER BEEP tone off, press the MENU button until the display shows an rb icon while on the right of the rb display, an on icon appears. Select of by turning the TUNING knob and push the PTT key, or press MENU button to move to the next feature setting. The ROGER BEEP icon will disappear on the display. Page 13
14 SILENT OPERATION Your XT511 Series has a SILENT OPERATION mode. In this mode, all beeps and tones are disabled. To turn the SILENT OPERATION mode on, press the MENU button until the display shows an bp icon while on the right of the bp display, an on icon appears. Select of by turning the TUNING knob and push the PTT key to confirm or press the MENU button to move to the next feature setting. The KEY TONE icon will appear on the display. To turn the SILENT OPERATION mode off, press the MENU button until the display shows an bp icon while on the right of the bp display, an of icon appears. Select on by turning the TUNING knob and push the PTT key or MENU button. The KEY TONE icon will disappear on the display. DUAL WATCH Your XT511 Series has a DUAL WATCH function, to enable user to monitor 2 selected channel/privacy code for any activity. It is similar with the SCAN function but will only monitor 2 channels instead of the whole 22 channels. The first channel/privacy code is the current setting, the second channel/privacy code is the one you will set on the MENU. To turn on the DUAL WATCH function, press the MENU button until the DUAL WATCH icon appear while in the right an of icon appears. Select the second channel by turning the TUNING knob.to select a Privacy Code for the second channel press the MENU button once, and then turn the TUNING knob to select one of the 38 CTCSS Privacy Code or press again the MENU button and turn the TUNING knob to select one of the 83 DCS Privacy Code. Press the MENU or PTT button to confirm. The DUAL WATCH icon will remain on the display. The radio will rapidly scan the two channels selected and stop on any active channel. Your radio will stay on the active channel as long as the signal is present and will resume scanning 5 seconds after the signal is no longer present. To turn off the DUAL WATCH function, press the SCAN button. The current GMRS/FRS radio setting will be displayed and the DUAL WATCH icon will disappear on the display. Page 14
15 SETTING THE RADIO TO NOAA WEATHER RADIO MODE To set the XT511 to NOAA WEATHER RADIO mode, move the BAND switch in WX position. The LCD will show the current WX channel setting, and the NOAA WEATHER (WX) BAND icon will appear on the display. Turn the TUNING knob to select one of the 7 NOAA WEATHER (WX) BAND channels. NOAA WEATHER ALERT Your XT511 has a NOAA WEATHER ALERT function, to enable you to automatically receive weather alert from designated NOAA stations. To turn the NOAA WEATHER (WX) ALERT on, press the MENU button once while in WX Band. The NOAA WEATHER (WX) ALERT icon will appear on the display while on the right an "of" icon appears. Select "on" by turning the TUNING knob. To confirm, press the PTT or the MENU button. The radio will return to WX BAND and the NOAA WEATHER (WX) ALERT icon will remain on the display. If the radio receives a WX ALERT signal from a designated NOAA station while on WX mode, the radio will beep for 20 seconds while an "AL" and "In" icon appear on the display while the FLASHLIGHT and the display illumination will blink altogether. Afterwhich the radio will automatically go to NOAA WEATHER RADIO mode. If the radio receives a WX ALERT signal from a designated NOAA station while on AM/FM or GMRS/FRS mode, the radio will beep for 20 seconds while the NOAA WEATHER (WX) ALERT icon will appear blinking on the display while the FLASHLIGHT and the display illumination will blink altogether. In this case, the user should set the BAND switch to WX position to listen for any weather alert broadcast. The NOAA WEATHER (WX) ALERT icon will remain blinking on the display when it receives a WX ALERT signal unless the BAND switch is set to WX mode or any button is pressed. This is to remind the user that a WX Alert signal have been received in case they missed it. To turn the NOAA WEATHER (WX) ALERT off, press the MENU button once while in WX Band. The NOAA WEATHER (WX) ALERT icon will appear on the display while on the right an "of" icon appears. Select "of" by turning the TUNING knob. To confirm, press the PTT or MENU button. Page 15
16 SETTING THE RADIO TO AM/FM RECEIVER MODE To set the XT511 to AM/FM RECEIVER mode, move the BAND switch in AM or FM position. The LCD will show the current AM or FM channel setting. CHANNEL SELECTION (AM/FM BAND) Turn the TUNING knob clockwise or counter-clockwise to select the AM or FM frequency. Turning and holding the TUNING knob will make the radio scan for the frequency continuously until it receives a strong signal. SETTING THE RADIO TO CLOCK MODE To set the XT511 to CLOCK mode, just turn the POWER/VOLUME switch to OFF. The display will show the current time setting. CHANGING THE HOUR SETTING To change the hour setting of the clock, press the LOCK/CALL/HOUR button while in CLOCK mode, and the hour digit of the clock will blink. Turn the TUNING knob to change the hour setting. Press the PTT/SELECT button to confirm. CHANGING THE MINUTE SETTING To change the minute setting of the clock, press the SCAN/MINUTE button while in CLOCK mode, and the minute digit of the clock will blink. Turn the TUNING knob to change the hour setting. Press the PTT/SELECT button to confirm. SETTING THE ALARM CLOCK The XT511 can also function as an ALARM CLOCK. To turn the ALARM CLOCK on, press the ALARM ON/OFF button while in CLOCK mode. The ALARM CLOCK icon will appear. To set the hour setting of the ALARM, press the LOCK/CALL/HOUR button while in CLOCK mode, and the hour digit of the clock will blink. Turn the TUNING knob to change the hour setting. Press the PTT/SELECT button to confirm. To set the minute setting of the ALARM, press the SCAN/MINUTE button while in CLOCK mode, and the minute digit of the clock will blink. Turn the TUNING knob to change the minute setting. Press the PTT/SELECT button to confirm. To turn the ALARM CLOCK off, press the ALARM ON/OFF button while in CLOCK mode. The ALARM CLOCK icon will disappear. ALARM CLOCK SNOOZE When the ALARM CLOCK goes off, you can activate the SNOOZE function by pressing the SNOOZE button. Everytime the SNOOZE button is pressed the the ALARM CLOCK will go off again after 8 minutes. Page 16
17 USING THE FLASHLIGHT Your XT511 Series has a built-in FLASHLIGHT. To turn the FLASHLIGHT on, set the LIGHT switch to ON. To turn the FLASHLIGHT off, set the LIGHT switch to OFF. EXTERNAL SPEAKER/MICROPHONE JACK Your XT511 Series can be used with an optional external speaker/ microphone or headset, freeing your hands for other tasks. You can also use the HAND MIC thru the SPEAKER/MICROPHONE JACK. To use an optional speaker/microphone or headset: l Open the SPEAKER/MIC Jack Rubber Cap on the side radio. l Insert the plug(s) into the SPK/MIC jacks. l Place the earbud into your ear, and adjust the mic into your desired position. USB JACK Your XT511 Series can be used to charge a mobile phone by the DYNAMO CRANK, AC, or DC Adapter thru the USB Jack. l Open the USB Jack Rubber Cap on the side radio. l Attach a USB Charging Cable (not included) to the mobile phone. l Connect the other end of the USB Charging Cable to the USB Jack of the XT511. l Recharge the mobile phone battery by turning rapidly the DYNAMO CRANK, or by attaching the AC or DC Adapter in the Charging Jack. Note: Charging a mobile phone thru the USB Jack is intended for emergency purpose only. It is not intended for recharging fully a discharged battery. USB JACK EXTERNAL SPK/MIC JACK CHARGING JACK Page 17
18 TROUBLESHOOTING GUIDE No Power Cannot Receive Messages Radio is not responding to button presses Display is dim Charger not functioning - Check battery installation and/or replace batteries - Confirm the radios have the same channel and Privacy Code settings. - Make sure that you are within range of the other transceivers. - Buildings and other structures may interfere with your communication. (See ABOUT RANGE on Page 10) - Make sure key lock is not on. See "Keypad Lock" (Page 12). - Radio might need to be reset. Turn radio off then on. - Ensure accessory microphone is set properly - Recharge or replace batteries. - Ensure that the Charger Plug is installed in the radio properly. - Ensure the outlet where the charger is plugged into is functioning properly. - Check that the battery pack is installed in the radio properly. USE AND CARE 1. Use a soft damp cloth to clean the radio 2. Do not use alcohol or cleaning solutions to clean the radio. 3. Do not immerse the radio in water. 4. Dry the radio with dry lint-free cloth should it get wet. 5. Turn off the radio and remove the batteries during long-term storage. If you have a problem which you believe requires service, please call first and speak with a service technician. Many problems can be remedied over the phone without returning the unit for service. Page 18
19 SPECIFICATIONS Channels 22 GMRS/FRS Channels +121 Privacy Codes 7 NOAA Weather (WX) Band Channels Operating Frequency UHF ~ MHz AM : 520kHz ~ 1710kHz -10kHz steps FM : 87.5MHz ~ 108.0MHz - 100kHz steps Power Source 4 AA Alkaline or 6.0V Rechargeable Ni-MH battery pack GMRS/FRS FREQUENCY CHART (MHz) CH. No CH. Freq. CH. No CH. Freq. CH. No CH. Freq * Channels 8~14 are low-power FRS license free channels NOAA WEATHER (WX) RADIO FREQUENCY CHART (MHz) CH. No CH. Freq. CH. No CH. Freq PRIVACY CODES FREQUENCY CHART (Hz) Code Freq. Code Freq. Code Freq. Code Freq. Code Freq Note: Privacy codes can be programmed for use on any channel Page 19
20 DCS PRIVACY CODE CHART No. CODE No. CODE No. CODE Note: Privacy codes can be programmed for use on any channel Page 20
21 LIMITED WARRANTY Midland Radio Corporation will repair or replace, at its option without charge, any Midland FRS/GMRS transceiver which fails due to a defect in material or workmanship within Three Years following the initial consumer purchase. This warranty does not apply to water damage, battery leak or abuse. Accessories have a 90 day warranty from date of purchase, including any antennas, chargers, or earphones. This warranty does not include the cost of labor for removal or re-installation of the product in a vehicle or other mounting. Performance of any obligation under this warranty may be obtained by returning the warranted product, prepaid freight, along with proof of purchase to: Midland Radio Corporation Warranty Service Department 5900 Parretta Drive Kansas City, MO This warranty gives you specific legal rights, and you may also have other rights, which vary from state to state. Note : The above warranty applies only to merchandise purchased in the United States of America or any of the territories or possessions thereof, or from a U.S. Military exchange. Midland Radio Corporation 5900 Parretta Drive Kansas City, MO Tel: (816) mail@midlandradio.com URL: Page 21


22 ACCESSORIES Accessories can be purchased at or fill in the form on the following page and mail it to our address. AVP-7-2 Rechargeable battery packs - $19.99 Page 22


23 AVP-1-2 Over the Ear Mic. Headsets w/ PTT - $19.99 AVP-H1-1 Open Face Helmet Microphone Kit - $49.99 AVP-H2-1 Closed Face Helmet Microphone Kit - $49.99 Page 23


24 AVP-H3-2 Surveillance Headset - $39.99 AVP-H4-2 Ear Wrap Headset - $39.99 AVP-H5-2 Behind the Head Headset - $39.99 Page 24
25 ACCESSORIES ORDER FORM Please send Money Order or fill in Visa/MasterCard information and mail to the address below. Please DO NOT send cash or checks. Make Money Order to Midland Radio Corporation. Name: Address: City: State Zip Code Tel: CC# Type: Exp. Qty Item Price Total AVP-7 $19.99 AVP-1 $19.99 AVP-H1 $49.99 AVP-H2 $49.99 AVP-H3 $39.99 Mail To: Midland Radio Corporation Consumer Dept Parretta Drive Kansas City, MO Or Call To order online go to AVP-H4 $39.99 AVP-H5 $39.99 Sub-Total Tax (MO, CO, IL, FL only) S & H $14.95 (Applies to Domestic U.S. only. For Hawaii, Alaska, and Puerto Rico S&H will be $36.25 for 1lb and $64.25 for 2lbs or more). Total $ Page 25
26
27
28 MIDLAND RADIO CORPORATION 5900 Parretta Drive Kansas City, MO Call visit us at Note: Features & Specifications are subject to change without notice. MIDLAND is not responsible for unintentional errors or omissions on its packaging. Rev C
X-TRA TALK. GXT500/550 Series GMRS/FRS Radio OWNER'S MANUAL.
 X-TRA TALK GXT500/550 Series GMRS/FRS Radio OWNER'S MANUAL TABLE OF CONTENTS 2 Introduction 3 Important Notice, FCC Licensing 4 LCD Display 5 Controls 5 Battery Installation 6 Installing the Belt Clip
GMRS/FRS Radio OWNER'S MANUAL
 X-TRA TALK LXT376/440 Series GMRS/FRS Radio OWNER'S MANUAL MON SCAN TABLE OF CONTENTS 2 Introduction 3 Important Notice, FCC Licensing 4 LCD Display 5 Controls 5 Battery Installation 6 Installing the Belt
LXT480 Series GMRS/FRS Radio
 LXT480 Series GMRS/FRS Radio OWNER'S MANUAL www.midlandradio.com Welcome to the world of Midland electronics Congratulations on your purchase of a high quality MIDLAND product. Your 2-way radio represents
Features 36 GMRS/FRS Channels 121 Privacy Codes (38 CTCSS / 83 DCS)
") Welcome to the world of Midland electronics Congratulations on your purchase of a high quality MIDLAND product. Your 2-way radio represents state-of-the-art high-tech engineering. Designed for GMRS (General
Welcome to the world of Midland electronics Congratulations on your purchase of a high quality MIDLAND product. Your 2-way radio represents state-of-the-art high-tech engineering. Designed for GMRS (General
X-TRA TALK. GXT720/775 Series GMRS/FRS Radio OWNER'S MANUAL.
 X-TRA TALK GXT720/775 Series GMRS/FRS Radio OWNER'S MANUAL TABLE OF CONTENTS 2 Introduction 3 Important Notice, FCC Licensing 4 LCD Display 5 Controls 5 Battery Installation 6 Installing the Belt Clip
Owner s Manual For Models G-225 & G-227 GMRS/FRS Radio
 Owner s Manual For Models G-225 & G-227 GMRS/FRS Radio FEATURING 22 Channels 38 CTCSS codes VOX Monitor function Call Alert Back-Lit LCD Vibrate Alert (G-227 Only) Scan Roger Beep Tone This device complies
Owner s Manual. Model G-223. GMRS/FRS Radio. FEATURES 22 Channels Scan 22 Key Pad Lock Call Alert Power HI/LO Roger Beep Tone
 Owner s Manual Model G-223 GMRS/FRS Radio FEATURES 22 Channels Scan 22 Key Pad Lock Call Alert Power HI/LO Roger Beep Tone This device complies with Part 15 of the FCC rules. Operation is subject to the
TABLE OF CONTENTS 3. Model GXT800/850 Series
 X-TRA TALK GXT800/850 Series GMRS/FRS Radio OWNER'S MANUAL TABLE OF CONTENTS 3 Introduction 4 Important Notice, FCC Licensing 5 LCD Display 6 Controls 6 Battery Installation 7 Installing the Belt Clip
NAUTICO1 (NT1) Owner s Guide
 Owner s Guide") N NAUTICO1 (NT1) Owner s Guide www.midlandradio.com TABLE OF CONTENTS. 1 Introduction.. 2 Important Notice, FCC Licensing... 3 LCD Display.. 4 Controls. 5 Battery Installation. 6 Installing the Belt Clip
N NAUTICO1 (NT1) Owner s Guide www.midlandradio.com TABLE OF CONTENTS. 1 Introduction.. 2 Important Notice, FCC Licensing... 3 LCD Display.. 4 Controls. 5 Battery Installation. 6 Installing the Belt Clip
TABLE OF CONTENTS 3. Model GXT900/950 Series
 TABLE OF CONTENTS 3 Introduction 4 Important Notice, FCC Licensing 5 LCD Display 6 Controls 6 Battery Installation 7 Installing the Belt Clip 7 Charging the Optional Battery Pack 8 Low Battery Level Indicator
Welcome to the world of Midland electronics
 Welcome to the world of Midland electronics Congratulations on your purchase of a high quality MIDLAND product. Your 2-way radio represents state-of-the-art high-tech engineering. Designed for GMRS (General
Welcome to the world of Midland electronics
 Welcome to the world of Midland electronics Congratulations on the purchase of your high quality MIDLAND product. Your two-way radio represents state-of-the-art high-tech engineering and is designed for
GMRS/FRS Radio OWNER'S MANUAL
 X-TRA TALK GXT1000/1050 Series GMRS/FRS Radio OWNER'S MANUAL TABLE OF CONTENTS 3 Introduction 4 Important Notice, FCC Licensing 5 LCD Display 6 Controls 6 Battery Installation 7 Installing the Belt Clip
THIS PAGE IS INTENTIONALLY LEFT BLANK
 THIS PAGE IS INTENTIONALLY LEFT BLANK Welcome to the world of Midland electronics Congratulations on the purchase of your high quality MIDLAND product. Your two-way radio represents state-of-the-art high-tech
THIS PAGE IS INTENTIONALLY LEFT BLANK
 THIS PAGE IS INTENTIONALLY LEFT BLANK Welcome to the world of Midland electronics Congratulations on the purchase of your high quality MIDLAND product. Your two-way radio represents state-of-the-art high-tech
MXT100. GMRS Radio OWNER S MANUAL. midlandusa.com
 MXT100 GMRS Radio OWNER S MANUAL Welcome to the World of Midland electronics Congratulations on your purchase of a high quality MIDLAND product. Your 2-way radio represents state-of-the-art high-tech engineering.
THIS PAGE IS INTENTIONALLY LEFT BLANK
 THIS PAGE IS INTENTIONALLY LEFT BLANK Welcome to the world of Midland electronics Congratulations on the purchase of your high quality MIDLAND product. Your two-way radio represents state-of-the-art high-tech
Welcome to the world of Midland electronics
 Welcome to the world of Midland electronics Congratulations on the purchase of your high quality MIDLAND product. Your two-way radio represents state-of-the-art high-tech engineering and is designed for
THIS PAGE IS INTENTIONALLY LEFT BLANK
 THIS PAGE IS INTENTIONALLY LEFT BLANK Welcome to the world of Midland electronics Congratulations on the purchase of your high quality MIDLAND product. Your two-way radio represents state-of-the-art high-tech
Welcome to the world of Midland electronics Features
 Welcome to the world of Midland electronics Congratulations on the purchase of your high quality MIDLAND product. Your two-way radio represents state-of-the-art high-tech engineering and is designed for
MIDLAND (TEAM MEMBER) RADIO-RELATED INFORMATION OPERATION OF THE WOUXAN UVA-1 OR DB16X IC RADIOS
 RADIO-RELATED INFORMATION OPERATION OF THE WOUXAN UVA-1 OR DB16X IC RADIOS") MIDLAND TEAM MEMBER) RADIO-RELATED INFORMATION When your radio is to be stored for an extended period, you should remove the batteries so that they will not corrode and damage the radio. You may need to
MIDLAND TEAM MEMBER) RADIO-RELATED INFORMATION When your radio is to be stored for an extended period, you should remove the batteries so that they will not corrode and damage the radio. You may need to
BASE CAMP446 Ricetrasmettitore PMR446 multiuso Multi-task PMR446 transceiver
 BASE CAMP446 Ricetrasmettitore PMR446 multiuso Multi-task PMR446 transceiver Via R. Sevardi 7 42124Reggio Emilia Italy www.cte.it MIDLAND BASE CAMP PMR446 A multi-task PMR446 transceiver MIDLAND BASE CAMP
Table of Contents. Page 2. midlandusa.com. Model MXT105
 MXT105 MicroMobile Table of Contents WELCOME TO THE WORLD OF MIDLAND RADIO FEATURES FCC NOTICE Exposure To Radio Frequency Energy INSTALLING YOUR RADIO Preparation for Installation Installing the Mounting
ER200 COMPACT EMERGENCY CRANK DIGITAL WEATHER ALERT RADIO OWNER S MANUAL
 ER200 COMPACT EMERGENCY CRANK DIGITAL WEATHER ALERT RADIO OWNER S MANUAL Table of Contents -------------------------------------- 2 Features ----------------------------------------------- 3 Controls and
Table of Contents. Model MXT100
 Table of Contents Model MXT100 WELCOME TO THE WORLD OF MIDLAND RADIO... 3 FEATURES... 3 FCC NOTICE... 4 Exposure To Radio Frequency Energy... 4 INSTALLING YOUR RADIO... 5 Preparation for Installation...
MXT275 Owner s Manual
 MXT275 Owner s Manual Page 2 Model MXT275 Table of Contents WELCOME TO THE WORLD OF MIDLAND....3 FEATURES...3 FCC NOTICE.....4 Exposure to Radio Frequency Energy.....4 INSTALLING YOUR RADIO....5 Preparation
Owner s Manual PMR 446 Handheld transceiver G5
 Owner s Manual PMR 446 Handheld transceiver G5 Featuring 8 Channels 38 CTCSS codes VOX/Babymonitoring Display illumination Scan function Roger Beep Tone Index Accessories 4 Introduction 5 Controls and
Using the USB Output Port to Charge a Device
 Table of Contents ----------------------------------- 2 Features ----------------------------------------------- 3 Controls and Functions ---------------------------------- 4 ER210 Power Sources -----------------------------------
CXT395. Making Life Easier and Safer. Owner s Manual TWO-WAY RADIO MODEL
 Making Life Easier and Safer Owner s Manual Staying in touch with your family and friends is convenient and easy when using your microtalk radio. Some of the many uses you will discover include: Communicating
CXT545. Making Life Easier and Safer. Owner s Manual TWO-WAY RADIO MODEL
 Making Life Easier and Safer Owner s Manual Staying in touch with your family and friends is convenient and easy when using your microtalk radio. Some of the many uses you will discover include: Communicating
ER200 COMPACT EMERGENCY CRANK DIGITAL WEATHER ALERT RADIO OWNER S MANUAL
 ER200 COMPACT EMERGENCY CRANK DIGITAL WEATHER ALERT RADIO OWNER S MANUAL Table of Contents -------------------------------------- 2 Features ----------------------------------------------- 3 Controls and
Making Life Easier and Safer
 Making Life Easier and Safer Owner s Manual Staying in touch with your family and friends is convenient and easy when using your microtalk radio. Some of the many uses you will discover include: Communicating
User s Guide GMRS-310. Topaz3, LLC NW Air World Drive Kansas City, Missouri
 GMRS-310 User s Guide Topaz3, LLC 10828 NW Air World Drive Kansas City, Missouri 64153 www.topaz3.com Toll-free: 800-821-7848 Phone: 816-891-6320 Fax: 816-891-8815 e-mail: sales@topaz3.com Printed in China
Making Life Easier and Safer
 The Cobra line of quality products includes: CB Radios microtalk Radios Radar/Laser Detectors Safety Alert Traffic Warning Systems Handheld GPS Receivers Mobile GPS Navigation Systems HighGear Accessories
WR120 Owner s Manual Guide du propriétaire Manual de instrucciones
 WR120 Owner s Manual Guide du propriétaire Manual de instrucciones Midland Radio Corporation 5900 Parretta Drive Kansas City, MO 64120 Tel. (816) 241-8500 All Hazards Alert Weather Radio with S.A.M.E Quick
TWO-WAY RADIO MODEL CXR925
 Making Life Easier and Safer Owner s Manual Staying in touch with your family and friends is convenient and easy when using your microtalk radio. Some of the many uses you will discover include: Communicating
TLKR T60 OWNER'S MANUAL EN DE FR IT ES PR NL DA NO TU PL SV RU
 TLKR T60 OWNER'S MANUAL EN DE FR IT ES PR NL DA NO TU PL SV RU SF 1 PRODUCT SAFETY AND RF EXPOSURE FOR PORTABLE TWO-WAY RADIOS! Caution ATTENTION! Before using this product, read the RF energy awareness
Product Features. Product Features. Features. Wrist Strap Connector
 The Cobra line of quality products includes: CB Radios microtalk Radios Radar/Laser Detectors Safety Alert Traffic Warning Systems Handheld GPS Receivers Mobile GPS Navigation Systems HighGear Accessories
Making Life Easier and Safer
 The Cobra line of quality products includes: CB Radios microtalk Radios Radar/Laser Detectors Safety Alert Traffic Warning Systems Handheld GPS Receivers Mobile GPS Navigation Systems HighGear Accessories
You can connect an optional speaker/microphone and earphone to the radio (neither supplied, available at your local RadioShack store).
.") 21-1903 RadioShack Copyright 22 Ch GMRS/FRS Two-way Radio Your RadioShack 22 Channel FRS/GMRS Two-way Radio provides short-range voice radio communication that lets families and groups keep in touch with
21-1903 RadioShack Copyright 22 Ch GMRS/FRS Two-way Radio Your RadioShack 22 Channel FRS/GMRS Two-way Radio provides short-range voice radio communication that lets families and groups keep in touch with
OWNER S MANUAL FOR THE G-11 (GMRS)
") OWNER S MANUAL FOR THE G-11 (GMRS) Check out our accessories at www.midlandradio.com or click on the images www.midlandradio.com http://www.midlandradio.compage 1 of 16 TABLE OF CONTENTS FCC Licensing
OWNER S MANUAL FOR THE G-11 (GMRS) Check out our accessories at www.midlandradio.com or click on the images www.midlandradio.com http://www.midlandradio.compage 1 of 16 TABLE OF CONTENTS FCC Licensing
CXR925. Making Life Easier and Safer. Owner s Manual TWO-WAY RADIO MODEL
 Making Life Easier and Safer Owner s Manual Staying in touch with your family and friends is convenient and easy when using your microtalk radio. Some of the many uses you will discover include: Communicating
Making Life Easier and Safer
 10293_LI7200WX_vB.qxd 9/5/07 10:55 AM Page RC1 Making Life Easier and Safer Owner s Manual Staying in touch with your family and friends is convenient and easy when using your microtalk radio. Some of
ALAN 777 PMR 446 Radio Set User manual
 ALAN 777 PMR 446 Radio Set User manual The all new ALAN 777 represents the very latest and most advanced technology currently available on the PMR446 and LPD market. With its stylish lines and modern design,
Making Life Easier and Safer
 Making Life Easier and Safer Owner s Manual Staying in touch with your family and friends is convenient and easy when using your microtalk radio. Some of the many uses you will discover include: Communicating
Owner s Manual TWO-WAY RADIO MODEL CXR800
 Making Life Easier and Safer Owner s Manual Staying in touch with your family and friends is convenient and easy when using your microtalk radio. Some of the many uses you will discover include: Communicating
Owner s Manual. TWO-WAY RADIO MODEL LI 6000WX Nothing Comes Close to a Cobra. English. Printed in China Part No P Version B
 Owner s Manual TWO-WAY RADIO MODEL LI 6000WX Printed in China Part No. 480-253-P Version B English Making Life Easier and Safer Staying in touch with your family and friends is convenient and easy when
GETTING STARTED. Radio layout. LCD display with icons
 GETTING STARTED Radio layout LCD display with icons 1. Key lock button 2. Battery meter 3. Main channel indicator 4. Scan icon 5. Roger beep indicator 6. CTCSS sub-channel indicator 7. VOX indicator 1
Making Life Easier and Safer
 10289_LI5600DX_PH2 8/10/07 11:28 AM Page RC1 Making Life Easier and Safer Owner s Manual Staying in touch with your family and friends is convenient and easy when using your microtalk radio. Some of the
Pair of PMR446 Two-Way Personal Radios Model: TP391
 Pair of PMR446 Two-Way Personal Radios Model: TP391 USER MANUAL MANUALE D USO MANUEL DE L UTILISATEUR BEDIENUNGSANLEITUNG MANUAL DE USUARIO MANUAL DO USUÁRIO HANDLEIDING BRUKSANVISNING P/N:086L004722-016
All Hazards Weather Alert Radio WR-300
 All Hazards Weather Alert Radio WR-300 Owner s Manual Quick Start Instructions: Please see pg. 5 for important buttons and controls. 1. Place 4 AA batteries (not supplied) into the compartment on the underside
Walkie-Talkie. User Manual and Instruction. Getting Started
 Walkie-Talkie User Manual and Instruction Getting Started Installing the AA Batteries Your radio uses 3 AA Alkaline batteries. 1. With the back of the radio facing you, lift the battery latch up to release
Read this Owner s Manual carefully and you ll get the most out of your two-way wrist watch communicator.
 User s Manual CONGRATULATIONS! You have purchased one of the smartest and smallest devices with a unique hand-flexing operation feature. The lightweight and compact wrist watch style device can be operated
UH043SX-2NB. UHF CB Transceiver. For more exciting new products please visit our website: Australia: New Zealand:
 UH043SX-2NB UHF CB Transceiver For more exciting new products please visit our website: Australia: www.uniden.com.au New Zealand: www.uniden.co.nz Controls & Indicators Included in your Package UH043SX-NB
CXT1035R FLT. Making Life Easier and Safer. Owner s Manual TWO-WAY RADIO MODEL
 Introduction Making Life Easier and Safer Owner s Manual Staying in touch with your family and friends is convenient and easy when using your microtalk radio. Some of the many uses you will discover include:
Talkabout T82/ T82 EXTREME OWNER S MANUAL
 Talkabout T82/ T82 EXTREME OWNER S MANUAL B RF ENERGY EXPOSURE AND PRODUCT SAFETY GUIDE FOR PORTABLE TWO-WAY RADIOS ATTENTION! Before using this product, read the RF Energy Exposure and Product Safety
X2 SLIM USER S MANUAL
 X SLIM USER S MANUAL Product detail information : PTT Button POWER on/off External PTT Ear Jack Charger LCD Display JogButton/JogDial. Power ON/OFF : Press Power Key.. Mode : Music Play Mode, (To use Radio,
RMV25 / RMV50 RMU25 / RMU45
 RMV25 / RMV50 RMU25 / RMU45 Owner's Manual TABLE OF CONTENTS INTRODUCTION... 3 FCC Requirements... 3 SAFETY WARNING INFORMATION... 3 CONTROLS and INDICATORS... 5 FRONT PANEL... 5 LCD Icons and Indicators...
2-WAY RADIO MODEL PR 3175 WX
 Owner s Manual 2-WAY RADIO MODEL PR 3175 WX Printed Nothing comes close to a Cobra in Philippines Part No. 480-114-P Revised 11-21-03 English Making Life Easier And Safer Staying in touch with your family
Content. Maintenance. Features ENGLISH. 1 transceiver 1 antenna 1 battery pack 1 belt clip 1 fast desktop charger User manual
 ENGLISH Content 1 transceiver 1 antenna 1 battery pack 1 belt clip 1 fast desktop charger User manual If any items are missing, contact your dealer. Maintenance Your Two Way Radio is an electronic product
HY737 Walkie talkie for kids
 HY737 Walkie talkie for kids ANTENNA SWITCH, VOLUME KNOB RED STATUS LIGHT MIC SPEAKER WWW.THEIPAR.CC WILLIAMWANG18@OUTLOOK.COM FCC ID: 2AJEM-HY737 ANTENNA ANTENNA SWITCH, VOLUME KNOB BELT BUCKLE PUSH TO
Model GMRS200W. Owner s Manual of Released: PTT/CALL
 General Mobile Radio Service (GMRS) Model GMRS200W PTT/CALL Owner s Manual 1-800-290-6650 Released: 4-25-03 1 of 16 CAUTIONS WHEN RECHARGING LITHIUM ION (Li-ion) BATTERY WITH THE AUDIOVOX CHARGER, USE
Two-Way Radio Model MT 925 PRO
 Two-Way Radio Model MT 925 PRO ENGLISH Antenna External Speaker/ Microphone Jack ON-OFF/VOLUME Knob Power/Transmit-Receive Indicator TALK Button CHANNEL UP/ CHANNEL DOWN Buttons LIGHT/MAX RANGE Button
BR100/200 Owners Manual
 BR100/200 Owners Manual TABLE OF CONTENTS FEATURES...3 FCC NOTICE...4 EXPOSURE TO RADIO FREQUENCY ENERGY...4 BODY WORN OPERATION...4 ISED NOTICE...6 GETTING TO KNOW YOUR RADIO...8 CONTROLS...8 INSTALLING
Two-Way Radio Model MT 600
 Two-Way Radio Model MT 600 ENGLISH 1 10 9 2 3 4 1. Antenna 2. External Speaker/ Microphone/Charge Jack 3. Mode/Power Button 4. Lock Button 5. Channel Select Buttons 6. Speaker/Microphone 7. Light/Max Range
User manual AWR-8000 / AWR Advanced Wireless Communications
 User manual AWR-8000 / AWR-8001 Advanced Wireless Communications THANK YOU! Thank you for your purchase of Advanced Wireless Communications AWR-8000 / AWR-8001 two-way radio. This portable two-way radio
T80/T80 EXTREME/T81 HUNTER
 T80/T80 EXTREME/T81 HUNTER OWNER'S MANUAL en pt-pt de-de fr-fr it-it es-es nl-nl da sv fi no-no hu pl ru uk RF ENERGY EXPOSURE AND PRODUCT SAFETY GUIDE FOR PORTABLE TWO- WAY RADIOS ATTENTION! Before using
DC Instruction Manual. Professional FM Transceiver
 DC-1074 Professional FM Transceiver Instruction Manual Use of the citizen band radio service is licensed in Australia by ACMA Radiocommunications (Citizen Band Radio Stations) Class Licence and in New
Owner s Manual. GMRS/Weather Model: GMRS-2000 General Mobile Radio Service Base Station With NOAA Weather Alert
 GMRS/Weather Model: GMRS-2000 General Mobile Radio Service Base Station With NOAA Weather Alert Owner s Manual Customer Service/Service 1-800-290-6650 CAUTION NEVER ATTEMPT TO CHARGE ALKALINE OR DRY CELL
LSC Radio User Guide Information and Guidelines
 LSC Radio User Guide Information and Guidelines The following user guide applies to both the Motorola VL50 and CLS1410 Radio s. Below are guidelines established for usage. 1) Radios and headsets are to
OWNER S MANUAL
 OWNER S MANUAL 19-1208 RADIOSHACK CORP. FCC ID : AAO1901208 JOB # : 578ZA1 EXHIBIT # : 6 INTRODUCTION Your Radio Shack 19-1208 Business band transceiver is a portable, easy-to-use, two-way radio that you
Instruction Manual PMR-101TX. Private Mobile Radio. TTI Tech. 446MHz, 8 Channels
 PMR-101TX Instruction Manual Private Mobile Radio 446MHz, 8 Channels? 38 CTCSS Sub Tone? 8 Channels? VOX Mode? Scanning? Monitor? Key Pad Lock? Dual Watch? Auto Power Save Mode? Battery Status Indicator?
Model: TP380 User Manual
 Model: TP380 User Manual 1 UHF RADIO TRANSCEIVER MODEL: TP380 USER MANUAL INTRODUCTION Thank you for selecting the Oregon Scientific TP380 as your product of choice. This product is a portable, easy-to-use
Two-Way Radio Model MT 525
 Two-Way Radio Model MT 525 Antenna CALL Button ENGLISH External Speaker/ Microphone Jack This equiment is intended for use in: AT EE HU LI BE ES IE LU CY FI IS MT CZ FR IT NL DE GB LT NO DK GR LV PL Countries
UNIDEN Model uh065sx UHF CB Radio. uh065sx uh065sx-2. Owner s Manual
 uh065sx uh065sx-2 Owner s Manual 1 uh065sx OM.indd 1 17/8/07 3:00:26 PM WARNING! The citizen band radio service is licenced in Australia by ACMA Radio-communications (Citizen Band Radio Stations) Class
INTRODUCTION DISPLAY FUNCTIONS
 USER MANUAL FR-76 INTRODUCTION The Alecto FR-76 is a PMR-446 Walkie-Talkie. This walkie-talkie will allow you, free of charge, to communicate with each other or with other (Alecto) walkie-talkie users
TWO-WAY RADIO. Þ ß Ô ² ú RPV516/RPU416. Owner's Manual
 TM TWO-WAY RADIO Þ ß Ô ² ú RPV516/RPU416 Owner's Manual Thank you! We are grateful that you choose RELM for your land mobile applications. We believe this easyto-use transceiver will provide dependable
Owner s Manual Model FR-230 Two Way Family Radio
 Owner s Manual Model FR-230 Two Way Family Radio Family Radio Service Customer Service 1-800-645-4994 Rev NC Released on 4-21-99. Rev A 4/22/99 Changed Phone # to 1-800-645-4994 Rev B 4/27/99 1st production-changed
UH45 Series. UHF CB Transceiver. For more exciting new products please visit our website: Australia:
 UH45 Series UHF CB Transceiver For more exciting new products please visit our website: Australia: www.uniden.com.au Controls & Indicators Included in your Package UH45 Series Radio Operating Guide Belt
UH506SX-2NB. UHF CB Radio. For more exciting new products please visit our website: Australia: New Zealand:
 UH506SX-2NB For more exciting new products please visit our website: Australia: www.uniden.com.au New Zealand: www.uniden.co.nz Controls & Indicators Included in your Package UH506SX-2NB Radio (2) Owner
OWNER S MANUAL FRS RADIO
 OWNER S MANUAL FRS RADIO 21-1860 INTRODUCTION Your RadioShack FRS radio is a portable, easy-to-use, two-way radio that you can carry almost anywhere. Use it at shopping malls, amusement parks, sports events,
SAFETY INFORMATION IMPORTANT FCC LICENSING INFORMATION
 This device complies with part 15 of the FCC Rules. Operation is subject to the following two conditions: (1) This device does not cause harmful interference, and (2) This device must accept any interference
14 CHANNEL FAMILY RADIO SYSTEM MODEL # FR142
 14 CHANNEL FAMILY RADIO SYSTEM MODEL # FR142 2001 Audiovox Electronics Corp., Hauppauge, NY 11788 Printed in China 128-6020 052FR142104 BEFORE OPERATING THIS PRODUCT PLEASE READ THESE INSTRUCTIONS COMPLETELY
DT-400W GB Rersion 1
 DT-400W GB Rersion 1 Limited Warranty Sangean America, Inc. warrants this product to be free from defects in material and workmanship under normal use and conditions for a period of 90 (Ninety) days from
AM/FM ARMBAND RADIO WITH CLOCK AND ALARM SAB-55A USER MANUAL
 AM/FM ARMBAND RADIO WITH CLOCK AND ALARM SAB-55A USER MANUAL PLEASE READ THIS USER MANUAL COMPLETELY BEFORE OPERATING THIS UNIT AND RETAIN THIS BOOKLET FOR FUTURE REFERENCE. A IMPORTANT SAFETY INFORMATION
RELM Wireless Corporation
 RELM Wireless Corporation 1 THANK YOU Thank you for your purchase of the RELM two-way portable radio. This easy-to-use radio adopts the latest advanced technology, providing reliable communication performance
General Mobile Radio Service (GMRS) Model : GMRS500SLK. Owner's. Manual. Customer Service of28.
 Model : GMRS500SLK. Owner's. Manual. Customer Service of28.") General Mobile Radio Service (GMRS) Model : GMRS500SLK Owner's Manual Customer Service 1-800-290-6650 Released: 5-28-04 1of28 THIS PAGE LEFT BLANK INTENTIONALLY 2 2 of 28 CAUTION SAFETY INFORMATION Your
General Mobile Radio Service (GMRS) Model : GMRS500SLK Owner's Manual Customer Service 1-800-290-6650 Released: 5-28-04 1of28 THIS PAGE LEFT BLANK INTENTIONALLY 2 2 of 28 CAUTION SAFETY INFORMATION Your
DT-800 中文 GB. Version 1
 DT-800 中文 GB Version 1 1. 2. 3. 4. 5. 6. 7. 8. 9. Important safety instructions Read and understand all safety and operating instructions before the radio is operated. Retain instructions: The safety and
TX670 POCKET SIZE UHF CB RADIO INSTRUCTION MANUAL 2 WATT HANDHELD. TX670 Instruction Manual Page 1
 TX670 POCKET SIZE 2 WATT HANDHELD UHF CB RADIO INSTRUCTION MANUAL TX670 Instruction Manual Page 1 Warning: Safety Information The TX670 is a radio frequency transmitting device. When transmitting, keep
AUDIOVOX GMRS4WM Owner s/installation Manual
 AUDIOVOX GMRS4WM Owner s/installation Manual GMRS (General Mobile Radio Service) Wall Mount Charger Patent Pending www.asaelectronics.com WARNING Replacement or substitution of transistors, diodes, or
CAUTION! CAUTION! Hearing Helper Transmitter, Model PFM T32 Instructions For Use and Care
 Hearing Helper Transmitter, Model PFM T32 Instructions For Use and Care Thank you for purchasing the PFM T32 transmitter from Williams Sound. The T32 is designed to operate with a wideband FM, 72 76 MHz
TLKR T92 H2O OWNER'S MANUAL. it-it. nl-nl. fi-fi. pt-pt. nb-no tr-tr pl-pl ru-ru uk-ua
 TLKR T92 H2O OWNER'S MANUAL en de-de fr-fr it-it es-es pt-pt nl-nl da-dk sv-se fi-fi nb-no tr-tr pl-pl ru-ru uk-ua RF ENERGY EXPOSURE AND PRODUCT SAFETY GUIDE FOR PORTABLE TWO- WAY RADIOS ATTENTION! Before
Owner s Manual. Model FR-1400 Two Way Family Radio A 1 of 20. Customer Service Manufacturer will reduce to 75 per cent.
 Owner s Manual Model FR-1400 Two Way Family Radio Customer Service 1-800-290-6650 Released on 8-18-00. Revision A: Changed pages 13 and 16, 11-3-00. 1 of 20 Manufacturer will reduce to 75 per cent. CONGRATULATIONS
Features:...2 Installing the back-up Batteries:...2 Connecting AC Power:...2 Connecting an External Antenna:...3 Connecting the Weather Radio to an
 Features:...2 Installing the back-up Batteries:...2 Connecting AC Power:...2 Connecting an External Antenna:...3 Connecting the Weather Radio to an External System:...3 Location of the Weather Radio:...3
Operating Guide SMH 1525DT SMU 4525KT Technology Drive West Melbourne, FL RELM Wireless Corporation. All Rights Reserved CC OG 23
 W I R E L E S S C O R P O R AT I O N Operating Guide 7100 Technology Drive West Melbourne, FL 32904 2000 RELM Wireless Corporation. All Rights Reserved CC OG 23 ULUD01083ZZ RELM WIRELESS CORP. 7100 Technology
i4088a INSTRUCTION MANUAL FRS UHF FM TRANSCEIVER
 INSTRUCTION MANUAL FRS UHF FM TRANSCEIVER i4088a This device complies with Part 15 of the FCC rules. Operation is subject to the following two conditions: (1) This device may not cause harmful interference,
Two-Way Radios. Quick Start Guide. XT460 Display model
 Two-Way Radios Quick Start Guide XT460 Display model CONTENTS Contents..................................... 1 Safety....................................... 2 Batteries and Chargers Safety Information........
I!::1 LA!::1. All Hazards Weather. Alert.
 I!::1 LA!::1 All Hazards Weather Alert m I0 Owner's M nu www.midlandradio.com I WR-IO0 Owner's Manual Qu'ck Start Instructions: Please see pg, 5 for important buttons and controls ID LAN ID _ 1. Place
BCH-270 Owner s Manual
 BCH-270 Owner s Manual By BridgeCom Systems, Inc. TABLE OF CONTENTS CHAPTER 1: INTRODUCTION... 4 WELCOME... 4 SPECIFICATIONS... 4 CHAPTER 2: UNPACKING AND PREPARATION... 5 PARTS LIST... 5 CHARGING THE
5W 15 Channel 2-Way GMRS Radio
 5W 15 Channel 2-Way GMRS Radio OWNER S MANUAL Please read before using this equipment. Your RadioShack 5W Compact GMRS Handheld Transceiver is a portable, two-way, General Mobile Radio Service (GMRS) transceiver