Slide Film Scanner. Instruction Manual DF-600. Digitizing slides and negative films. Article No ENGLISH. 1800/3600 dpi resolution USB
|
|
|
- Robert Lloyd
- 5 years ago
- Views:
Transcription


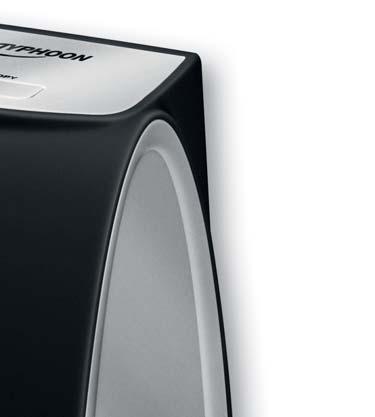


1 DF-600 Slide Film Scanner Digitizing slides and negative films Instruction Manual Article No USB Film strips/ framed slides 1800/3600 dpi resolution 1 buton operation


2 Thank you for deciding on purchasing this quality product from TYPHOON.
3 Table of Contents 6 Chapter 1 Intended use Before use Explanation of symbols 33 Chapter 8 Troubleshooting 34 Chapter 9 Maintenance and handling the device 7 Chapter 2 Safety information 37 Chapter 10 System requirements 10 Chapter 3 Features 37 Chapter 11 Technical data 10 Chapter 4 The device 37 Chapter 12 Delivery contents 11 Chapter 5 Installation and connection Driver installation Connecting the scanner Installing PhotoImpression 22 Chapter 6 Scanning pictures How to start PhotoImpression Inserting/Removing slides/negative film strips Basic settings Copy 28 Chapter 7 Other software options Preferences Photo editing tools Creativity Playback TYPHOON DF-600 Table of Contents 3
4 Dear Customer: This instruction manual will give you a general idea of how this device operates, as well as provide you with information on cleaning and safety procedures. Please take a few minutes to read and follow all safety and operating instructions found in this manual carefully, in order to maintain this products condition and ensure safe operation. Retain this manual for future reference and pass on to third parties where applicable. Should you have any additional questions regarding this device or should any suggestions arise, please contract a specialized dealer or our service team for further information. We look forward to you recommending us to others and hope you enjoy using this device from TYPHOON. Your TYPHOON Team Note All company and product names mentioned in this document are registered trademarks of their respective owners. All rights reserved. We assume no liability for damage occurred as a result of improper use or damage resulting from the failure to comply with the safety instructions found in this manual, improper operation or handling! Under such circumstances, all claims under warranty will become void. We assume no liability for consequential damage! The information contained in this instruction manual is subject to change without notice. Please adhere to all of the safety information/instructions found in this instruction manual! A declaration of CE conformity has been established for this product. Certification has been documented and entrusted to the manufacturer. Introduction General information 4
5 For customers in North and South America For customers in the USA This device complies with the criteria specified in section15 according to FCC standards and regulations. Device operation is permissible, provided both of the following mentioned regulations have been fulfilled: 1. This device must not cause or emit any harmful interference or disturbance. 2. This device must accept any interference or disturbance received, including any interference that may functionally impair operation or cause malfunctions. For customers in Canada This Class B digital device complies with Canadian ICES regulations. Introduction General information 5
6 1 Intended use The TYPHOON DF-600 Slide & Film Scanner can be used to digitize negative films and slides. The scanner can be operated via USB 2.0 connection to a PC or notebook that uses a Windows 7, Windows XP or Windows Vista (32-bit) operating system. The Arcsoft PhotoImpression 6 software can be used for operation with this device. 1.1 Before use Please read this instruction manual thoroughly before operating this device and retain it for further reference, questions and use. Following and heeding all information found in this instruction manual shall maintain this products condition and ensure safe operation. This instruction manual contains information on how to operate and maintain this device. Pass it along with the device if handed over to a third party. Should a component require maintenance, servicing or repairs, then please consult a qualified dealer or service technician. Note When connecting other devices, please refer to the safety and operating instructions found in the literature accompanying these devices. This device is intended for non-commercial use and is solely intended for the scanning and digitizing of private negative and slides only. 1.2 Explanation of symbols An exclamation mark is intended to inform the user of important information, operation or maintenance instructions or that special attention is required. This symbol is intended to alert you to the presence of unprotected, live parts or components found within the product s enclosure or of dangerous connections that upon contact may be of sufficient magnitude to constitute a risk of electric shock. Cables intended for such connections should only be connected by qualified personnel or you should only use ready to connect cables. There are no user-serviceable parts found inside the device, therefore the device is never to be opened. Copyright information According to the law the reproduction, duplication and copying of copyright protected material, as well as the distribution, circulation, public access to or even the rental of these, without explicit authorization of the copyright holder, is strictly prohibited. Chapter 1 Intended use 6
7 2 Safety information The following safety and hazard warnings are not only for the protection of your device, but also serve as a protection against potential health hazards. Please take time to read the following instructions carefully. We assume no liability for personal or property damage resulting from the failure to comply with the safety instructions, improper operation and handling. Under such circumstances, all claims under warranty will become void. For safety and licensing (CE) reasons any unauthorized modification and/or change on the device is prohibited and will void the warranty and all warranty claims. Any person operating, installing, setting up, or servicing this device must be trained and qualified accordingly and must also observe these operating instructions. Should any evident damage be seen on the device, the power supply or on the connection cables, do not come in contact with or touch these. Switch off the corresponding circuit breaker in the power distribution panel first before carefully unplugging the power plug from the wall outlet. Do not operate this device further! Please contact or take it to a qualified service technician/specialty workshop. Note Please adhere to the additional safety information found in the individual chapters of this instruction manual. Ensure that the device has been set up accordingly by following all instructions found in the instruction manual. Power supply cords should be routed so that they are not likely to be walked on or tripped over. Chapter 2 Safety information 7
8 This device is not suitable for children under 14 years of age. Small children are unaware of the serious and immediate dangers involved when exposing themselves to or handling electronic devices. Furthermore, this product contains small parts that could be swallowed. Never leave packaging material lying around unsupervised. For children it could become a hazardous toy and lead to serious injury. Keep packaging and protective foil away from children at all times to a void the danger of suffocation. The device should never come in contact with water or moisture. To prevent the risk of fire or electric shock make sure that liquids, such as dripping or splashing water, rain or moisture (e.g. in the bathroom), do not come in contact with the device and power supply plug. Care should be taken that liquids do not come in contact with the interior; this is why containers containing liquids, e.g. bucket, vase or plants should never be placed anywhere near or on this device. This can not only damage the device, but also become a fire hazard. Operate this device in a moderate climate and never expose to extreme temperatures, such as high humidity. Condensation can build up suddenly when this device is brought from a colder into a warmer area (e.g. when transporting). Should this happen, allow the device to warm up to room temperature first before using. Ensure that the device is properly ventilated during operation and never operate it in constricted areas, such as for example in a bookcase or shelf. Never cover the device with any magazines, tablecloths, curtains or similar. Chapter 2 Safety information 8
9 Make sure the device is placed on a firm and stable surface. Unstable devices could fall down and lead to serious injury or cause damage to the device. Never place any sources of fire on top of or near the device and power supply plug (e.g. lighted candle). Please contact our technical hotline or a service technician for further information, should you be in doubt about device operation, safety or when making connections or if any questions arise that are not explained within this manual. Chapter 2 Safety information 9
10 3 Features Scans slides and negative films Scans in colour or black & white Create JPG or TIF images Up to 48-bit colour depth and 3600 dpi resolution Extensive image editing software The device 1 Power LED displays operational status 2 Copy button captures an image during a scan 3 USB cable with plug for connection to a USB 2.0 port 4 Slot for slide/film holder insertion 5 Holder for positive slides 6 Holder for negative films 7 Cleaning brush for cleaning the lens Chapter 3/4 Features/The device 10
11 5 Installation and connection You will need to carry out the respective driver and software installation before commencing operation. Please proceed in the following order: Install the driver Connect the scanner Install the ArcSoft PhotoImpression 6 software Conclude the installation process 5.1 Driver installation Turn on your computer Insert the installation CD into the CD-ROM drive Once the above autostart installation menu appears on display, select Scanner Driver to install the driver Follow the instructions as displayed on screen Reboot your computer after completing the installation. Chapter 5 Installation and connection 11

12 Windows XP Follow the instructions as displayed on screen: 1. Click on Next. 2. Click on Install. Chapter 5 Installation and connection 12

13 3. Now a progress bar will be displayed on screen indicating the current status of installation. Please wait until the installation program changes to the next window. 4. Click on Finish to complete the installation process. Chapter 5 Installation and connection 13

14 Windows Vista Follow the instructions as displayed on screen: 1. Click on Next. 2. Click on Install. Chapter 5 Installation and connection 14

15 3. Now a progress bar will be displayed on screen indicating the current status of installation. Please wait until the installation program changes to the next window. 4. Click on Finish to complete the installation process. Chapter 5 Installation and connection 15
16 5.2 Connecting the scanner Do not insert the CD into the drive. If necessary, remove the CD beforehand. Ensure that no holder has been inserted first, before connecting the scanner to an available USB 2.0 port on your computer. This connection will also supply power to the device. The operating system will now automatically search for and install the new device driver. Windows XP Device driver installation begins automatically once the dialogue Found New Hardware appears on display. Device driver installation has been successfully completed. Chapter 5 Installation and connection 16


17 Windows Vista Select the first option available in the installation assistant. The device will be automatically installed once the dialogue Found New Hardware appears on display. Device driver installation has been successfully completed. Chapter 5 Installation and connection 17


18 5.3 Installing PhotoImpression software The ArcSoft PhotoImpression 6 software lets you scan your slides and negative films. Furthermore, you also have the opportunity of using an extensive program that helps you archive and edit your image files. The installation process for Windows XP and Windows Vista is the same. Insert the installation CD into the CD-ROM drive. After the autostart installation menu appears on display, select the menu option Arcsoft Software. Follow the instructions as displayed on screen. Select the desired language for this installation and confirm with OK. Software installation will begin. Chapter 5 Installation and connection 18


19 You will have to agree to the licence agreement terms in order to use the software. Click on Next to install the software to the displayed folder. Chapter 5 Installation and connection 19


20 Click on Next to add the displayed folder to the start menu. Program installation will be carried out. Chapter 5 Installation and connection 20


21 Select the file types to be linked to the software. Associated files will automatically be opened with ArcSoft PhotoImpression. Click on Next to continue. Click on Finish. Remove the installation CD and reboot your computer before using the software. The software will create a PhotoImpression 6 icon on your desktop that can be used to easily start the software. Chapter 5 Installation and connection 21


22 6 Scanning pictures The following step by step information describes how you will be able to digitize (scan) your slides and negatives. 6.1 How to start PhotoImpression You can start this program via the start menu or by clicking on the icon found on your desktop. The main window will appear on display after starting the software. Additional information on software operation can be seen under Help. This function can be used and started at anytime by pressing the F1 button. Note If the dialogue Code 10 error is displayed on screen while using the program, do not disconnect the device from your computer s USB port. Please reboot your computer and continue with the PhotoImpression program. Chapter 6 Scanning pictures 22
23 6.2 Inserting/Removing slides/negative strips You can open the holder by carefully pressing the small lever on the front in an upwards direction. 1 Pay attention to both supports found on the inside left and right when opening the lid on the holder. 2 You can insert/remove slides or negative films into/from the tray. Correct insertion can be ensured by using the positioning aids found within the tray. 3 Chapter 6 Scanning pictures 23
24 Close the lid. 4 Press down on the clips on the sides first and then on the lock on the front. 5 Slide the holder into the scanner s slot, ensuring that the holder is inserted the right way round. 6 To remove a holder, carefully slide the holder out of the device in the direction of the arrow. Note TYPHOON assumes no liability for any damages caused to negative films or slides arising from the use of this product. Chapter 6 Scanning pictures 24
 or TIF file format. 2 4 3 If a JPG file format has been selected, you can now select the photo quality.")
25 6.3 Basic settings In the main menu, click on the icon Get Photos and select Acquire from Film Scanner. A dialogue for available basic settings will appear on screen. 1 Select a scanner under Select the device. Select either a JPG (recommended) or TIF file format If a JPG file format has been selected, you can now select the photo quality Select a directory location where photos are to be stored. Now you can select a Slide, Negative, or Black & White Negative under the option Film Type. Select the depth of colour. This setting regulates the amount of colour information to be stored. The setting 48-bit will set the photo format automatically to TIF. Now you can determine the amount of dots per inch ( DPI ). Click on Acquire to continue the procedure. If the option Cancel is selected, you will return to the main menu. 1 Select the device 2 Format Select a file format 3 Quality Select the photo quality 4 Save to location 5 Film type Select film type 6 Colour depth 7 DPI Select the number of dots per inch 8 Calibrate For scanner alignment 9 Acquire Switch to image capture 10 Cancel Returns to the main menu Chapter 6 Scanning pictures 25


26 Note The device must be calibrated before using it for the first time. Nothing should be inserted into the scanner during this procedure. Therefore, all holders are to be removed before carrying out this process. Click on the button Calibrate and confirm with OK in the dialogue window that opens up after this on screen. Only repeat this process if necessary (for example by crooked photos) Dialogue to confirm 6.4 Copy You will now see a preview of the image in the window. For minimal image correction adjustment, carefully adjust the holder within the scanner slot by hand. If this is not quite sufficient, insert either the slides or negative strips once again or calibrate the device anew Colour/Brightness settings 2 Snapshot 3 Transfer 4 Delete 5 Exit Chapter 6 Scanning pictures 26


27 The option Colour/Brightness lets you adjust the preview. The plus and minus icons can be used to change the colour and brightness levels of a snapshot. Click on the icon Snap Shot or the COPY button on the device to scan the image. The time required to take a snapshot all depends on system performance. You can scan up to a maximum of 12 images before having to transfer and store to your computer. In this case a message will appear on screen. Click on Transfer to store all snapshots to your computer. Wait approximately 5 seconds between snapshots and transmission for optimal image quality. The required time that it takes all depends on system performance. Short status messages will appear on screen during image transmission. 6 To delete a snapshot, highlight the image within the film strip and click on Delete to remove. You can return to the main menu by selecting the option Exit. 7 6 Menu colour/brightness settings 7 Message that images must be stored first Chapter 6 Scanning pictures 27
28 You will be able to view captured snapshots by selecting the respective directory. Always close the scanner screen to view captured images, do not minimize it. To edit an image, select the desired photo in the main screen. Click on Edit in the toolbar and select Photo Editing Tools. 7 Other software options The following will give you a brief idea on other available software options. For additional information on further functions, please use the Help function ( F1 ). Note Different amounts of storage capacity may be required when storing images, depending on the type of quality selected to capture an image. If JPG has been selected, you will receive a compressed image. More image information will be stored if TIF has been selected. 7.1 Preferences This option can be used for setting general options and for assigning a folder that automatically monitors your media library. You can enter this menu by selecting File Preferences. Tool Tips: Displays additional information, for example icon names Media Monitor: Select a folder that automatically searches and updates image, music and video files. The colour depth defines the amount of possible colour information found in an image. This is specified in bit. The human eye perceives 24-bit as more natural ( True Colour ). 48-bit can be selected when the image material for an incoming photo is to be edited. The DPI option lets you select the amount of dots per inch (2.54 ) that are to be stored. Chapter 6/7 Scanning pictures / Other software options 28
29 7.2 Photo Editing Tools The image editing tools option offers you various opportunities for editing images. Basic functions Apply: Cancel: Balance slider: Rotate 90 : Resize: Undo/Redo: Actual size: Fit in: Save as: Close: Actual changes to an image will be carried out. Cancels the actual selected action. Click on the slider to the desired position or keep the mouse button depressed to drag the slider to the desired position. Rotate an image 90 to the left or right. Enter the desired image size. Undo the last action/restore. Scale to the original size. Enlarge image to a full screen size. Store all changes made. Exits the image editing tool option without storing changes made. Adjust Enhance: Automatically improves the quality of your picture or for manual adjustment of brightness, contrast, saturation, hue and sharpness levels. Manually set the colour and light/dark levels. Remove Red-Eye effects automatically or manually. Trim pictures to a desired size. Rotate pictures to straighten. Colour: Red-eye: Crop: Straighten: Blur Background: Use the sliders to tone down unwanted effects. Chapter 7 Other software options 29
30 Retouch Touch-up images with the following options Healing brush: Improve an image detail with an image detail. Clone: Cover an image detail with another image detail. Lighten/Darken: Lighten/Darken certain sections of an image. Smudge: Creates a smear effect within a certain range. Sharpen: Increase the sharpness level within a certain range. Blur: Increase the softness level within a certain range. Paint with the following options Paint brush: Paint over a certain range with a selected colour. Line: Draw a line with a selected colour. Eraser: Removes drawn or painted ranges. Clipboard Select: New, Add, Subtract: Select all: Inverse: Select: none: Copy to Clipboard: You can enclose a detail with different frames and lines in order to remove a certain range from an image. Double click to stop drawing a line. Determines whether a new selection is to begin, be added or removed each time. Selects the entire picture. Reverses the selection. Deletes the selection. Copy the highlighted range of an image to the clipboard. Paste from Clipboard: Add the selected image detail within the clipboard to a picture. Chapter 7 Other software options 30
31 Blend: If you highlight this box, the image detail to be added will be worked into the colour scheme of the picture being used. Delete: Deletes the selected picture section. 7.3 Creativity This option lets you add text, clipart graphics or borders to your images. 7.4 Playback You will be able to play image, music and video files with the software. Select the desired file and click on Play in the main window. If the file format and encoding method are supported, playback will commence. Chapter 7 Other software options 31
32 Below is a toolbar of the buttons available for slide show operation on your PC: Best Fit: Select this button to adjust the size of an image if it is larger than your screen s resolution. 2 Actual size: Displays an image in its original size. 3 Zoom Out/In: Enlarge/Reduce an image in size. 4 Pause (Play): Pauses a slide show (resumes / starts playing). 5 Stop: Stops a slide show. 6 Previous/Next: Returns to the previous/skips to the next image. 7 Slide Show Settings: Opens the settings menu for a slide show (display time, transition effects, repeat modes and background music). 8 Delete: Deletes the current image. 9 Rotate Left/Right: Rotates an image to the left/right. 10 Automatically Remove Red-Eye: Automatically searches for and removes red eyes. 11 Exit Full Screen: Exits a full-screen mode. 12 Close: Closes a slide show. Chapter 7 Other software options 32
33 8 Troubleshooting Before contacting a service technician, refer to the following possible solutions: The slide scanner is not recognized Check that all connections have been made properly. Connect the scanner anew. Connect the scanner to a different USB 2.0 connection. Install the device driver anew. The program can not be started or the software is not functioning correctly Install the software again and carrying out an update. Distorted sound or no sound is audible Check if everything has been connected properly. Open the sound card s settings menu. Increase the recording volume and set the playback volume to the lowest line-in option available. The file encoding method is not supported. Note The device you have just purchased is equipped with state-of-the-art technology and is safe to operate. Nevertheless, problems or malfunctions may occur. As an alternative by using the software you might be able to see if there s a possible way to solve your problem. Select Help in the main window or press the F1 button for further information. The CD/DVD is not recognized Check if the disc is deformed. Ensure that the disc is not damaged, scratched or dirty. Any repairs other than those mentioned above are to be carried out solely by an authorized technician. Chapter 8 Troubleshooting 33
34 9 Maintenance and handling the device Before cleaning or maintaining the device, please adhere to the following information: The device must be disconnected from the power supply source prior to service, maintenance or repairs. Capacitors within the device may still carry voltage even though they have been disconnected from all power supply sources. Live parts may be exposed, if the covering is opened or parts are removed. Repairs are only to be carried out by qualified personnel, who are familiar with the hazards involved and the relevant regulations. Keeping the external case clean Never use volatile fluids near the device, as for example insect spray. Avoid letting the device come in contact with rubber or plastic products for longer periods of time. These could otherwise leave marks behind. Cleaning the device Unplug the power cable before cleaning. Always use a soft and dry cloth to clean the unit s exterior. If the device is extremely dirty you can use a soft cloth, dampened with water or a mild cleaning solution to clean. Never use any abrasive or harsh cleaning agents (e.g. alcohol, benzine or thinners) as these could damage the device and housing. Chapter 9 Maintenance and handling the device 34

35 Removing dust from the lens We recommended that the film scanner slot and glass surface be cleaned on a regular basis. Doing so will ensure clear and high quality images. Use the included cleaning brush to clean. Alternatively, you can also use a fuzz-free, cotton cleaning cloth, brush or cotton swab. Before cleaning make sure that the utensils to be used are clean, fuzz-free and dry. Never use any abrasive or harsh cleaning agents, such as alcohol, benzine or thinners. Open PhotoImpression 6 in the same manner you would to scan an image. Do not insert any holders into the scanner. Now you will be able to see in the preview window of PhotoImpression 6 where dust has gathered and settled. (Please refer to the example below). Insert the cleaning brush just like you would a holder. Make sure the brush head is facing upwards. This could otherwise scratch the lens and the brush may become wedged upon removal. Now you can use the cleaning brush to remove any dust. Chapter 9 Maintenance and handling the device 35
36 Maintenance Carry out a technical safety inspection on a regular basis, e.g. check if the power cable or housing may have become damaged. If there is reason to believe that the device can no longer be operated safely, then disconnect it immediately from the power supply and secure it against any unintentional operation. It can be assumed that safe operation is no longer possible, if: there is visible damage to the device, the device no longer works, or exposed to rigorous transport conditions. Packaging Please retain the original box and the packaging material in case you need to transport or send the device out for maintenance at a later date. Please note that the device should be repacked in the original packaging. The box and packaging have been especially developed for this device in order to protect it during transport and against damage. Contribute to a better environment by using a designated disposal system (e.g. Dual System in Germany) or recycling site for the disposal of packaging material. Chapter 9 Maintenance and handling the device 36
37 10 System requirements Operating system: Windows 7, Windows XP or Windows Vista (32-bit) DirektX : Version 9.0 or higher Additional software: ArcSoft PhotoImpression 6 (included) Fixed disc storage: 800 MB or more (recommended) Main memory (RAM): 512 MB or more (recommended) Processor: Pentium 4 or later Frequency: 1.8 GHz or faster Additional hardware: 48 x CD drive Connections: 1 x USB 2.0 Image frequency (max.): 5 M (2592 x1680) 2 B/s Focus range: Fixed focus Exposure control: Automatic Colour balance: Automatic Scan resolution: 5 MP (3600 dpi) plus expanded mode Data conversion: 10 bit per colour channel Scan method: Single Pass Light source: Backlight (3 white LED) Interface: USB 2.0 Power supply: Supplied via USB port Dimensions (L x W x H): approx. 106 x 94 x 177 mm Weight: approx. 512 g Note The actual requirements may differ due to system configuration. 12 Delivery contents 11 Technical data Image sensor: 1/1.8 Zoll 5 Mega CMOS Sensor ( pixels) Lens: F = 6.0; 4 glass elements; half-field angle =15 TYPHOON DF-600 Slide Film Scanner Two holders (1 x positive slide, 1 x negative film) Cleaning brush ArcSoft PhotoImpression 6 software Instruction manual Service data sheet Chapter 10/11/12 System requirements/technical data/delivery contents 37
38 Service Should questions arise then please contact a specialist or our service hotline. Service-Hotline*: Telefon +49 (0) 1 80/ *14 cent/minute using the German fixed network (Max. price for mobile phones: 42 cents/min.) Contact: support@typhoon.eu Internet Information and updates: Original TYPHOON spare parts and accessories can be found on the TYPOON pages under Manufacturer PC live Distribution Basse and Prüße GbR Raiffeisenstraße 2D Vechelde (Germany) We reserve the right to alter specifications and information contained in this manual without notice. All brands mentioned are property of PC live or of their respective owners. PC live assumes no responsibility or liability for any errors or inaccuracies that may appear in this instruction manual. Version Typhoon All Rights Reserved.
For customers in USA This device complies with Part 15 of the FCC rules. Operation is subject to the following two conditions:
 User manual For customers in North and South America For customers in USA This device complies with Part 15 of the FCC rules. Operation is subject to the following two conditions: (1) This device may not
For customers in Canada This Class B digital apparatus meets all requirements of the Canadian Interference-Causing Equipment Regulations.
 User manual For customers in North and South America For customers in USA This device complies with Part 15 of the FCC rules. Operation is subject to the following two conditions: (1) This device may not
Table of Contents -1-
 -0- Table of Contents 1. Precautions. 2 2. Preparation.. 5 Standard Accessories.. 5 Parts Names.. 6 3. Install The Driver and Software 7 Install the Driver 7 Install the Software.. 8 4. Place Film/Slide
Table of Contents -1-
 -0- Table of Contents EN 1. Precautions. 2 2. Preparation.. 5 Standard Accessories.. 5 Parts Names.. 6 3. Install The Driver and Software 7 Install the Driver 7 Install the Software.. 8 4. Place Film/Slide
Table of Contents. 1. Precautions Preparation.. 5
 0 Table of Contents EN 1. Precautions..... 2 2. Preparation.. 5 l Standard Accessories... 5 l Parts Names.. 6 3. Install The Software... 7 l Install the Software in Windows..... 7 l Install the Software
Photo Maker. User Manual
 Photo Maker User Manual PhotoMaker Mac Manual.indd 1 12/01/2011 4:46:14 PM Mac Manual.indd 2 12/01/2011 4:46:14 PM Contents 1. Precautions 2. Standard Accessories 3. Part Names 4. Installing the software
Slide & Film Scanner. Instruction Manual LDSCAN11
 Slide & Film Scanner Instruction Manual LDSCAN11 1 Contents Unpacking...3 System Requirements...4 PC System Requirements...4 Mac System Requirements...4 Product Overview...5 Place Film / Slide Into The
Table of Contents -1-
 -0- Table of Contents EN 1. Precaution... 2 2. Preparation... 5 Standard Accessories... 5 Part Names... 6 Installing the Battery Pack... 8 Charging the Battery Pack... 9 3. Place Film/ Slide Into The Holder...
Table of Contents -1-
 -0- Table of Contents EN 1. Precaution... 2 2. Preparation... 5 Standard Accessories... 5 Part Names... 6 Installing the Battery Pack... 8 Charging the Battery Pack... 9 3. Place Film / Slide Into The
Please read and retain these instructions for future reference. PLEASE SAVE THESE INSTRUCTIONS FOR FUTURE REFERENCE.
 PLEASE SAVE THESE INSTRUCTIONS FOR FUTURE REFERENCE. Package contents: Film & photo scanner USB cable Negative film holder Positive holder 4 in 1 photo tray (with brackets) OCR CD (not pictured) AC/DC
Film2USB Converter. Quick Start Guide & User s Manual. Model Number F2USB-05
 Film2USB Converter Quick Start Guide & User s Manual Model Number F2USB-05 www.film2usb.com www.clearclicksoftware.com Table of Contents Safety Precautions... 3 Package Contents... 4 Description of Parts...
User manual DuoScan 100
 User manual DuoScan 100 Table of Contents Preface... 3 About this Manual... 3 Copyright... 3 Federal Communications Commision (FCC) Compliance... 3 Declaration of Conformity... 4 Disposal of Waste Equipment
USER MANUAL NEGATIVE & SLIDE TO SD SCANNER FS351N
 NEGATIVE & SLIDE TO SCANNER FS351N USER MANUAL Thank you for purchasing your Neostar Film and Slide to Scanner. Please read and retain these instructions for future reference. Extra 3-packs of Slide or
User s Manual. For correct usage please read these instructions carefully and keeps in a safe place for future reference!
 User s Manual For correct usage please read these instructions carefully and keeps in a safe place for future reference! Contents 1: Safety precautions... 2 2: Package contents... 3 3: Description of parts...
Film/Slide Scanner. User manual
 Film/Slide Scanner User manual CONTENTS 1. SYSTEM REQUIREMENTS... 4 2. PACK CONTENTS... 4 3. NAME OF PARTS... 5 4. HOW TO INSTALL SLIDES AND FILM INTO THE TRAY HOLDER... 6 5. INSERT AND TAKE OUT SD CARD
Combo Scanner. User Manual
 Combo Scanner User Manual I. Unpack the Combo Scanner Backlight Holder Combo Scanner Business card Fixture Photo/Business Card Holder User Manual Quick Installation Guide Note This Combo Scanner supports
Quick Start Guide. Setup and Scanning. Try the Additional Features. English
 English Quick Start Guide Be sure to install the software programs before connecting the scanner to the computer! Setup and Scanning Check the Package Contents p.3 Install the Software Windows Macintosh
FILM SCANNER P Instruction Manual
 FILM SCANNER P16-41458 Instruction Manual CONTENTS Safety Precautions 0 Features & Package Contents 1 Description of Parts 2 Loading Slides 3 Loading Negatives 4 Scanning Slides or Film 5-9 Transferring
Quick Start Guide. Setup and Scanning. Try the Additional Features. English
 English Quick Start Guide Be sure to install the software programs before connecting the scanner to the computer! Setup and Scanning Check the Package Contents p.3 Install the Software Windows Macintosh
Quick Start Guide. Setup and Scanning. Try the Additional Features. English
 English Quick Start Guide Be sure to install the software programs before connecting the scanner to the computer! Setup and Scanning Check the Package Contents p.3 Install the Software Windows Macintosh
FCC Notice (U.S.A. Only)
") Quick Start Guide Please read this guide before operating this scanner. After you finish reading this guide, store it in a safe place for future reference. Table of Contents Package Contents... 1 Scanning
Quick Start Guide Please read this guide before operating this scanner. After you finish reading this guide, store it in a safe place for future reference. Table of Contents Package Contents... 1 Scanning
DigiScope II v3 TM Aperture Scope User s Manual
 DigiScope II v3 TM Aperture Scope User s Manual Welcome Thank you for choosing DigiScope II v3 TM Aperture scope! The DigiScope II v3 TM Aperture Scope is an exciting new device to Capture and record the
ArcSoft PhotoImpression Table of Contents:
 ArcSoft PhotoImpression Table of Contents: 1. Welcome to PhotoImpression 2. Highlights of PhotoImpression 3. System Requirements 4. Installing PhotoImpression 5. Working with PhotoImpression Getting Started
English QT V01 CANON INC PRINTED IN CHINA
 English Quick Start Guide English Please read this guide before operating this scanner. After you finish reading this guide, store it in a safe place for future reference. Table of Contents Package Contents...
KoPa Scanner. User's Manual A99. Ver 1.0. SHENZHEN OSTEC OPTO-ELECTRONIC TECHNOLOGY CO.,LTD.
 KoPa Scanner A99 User's Manual Ver 1.0 SHENZHEN OSTEC OPTO-ELECTRONIC TECHNOLOGY CO.,LTD. http://www.ostec.com.cn Content Chapter 1 Start... 1 1.1 Safety Warnings and Precautions... 1 1.2 Installation
S100 Webcam. User s Manual
 S100 Webcam User s Manual Kodak and the Kodak trade dress are trademarks of Eastman Kodak Company used under license. 2009 Sakar International, Inc. All rights reserved. WINDOWS and the WINDOWS logo are
Welcome 1. Precaution
 Table of Contents EN Precaution....2 Preparation.. 4 Standard accessories....4 Parts Names & Functions...5 Computer System requirements.... 6 Technical Specifications 7 Install the software.. 7 Start Microscope.8
ClearClick Virtuoso. 22MP Film & Slide Scanner. Quick Start Guide & User s Manual
 ClearClick Virtuoso 22MP Film & Slide Scanner Quick Start Guide & User s Manual This document 2016 ClearClick Software LLC. All rights reserved. Do not reproduce in any form without permission. Register
Digital Color Printer
 3-858-635-12 (1) Digital Color Printer Operating Instructions Before operating the unit, please read this manual thoroughly and retain it for future reference. This PRINTER is designed to use PRINT PACK
S101v2 Webcam with adjustable focus
 S101v2 Webcam with adjustable focus User Manual Kodak and the Kodak trade dress are trademarks of Eastman Kodak Company used under license. 2010 Sakar International, Inc. All rights reserved. WINDOWS and
Film Scanner FS50. magnasonic.com. magnasonic.com/support. User Manual
 User Manual Film Scanner FS50 magnasonic.com Thank you for your purchase of this Magnasonic product. Please read this instruction manual carefully before using product to ensure proper use. Keep this manual
HP Designjet HD Scanner and T1200 HD Multifunction Printer
 HP Designjet HD Scanner and T1200 HD Multifunction Printer Introductory information USB 2.0 high-speed certified Introductory Information Other sources of information The User s Guide for your scanner
WELCOME WHAT S IN THE BOX
 WELCOME Congratulations on purchasing your Visioneer PaperPort flatbed scanner. With your scanner, you can quickly scan paper documents and color photos to place their electronic images on your computer.
Flash Stamp Machine T1511M User Manual
 Flash Stamp Machine T1511M User Manual Declaration of conformity (Europe only) We, Trodat GmbH Linzer Straße 156 A-4600 Wels hereby declare that the Flash Stamp Machine model T1511M is CE certified respectively
23070 / Digital Camera Owner s Manual
 23070 / 23072 Digital Camera Owner s Manual 2007 Sakar International, Inc. All rights reserved. 2007 Crayola Windows and the Windows logo are registered trademarks of Microsoft Corporation. All other trademarks
Welcome to Polaroid PhotoMAX FUN!
 Contents Welcome to Polaroid PhotoMAX FUN!...................... 1 The Polaroid PhotoMAX FUN! Digital 320 Creative Kit......... 2 Kit components......................................... 3 Polaroid Digital
Magic Wand Portable Scanner with Auto-Feed Dock. PDSDK-ST470-VP-BX2 User Manual
 Magic Wand Portable Scanner with Auto-Feed Dock PDSDK-ST470-VP-BX2 User Manual Table of Contents 1. KEY FEATURES... 2 2. FUNCTIONAL PARTS... 2 3. EXPLANATION OF THE STATUS ICONS... 4 4. GETTING STARTED...
Wireless Handy Scanner
 User Guide Works with iscanair Go Scanner App Wireless Handy Scanner For smartphones, tablets, and computers Wi-Fi 802.11g/n supported All trademarks are the property of their respective owners and all
Start Here. Unpack Contents. Install Software
 Start Here Installing your Microtek ArtixScan DI 5230/5240/5250/5260 & ArtixScan TS 540T Unpack Contents Unpack your scanner package and check for major components. 1. Scanner 2. Hi-Speed USB cable 3.
Table of Contents. Sound-Eklin rev052511
 User Manual Table of Contents Important Safety Information...1 Chapter 1: Opening TruDR...3 Chapter 2: Patient Information...4 Searching and Adding Patients...4 Editing an Existing Patient s Information...6
English User's Guide
 User's Guide Imacon Flextight 343 2 2003 Imacon A/S. All rights reserved. Imacon Flextight 343 User's Guide, Part No 70030009, revision B. The information in this manual is furnished for informational
Mini Photo Printer User Manual
 Mini Photo Printer User Manual CONTENTS SAFETY INFORMATION PACKAGE CONTENT PRINTER SETUP A) Charge Printer B) Power On C) Load Paper INSTALLING APP PARING MOBILE DEVICE & CANON MINI PRINT USER INTERFACE
Supplement. ScanMaker s480/s380 features, scenarios, and information. Getting to Know Your ScanMaker s480/s380
 Supplement ScanMaker s480/s380 features, scenarios, and information Getting to Know Your ScanMaker s480/s380 The ScanMaker s480/s380 is a high-performance scanner with the versatility to scan photos and
MANUAL. Textron Motors Diagnostic Tool. This manual is valid for the following Textron Motors Diagnostic Tool:
 MANUAL Textron Motors Diagnostic Tool This manual is valid for the following Textron Motors Diagnostic Tool: 0507 TD0507_HB Rev F 6..05 en_english Read the manual before performing the task on the engine.
ClearClick Photo2Digital 10 MP Photo, Slide, & Negative Scanner
 ClearClick Photo2Digital 10 MP Photo, Slide, & Negative Scanner Quick Start Guide & User s Manual Full 1-Year Warranty & Free USA Tech Support This product comes with ClearClick s full 1-year warranty
Supplement. ScanMaker i280 features, scenarios, and information. Getting to Know Your ScanMaker i280
 Supplement ScanMaker i280 features, scenarios, and information Getting to Know Your ScanMaker i280 The ScanMaker i280 is a high resolution scanner for reflective scanning. It features 4800 x 9600 dpi,
Supplement. ScanMaker s450/s350 features, scenarios, and information. Getting to Know Your ScanMaker s450/s350
 Supplement ScanMaker s450/s350 features, scenarios, and information Getting to Know Your ScanMaker s450/s350 The ScanMaker s450/s350 high-performance scanner with the versatility to scan photos and film.
User Manual. For MAC
 User Manual For MAC A3 Scanner with The TWAIN Driver (For Macintosh) English User Manual Contents Preface Chapter One Setting Up the Scanner 1 System Requirements... 1 Unpacking the Scanner... 2 The Scanner
Family HD Webcam F101
 Family HD Webcam F101 User Manual Kodak and the Kodak trade dress are trademarks of Eastman Kodak Company used under license. 2010 Sakar International, Inc. All rights reserved. WINDOWS and the WINDOWS
Quick Start Guide. Table of Contents
 Quick Start Guide Please read this guide before operating this scanner. After you finish reading this guide, store it in a safe place for future reference. Table of Contents Package Contents...1 Using
Visioneer OneTouch Scanner. Installation Guide FOR WINDOWS
 Visioneer OneTouch Scanner Installation Guide FOR WINDOWS TABLE OF CONTENTS i TABLE OF CONTENTS Getting Started with your new Scanner....................... 1 Step 1: Installing the Scanner Software.......................
Nikon View DX for Macintosh
 Contents Browser Software for Nikon D1 Digital Cameras Nikon View DX for Macintosh Reference Manual Overview Setting up the Camera as a Drive Mounting the Camera Camera Drive Settings Unmounting the Camera
Quick Start Guide. Table of Contents
 Quick Start Guide Please read this guide before operating this scanner. After you finish reading this guide, store it in a safe place for future reference. Table of Contents Package Contents... 1 Using
640SEcdqs.book Page 1 Tuesday, June 20, :40 PM FUN! FLASH 640 SE Rev. 1, June 10, 2002
 FUN! FLASH 640 SE Rev. 1, June 10, 2002 Contents The Polaroid PhotoMAX FUN! FLASH 640 SE Creative Kit......... 2 Kit components........................................ 3 Camera features........................................
SOLDERING STATION. Thermo-Control Anti-Static. Operating Instructions. 405 S. Pioneer Blvd. Springboro, OH MCMElectronics.
 Thanks for using our products, please read this manual thoroughly before operation. 405 S. Pioneer Blvd. Springboro, OH 45066 MCMElectronics.com 21-10120 Thermo-Control Anti-Static SOLDERING STATION Operating
2015 RIGOL TECHNOLOGIES, INC.
 Service Guide DG000 Series Dual-channel Function/Arbitrary Waveform Generator Oct. 205 TECHNOLOGIES, INC. Guaranty and Declaration Copyright 203 TECHNOLOGIES, INC. All Rights Reserved. Trademark Information
DC155 Digital Visualizer. User Manual
 DC155 Digital Visualizer User Manual Table of Contents CHAPTER 1 PRECAUTIONS... 4 CHAPTER 2 PACKAGE CONTENT... 6 CHAPTER 3 PRODUCT OVERVIEW... 7 3.1 PRODUCT INTRODUCTION... 7 3.2 I/O CONNECTION... 8 3.3
Extreme Makeovers: Photoshop Retouching Techniques
 Extreme Makeovers: Table of Contents About the Workshop... 1 Workshop Objectives... 1 Getting Started... 1 Photoshop Workspace... 1 Retouching Tools... 2 General Steps... 2 Resolution and image size...
Digital Design and Communication Teaching (DiDACT) University of Sheffield Department of Landscape. Adobe Photoshop CS5 INTRODUCTION WORKSHOPS
 University of Sheffield Department of Landscape. Adobe Photoshop CS5 INTRODUCTION WORKSHOPS") Adobe INTRODUCTION WORKSHOPS WORKSHOP 1 - what is Photoshop + what does it do? Outcomes: What is Photoshop? Opening, importing and creating images. Basic knowledge of Photoshop tools. Examples of work.
Adobe INTRODUCTION WORKSHOPS WORKSHOP 1 - what is Photoshop + what does it do? Outcomes: What is Photoshop? Opening, importing and creating images. Basic knowledge of Photoshop tools. Examples of work.
Part/Reorder Number: Version 1.0
 Part/Reorder Number: 870000 Version 1.0 Cross Match Technologies L SCAN 100/100R Operator s Manual Version 1.0 First Edition (August 2006) No portion of this guide may be reproduced in any form or by any
Safety instructions and installation
 1 Safety instructions and installation Thank you for deciding to purchase the innovative Frama Starter / Matrix F10 / Matrix F12 franking system. The information below in this operating manual is intended
ENGLISH CyberView X5 SF X5 SF User s Manual Manual
 CyberView User s X5 SF Manual 1 FEDERAL COMMUNICATIONS COMMISSION (FCC) STATEMENT TABLE OF CONTENTS This Equipment has been tested and found to comply with the limits for a class B digital device, pursuant
Radio System Strobe Wizard Plus Freemask
 Radio System Strobe Wizard Plus Freemask User manual Translation of the original German user manual Doc. No.: 900.0509.00 Version: 09/2017 Contents Information about this manual and about the manufacturer...
CANARY AUDIO. Power Amplifier CA-309 OWNER S MANUAL. Handcrafted in California MADE IN USA
 CANARY AUDIO 300B Push-Pull Parallel Power Amplifier Mono Block Handcrafted in California CA-309 OWNER S MANUAL MADE IN USA Dear Customer: Please allow us to take this opportunity to thank you for purchasing
The ideal K-12 science microscope solution. User Guide. for use with the Nova5000
 The ideal K-12 science microscope solution User Guide for use with the Nova5000 NovaScope User Guide Information in this document is subject to change without notice. 2009 Fourier Systems Ltd. All rights
ephoto Z300 Installation Usage & Maintenance
 ephoto Z300 Installation Usage & Maintenance Trademarks 2016 Plustek Inc. All rights are reserved. No portion of this document may be reproduced without permission. All trademarks and brand names mentioned
Sense. 3D Scanner. User Guide. See inside for use and safety information.
 Sense 3D Scanner User Guide See inside for use and safety information. 1 CONTENTS INTRODUCTION.... 3 IMPORTANT SAFETY INFORMATION... 4 Safety Guidelines....4 SENSE 3D SCANNER FEATURES AND PROPERTIES....
Start Here. Installing your Microtek ScanMaker 9800XL Plus PC:
 Start Here Installing your Microtek ScanMaker 98XL Plus Step : Unpack Contents. Optional package items depend on the scanner configuration that you purchased. Unpack your scanner package and check for
EPSON Stylus Color 480SXU
 sheet feeder left edge guide Accessories Ink Cartridges paper support printer cover ink cartridge clamps output tray ink cartridge holders (do not remove) Media Media name Size Part number EPSON 360 dpi
Scanning Procedure Using SilverFast Ai Software (6.6.1r2b) 1
 1") last modified 6.16.2015 Scanning Procedure Using SilverFast Ai Software (6.6.1r2b) 1 PREP In scanner notebook, fill out Incoming Checklist column on a Scanner Equipment Checklist sheet. Use flash drive
last modified 6.16.2015 Scanning Procedure Using SilverFast Ai Software (6.6.1r2b) 1 PREP In scanner notebook, fill out Incoming Checklist column on a Scanner Equipment Checklist sheet. Use flash drive
USER MANUAL PV 360. Vidifox Document Camera
 Vidifox Document Camera PV 360 USER MANUAL Please read this User Manual thoroughly before you use the document camera. Keep the CD-ROM in a convenient place so you can use it quickly if you need to. Please
SCANNING IMAGES - USER S GUIDE. Scanning Images with Epson Smart Panel and PhotoShop [for Epson 1670 scanners]
![SCANNING IMAGES - USER S GUIDE. Scanning Images with Epson Smart Panel and PhotoShop [for Epson 1670 scanners]](/thumbs/89/98942649.jpg "SCANNING IMAGES - USER S GUIDE. Scanning Images with Epson Smart Panel and PhotoShop [for Epson 1670 scanners]") University of Arizona Information Commons Training 1 SCANNING IMAGES - USER S GUIDE Scanning Images with Epson Smart Panel and PhotoShop [for Epson 1670 scanners] p.2 Introduction and Overview Differences
University of Arizona Information Commons Training 1 SCANNING IMAGES - USER S GUIDE Scanning Images with Epson Smart Panel and PhotoShop [for Epson 1670 scanners] p.2 Introduction and Overview Differences
INSTRUCTION MANUAL. IBRit - rf1 - usb PC - Station for wireless Data transmission. M e s s t e c h n i k. Messtechnik GmbH & Co.
 M e s s t e c h n i k INSTRUCTION MANUAL PC - Station for wireless Data transmission Document No. : D1F604 001 Version : April 2006 Copyright : IBR Messtechnik GmbH & Co. KG Contents 1. Introduction 1.1
Lenovo 3300/3310 Inkjet Printer
 Lenovo 3300/3310 Inkjet Printer User s Guide for Windows Setup troubleshooting A checklist to find solutions to common setup problems. Printer overview Learn about the printer parts and the printer software.
English User's Guide
 User's Guide Imacon Flextight 646 2 2002 Imacon A/S. All rights reserved. Imacon Flextight 646 User's Guide, Part No 70030036, revision A. The information in this manual is furnished for informational
Visioneer OneTouch 5820 Scanner Installation Guide FOR WINDOWS
 Visioneer OneTouch 5820 Scanner Installation Guide FOR WINDOWS COPYRIGHT INFORMATION Copyright 2001 Visioneer, Inc. Reproduction, adaptation, or translation without prior written permission is prohibited,
Model S-520 Coin Counter / Sorter Operating Manual
 Model S-520 Coin Counter / Sorter Operating Manual Table of Contents Using the Product Safely... 2 About the Warning Stickers and Points of Warning/... 2 Warning.... 3. 4 Names of the Main Parts......
ephoto Z300 Installation Usage & Maintenance
 ephoto Z300 Installation Usage & Maintenance Trademarks 2017 Plustek Inc. All rights are reserved. No portion of this document may be reproduced without permission. All trademarks and brand names mentioned
Mini Photo Printer User Manual
 Mini Photo Printer User Manual CONTENTS SAFETY INFORMATION PACKAGE CONTENT PRINTER SETUP A) Charge Printer B) Power On C) Load Paper INSTALLING APP PARING MOBILE DEVICE & CANON MINI PRINT USER INTERFACE
eflex 75x/300x Digital Microscope with Flexible Neck User Guide
 eflex 75x/300x Digital Microscope with Flexible Neck User Guide Table of Contents Important information... 4 Product description... 4 Computer requirements... 5 Windows based PC... 5 Mac OS based PC...
Digital Microscope. User Manual
 Digital Microscope User Manual Features The digital microscope provides 10~200X adjustable magnification range. The build-in high-performance white LED can illuminate the object without using any auxiliary
Digital Portable Overhead Document Camera LV-1010
 Digital Portable Overhead Document Camera LV-1010 Instruction Manual 1 Content I Product Introduction 1.1 Product appearance..3 1.2 Main functions and features of the product.3 1.3 Production specifications.4
Adobe Photoshop CC 2018 Tutorial
 Adobe Photoshop CC 2018 Tutorial GETTING STARTED Adobe Photoshop CC 2018 is a popular image editing software that provides a work environment consistent with Adobe Illustrator, Adobe InDesign, Adobe Photoshop,
Active Transmitter Combiner 8:1 AC 3200-II. Instruction manual
 Active Transmitter Combiner 8:1 AC 3200-II Instruction manual Contents Contents Important safety instructions... 2 The AC 3200-II active transmitter combiner 8:1... 4 Delivery includes... 4 Connection
Carrier Sheet Option User s Guide
 P3PC-1042-01ENZ0 Carrier Sheet Option User s Guide Index 1. Introduction... 1 1.1. Contents of the Package... 4 1.2. System Requirements... 4 2. Preparation... 5 2.1. Installing the software... 5 2.2.
ET-413 2MP USB PEN MICROSCOPE
 ET-413 2MP USB PEN MICROSCOPE USER S MANUAL INTRODUCTION FUNCTIONS AND APPLICATIONS The ET-413 2 Mega-Pixel USB PEN MICROSCOPE is a new electronic product for micro observations. It is a tubular imaging
On-Line Cardio Theater Wireless Digital Transmitter Installation and Instruction Manual
 On-Line Cardio Theater Wireless Digital Transmitter Installation and Instruction Manual Full installation instructions accompany your Cardio Theater equipment order. This On-Line version of our Installation/Instruction
HARMONY SINGER 2. Battery-Powered Vocal Effects Stompbox with Guitar-Controlled Harmony, Reverb and Tone. User Manual
 HARMONY SINGER 2 Battery-Powered Vocal Effects Stompbox with Guitar-Controlled Harmony, Reverb and Tone User Manual 2 Harmony Singer 2 User Manual Important Safety Instructions Terminals marked with this
I. Unpack FilmScan35 I
 Version 3.01 Jun-2009 I. Unpack FilmScan35 I Note This film scanner supports Windows XP and Vista (32/64bits) via USB 2.0 only. We strongly suggest using a clean, dry, non-alcohol cotton swab to insert
DC162 Digital Visualizer. User Manual. English - 1
 DC162 Digital Visualizer User Manual English - 1 Chapter 1 Precautions Always follow these safety instructions when setting up and using the Digital Visualizer: 1. Please do not tilt the machine while
A WORLD OF LISTENING WARNING: TO PREVENT FIRE OR ELECTRIC SHOCK HAZARD, DO NOT EXPOSE THIS PRODUCT TO RAIN OR MOISTURE.
 DDR-3 FM RDS/DAB digital radio A WORLD OF LISTENING THE LIGHTNING FLASH AND ARROW- HEAD WITHIN THE TRIANGLE IS A WARNING SIGN ALERTING YOU OF DANGEROUS VOLTAGE INSIDE THE RADIO. WARNING: TO PREVENT FIRE
a u d i o p h i l e d i g i t a l - t o - a n a l o g u e c o n v e r t e r user guide
 DAC30 a u d i o p h i l e d i g i t a l - t o - a n a l o g u e c o n v e r t e r user guide Welcome! Welcome to the Primare DAC30! Your DAC30 is a fully balanced audiophile digitalto-analogue converter,
Operating Instructions
 FM Transmitter 2 Operating Instructions PLEASE READ ALL THE INSTRUCTIONS COMPLETELY BEFORE USE AND SAVE THIS MANUAL FOR FUTURE REFERENCE. Before Use Please read IMPORTANT SAFETY INSTRUCTIONS on pages 10-11
HP Latex 1500 Printer HP Latex 3000 Printer Series. Double-sided Day Night Kit User Guide
 HP Latex 1500 Printer HP Latex 3000 Printer Series Double-sided Day Night Kit User Guide Copyright 2016 HP Development Company, L.P. Edition 1 Legal notices The information contained herein is subject
RM4 MODULAR TUBE PREAMP OWNERS MANUAL
 A M P L I F I E R S RM4 MODULAR TUBE PREAMP OWNERS MANUAL Dear Randall Owner, Congratulations on the purchase of your new Randall Amplifier, and thank you for the support of our product line. Randall amps
Kigamo Scanback which fits in your view camera in place of conventional film.
 What's included Kigamo Scanback which fits in your view camera in place of conventional film. SCSI Cable to connect your Scanback to the host computer. A 3-meter SCSI cable is standard. Kigamo also has
DocuMate 510, 515, 520. scanner. user s guide
 DocuMate 510, 515, 520 scanner user s guide Copyright 2008 Visioneer, Inc. Reproduction, adaptation, or translation without prior written permission is prohibited, except as allowed under the copyright
DOCUMENT SCANNER INSTRUCTIONS. Space. Backup. Count Only. New File. Scanner. Feeding Option Manual Auto Semi-Auto
 E FILM F Scanner A Space Count Only New File Feeding Option Manual Auto Semi-Auto Backup DOCUMENT SCANNER INSTRUCTIONS NOTICE q Copyright 2001 by CANON ELECTRONICS INC. All rights reserved. No part of
Installation Usage & Maintenance
 Installation Usage & Maintenance Trademarks 2008 Plustek Inc. All rights are reserved. No portion of this document may be reproduced without permission. All trademarks and brand names mentioned in this
Copyright Notice. Trademarks
 Copyright Notice All rights reserved. No part of this publication may be reproduced, stored in a retrieval system, or transmitted in any form or by any means, electronic, mechanical, photocopying, recording,