TOPAZ LENS EFFECTS QUICK START GUIDE
|
|
|
- Mervin Moody
- 5 years ago
- Views:
Transcription


1 TOPAZ LENS EFFECTS QUICK START GUIDE

2 Introduction Topaz Lens Effects is designed to give you the power to direct and focus your viewer s eyes where you want them. With Lens Effects, you get advanced technology that realistically simulates the most diverse range of lens and specialty camera effects With Topaz Lens Effects, you can achieve a variety of camera, lens and filter effects and adjustments such as: Bokeh Single Tone Graduated Color Creative Blur FishEye Vignette Dual Tone Graduated Neutral Density Motion Blur Toy Camera Here are some of the neat Topaz Lens Effects features: 1. Smart Brush. Use for easy selective adjustments. 2. Apply button. Stack effects and presets. 3. Split Screen. Use the 2-screen split view for easy before and after comparison. 4. Effect Center. Single-click ability for selecting effect center. 5. Click to position. Click anywhere on slider to jump to that adjustment value. 6. Style user interface. Select from a light or dark color scheme.


3 Introduction Presets/Effects Preview Displays previews of the included presets & effects. 2. Presets Panel 3. Preview Window 4. Preview Navigator Provides snapshots Displays the preview of the Displays the region of the of pre-defined effects. original and adjusted image. preview image you are currently focused on. 5. Settings & Parameters Controls the editing using sliders to adjust the various effects.


4 Tools You will use the various tools in the tool panel during your workflow to make your image adjustments Preview Navigator - Displays the region of the preview image you are currently focused on. 2. Zoom Buttons - Use the zoom buttons to zoom in and out of your image. Or you can also set your image to fit the preview window or to view it at 100% Undo and Redo buttons - move back and forward through previous adjustments Snap and Recall buttons. Save up to 99 snapshot settings for easy comparison. 5. Sliders and Parameters - Controls the editing process using sliders to adjust the various effects. 6. Reset All. Reset all of the sliders values back to the default value. 7. Apply. Used to stack the effects and presets you want to apply to your image (during the same workflow). 6 7

5 Presets & Effects Presets are a great way to speed up and simplify the whole process of using Topaz Lens Effects Presets are set previews with previously defined settings that you can recall and reapply at any time. We ve included some default presets for you and, although they won t work for every single photograph, they serve as excellent starting points for customized tweaking Effects & Presets Preview Provides snapshots of the available pre-defined parameter settings included in the presets list below Effects List Lists all of the saved presets available for use. 3. Presets List Lists all of the saved presets available for use Preset Options The preset options allow you to save your presets, delete presets (default presents cannot be deleted), import new presets and export your saved presets to share with your friends. 4

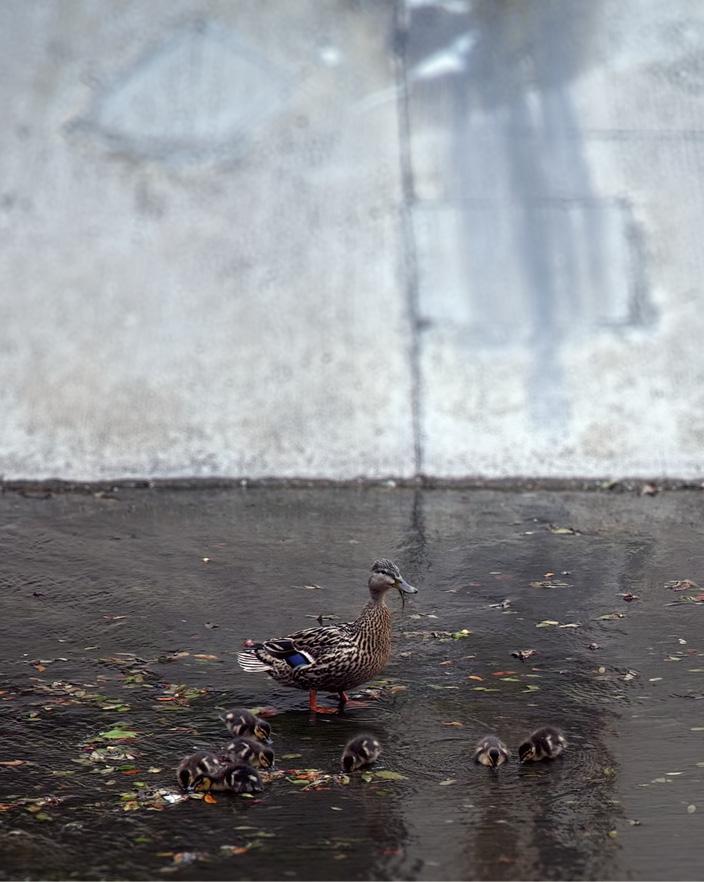
6 Workflow Sample Project In this project, we will walk you through a quick example workflow to help you get acquainted with the tools and setup of the new Topaz Lens Effects. This example will show you a basic example of the Bokeh - Selective Effect. Your first steps will be in the Edit Depth Map tab. This will automatically open up the split screen view, which will help you visually when creating the depth map. When your mask preview loads there may be a partial depth map outline that loads with it. You can tweak it, to complete the depth map, or you can start over and create your depth map from scratch. 5. (To star over) Go ahead and set your Depth Value slider to 255 (either by dragging the slider or by clicking the 255 button) and then click on the Reset button that has the green icon next to it. This will reset the depth map and fill it with white. 1. Set the brush size and paint in the subject using the Brush tool. 2. Go ahead and set your Depth Value slider to 255 (either by dragging the slider or by clicking the 255 button) and then click on the Reset button that has the green icon next to it. This will reset the depth map and fill it with white.

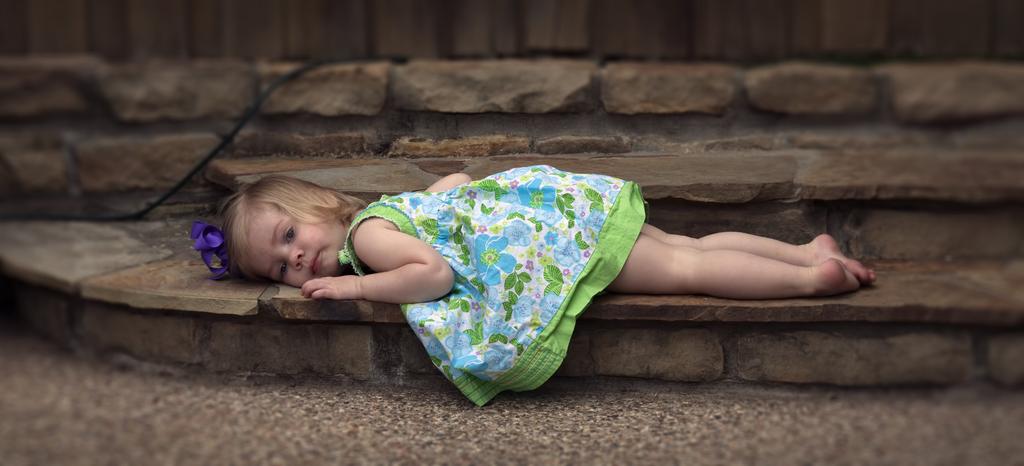
7 Workflow The black portion of your image will be the most the most focused part of your image and will taper into the blur or white portion of your image. You will be able to control the look and intensity of the blur and transition using the other tabs once you have fished the depth map creation. 3. Using the black brush, brush in the subject areat - in this case the girl and her hood. The brush is pretty intuitive so it will help you along.
8 Workflow 4. Then click the Use Gradient Brush checkbox to enable this feature. We will use the default buttons to set the gray to white values. Use a gray tone, 64 or 128, as the start value and use 255 as the white / end value. 5. We will make small selections in the background ares (bushes and brick wall) of the image and drag our cursor to create the gradient. You may find that you need to do more than one stroke to create the optimal gradient for your image. 6. Once your depth map is complete, go to the focal point adjustments tab to set your focal point.
9 Workflow Here in the Focal Plane Adjustments is where our depth map work comes to life. Here we will make selections as to what part of the image we want to be infocus - similar to focusing a camera. 7. First, we will set the Focal Plane Position. You can do this using the Select Focal Plane Button (easiest way) or by adjusing the Focal Plane Position slider (more incremental flexibility). Our Focal Plane Position was set on the girl s face. 8. Next, you will need to set your depth of field - this is similar to changing the aperture of a lens. For this image we used a high depth of field setting. 9. Adjust the Background and Foreground Amounts. For most images you will want to set your Foreground Blur Amount to zero - so that your foreground is in-focus. 10. Slowly increase the Background Blur Amount until you are satisfied with the amount of blur in your image. 11. We will work our way down each adjustment tab. For this image the only adjustments made in the Lens Characteristics tab was to increase the creamy slider. This offers a smoother blur effect. If your image has highlights in the background then you can adjust the other parameters in this tab to enhance those highlights. See pages 34 and 35 of the Lens Effects user guide for details. Once you are happy with your Bokeh Adjustments and Lens Characteristic Adjustments you can either click OK to process your image or you can click Apply to add more effects. Please note that once you click Apply that the applied effect can Not be undone.

10 Workflow 12. So, for example, you may want to add a filter effect. Go ahead and click the Apply button to apply the bokeh adjustments just made. You will see the progress bar at the bottom of the screen move as your changes are being processed. 13. After that, go back to your Effects menu and select the Filter - Dual Tone. This will bring up some default presets for additional enhancements you can add. For this example we applied the Cool to Warm I preset. You can go to your tool tabs on the right side of the interface to have more control and manually adjust the settings here.
11 Workflow 14. Go ahead and click the Apply button to apply the Filter adjustments just made. You will see the progress bar at the bottom of the screen move as your changes are being processed. 15. Next we are going to add a slight vignette. Go back to your Effects menu and select the xf - Add Vignette. This will bring up some default presets for additional enhancements you can add. For this example we applied the Darker Around preset. You can go to your tool tabs on the right side of the interface to have more control and manually adjust the settings here. 16. Click OK to process your changes and save your image back to Photoshop.
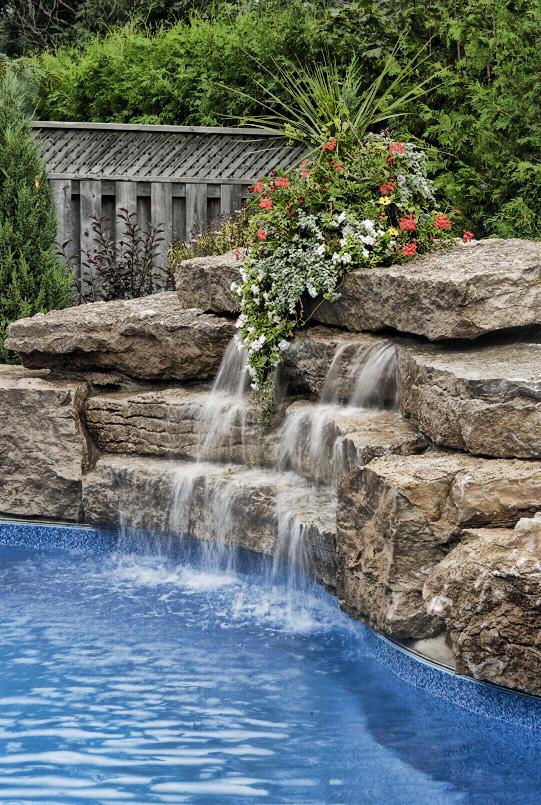
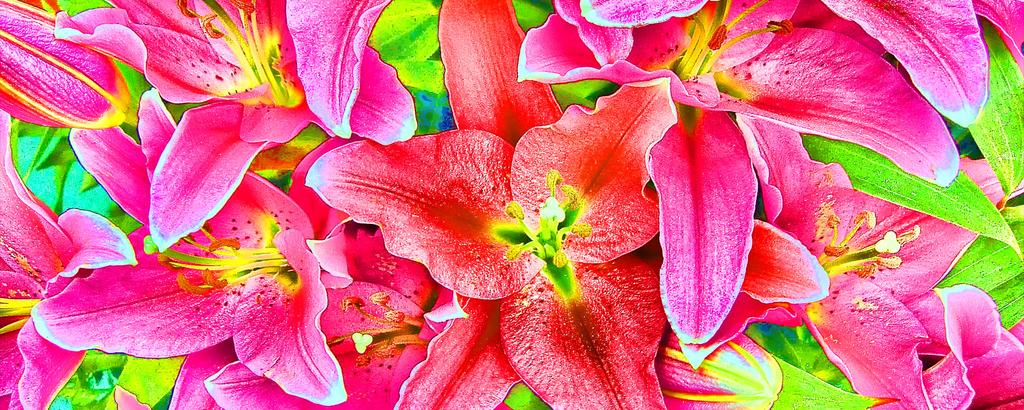
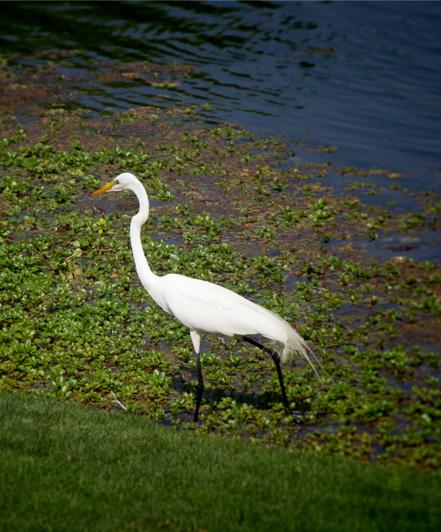
12 Section Title Before Topaz Lens Effects

13 Section Title After Topaz Lens Effects


14 Quick Start Use This Topaz Lens Effects Quick Start Guide is for users who are familiar with the image enhancement process and who want to jump straight into using Lens Effects For a more in-depth and comprehensive break down of using Topaz Lens Effects please view the Topaz Lens Effects User Guide. The User Guide was automatically installed on your computer when you installed Topaz Lens Effects. Here is how to access it: MAC: HD -> Library -> Application Support -> Topaz Labs -> Lens Effects -> Docs WINDOWS: Computer -> C:/ -> Program Files -> Topaz Labs -> Lens Effects -> Docs You can also watch video tutorials online at:
15 Shortcut Keys Topaz Lens Effects uses some shortcut keys to speed up your workflow. Many of these keys are similar to those in Photoshop. The following keys work at all times. Action MAC Shortcut PC Shortcut View Original Image Spacebar Spacebar Reset All CMD-ALT-R CTRL-ALT-R Zoom to Fit CMD-0 CTRL-0 Zoom to 100% CMD-ALT-0 CTRL-ALT-0 Zoom In + or CMD or CTRL - + Zoom Out - or CMD or CTRL - - Undo CMD -Z Ctrl - Z Redo CMD - Shift - Z Ctrl - Shift - Z ADDITIONAL SHORTCUTS Action Shortcut Left or Right Arrow Key Scrolls through presets Return (enter) key Applies selected preset [ key Reduces selected slider value by 0.1 ] key Increases selected slider value by 0.1 Home Key Set the slider value to minimum End Key Set the slider value to maximum Double-click slider name Resets the slider value to 0

16 Connect with Topaz Check out our new Forum and our blog for tutorials, tips and updates from Topaz Labs! Follow us on Twitter for notifications of recent news and easily get in touch with us whenever you feel like it! Find us on our Facebook page and network with other Topaz users! Participate in the entirely user-led Topaz Flickr group for a helpful and highly active community for Topaz Photoshop plug-ins! Subscribe to our YouTube channel to keep up with any newly released product video tutorials!
TOPAZ ReMask V3 QUICK START GUIDE
 TOPAZ ReMask V3 QUICK START GUIDE Introduction Topaz ReMask is a masking solution that offers professional results while cutting down on masking and extraction time. It is designed to tackle some of the
Workflow. Sample Project
 Workflow Sample Project In this tutorial, we will walk you through a sample project, step-by-step, to help you become more familiar with the DeJPEG program focusing on using the default presets. We will
ReMask 2 TOPAZ REMASK 2. How It Works
 TOPAZ REMASK 2 Having a thorough understanding of the new Topaz and how it works will allow you to use the program and its tools most effectively. This will help you achieve optimal results with every
Workflow. Sample Project. In this tutorial, we will walk you through a second Clean workflow to show you how easy it is to instantly clean up skin.
 Workflow Sample Project In this tutorial, we will walk you through a second Clean workflow to show you how easy it is to instantly clean up skin. Before Topaz Clean After Topaz Clean Please visit the Topaz
Workflow. Sample Project
 Workflow Sample Project In this tutorial, we will walk you through a sample project, step-by-step, to help you become more familiar with the Clean program focusing on using a combination of presets and
Topaz Labs DeNoise 3 Review By Dennis Goulet. The Problem
 Topaz Labs DeNoise 3 Review By Dennis Goulet The Problem As grain was the nemesis of clean images in film photography, electronic noise in digitally captured images can be a problem in making photographs
The horse image used for this tutorial comes from Capgros at the Stock Exchange. The rest are mine.
 First off, sorry to those of you that are on the mailing list or RSS that get this twice. I m finally moved over to a dedicated server, and in doing so, this post was lost. So, I m republishing it. This
4 PHOTOSHOP SPECIAL EFFECTS HACKS FROM SCOTT KELBY
 4 PHOTOSHOP SPECIAL EFFECTS HACKS FROM SCOTT KELBY You can do some pretty cool stuff in Photoshop, with most tiny tweaks taking no time at all. However, for some of us (myself included) it s hard to know
Contents. User Manual. Topaz Simplify I. Installation A. How to Install.3 B. Host-Specific Installation 4 D. Uninstalling.6
 Contents I. Installation A. How to Install.3 B. Host-Specific Installation 4 D. Uninstalling.6 II. Introduction A. 7 1. About 7 2. Primary Functions 7 B. New Features 9 III. Work Area A. Interface.9 B.
Adobe Photoshop CS5 Tutorial
 Adobe Photoshop CS5 Tutorial GETTING STARTED Adobe Photoshop CS5 is a popular image editing software that provides a work environment consistent with Adobe Illustrator, Adobe InDesign, Adobe Photoshop
Adobe Photoshop CC 2018 Tutorial
 Adobe Photoshop CC 2018 Tutorial GETTING STARTED Adobe Photoshop CC 2018 is a popular image editing software that provides a work environment consistent with Adobe Illustrator, Adobe InDesign, Adobe Photoshop,
Black and White using Photoshop
 Topics to be covered: Methods for B&W conversion Improving the image Toning Printer color management Black and White using Photoshop Various ways to get to B&W Adobe Raw Converter (ACR) in from Bridge
Veil & Transparency Masking Tutorial
 In this tutorial we will look at another way to tackle the masking process. This workflow makes use of ReMask 3 s new Dual-Color Selection brush, which comes in handy for tricky and delicate transparency
SAVING, LOADING AND REUSING LAYER STYLES
 SAVING, LOADING AND REUSING LAYER STYLES In this Photoshop tutorial, we re going to learn how to save, load and reuse layer styles! Layer styles are a great way to create fun and interesting photo effects
Selective Editing in Camera Raw 5
 Selective Editing in Camera Raw 5 The editing tools that you saw in the last chapter are global editing tools. That is, they affect all parts of the image. So, when you choose to, for example, brighten
Creating Photo Borders With Photoshop Brushes
 Creating Photo Borders With Photoshop Brushes Written by Steve Patterson. In this Photoshop photo effects tutorial, we ll learn how to create interesting photo border effects using Photoshop s brushes.
Transforming Your Photographs with Photoshop
 Transforming Your Photographs with Photoshop Jesús Ramirez PhotoshopTrainingChannel.com Contents Introduction 2 About the Instructor 2 Lab Project Files 2 Lab Objectives 2 Lab Description 2 Removing Distracting
ITEC185 INTRODUCTION TO DIGITAL MEDIA
 1 ITEC185 INTRODUCTION TO DIGITAL MEDIA ADOBE PHOTOSHOP ITEC185 - Introduction to Digital Media ITEC185 - Introduction to Digital Media 2 What is Adobe Photoshop? Photoshop is the leading professional
Exploring Photoshop Tutorial
 Exploring Photoshop Tutorial Objective: In this tutorial we will create a poster composed of three distinct elements: a Bokeh, an image and title text. The Bokeh is an effect which is sometimes seen in
METAL TEXT EFFECT. Step 1: Create A New Document. Step 2: Fill The Background With Black
 METAL TEXT EFFECT In this text effects tutorial, we ll learn how to easily create metal text, a popular effect widely used in video games and movie posters! It may seem like there s a lot of steps involved,
Using Adobe Photoshop
 Using Adobe Photoshop 4 Colour is important in most art forms. For example, a painter needs to know how to select and mix colours to produce the right tones in a picture. A Photographer needs to understand
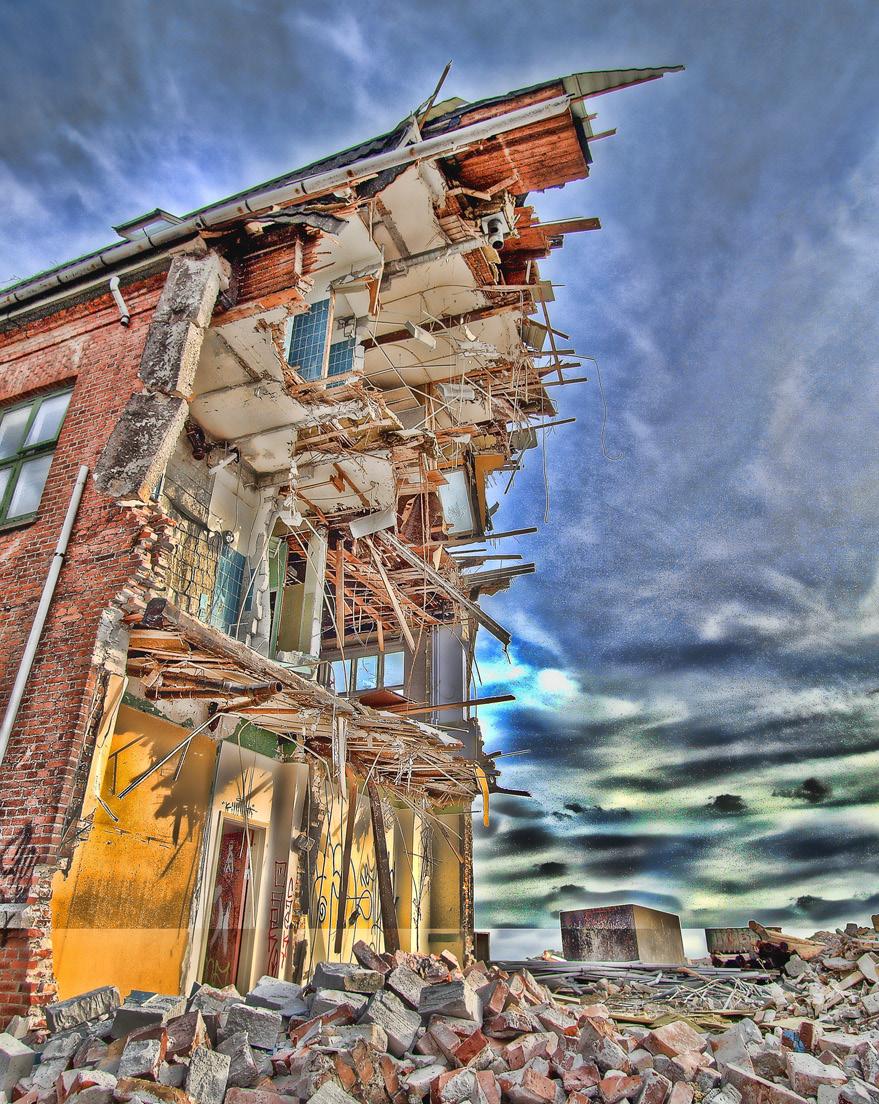
WORN, TORN PHOTO EDGES EFFECT
 Photo Effects: CC - Worn, Torn Photo Edges Effect WORN, TORN PHOTO EDGES EFFECT In this Photoshop tutorial, we ll learn how to take the normally sharp, straight edges of an image and make them look all
ADOBE PHOTOSHOP CS TUTORIAL
 ADOBE PHOTOSHOP CS TUTORIAL A D O B E P H O T O S H O P C S Adobe Photoshop CS is a popular image editing software that provides a work environment consistent with Adobe Illustrator, Adobe InDesign, Adobe
Contents. User Manual. 2. What s This? User Guide Tech Support Product Info Detail Gallery About 20
 Contents I. Installation A. How to Install 3 B. Entering Your Key 3 C. Host-Specific Installation 3 1. Paint Shop Pro 4 2. Photo Impact 5 3. Irfanview 6 II. Introduction A. Enhanced Photography 7 1. Edge
Black and White Photoshop Conversion Techniques
 Black and White Photoshop Conversion Techniques Andrew Gibson on Jan 27th 2011 Final Product What You'll Be Creating A quick glance through any photography or fashion magazine, or at the photos on social
Contents. User Manual
 Contents I. Installation A. How to Install 3 B. Entering Your Key 3 C. Host-Specific Installation 3 1. Paint Shop Pro 4 2. Photo Impact 5 3. Irfanview 6 D. Uninstalling 7 II. Introduction A. 8 1. Primary
Add Rays Of Sunlight To A Photo With Photoshop
 Add Rays Of Sunlight To A Photo With Photoshop Written by Steve Patterson. In this photo effects tutorial, we'll learn how to easily add rays of sunlight to an image, a great way to make an already beautiful
The original image. As I said, we ll be looking at a few different variations on the effect. Here s the first one we ll be working towards:
 DIGITAL PIXEL EFFECT In this Photoshop tutorial, we re going to look at how to create a digital pixel effect, which is often used in ads that sell anything to do with digital. We re going to first pixelate
Digital Design and Communication Teaching (DiDACT) University of Sheffield Department of Landscape. Adobe Photoshop CS5 INTRODUCTION WORKSHOPS
 University of Sheffield Department of Landscape. Adobe Photoshop CS5 INTRODUCTION WORKSHOPS") Adobe INTRODUCTION WORKSHOPS WORKSHOP 1 - what is Photoshop + what does it do? Outcomes: What is Photoshop? Opening, importing and creating images. Basic knowledge of Photoshop tools. Examples of work.
Adobe INTRODUCTION WORKSHOPS WORKSHOP 1 - what is Photoshop + what does it do? Outcomes: What is Photoshop? Opening, importing and creating images. Basic knowledge of Photoshop tools. Examples of work.
Topaz Detail V3 User Manual
 V3 User Manual The most controllable detail enhancement tool avaliable to selectively control three levels of detail and sharpening within images with absolutely no leftover artifacts or halos. Contents
Select your Image in Bridge. Make sure you are opening the RAW version of your image file!
 CO 3403: Photographic Communication Steps for Non-Destructive Image Adjustments in Photoshop Use the application Bridge to preview your images and open your files with Camera Raw Review the information
Contents. User Manual. Topaz DeJPEG
 Contents I. Installation A. How to Install 3 B. Entering Your Key 3 C. Host-Specific Installation 3 1. Paint Shop Pro 4 2. Photo Impact 5 3. Irfanview 6 II. Introduction A. JPEG Artifacts 7 1. What are
By Washan Najat Nawi
 By Washan Najat Nawi how to get started how to use the interface how to modify images with basic editing skills Adobe Photoshop: is a popular image-editing software. Two general usage of Photoshop Creating
Introduction to Photoshop
 Introduction to Photoshop Instructional Services at KU Libraries A Division of Information Services www.lib.ku.edu/instruction Abstract: This course covers the basics of Photoshop, including common tools
32 Float v3 Quick Start Guide. AUTHORED BY ANTHONY HERNANDEZ (415)
") 32 Float v3 Quick Start Guide 32 Float v3 Trademark/Copyright Information Copyright 2013 by United Color Technologies, LLC. All rights reserved. Unified Color Technologies, BeyondRGB, and HDR Expose are
32 Float v3 Quick Start Guide 32 Float v3 Trademark/Copyright Information Copyright 2013 by United Color Technologies, LLC. All rights reserved. Unified Color Technologies, BeyondRGB, and HDR Expose are
Adobe Photoshop CC 2018
 Adobe Photoshop CC 2018 By Martin Evening Welcome to the latest Adobe Photoshop CC bulletin update. This is provided free to ensure everyone can be kept up-to-date with the latest changes that have taken
Topaz DeJPEG. v3.0. User Manual
 v3.0 Contents Topaz DeJPEG I. Installation A. How to Install 3 B. Entering Your Key 3 C. Host-Specific Installation 3 1. Paint Shop Pro / Photo Impact 4 2. Irfanview 5 II. Introduction A. JPEG Artifacts
GETTING STARTED. 0 P a g e B a s i c s o f A d o b e P h o t o s h o p A g a P r i v a t e I n s t i t u t e f o r c o m p u t e r s c i e n c e
 GETTING STARTED 0 P a g e B a s i c s o f A d o b e P h o t o s h o p Adobe Photoshop: is a popular image editing software that provides a work environment consistent with Adobe Illustrator, Adobe InDesign,
PHOTOSHOP DESIGN EFFECTS FOR INTERMEDIATE TO ADVANCED USERS
 PHOTOSHOP DESIGN EFFECTS FOR INTERMEDIATE TO ADVANCED USERS Copyright 2012, National Seminars Training Introduction This class is all about design effects in Adobe Photoshop. For example, let s say that
RETRO User guide RETRO. Photoshop actions. For PS CC, CS6, CS5, CS4. User Guide
 RETRO Photoshop actions For PS CC, CS6, CS5, CS4 User Guide CONTENTS 1. THE BASICS... 1 1.1. About the effects... 1 1.2. How the actions are organized... 1 1.3. Installing the actions in Photoshop... 2
A Basic Guide to Photoshop CS Adjustment Layers
 A Basic Guide to Photoshop CS Adjustment Layers Alvaro Guzman Photoshop CS4 has a new Panel named Adjustments, based on the Adjustment Layers of previous versions. These adjustments can be used for non-destructive
Contents. User Manual. Topaz ReMask. 13. Recovery (Foreground) Desaturation (Foreground) 16
 Desaturation (Foreground) 16") Contents I. Installation A. How to Install 3 B. Entering Your Key 3 C. Host-Specific Installation 3 1. Paint Shop Pro 4 II. Uninstalling A. How to uninstall 5 III. Introduction A. Masking Unveiled 6 1.
Contents I. Installation A. How to Install 3 B. Entering Your Key 3 C. Host-Specific Installation 3 1. Paint Shop Pro 4 II. Uninstalling A. How to uninstall 5 III. Introduction A. Masking Unveiled 6 1.
The original image. Let s get started! The final result.
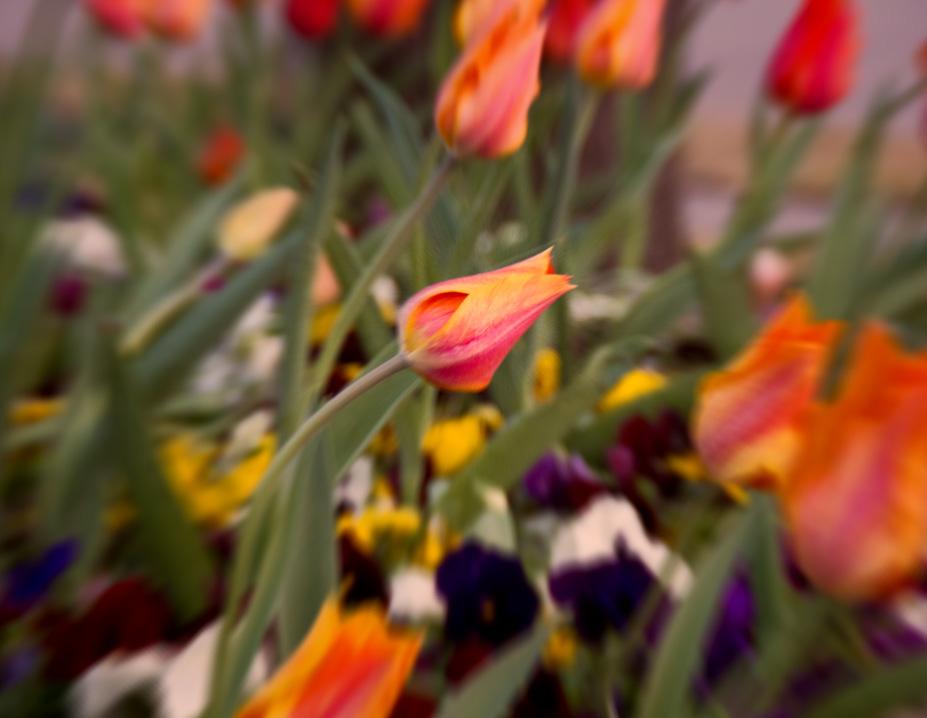
 Miniature Effect With Tilt-Shift In Photoshop CS6 In this tutorial, we ll learn how to create a miniature effect in Photoshop CS6 using its brand new Tilt-Shift blur filter. Tilt-shift camera lenses are
Tutorial: Gradient Noise Reduction
 Introduction This photoshop tutorial will show how to use a linear gradient to selectively apply noise reduction to an image. This tutorial assumes that you have the photoshop plug-in version of Noise
Photo Editing in Mac and ipad and iphone
 Page 1 Photo Editing in Mac and ipad and iphone Switching to Edit mode in Photos for Mac To edit a photo you ll first need to double-click its thumbnail to open it for viewing, and then click the Edit
How to Add Fake Smoke/ Mist to your Pictures
 TIP SHEET #4 How to Add Fake Smoke/ Mist to your Pictures In this tutorial I want to take you through two different ways that you can add smoke / fog into your pictures. Ordinarily adding in smoke would
Reveal the mystery of the mask
 Reveal the mystery of the mask Imagine you're participating in a group brainstorming session to generate new ideas for the design phase of a new project. The facilitator starts the brainstorming session
The original image. Let s get started! The final effect.
 Non-Destructive Infrared Glow Effect In this Photoshop tutorial, we ll learn how to quickly and easily add a dream-like infrared glow effect to an image, and we ll do it non-destructively using Smart Filters
Photoshop Filters. Applying Filters from the Filter Menu
 Photoshop Filters Filters are easy to learn and use, and yet are one of Photoshop s most powerful features. When used properly, they can recreate a number of photographic and artistic effects, can enhance
The original image. The final rainbow effect.
 ADD A realistic rainbow to a photo In this Photoshop photo effects tutorial, we re going to learn how to easily add a rainbow, even a double rainbow, to a photo. Of course, as with most photo effects,
Using Adobe Photoshop
 Using Adobe Photoshop 8 In the last section we looked at adjusting colours to improve your image. In this section we ll look at various ways of touching up your images to fix problems with the images or
Workspace. Workspace
 Workspace Workspace AKVIS SmartMask is a plug-in to a photo editor. To call AKVIS SmartMask plugin, select the command Filter > AKVIS > SmartMask in Adobe Photoshop ; in Corel (Jasc) Paint Shop Pro it
How to Create Fake Shadows
 TIP SHEET #8 How to Create Fake Shadows As well as the colour, it s the shadows in a picture that help to give it mood and atmosphere so in this tutorial I want to show you how you can add in extra shadows.
32 Float v2 Quick Start Guide. AUTHORED BY ANTHONY HERNANDEZ - (415)
") 32 Float v2 Quick Start Guide 32 Float V2 Trademark/Copyright Information Copyright 2011 by United Color Technologies, LLC. All rights reserved. Unified Color Technologies, BeyondRGB, and HDR Float are
32 Float v2 Quick Start Guide 32 Float V2 Trademark/Copyright Information Copyright 2011 by United Color Technologies, LLC. All rights reserved. Unified Color Technologies, BeyondRGB, and HDR Float are
CREATE A BURNT EDGE EFFECT
 CREATE A BURNT EDGE EFFECT One of the all-time classic effects in Photoshop is the burnt edge, and there s lots of different ways to create it, but in this Adobe Photoshop tutorial, we re going to look
Photoshop CC Editing Images
 Photoshop CC Editing Images Rotate a Canvas A canvas can be rotated 90 degrees Clockwise, 90 degrees Counter Clockwise, or rotated 180 degrees. Navigate to the Image Menu, select Image Rotation and then
Creating a Watercolor Painting From a Photo. Open the photo you want to appear to be a watercolor painting. I am using the photo below:
 Creating a Watercolor Painting From a Photo Open the photo you want to appear to be a watercolor painting. I am using the photo below: Make any adjustments as needed like cropping the photo before preceding
Stone Creek Textiles. Layers! part 1
 Stone Creek Textiles Layers! part 1 This tutorial is all about working with layers. This, to my mind, is one of the two critical areas to master in order to work creatively with Photoshop Elements. So,
The original image. Let s get started! The final rainbow effect. The photo sits on the Background layer in the Layers panel.
 Add A Realistic Rainbow To A Photo In this Photoshop photo effects tutorial, we ll learn how to easily add a rainbow, and even a double rainbow, to a photo! As we ll see, Photoshop ships with a ready-made
Settings. ! The Preview Pane !!!!! THE PREVIEW PANE IMAGES & LAYERS PANE SETTINGS PANE SETTINGS WINDOW UNDO/REDO AND RESET
 Settings THE PREVIEW PANE IMAGES & LAYERS PANE SETTINGS PANE UNDO/REDO AND RESET SETTINGS WINDOW The Preview Pane When you first load an image, PhotoDonut calculates the preview scale to fit your image
A Basic Guide to Photoshop Adjustment Layers
 A Basic Guide to Photoshop Adjustment Layers Photoshop has a Panel named Adjustments, based on the Adjustment Layers of previous versions. These adjustments can be used for non-destructive editing, can
Introduction to Photoshop Elements
 John W. Jacobs Technology Center 450 Exton Square Parkway Exton, PA 19341 610.280.2666 ccljtc@ccls.org www.ccls.org Facebook.com/ChesterCountyLibrary Introduction to Photoshop Elements Chester County Library
5 Masks and Channels
 5 Masks and Channels Adobe Photoshop uses masks to isolate and manipulate specific parts of an image. A mask is like a stencil. The cutout portion of the mask can be altered, but the area surrounding the
Lightroom CC. Welcome to Joshua Tree Workshops. Astro & Landscape Lightroom Workflow w/presets
 Welcome to My approach to teaching is to offer small workshops which allow you to explore and discover our amazing planet, while learning photography and timelapse techniques. Astro & Landscape Lightroom
ADDING A RAINBOW TO A PHOTOGRAPH
 ADDING A RAINBOW TO A PHOTOGRAPH This assignment will cover how to add a simple rainbow (or if you want to go crazy, a double rainbow) to any photograph. This will give us some great work with gradients,
Creating Pastel Images and other effects in Photoshop
 Creating Pastel Images and other effects in Photoshop Martin Addison 2015 Creating pastel images Page 1 Martin Addison FRPS Using White Layers in Photoshop 1. Create a new empty Layer 2. Edit> Fill 3.
Unit 7 : Image Painting, Editing and Layers
 Unit 7 : Image Painting, Editing and Layers Introduction This Unit describes about various painting tools; such as selection, cropping and measuring tools, retouching, drawing and type tools, Navigation
User Manual. Topaz Simplify 4
 Topaz Simplify 4 I. Installation A. How to Install 3 B. Plugin Compatibility 3 C. Host-Specific Installation 3 1. Photoshop 3 2. Lightroom 4 3. PaintShop Pro 4 4. PhotoPlus 5 D. Uninstalling 5 E. License
Using Adobe Photoshop
 Using Adobe Photoshop 8 In the last section we looked at adjusting colours to improve your image. In this section we ll look at various ways of touching up your images to fix problems with the images or
Corel PHOTO-PAINT BERNINA Page 1 DL
 Corel PHOTO-PAINT 2018 BERNINA Page 1 Corel PHOTO-PAINT Corel PHOTO-PAINT is part of BERNINA Embroidery Software and gives users many tools for editing photos or bitmap artwork. Corel PHOTO- PAINT can
PHOTOSHOP1 15 / WORKSPACE
 MassArt Studio Foundation: Visual Language Digital Media Cookbook, Fall 2013 PHOTOSHOP1 15 / WORKSPACE Imaging software, just like our computers, relies on metaphors from the physical world for their design.
Miniature Effect With Tilt-Shift In Photoshop CS6
 Miniature Effect With Tilt-Shift In Photoshop CS6 This effect works best with a photo taken from high overhead and looking down on your subject at an angle. You ll also want a photo where everything is
Photoshop CC 2018 Essential Skills
 Photoshop CC 2018 Essential Skills Adobe Photoshop Creative Cloud 2018 University Information Technology Services Learning Technology, Training, Audiovisual and Outreach Copyright 2018 KSU Division of
PHOTOSHOP TUTORIAL: DIGITAL DARKROOM TECHNIQUES
 PHOTOSHOP TUTORIAL: DIGITAL DARKROOM TECHNIQUES STEP BY STEP TRAINING Learn by doing step by step exercises. Includes downloadable class files that work on Mac & PC. EDITION 1 Copyright Info Published
EXTREME CONTRAST PHOTO EFFECT
 EXTREME CONTRAST PHOTO EFFECT In this Photoshop tutorial, we re going to learn how to use layers, layer blend modes, some noise, a little sharpening, and a simple adjustment layer to easily give a photo
Reference Manual Version 1.1
 Reference Manual Version 1.1 Copyright 2001-2002, Digital Light & Color All Rights Reserved Introduction Color Mechanic is a selective color correction plug-in for Photoshop from Digital Light & Color.
Perspective Shadow Text Effect In Photoshop
 Perspective Shadow Text Effect In Photoshop Written by Steve Patterson. In this Photoshop text effects tutorial, we ll learn how to create a popular, classic effect by giving text a perspective shadow
The original image. Let s get started! The final light rays effect. Photoshop adds a new layer named Layer 1 above the Background layer.
 Add Rays Of Light To A Photo In this photo effects tutorial, we ll learn how to quickly and easily add rays of sunlight to an image with Photoshop! I ll be using Photoshop CS5 throughout this tutorial
Advanced Sharpening in Photoshop
 Advanced Sharpening in Photoshop A Tutorial by Ray Grace ARPS DPAGB There are many various methods of sharpening in Photoshop all of which work to a greater or lesser degree. This particular method is
ADDING RAIN TO A PHOTO
 ADDING RAIN TO A PHOTO Most of us would prefer to avoid being caught in the rain if possible, especially if we have our cameras with us. But what if you re one of a large number of people who enjoy taking
COLORIZING IMAGES WITH GRADIENT MAPS
 COLORIZING IMAGES WITH GRADIENT MAPS In this Photoshop tutorial, we ll learn how to add complex colorizing effects to images using custom gradients! Specifically, we ll look at the Gradient Map image adjustment
ADD A REALISTIC WATER REFLECTION
 ADD A REALISTIC WATER REFLECTION In this Photoshop photo effects tutorial, we re going to learn how to easily add a realistic water reflection to any photo. It s a very easy effect to create and you can
The original photo. The final result.
 giving a photo painted edges In this Adobe Photoshop tutorial, we re going to combine a couple of different effects. First, we ll give the photo easy-tocreate painted edges, and then we ll make it look
TEXT PERSPECTIVE SHADOW EFFECT
 TEXT PERSPECTIVE SHADOW EFFECT In this Photoshop text effects tutorial, we ll learn how to create a popular, classic effect by giving text a perspective shadow as if a light source behind the text was
Photoshop CS part 2. Workshop Objective. Getting Started Quit all open applications Single click Adobe Photoshop from the Dock
 pg. 1 Photoshop CS part 2 Photoshop is the premier digital photo editor application used for photo retouching, creating web images, film/video compositing, and other pixel/vector-based imagery. Workshop
Step 1: Select The Main Subject In The Photo
 Create A custom Motion Trail from your subject In this Photoshop photo effects tutorial, we ll learn how to add a sense of action and movement to an image by giving the main subject an easy to create motion
Enhanced Eyes. Here's the image I'll be working with (glamour eyes photo from Shutterstock): Here's what the eyes will look like when we're done:
: Here's what the eyes will look like when we're done:") Enhanced Eyes Here's the image I'll be working with (glamour eyes photo from Shutterstock): The original image. Here's what the eyes will look like when we're done: The final effect. Here's a close-up
Enhanced Eyes Here's the image I'll be working with (glamour eyes photo from Shutterstock): The original image. Here's what the eyes will look like when we're done: The final effect. Here's a close-up
Adobe Photoshop. Levels
 How to correct color Once you ve opened an image in Photoshop, you may want to adjust color quality or light levels, convert it to black and white, or correct color or lens distortions. This can improve
Combine Black-and-White and Color
 Combine Black-and-White and Color Contributor: Seán Duggan n Specialty: Fine Art Primary Tool Used: Smart Objects Combining color and black-and-white in the same image is a technique that has been around
PUZZLE EFFECTS 2D Photoshop actions For Photoshop CC, CS6, CS5, CS4
 PUZZLE EFFECTS 2D Photoshop actions For Photoshop CC, CS6, CS5, CS4 User Guide CONTENTS 1. THE BASICS... 1 1.1. About the actions... 1 1.2. How the actions are organized... 1 1.3. The Classic effects (examples)...
CHANGING EYE COLOR IN A PHOTO
 CHANGING EYE COLOR IN A PHOTO In this photo retouching tutorial, we ll learn a very simple technique for changing someone s eye color in a photo using a Hue/Saturation adjustment layer! Of course, there
Workflow. User Manual
 Workflow I. Installation A. How to Install 3 B. Entering Your Key 3 C. Host-Specific Installation 3 1. Paint Shop Pro 4 2. Photo Impact 5 3. Irfanview 6 D. Uninstalling 7 II. Introduction A. About 8 1.
Realistic Skin Smoothing
 TIP SHEET #7 Realistic Skin Smoothing I think it s fair to say when it comes to retouching techniques, the number of different ways to smooth skin is seemingly endless. From blurring techniques through
Camera Raw software is included as a plug-in with Adobe Photoshop and also adds some functions to Adobe Bridge.
 Editing Images in Camera RAW Camera Raw software is included as a plug-in with Adobe Photoshop and also adds some functions to Adobe Bridge. Camera Raw gives each of these applications the ability to import
ImagesPlus Basic Interface Operation
 ImagesPlus Basic Interface Operation The basic interface operation menu options are located on the File, View, Open Images, Open Operators, and Help main menus. File Menu New The New command creates a
iphoto Getting Started Get to know iphoto and learn how to import and organize your photos, and create a photo slideshow and book.
 iphoto Getting Started Get to know iphoto and learn how to import and organize your photos, and create a photo slideshow and book. 1 Contents Chapter 1 3 Welcome to iphoto 3 What You ll Learn 4 Before
12. Creating a Product Mockup in Perspective
 12. Creating a Product Mockup in Perspective Lesson overview In this lesson, you ll learn how to do the following: Understand perspective drawing. Use grid presets. Adjust the perspective grid. Draw and
ADD A SPARKLE TRAIL TO A PHOTO
 ADD A SPARKLE TRAIL TO A PHOTO In this Adobe Photoshop tutorial, we re going to learn how to add a sparkle trail to a photo, using a custom Photoshop brush we ll be creating. I got the idea for this tutorial
B&W Photos from Colour:
 Quick and Dirty Methods for PS, PS Elements and Canon Software 8/1/2007 New Westminster Photography Club Derek Carlin New Westminster Photography Club Page 1 Introduction This is a very brief article on
Next Back Save Project Save Project Save your Story
 What is Photo Story? Photo Story is Microsoft s solution to digital storytelling in 5 easy steps. For those who want to create a basic multimedia movie without having to learn advanced video editing, Photo