THE COMPLETE GUIDE TO OLYMPUS OM- D E-M1 FIRMWARE UPDATE 2.0
|
|
|
- Bennett Bradley
- 6 years ago
- Views:
Transcription
1
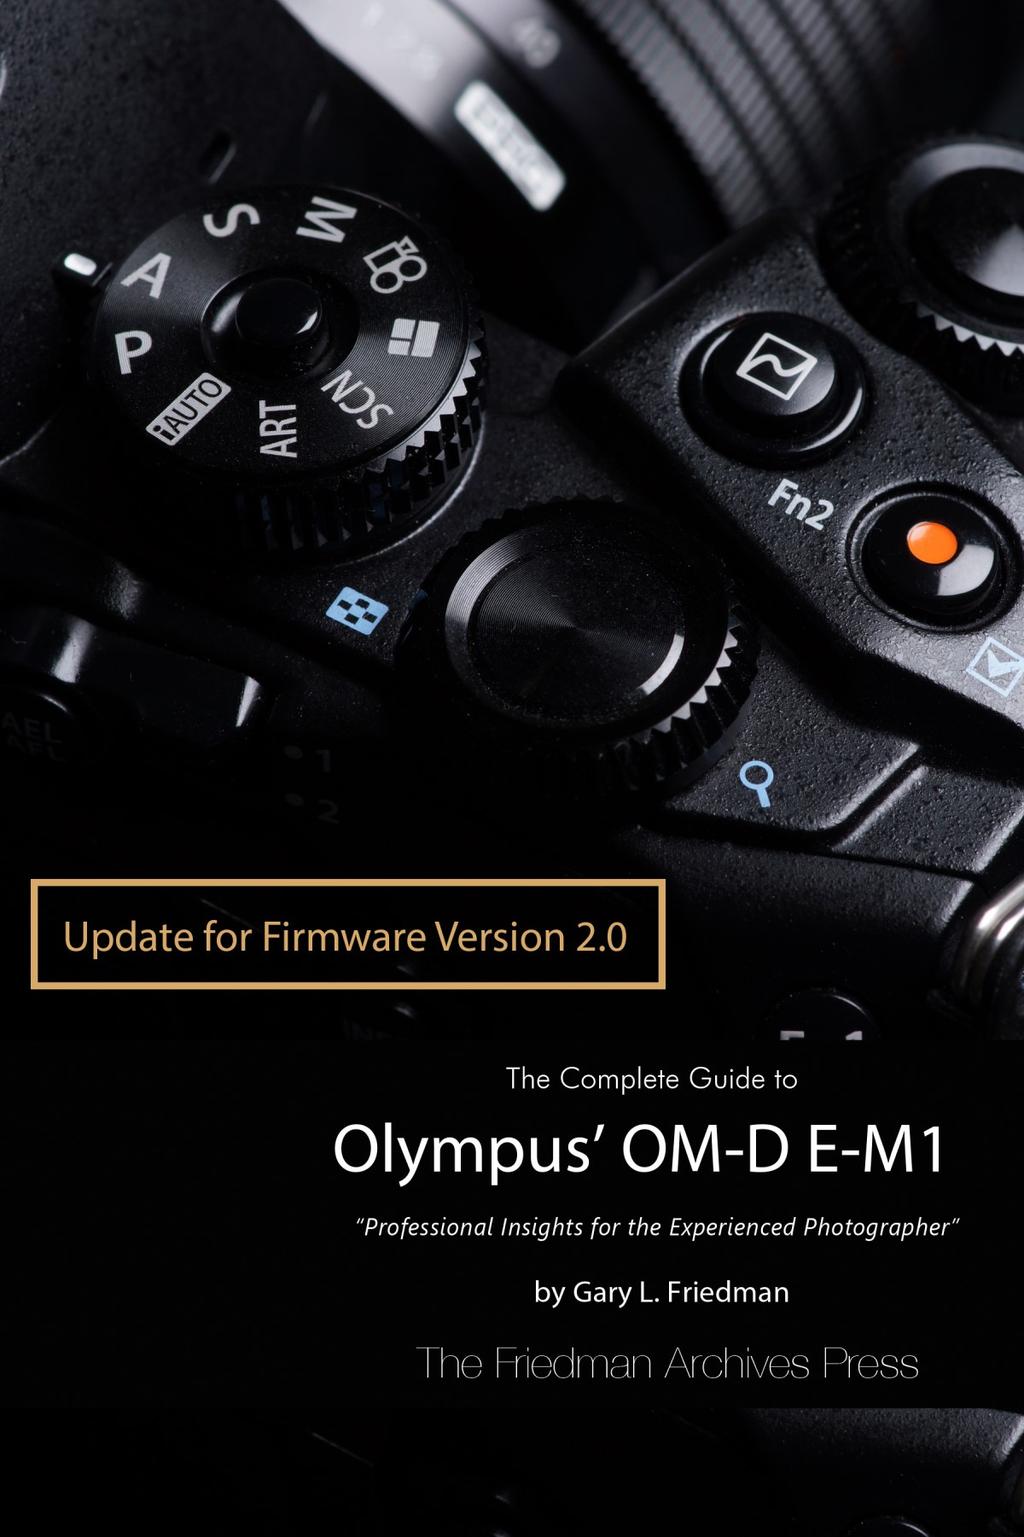
2 THE COMPLETE GUIDE TO OLYMPUS OM- D E-M1 FIRMWARE UPDATE 2.0 PROFESSIONAL INSIGHTS FOR THE EXPERIENCED SHOOTER by Mike Hendren This is an addendum to the best-selling "The Complete Guide to Olympus' OM- D E-M1" by Gary Friedman. The original book can be purchased at the author's website in three different electronic formats at Published by The Friedman Archives Press Copyright 2014 Gary L. Friedman All rights reserved. No portion of this book may be reproduced either in print or in any digital format without express written permission. Contact the author at Gary@FriedmanArchives.com
3 Table of Contents iii TABLE OF CONTENTS CHAPTER 0 INTRODUCTION New Functions: Operability Improvements:... 6 WHY THIS BOOK IS NEEDED...7 CHAPTER 1 E-M1 FIRMWARE NEW FUNCTIONS:...8 Tethered Shooting...8 Live Composite mode Keystone Compensation New Art Filters: Aperture Preview Lock function Panning Shot SCENE mode Old Film effect New Photo Story mode features: OPERABILITY IMPROVEMENTS: EVF Time Lag Reduced to 16 milliseconds Improvements to Live Guide Exposure Compensation in HDR1 / HDR Color Creator Improvements Movie Tele-Converter with Art Filter Auto Focus with Custom Self Timer Manual Focus Assist with Magnified Frame Magnified Live View now has 3X Improved Focus Peaking Display Electronic Zoom Speed Setting Underwater/Underwater Macro Double Tap Touch with SCP Level Gauge / Histogram with Magnified Display HDR1/HDR2 Shooting INFO now on Playback Live Composite Enhancement BKT Menu with BKT Button MISC. INFORMATION Olympus Image Share App Version Camera Manual Updates... 25
4 iv Table of Contents Reported Problems LIKE WHAT YOU JUST READ?... 26

5 CHAPTER 0 INTRODUCTION It seems that the pace of new camera introductions may be slowing. And instead, the manufacturers are choosing to improve existing models with firmware updates, adding features and functions while also eliminating some problems. Frankly, I m glad to see this trend and my budget officer (wife) is also happy. Olympus has been pretty good about regular firmware updates over the last couple of years, but they have really raised the bar with this latest release, Firmware Version 2.0 (FW 2.0). According to them, this new FW 2.0 has 8 New Functions and 16 Operability Improvements, some major but all significant. Here is the Olympus list of new functions and improvements. 8 New Functions: (Image taken from the Olympus website) Tethered Shooting for studio photography via the new Olympus Capture Software. Live Composite mode for star-trail photography. Keystone Compensation (digital shift) to correct vertical distortion. 2 New Art Filters: Vintage and Partial Color. Aperture Lock function has been added to Aperture Preview. Panning Shot shooting mode has been added to SCN mode. Old Film effect has been added to movie effect.
6 6 Table of Contents New Photo Story mode features: Zoom In/Out and Layout framing options. Save (complete partway through), Temporary Save, and Resume functions. 16 Operability Improvements: EVF image display time lag reduced to 16 milliseconds (when frame rate setting is set to high speed). Multiple simultaneous settings now available in Live Guide. Exposure compensation (±3 EV) is now available in HDR 1/HDR2 shooting. A function has been added to cancel Color Creator and return to the original Picture Mode by pressing the MENU button when using Color Creator function. Movie Tele-converter can now be used simultaneously when Art Filter is set to Picture Mode. AF function for each frame was added to Custom Self Timer. In Drive Mode's Custom Self Timer settings, you can now press the INFO button to change settings. MF Assist is now supported in magnified frame position. 3x has been added to high resolution magnified Live View. The Peaking display frame rate has been improved. Electronic zoom speed setting function was added. An icon appears on the LCD monitor when using an Olympus electronic zoom lens. When the arrow pad is set to Direct function, the Underwater/Underwater macro functions can be used with the left and down button on the arrow pad. Double tap is now supported in touch operations on the Super Control Panel. The level gauge and histogram can now be displayed during magnified frame display. The Touch Off icon was added to magnified frame display. A function was added so that shooting information recorded in HDR1/HDR2 can be viewed in the playback screen. Information on composited number of shots for images recorded with Live Composite was added (Can be checked in Olympus Viewer3). When the BKT button is held down, the BKT menu now appears. Contents of this book Copyright 2014 Gary L. Friedman. All rights reserved.
7 Why This Book Is Needed 7 Plus, Olympus Image Share App Ver. 2.4 is now supported. WHY THIS BOOK IS NEEDED Until now, firmware updates have typically included a new feature or two and some fixes to things customers have been complaining about. But with this release, there are several major new functions and a host of improvements and many of the changes aren t necessarily intuitive. While Olympus did actually update the camera manual to include Firmware 2.0 information, it s hard to find and incomplete as camera manuals so often are. So that s where we step in to write this, and why you are here reading it. So without further delay, let s decipher E-M1 Firmware Version 2.0.

8 CHAPTER 1 E-M1 FIRMWARE NEW FUNCTIONS: TETHERED SHOOTING In this update, this is the Biggie. Tethered shooting is a big deal for most studio photographers, allowing them to get a much larger preview of the image, change settings from the computer, and quickly transfer the image to the computer (Figure 1-1). To make tethered shooting a reality, you must also download and install the Olympus Capture Tethering Software. It s available here: Figure 1-1: Olympus Capture software with E-M1 FW 2.0 makes a great studio combination. While you re on the website, I suggest taking just a few minutes to view a short demonstration video about the new Capture Software. I found the install (on a Mac) to be very easy and straight forward. Then it s just a matter of connecting your camera to the computer with its USB cable, turning on the camera, and scrolling down to the third option (icon of computer and camera connected). Select it and the connection is instantly made. Note: Tethered shooting is only available in these shooting modes: P, A, S, and M. Once the connection is complete, you ll see the live view feed from the camera with a row of control icons across the bottom. As you hover your

9 Tethered Shooting 9 mouse over these icons, you will see small pop-ups that tell what that particular icon is for, but most of them are fairly intuitive. The Camera s LCD screen also works, as does the EVF and auto switching between the two. Plus, you can control the camera from your computer or from the camera, wherever you happen to be. (Figure 1-2) Figure 1-2: Olympus Capture Tethering Software on a Mac. There is a small, optional floating window that shows a histogram. In the lower right corner of that window is an arrow that, when clicked, lets you choose between Luminance, RGB, R, G, or B for the display. There is another large floating window that shows the main control panels. The top part contains controls for most of the same settings you find in the SCP (Super Control Panel) on your E-M1. Below that is the wireless flash control panel, which duplicates the one on your camera. At the very bottom of this panel is the Shutter Button and AEL/AFL control. Just above the Shutter Button is a unique control called Manual Focus. But it s not really Manual. It just gives you a way to tweak your autofocus by adjusting it in small amounts in either direction. There are buttons for
 and you can adjust these settings.")
10 10 8 New Functions: moving the focus in small, medium, or large increments. And even better is the fact that you can dictate how much each button will move the focus. Just click on the little icon to the right (it looks like four horizontal bars) and you can adjust these settings. I m not going to go into a lot of detail about operating the camera using the software because it really is quite intuitive. However, I will mention one very nice Button for use in dark studio settings. You know, when you ve got the camera set to manual, using wireless flash, and the scene is too dark to adequately judge your focus, or maybe even to dark for the camera to focus. Well, we know the camera has a boost setting that can fix this by boosting the live view to a more normal light level for viewing. But this is one of those pesky menu settings. Capture has a small button on the bottom (see the yellow arrow in Figure 1-3) that will automatically turn Boost on and off. Figure 1-3: The image on the left shows what you might see with Boost turned off. On the right, the scene is considerably brighter after turning Boost On. Sure makes it easier to fine-tune your focus. For those countries where Wi-Fi is not allowed, the addition of tethered shooting will be a nice option for quick downloading of your images to your computer as you shoot. Olympus provides the following WARNINGS: 1. Do not turn off the camera or disconnect the cable while the software is starting or running, as it may cause the camera or software to malfunction. 2. The RAW Contents of this book Copyright 2014 Gary L. Friedman. All rights reserved.
11 Live Composite mode 11 development result with software might not be corresponding to the result with the camera, because software uses the latest RAW development algorithm. 3. For more information, refer to the online Help after installation. (Note: This was my only problem spot. When I selected Help, it said I needed to update the software, but it kept hanging up about half way through the download. I finally just downloaded and reinstalled the software, and then the update worked perfectly.) TIP: This software can also automatically import your images to the computer as you shoot. Here's how I set up Lightroom 5: 1. Go to Auto Import Settings and designate a Watch folder to initially receive the images. Next, designate a Destination folder, which is where the images will end up when they are actually imported. 2. In Olympus Capture, open the Options Menu, select Transfer Settings, and designate your LR Watch folder as the Transfer Destination. Now, as you shoot, the images will automatically be imported into your computer, and if you have LR open, and the appropriate folder selected, you will see your images magically appear. LIVE COMPOSITE MODE For those of you who have already used the E-M10, then you already know about this. Or if you ve already used Live Time or Live Bulb, then you understand how totally cool it is to watch your image develop in real time. Live Composite is quite similar in that it also lets you view the evolving image as it happens. But it works a little bit differently. Let s see how. With Live Time / Bulb, a single exposure evolves in such a way that the image slowly continues to brighten as time passes, and then when it s just right, you can stop the exposure. Live Composite takes a continuous series of images at your set exposure, i.e. maybe f/5.6 and 2 seconds. But then the camera layers each exposure in real time, much like you would create a composite in Photoshop, using layers and then blending them with the Lighten blending mode. Only the lighter portions of each image are added. So enough of what s happening under the hood, let s use this great feature.

12 12 8 New Functions: Live view is great, except that for longer exposures it can t really show you what the final image will look like, so I suggest you begin by taking a test shot (in Manual) to see what settings you need to get the underlying exposure the way you want it. Once you know your basic settings, keep turning the shutter speed adjustment dial past 60, Live Time, and Bulb, until you get to Live Composite. Now press the Menu button and it will take you directly into the Live Composite menu so you can set your desired shutter speed. Now you re ready, and I suggest using a tripod for these. The first time you press the shutter, you re just telling the camera to get ready. After a couple of seconds, you will see a message on the screen, Ready for composite shooting. The next time you press the shutter, your exposure series begins. In the lower right corner there will be a timer showing total elapsed time and just above it, a counter showing the set shutter speed (2 sec.) and the total number of layers. (Figure 1-4) Figure 1-4: The image on the left shows the result after 46 seconds (22 exposures), while the right one shows after 49 exposures. The only increase in brightness is from light painting with a flashlight. In the lower left corner is a real nice touch a live histogram. Finally, when you see the look you were wanting, just press the shutter one more time and you re done. On your memory card, there will only be the one image. As you can imagine, this is perfect for shooting star trails (or car light trails), flowing water to get that smooth look, light painting, or whatever your imagination can come up with. Contents of this book Copyright 2014 Gary L. Friedman. All rights reserved.

13 Keystone Compensation 13 Select any Quality you want. Live Composite works with RAW, JPG, or RAW + JPG. Note: If you really want to know, the Live Composite Menu is the very last item in Custom Menu E. But it is so much easier to just select Live Composite in Manual Mode and then press the Menu button to go straight there. Rather than continuing to reinvent the wheel, allow me to refer you to an excellent blog post (with video), written by Pekka Potka. KEYSTONE COMPENSATION Figure 1-5: The image on the left is the uncorrected one, shot at 24mm. With the E-M1 s Keystone Correction, you can end up with the right photo. Keystoning is the vertical distortion caused when you point your camera up at the subject, causing it to look like it s leaning back (Figure 1-5, left image). Tall buildings tend to lean in toward the center of the frame and take a trapezoidal shape instead of the rectangle they really are. The effect is normally exaggerated with wide-angle lenses.

14 14 8 New Functions: The classic way to accomplish this correction has been to either use a tilt-shift lens, or fix it in post processing with software like Adobe Photoshop and others. But now, your E-M1 can do this before you take the shot. And the beauty of this is that by doing it in camera, you end up with a full size image no lost pixels as would happen in post processing. Figure 1-6: Keystone On icon at the top. Bars showing Up-Down (vertical) and Left-Right (horizontal) corrections. To turn this feature on, you can either do it in Shooting Menu 1, or assign it to one of the function buttons (this is my preferred way). When assigned to a Function Button, just press the button to turn it on, then press and hold for about two seconds to turn it off. When it s On, you ll see a small icon at the top of the screen (see Figure 1-6). Plus, you ll notice the two adjustment bars along the right edge and bottom edge of the screen. These bars will disappear in about 15 seconds, or if you half press the shutter button. Or just press the appropriate Fn Button again and they pop right back into view. You can only adjust in one dimension for each photo, i.e. either vertical (probably the most common) or horizontal. As soon as you adjust either one, the other adjustment bar disappears and can only be brought back into view by zeroing out the other one. These are adjusted using the front and rear control dials. Keystone is only available in the P, A, S, and M Modes, and turns off if you leave these modes or turn the camera off. However, the last used settings are remembered and will be there waiting for you the next time you turn it On. Note: Keystone Correction only works on JPG files. If you happen to be in in RAW when you turn it on, the camera automatically switches to RAW + JPG. Contents of this book Copyright 2014 Gary L. Friedman. All rights reserved.

15 2 New Art Filters: 15 Plus, by starting in camera you can get more of the effect by continuing the processing in LR. 2 NEW ART FILTERS: You now have two new Art Filters, Vintage and Partial Color, bringing the total number to 14. Like the other Art Filters, these also have a variety of settings and effects that you can apply. Vintage really doesn t need much explanation it does about what it sounds like it would do. It makes your photos look like aged prints or slides would look, with faded, muted colors. The other new filter, Partial Color, also gives you a bit more control over the final setting by providing a way to select among 18 different hues. They do this using a graphic very similar to the color wheel used by the Color Creator function. You can see this in Figure 1-7. When you invoke this, you ll notice that there are six black dots around the wheel, representing the major colors: Yellow, Red, Magenta, Blue, Cyan, and Green. By rotating either control dial, you can select your color of choice, which will be identified by the white dot that rotates around the wheel. With six main colors and two intermediate choices between each of those, you have a total of eighteen different colors to choose from. APERTURE PREVIEW LOCK FUNCTION Figure 1-7: The color wheel used to change settings for the Partial Color Art Filter. Black dots (red arrow) show the primary colors while the white dot (yellow arrow) shows your current setting. Aperture preview has been around for a long time and is invaluable at those times when depth of field (DOF) is critical to your image, when you really want certain parts of the photo in focus or not in focus. You all know that on the E-M1, Aperture Preview can be assigned to one of several function buttons. Then to turn it on (before FW 2.0), you had to press and hold that particular button. Now, IF you enable Preview Lock,
16 16 8 New Functions: when you turn DOF Preview On it remains engaged even for subsequent shots. Your Preview Button is now a Press On, Press Off Button. To enable Preview Lock, go to Custom Menu D --> (Preview) Lock --> On. The obviously great thing about this is that now you can turn Preview On and then monitor how your DOF changes as you vary the aperture, or change your focus point. There are a couple of notes to be aware of. Aperture Preview is only available in these modes: P, A, S, M, iauto, and ART. Preview will turn off if you leave your current mode or turn the camera off. PANNING SHOT SCENE MODE This is actually a pretty useful Scene (SCN) Mode, good for those times when you want to pan with a moving subject to try and get that subject relatively sharp while blurring the background. It does this by automatically changing several of your camera settings. Initially, it makes the following changes: Picture Mode --> Vivid AF Area --> Group Target AF Mode --> C-AF Drive Mode --> Sequential Low Image Stabilizer --> S-IS Auto ISO --> Auto Of these settings, only a few can be changed while in the Panning Mode. AF Area and AF Mode can be set to whatever you want. But Drive Mode is limited to either Single or Sequential Low. And if you leave SCN Mode, when you return the settings will be back to the Panning default. Another thing the camera does automatically in this mode is to detect when you re panning (S-IS AUTO does this), and change shutter speed and f- stop. For example, in bright light you may see a combination of f/8 and 1/500 second while holding the camera steady. Then, as you start to pan, Contents of this book Copyright 2014 Gary L. Friedman. All rights reserved.
17 Old Film effect 17 the f-stop might jump to f/22 and the shutter speed drop to 1/60 second. This is to allow the background to get a motion blur as you track your moving subject. When you re in Panning SCN Mode, you ll see a new icon in the lower left corner of your screen. Initially, while still, the icon will look like a cartoon car. But then as you start to pan, it will look like a cartoon car in motion. Note: If you are using a lens with built in stabilization (Panasonic for instance), be sure and turn it Off on the lens. OLD FILM EFFECT First, let me say I m not really a movie guy. But honestly, this effect really didn t do much for me. It just sort of adds random black, vertical lines to simulate the scratches or dust you might see on old film. Like the rest of the movie effects that appear as icons across the bottom of the screen when you select Movie on the Mode Dial, you just touch it to turn in On, then touch again to turn Off. It will be the third icon from the left, just to the right of the red/blue balls icon. NEW PHOTO STORY MODE FEATURES: Photo Story is one of those modes that many pros scoff at. But you know, we all need to let our hair down and just have fun, sometimes. This is one of those great modes that can let you do just that. I think Photo Story is the perfect fun mode to use when you re on a family vacation, at parties, or over the holidays. Firmware 2.0 has added three new features: Zoom In/Out, Layout, and Works in Progress Zoom In/Out simply shoots the first photo at the normal focal length, and then automatically performs a digital zoom for the second shot. Layout gives you several options using either two or three images and places them on a large white background. Much like you might do when printing a proof sheet, or sticking photos to a white board. (Figure 1-8)
 and then either Save it as is, stop and finish it later, or discard it.")
18 18 16 Operability Improvements: Works in Progress is a nice new addition to this feature. Using any of the five primary Photo Story modes, you can take one shot (or more) and then either Save it as is, stop and finish it later, or discard it. So maybe you re on vacation and would like to create a story board with the first image showing the national forest sign, and another photo of the quaint little cabin you re staying in. But you d like to be able to take different photos in the meantime. Figure 1-8: This one of the new Photo Story layout selections. To use this is quite easy. After you take a shot with the chosen story mode, press the Menu Button and you ll get a menu to let you choose to Save (as is), Finish Later, or Discard. Save is self-explanatory press that and you re done with that story. If you press Finish Later, that story is saved and you can choose another shooting mode if you d like to continue taking other photos. Then when back in Photo Story, scroll down to Works in Progress, press OK, and select the story you want to complete. Easy! 16 OPERABILITY IMPROVEMENTS: EVF TIME LAG REDUCED TO 16 MILLISECONDS As I recall, the original EVF lag on the E-M1 was 29ms (Olympus has already changed the E-M1 Specs page), and FW 2.0 reduces this to 16ms with certain settings, a reduction of 13ms. Let s think about this for a moment. 13 milliseconds = 13/1,000 th of a second, much closer to 1/100 th of a second than 1/10 th of a second. So, here s the question. Can 13ms really make a difference in real life photography in whether you capture the moment or miss it? It s a big topic on online discussion forums, so a lot of people think it matters. So, here s the other question. What is the lag between our eye Contents of this book Copyright 2014 Gary L. Friedman. All rights reserved.
19 Improvements to Live Guide 19 seeing the moment and the time it takes to make the decision and actually press the shutter release? Yes, I understand that you must try to anticipate those moments, but still is 13ms significant? FW 2.0 reduces EVF image display time lag to 16 milliseconds, but only when frame rate setting is set to high speed. But with frame rate set to high, you then lose focus peaking. It seems there s always a tradeoff. So, if you have Peaking turned on in Custom Menu A --> MF Assist, Frame Rate will be grayed out in its menu (Custom Menu D). Personally, I ll take Peaking over reduced lag time. IMPROVEMENTS TO LIVE GUIDE Live Guide is especially important because it is essentially the only way to change some settings while in iauto, settings like saturation, color temperature, brightness, aperture (dof), and shutter speed. Otherwise, iauto makes those decisions. Before FW 2.0, you could only change one of these. If you changed one of the others, it would just cancel out what you just set, so this is a very nice change. Now, you can change one or all of the Live Guide settings and have all of those settings in effect simultaneously. The settings will remain in effect from one shot to the next, but will be lost (go back to normal) if you leave iauto or turn your camera off. EXPOSURE COMPENSATION IN HDR1 / HDR2 Here s a nice addition for HDR shooting. Sometimes when using the auto HDR1/2, you may have a scene with excessively bright highlights or deep dark shadows. And wouldn t it be nice to be able to move the exposure sequence away from those extremes so your HDR image can more effectively compensate for the high dynamic range you re seeing. This change allows you to compensate the exposure by up to +/-3 EV, when shooting in HDR 1 or HDR 2 In the other HDR modes, where you pick the number of exposures and the EV separation, you still have the full +/-5 EV exposure compensation available to you.
20 20 16 Operability Improvements: COLOR CREATOR IMPROVEMENTS There are two ways to access the Color Creator. You can use the SCP Picture Modes, or use a function button set for Multi Function. The problem used to be that if you used Multi Function to turn on the Color Creator, it stayed on even if you changed the Multi Function to one of the other functions, or took the time to zero out the Color Creator Settings. FW 2.0 adds the ability to cancel Color Creator and return to your original Picture Mode by just pressing the Menu Button while using Color Creator. MOVIE TELE-CONVERTER WITH ART FILTER Movie Tele-converter can now be used simultaneously when Art Filter is set to Picture Mode. AUTO FOCUS WITH CUSTOM SELF TIMER How nice to be able to set the Custom Self Timer to several exposures, with a set interval, and of course a time before it all starts to happen. And the E- M1 will refocus between each frame if your subject moves. In my tests this worked very well. When you enter the Drive Mode to select Custom Timer, you can press the INFO Button to be able to change the timer, number of shots, interval, and whether or not to use AF for each new frame. So they ve even made it optional. Cool. What you need to remember is that it will use the AF area or frame that you have set. MANUAL FOCUS ASSIST WITH MAGNIFIED FRAME I think what they re really talking about here is Focus Peaking and it is a nice addition, but is not always there, depending on how the frame is magnified. There are several ways to magnify the frame. 1. One of the easiest ways is with MF Assist --> Magnify --> On. Then when you turn the focus ring in MF, the image will magnify, and if Peaking is also On, it will kick in. Contents of this book Copyright 2014 Gary L. Friedman. All rights reserved.
21 Magnified Live View now has 3X Another way is to use the Magnify function of the Multi Function feature, which is available if it is assigned to a function button. The only way I could get Peaking to work with this was if I had it assigned to a function button and turned Peaking on with the button even though it was already On in the Menu system. Interesting 3. Of course you can also select S-AF+MF and then you get the magnification (& Peaking) after you AF and then turn the focus ring on the lens. Other ways to engage MF (and MF Assist) include those lenses with the snap focus ring like the Pro 12-40mm, or using the Lever when set to Mode 5 (Custom Menu B). All of the flexibility with Manual Focus, Magnification, and Focus Peaking makes using MF a real pleasure and all of those 3 rd party lenses that we can adapt become just that much more fun to use. MAGNIFIED LIVE VIEW NOW HAS 3X Previously, when using Magnified Live View, you could choose between four different magnifications: 5X, 7X, 10X, and 14X. For me, even 5X was a bit more than I wanted sometimes sometimes, in this magnified view I still wanted to be able to see more of my subject. So now we can! Olympus has added 3X magnification to the choices available. IMPROVED FOCUS PEAKING DISPLAY While talking to Olympus tech support, I was told that this improvement is actually from a better display rate. But it is unrelated to the reduced lag time available when Frame Rate is set to High, which also causes Peaking to become unavailable. I was told this results in a smoother display with Focus Peaking, especially during camera movement. Without a non-firmware-updated E-M1 to compare to, I really can t tell the difference over the way it used to be. So if anyone out there can do this test with two cameras, before and after, please let me know how it works.
22 22 16 Operability Improvements: ELECTRONIC ZOOM SPEED SETTING Electronic Zoom is sometimes one of those double edged swords. It can be a nice feature, but sometimes it s too slow and sometimes it s just too darned fast. So you re either overshooting your desired zoom setting, or taking way too long to get there and miss the shot. At least now you have some control over that for those times when you have a lens with electronic zoom mounted on your camera. You ll find the settings here: Custom Menu K (Utility) --> Electronic Zoom Speed --> Low, Normal, or High for Still Pictures and Movies. UNDERWATER/UNDERWATER MACRO This is a straightforward improvement, but also requires some correction since the Olympus information about this was incorrect (confirmed by talking with Olympus tech support). First, the new part. Underwater/Underwater macro functions can now be assigned to the Down or Right keys on the arrow pad, if the arrow pad is set to Direct Function. The initial information from Olympus indicated this could be assigned to either the Left or Down keys, but that is incorrect. It should have read Right instead of Left. DOUBLE TAP TOUCH WITH SCP Oh Yeah! Just like our phones and tablets, now! It only works when using the Super Control Panel (SCP), but that s okay with me since the SCP is my default screen for changing settings. If you prefer the Live Control Panel well sorry about that. Maybe next time. This happens to be a very nice feature to have. Sometimes it s just nice to save a step or two and not have to click a button or turn a dial to make a setting. So just Double Tap and you re there. Contents of this book Copyright 2014 Gary L. Friedman. All rights reserved.

23 Level Gauge / Histogram with Magnified Display 23 LEVEL GAUGE / HISTOGRAM WITH MAGNIFIED DISPLAY According to the information released by Olympus, the Level Guage and/or Histogram can now be displayed during magnified frame display. They also claim that the Touch Off icon has been added to the magnified frame display. However, I ve been unsuccessful at getting any of these to work. Normally, Olympus Tech. Support is very helpful, but I ve had two conversations with senior tech support people at Olympus, and they couldn t seem to get it to work either. In the meantime, I think this question has probably been forwarded up the food chain to engineering to see what this really means. So that's the state of these features. If Olympus ever clarifies the operation of this feature, the fastest way to learn about it is to follow Mike Hendren's blog at HDR1/HDR2 SHOOTING INFO NOW ON PLAYBACK After shooting in either HDR1 or HDR2, the playback screen that shows the EXIF information will also show which of these modes was used. (Figure 1-9) This isn t a huge deal, but is quite nice to be able to see which photos (in camera) were taken using the HDR1/2 modes. If you go past HDR1/2 to the real HDR bracketing settings, Figure 1-9: In the yellow boxes you ll see HDR2, indicating the HDR mode that was used. then you get all three (or five or seven) images, but no indication during playback that they were taken in the HDR bracketing mode.

24 24 16 Operability Improvements: LIVE COMPOSITE ENHANCEMENT While shooting in Live Composite, the screen shows elapsed time and number of shots taken so far. But if you don t write this down, it would otherwise be lost except for this improvement to Olympus Viewer 3. Now, when you view a Live Composite image in OV3, you can see the total number of images used for the composite. First, make sure the Information panel is showing (if not, click the round i icon in the upper right corner). Then expand Display and Shooting Information and at the bottom of the Shooting Information panel, you ll see something like this: Composite Settings Lighten, 20frame. This indicates that 20 frames were taken for the composite photo. BKT MENU WITH BKT BUTTON Until now, changes to your bracketing settings had to be done in the menu system. But now, it s very easy. Just assign BKT to one of your function buttons and it does double duty. Press the button to turn on Bracketing. Press and Hold the button for a couple of seconds and you will see a Bracketing menu that s way better than the menu you find in the Menu system. (See Figure 1-10.) Figure 1-10: Press and Hold the function button you ve assigned to BKT, and this menu pops up. Contents of this book Copyright 2014 Gary L. Friedman. All rights reserved.
25 Olympus Image Share App Version MISC. INFORMATION OLYMPUS IMAGE SHARE APP VERSION 2.4 Olympus Image Share App Ver. 2.4 is now supported. CAMERA MANUAL UPDATES In a very unusual move and what may be a precedent, Olympus updated the E-M1 camera manual to include FW 2.0 information. Plus, they also expanded some of the other information. Below are a couple of examples. 1. In the Menu explanations, there is now some new information about Anti-Shock. Select [0 sec] to reduce the slight blur caused by the shutter. Sequential shooting is not available when [0 sec] is selected. To further amplify this, I ll add a reminder that even when Anti-Shock is set to [0 sec], to get this benefit, you must select the appropriate Anti-Shock setting in the Drive Menu. 2. There is a new item in Custom Menu I (Movie). At the very bottom of the menu, you ll find a Volume Limiter setting to allow the camera to automatically limit microphone sensitivity in high volume situations. REPORTED PROBLEMS Yes, like all software, even cameras firmware can have bugs. Or sometimes maybe it s not even a bug, but just unexpected behavior. And the E-M1 FW 2.0 is no different. First, the fact that installing the firmware update resets your camera is no surprise. It is even mentioned by Olympus so that you realize you ll need to go back through the menus and readjust most of your preferred settings. So to make this easy, you may want to go through and write down your settings before installing the update. Another reported problem that is probably related to the reset is the sudden appearance / reappearance of hot or dead pixels. Running the Pixel Mapping function in Custom Menu K (Utility) --> Pixel Mapping --> Start will hopefully repair this issue.
26 LIKE WHAT YOU JUST READ? This e-booklet is a companion to the best-selling ebook by professional photographer Gary L. Friedman at You can buy the original ebook in a 3-file bundle (.pdf,.epub, and.mobi good for all of your electronic devices) and all files are DRM-Free, meaning you can copy them to all of your devices, make backups, print them, etc. They re yours. (The only thing I ask you not to do sell them online.) Learn more about the book and even view some sample pages at
AF Area Mode. Face Priority
 Chapter 4: The Shooting Menu 71 AF Area Mode This next option on the second screen of the Shooting menu gives you several options for controlling how the autofocus frame is set up when the camera is in
E-520. Built-in image stabiliser for all lenses. Comfortable Live View thanks to high speed contrast AF** 100% D-SLR quality
 E-520 Built-in image stabiliser for all lenses Excellent dust reduction system Professional functions 10 Megapixel Live MOS sensor Comfortable Live View thanks to high speed contrast AF** 100% D-SLR quality
The Pro Masterpiece with world's fastest AF* and built-in IS.
 E-30 Art Filters, Multi Exposure, Wireless flash, Multiaspect Fully biaxial high-speed 11 point AF system High Speed 12.3 Megapixel Live MOS sensor Live View with multi-angle LCD 5fps sequential shooting
How to combine images in Photoshop
 How to combine images in Photoshop In Photoshop, you can use multiple layers to combine images, but there are two other ways to create a single image from mulitple images. Create a panoramic image with
E-420. Exceptional ease of use. 100% D-SLR quality. 10 Megapixel Live MOS sensor Shadow Adjustment Technology
 E-420 World's most compact D- SLR* Comfortable viewing with Autofocus Live View 6.9cm / 2.7'' HyperCrystal II LCD Face Detection for perfectly focused and exposed faces Exceptional ease of use 100% D-SLR
Winston C Hall Tuner Photography
 D4s Custom Banks Settings Shooting and Custom Setting Menus Created by: Winston C Hall Tuner Photography 714 D4s Shooting and Custom Settings Banks This guide is an outline of my recommendations for the
Name Digital Imaging I Chapters 9 12 Review Material
 Name Digital Imaging I Chapters 9 12 Review Material Chapter 9 Filters A filter is a glass or plastic lens attachment that you put on the front of your lens to protect the lens or alter the image as you
CHAPTER 7 - HISTOGRAMS
 CHAPTER 7 - HISTOGRAMS In the field, the histogram is the single most important tool you use to evaluate image exposure. With the histogram, you can be certain that your image has no important areas that
E-420. Exceptional ease of use. 100% D-SLR quality. 10 Megapixel Live MOS sensor Shadow Adjustment Technology
 E-420 World's most compact D- SLR* Comfortable viewing with Autofocus Live View 6.9cm / 2.7'' HyperCrystal II LCD Face Detection for perfectly focused and exposed faces Exceptional ease of use 100% D-SLR
New Features Guide. Version 3.00
 New Features Guide Version 3.00 Features added or changed as a result of firmware updates may no longer match the descriptions in the documentation supplied with this product. Visit our website for information
D850 Settings
 D850 Settings 10.03.17 PLAYBACK MENU Delete Playback folder ALL Hide image Playback display options > Additional photo info > None Highlights Shooting data Overview Copy images(s) Image review - OFF After
Sony A6000. Custom Setup Suggestions A professional s perspective
 Sony A6000 Custom Setup Suggestions A professional s perspective Community Support Facebook Google+ Flickr Contents Meet the Author Why customise your A6000 camera? Getting Started Camera Settings Drive
PHIL MORGAN PHOTOGRAPHY
 Including: Creative shooting Manual mode Editing PHIL MORGAN PHOTOGRAPHY A free e-book to help you get the most from your camera. Many photographers begin with the naïve idea of instantly making money
The Essential Guide To Advanced EOS Features. Written by Nina Bailey. Especially for Canon EOS cameras
 The Essential Guide To Advanced EOS Features Written by Nina Bailey Especially for Canon EOS cameras Introduction 2 Written, designed and images by Nina Bailey www.eos-magazine.com/ebooks/es/ Produced
The original image. Let s get started! The final result.
 Miniature Effect With Tilt-Shift In Photoshop CS6 In this tutorial, we ll learn how to create a miniature effect in Photoshop CS6 using its brand new Tilt-Shift blur filter. Tilt-shift camera lenses are
KNOW YOUR CAMERA LEARNING ACTIVITY - WEEK 9
 LEARNING ACTIVITY - WEEK 9 KNOW YOUR CAMERA Tina Konradsen GRA1 QUESTION 1 After reading the appropriate section in your prescribed textbook From Snapshots to Great Shots, please answer the following questions:
D750 Settings
 D750 Settings 12.04.14 PLAYBACK MENU Delete Playback folder ALL Hide image Playback display options > Additional photo info > Highlights Shooting data Overview Copy images(s) Image review - OFF After delete
PHOTOGRAPHER S GUIDE TO THE PANASONIC LUMIX LX7
 PHOTOGRAPHER S GUIDE TO THE PANASONIC LUMIX LX7 In Intelligent Auto, Creative Control, and Scene shooting modes, ISO is set to Auto and the ISO button has no effect for controlling this setting. You also
TG 5 Red. Harshest conditions. Exceptional shots.
 TG 5 Red Waterproof to 15m**, shockproof to 2.1m***, crushproof to 100kg**** and freezeproof to 10 C Super bright 1:2.0 4.9 wide aperture high speed lens for shooting with fast shutter speeds TruePic VIII
Until now, I have discussed the basics of setting
 Chapter 3: Shooting Modes for Still Images Until now, I have discussed the basics of setting up the camera for quick shots, using Intelligent Auto mode to take pictures with settings controlled mostly
ONE OF THE MOST IMPORTANT SETTINGS ON YOUR CAMERA!
 Chapter 4-Exposure ONE OF THE MOST IMPORTANT SETTINGS ON YOUR CAMERA! Exposure Basics The amount of light reaching the film or digital sensor. Each digital image requires a specific amount of light to
Photographing the Night Sky
 JANUARY 20, 2018 ADVANCED Photographing the Night Sky Featuring STEVE HEINER, DIANA ROBINSON, PETE SALOUTOS & DEBORAH SANDIDGE Deborah Sandidge Nikon D3, 16mm lens, 30 sec., f/2.8. Image is one of a series
Dust reduction filter. Live View
 E P2 Art Filters, Multi Exposure, Multi aspect Tiltable, high contrast and high resolution electronic viewfinder* Accessory Port High Speed 12.3 Megapixel Live MOS sensor High performance built in Real
FOCUS, EXPOSURE (& METERING) BVCC May 2018
 BVCC May 2018") FOCUS, EXPOSURE (& METERING) BVCC May 2018 SUMMARY Metering in digital cameras. Metering modes. Exposure, quick recap. Exposure settings and modes. Focus system(s) and camera controls. Challenges & Experiments.
FOCUS, EXPOSURE (& METERING) BVCC May 2018 SUMMARY Metering in digital cameras. Metering modes. Exposure, quick recap. Exposure settings and modes. Focus system(s) and camera controls. Challenges & Experiments.
Take Control of Your Camera
 Take Control of Your Camera With all of the technology packed into our cameras, it is easy to hand over control & blame our equipment when our images don t meet our expectations.. In this workshop we will
A Beginner s Guide To Exposure
 A Beginner s Guide To Exposure What is exposure? A Beginner s Guide to Exposure What is exposure? According to Wikipedia: In photography, exposure is the amount of light per unit area (the image plane
TAKING GREAT PICTURES. A Modest Introduction
 TAKING GREAT PICTURES A Modest Introduction HOW TO CHOOSE THE RIGHT CAMERA EQUIPMENT WE ARE NOW LIVING THROUGH THE GOLDEN AGE OF PHOTOGRAPHY Rapid innovation gives us much better cameras and photo software...
Art Filters, Multi Exposure, Wireless flash, Multiaspect
 E-620 The world s smallest and lightest D-SLR* with Builtin Image Stabilisation and a portable creative studio! High Speed 12.3 Megapixel Live MOS sensor 7 point AF system High-performance built-in image
Acknowledgments 13 Introduction 14 Chapter 1: Preliminary Setup Chapter 2: Basic Operations Chapter 3: Th e Shooting Modes
 Contents Acknowledgments 13 Introduction 14 Chapter 1: Preliminary Setup 17 Setting Up the Camera 17 Charging and Inserting the Battery 17 Inserting the Memory Card 19 Setting the Language, Date, and Time
system* 5fps sequential shooting with 17 image RAW buffer High Speed 10.1 Megapixel Live MOS sensor Excellent variety of digital lenses Live View
 E-3 Professional working tool Fully biaxial high-speed 11 point AF system High-performance built-in image stabiliser Qualified image processing with new TruePic III World's fastest auto focus system* 5fps
Dust reduction filter. Live View
 E P1 14-42mm Kit Art Filters, Multi Exposure, Multi aspect High performance built in image stabiliser Real time effect monitoring Multiple exposure function with LCD monitor display of current view on
CELL PHONE PHOTOGRAPHY
 CELL PHONE PHOTOGRAPHY Understanding of how current phone cameras are different due to advanced technology What this presentation will provide What features are available for control of your phone photography
Basics of Photographing Star Trails
 Basics of Photographing Star Trails By Rick Graves November 15, 2016 1 What are Star Trails? Night sky images with foreground elements that show the passage of time and the motion of the stars 2 Which
HISTOGRAMS. These notes are a basic introduction to using histograms to guide image capture and image processing.
 HISTOGRAMS Roy Killen, APSEM, EFIAP, GMPSA These notes are a basic introduction to using histograms to guide image capture and image processing. What are histograms? Histograms are graphs that show what
Does Nikon Coolpix L810 Have Manual Settings
 Does Nikon Coolpix L810 Have Manual Settings Nikon COOLPIX L810 Manual Online: Using The Self-timer. The camera's If a setting is not applied by pressing the k button. a few seconds,. COOLPIX L810 from
Nikon D300 Custom Functions
 Nikon D300 Custom Functions This spreadsheet allows you to record the custom functions saved in each menu and bank on the camera. I've carefully laid out the tabs and menus to match the camera as exactly
Intro to Digital SLR and ILC Photography Week 1 The Camera Body
 Intro to Digital SLR and ILC Photography Week 1 The Camera Body Instructor: Roger Buchanan Class notes are available at www.thenerdworks.com Course Outline: Week 1 Camera Body; Week 2 Lenses; Week 3 Accessories,
Chapter 11-Shooting Action
 Chapter 11-Shooting Action Interpreting Action There are three basic ways of interpreting action in a still photograph: Stopping action (42) Blurring movement Combining both in the same image Any
In the past year or so, just about everyone I know has gone out and purchased
 In This Chapter Having some fun with your digital camera Getting out and shooting Chapter 1 Jumping Right In Transferring images from your camera to your computer Opening images in Photoshop Printing and
Art Filters, Multi Exposure, Wireless flash, Multiaspect. Filter
 E-620 The world s smallest and lightest D-SLR* with Builtin Image Stabilisation and a portable creative studio! High Speed 12.3 Megapixel Live MOS sensor 7 point AF system High-performance built-in image
Topaz Labs DeNoise 3 Review By Dennis Goulet. The Problem
 Topaz Labs DeNoise 3 Review By Dennis Goulet The Problem As grain was the nemesis of clean images in film photography, electronic noise in digitally captured images can be a problem in making photographs
gfm-app.com User Manual
 gfm-app.com User Manual 03.07.16 CONTENTS 1. MAIN CONTROLS Main interface 3 Control panel 3 Gesture controls 3-6 2. CAMERA FUNCTIONS Exposure 7 Focus 8 White balance 9 Zoom 10 Memory 11 3. AUTOMATED SEQUENCES
èõ Changing Recording Modes Text Mode Continuous Shooting Mode Changing Flash Modes Flash Off Mode Auto Mode...
 3 ADVANCED SHOOTING Chapter ëêå@å@ èõ Changing Recording Modes... 52 Text Mode... 52 Continuous Shooting Mode... 53 Changing Flash Modes... 55 Flash Off Mode... 56 Auto Mode... 57 Forced Flash Mode...
Focus Shift, the Basics: Stacking Focus
 JANUARY 31, 2019 ADVANCED Focus Shift, the Basics: Stacking Focus Focus Shift: what it does and how to use it The D850 s handy focus shift feature is used chiefly to create the images for focus stacking,
TAKING GREAT PICTURES. A Modest Introduction
 TAKING GREAT PICTURES A Modest Introduction 1 HOW TO CHOOSE THE RIGHT CAMERA EQUIPMENT 2 THE REALLY CONFUSING CAMERA MARKET Hundreds of models are now available Canon alone has 41 models 28 compacts and
Nikon Z6 / Z7 Settings
 Nikon Z6 / Z7 Settings 11.22.2018 PLAYBACK MENU Delete Playback folder ALL Playback display options > Additional photo info > Highlights Shooting data Overview None Image review - OFF After delete > Continue
Introduction... 1 Part I: Fast Track to Super Snaps Part II: Taking Creative Control Part III: After the Shot
 Contents at a Glance Introduction... 1 Part I: Fast Track to Super Snaps... 5 Chapter 1: Getting Up and Running...7 Chapter 2: Reviewing Five Essential Picture-Taking Options...39 Part II: Taking Creative
Mac User s Manual for the CamRanger, CamRanger Share, and CamRanger PT Hub & Tripod. Supports Mac OS 10.7/Lion, 10.8/Mountain Lion, and Mavericks
 Mac User s Manual for the CamRanger, CamRanger Share, and CamRanger PT Hub & Tripod Supports Mac OS 10.7/Lion, 10.8/Mountain Lion, and Mavericks Table of Contents CamRanger Hardware... 3 CamRanger Registration...
1. This paper contains 45 multiple-choice-questions (MCQ) in 6 pages. 2. All questions carry equal marks. 3. You can take 1 hour for answering.
 in 6 pages. 2. All questions carry equal marks. 3. You can take 1 hour for answering.") UNIVERSITY OF MORATUWA, SRI LANKA FACULTY OF ENGINEERING END OF SEMESTER EXAMINATION 2007/2008 (Held in Aug 2008) B.Sc. ENGINEERING LEVEL 2, JUNE TERM DE 2290 PHOTOGRAPHY Answer ALL questions in the answer
UNIVERSITY OF MORATUWA, SRI LANKA FACULTY OF ENGINEERING END OF SEMESTER EXAMINATION 2007/2008 (Held in Aug 2008) B.Sc. ENGINEERING LEVEL 2, JUNE TERM DE 2290 PHOTOGRAPHY Answer ALL questions in the answer
Basic Camera Craft. Roy Killen, GMAPS, EFIAP, MPSA. (c) 2016 Roy Killen Basic Camera Craft, Page 1
 2016 Roy Killen Basic Camera Craft, Page 1") Basic Camera Craft Roy Killen, GMAPS, EFIAP, MPSA (c) 2016 Roy Killen Basic Camera Craft, Page 1 Basic Camera Craft Whether you use a camera that cost $100 or one that cost $10,000, you need to be able
Basic Camera Craft Roy Killen, GMAPS, EFIAP, MPSA (c) 2016 Roy Killen Basic Camera Craft, Page 1 Basic Camera Craft Whether you use a camera that cost $100 or one that cost $10,000, you need to be able
Photography for Model Railroaders
 Photography for Model Railroaders Ted Culotta Prototype Rails August 10-12, 2019 This file will be posted to prototopics.blogspot.com What equipment to use? What do I use? The best camera is the one in
<Motion Panorama> 180 Vertical : 2160 x 9600 Horizontal : 9600 x Vertical : 2160 x 6400 Horizontal : 6400 x 1440
 FUJIFILM X-T10 Spec Sheet Model name FUJIFILM X-T10 Number of effective pixels 16.3 million pixels Image sensor 23.6mm x 15.6mm (APS-C) X-Trans CMOS II with primary color filter Total number of pixels:
5 THINGS YOU PROBABLY DIDN T KNOW ABOUT CAMERA SHUTTER SPEED
 Photzy 5 THINGS YOU PROBABLY DIDN T KNOW ABOUT CAMERA SHUTTER SPEED Quick Guide Written by Kent DuFault 5 THINGS YOU PROBABLY DIDN T KNOW ABOUT CAMERA SHUTTER SPEED // PHOTZY.COM 1 There are a few things
Color and More. Color basics
 Color and More In this lesson, you'll evaluate an image in terms of its overall tonal range (lightness, darkness, and contrast), its overall balance of color, and its overall appearance for areas that
Very High Dynamic Range Photography
 Very High Dynamic Range Photography Night photography with Moons & Lights November 24, 2917 Guy Huntley The Complete Photographer Meetup The Preprocessing & The Postprocessing Manual Bracketing Camera
or, How do I get this thing to do what I want? Copyright 2016 Paul Fisher
 or, How do I get this thing to do what I want? Copyright 2016 Paul Fisher So just what are the basic camera operations we re going to discuss? Set up. How do you have your camera configured ISO setting
Photoshop Elements Hints by Steve Miller
 2015 Elements 13 A brief tutorial for basic photo file processing To begin, click on the Elements 13 icon, click on Photo Editor in the first box that appears. We will not be discussing the Organizer portion
Photo Effects & Corrections with PhotoFiltre
 Photo Effects & Corrections with PhotoFiltre P 330 / 1 Fix Colour Problems and Apply Stylish Effects to Your Photos in Seconds with This Free Software If you re keen on digital photography, you probably
Photoshop: Manipulating Photos
 Photoshop: Manipulating Photos All Labs must be uploaded to the University s web server and permissions set properly. In this lab we will be manipulating photos using a very small subset of all of Photoshop
In order to manage and correct color photos, you need to understand a few
 In This Chapter 1 Understanding Color Getting the essentials of managing color Speaking the language of color Mixing three hues into millions of colors Choosing the right color mode for your image Switching
Black and White Photoshop Conversion Techniques
 Black and White Photoshop Conversion Techniques Andrew Gibson on Jan 27th 2011 Final Product What You'll Be Creating A quick glance through any photography or fashion magazine, or at the photos on social
Love Your Camera (Introduction to D-SLR)
") Love Your Camera (Introduction to D-SLR) Photography Workshops and Tours in New York City Phone: (646) 736-3231 Email: info@rememberforever.co Web: www.rememberforever.co Copyright 2009-2013 - Remember
Love Your Camera (Introduction to D-SLR) Photography Workshops and Tours in New York City Phone: (646) 736-3231 Email: info@rememberforever.co Web: www.rememberforever.co Copyright 2009-2013 - Remember
Lightroom Classic CC and Lightroom CC Updates
 Lightroom Classic CC and Lightroom CC Updates Information about the latest December 2017 Lightroom system updates This December Adobe have released updates for the entire Lightroom CC ecosystem, including
So far, I have discussed setting up the camera for
 Chapter 3: The Shooting Modes So far, I have discussed setting up the camera for quick shots, relying on features such as Auto mode for taking pictures with settings controlled mostly by the camera s automation.
Awesome Skies: Tips and Techniques for Photographing the Northern Lights
 JUNE 29, 2018 INTERMEDIATE Awesome Skies: Tips and Techniques for Photographing the Northern Lights Featuring TOM BOL & ADAM WOODWORTH Tom Bol Tom Bol captured the Aurora coming down like a waterfall as
Digital Matrix User s Guide
 Digital Matrix User s Guide Dear Legacy2Digital Customers: Our hope is that you fully enjoy using your modified manual focus Nikon or third party lens on your DSLR camera and that our conversion meets
PHOTOGRAPHING THE LUNAR ECLIPSE
 1/29/18 PHOTOGRAPHING THE LUNAR ECLIPSE NICK SINNOTT CHICAGO PHOTOGRAPHY CLASSES PREPARATION TIMING AND FINDING LOCATION https://www.timeanddate.com/moon/phases/ - Dates of Lunar Phases 1 PREPARATION TIMING
Impact With Smartphone Photography. Smartphone Camera Handling. A Smartphone for Serious Photography?
 A Smartphone for Serious Photography? DSLR technically superior but photo quality depends on technical skill, creative vision Smartphone cameras can produce remarkable pictures always at ready After all
Digital Director Troubleshooting
 Digital Director Troubleshooting Please find below the most common FAQs to assist in the understanding and use of the product. For details related to each specific camera model, refer to the Compatibility
CHAPTER 12 - HIGH DYNAMIC RANGE IMAGES
 CHAPTER 12 - HIGH DYNAMIC RANGE IMAGES The most common exposure problem a nature photographer faces is a scene dynamic range that exceeds the capability of the sensor. We will see this in the histogram
One Week to Better Photography
 One Week to Better Photography Glossary Adobe Bridge Useful application packaged with Adobe Photoshop that previews, organizes and renames digital image files and creates digital contact sheets Adobe Photoshop
Chapter5 Camera Settings and Other Functions
 Chapter5 Camera Settings and Other Functions Changing Camera Settings.. 106 Adding or Deleting a Folder... 106 Keep Settings... 108 Changing the LCD Confirmation Time... 109 Auto Power Off Setting... 110
Photo Editing in Mac and ipad and iphone
 Page 1 Photo Editing in Mac and ipad and iphone Switching to Edit mode in Photos for Mac To edit a photo you ll first need to double-click its thumbnail to open it for viewing, and then click the Edit
High Dynamic Range (HDR) photography is a combination of a specialized image capture technique and image processing.
 photography is a combination of a specialized image capture technique and image processing.") Introduction High Dynamic Range (HDR) photography is a combination of a specialized image capture technique and image processing. Photomatix Pro's HDR imaging processes combine several Low Dynamic Range
Introduction High Dynamic Range (HDR) photography is a combination of a specialized image capture technique and image processing. Photomatix Pro's HDR imaging processes combine several Low Dynamic Range
D-Movie Setting Guide
 D-Movie Setting Guide En Table of Contents Workflow Making Movies: Workflow...4 Buttons and Icons Frequently-Used Controls...6 The Live View Display...7 The Live View Display... 7 The Information Display:
230 Photographer s Guide to the Nikon Coolpix P610. GPS log creating Grid displaying in shooting mode 114,
 Index A AC adapter Nikon model EH-67A 218 219 Active D-Lighting menu option 99 100 incompatibility with other settings 101 Adobe Bridge CC software reading location data with 164 Adobe Photoshop Elements
Shooting Menu. Spinnaker Sail Multi-Exposure Resembles a Flying Tern Jim Austin (Jimages)
") Shooting Menu Spinnaker Sail Multi-Exposure Resembles a Flying Tern Jim Austin (Jimages) 57 The Shooting Menu settings are some of the most-used functions in the camera. Spend time carefully learning about
Shooting Menu Spinnaker Sail Multi-Exposure Resembles a Flying Tern Jim Austin (Jimages) 57 The Shooting Menu settings are some of the most-used functions in the camera. Spend time carefully learning about
Capturing God s Creation Through The Lens. Session 3 From Snap Shots to Great Shots January 20, 2013 Donald Jin
 Capturing God s Creation Through The Lens Session 3 From Snap Shots to Great Shots January 20, 2013 Donald Jin donjin@comcast.net Course Overview Jan 6 Setting The Foundation Jan 13 Building Your Craft
Drive Mode. Details for each of these Drive Mode settings are discussed below.
 Chapter 4: Shooting Menu 67 When you highlight this option and press the Center button, a menu appears at the left of the screen as shown in Figure 4-20, with 9 choices represented by icons: Single Shooting,
Case Air Wireless TETHERING AND CAMERA CONTROL SYSTEM
 Case Air Wireless TETHERING AND CAMERA CONTROL SYSTEM PRODUCT MANUAL CAWTS03 v3.16 Apple ios ABOUT CASE AIR TABLE OF CONTENTS FEATURES ACCESSORIES The Case Air Wireless Tethering System connects and transfers
Creating Stitched Panoramas
 Creating Stitched Panoramas Here are the topics that we ll cover 1. What is a stitched panorama? 2. What equipment will I need? 3. What settings & techniques do I use? 4. How do I stitch my images together
Dust reduction filter. Excellent variety of digital lenses. Live View
 E-5 Professional working tool Fully biaxial high-speed 11 point AF system High Speed 12.3 Megapixel Live MOS sensor High-performance built-in image stabiliser Splashproof magnesium alloy body Unique dust
232 Photographer s Guide to the Nikon Coolpix P900. LumoPro LP using with Coolpix P Yongnuo YN560 III 221 Eye sensor 114
 Index A AC adapter Nikon model EH-67A 219 220 Active D-Lighting menu option 100 101 incompatibility with other settings 102 Adobe Bridge CC software reading location data with 165 Adobe Photoshop Elements
Capturing Realistic HDR Images. Dave Curtin Nassau County Camera Club February 24 th, 2016
 Capturing Realistic HDR Images Dave Curtin Nassau County Camera Club February 24 th, 2016 Capturing Realistic HDR Images Topics: What is HDR? In Camera. Post-Processing. Sample Workflow. Q & A. Capturing
Introduction to HDR Photography with Brian McPhee
 Introduction to HDR Photography with Brian McPhee What is HDR Photography? What is HDR Photography? HDR stands for High Dynamic Range What is HDR Photography? HDR stands for High Dynamic Range It is a
TOPAZ LENS EFFECTS QUICK START GUIDE
 TOPAZ LENS EFFECTS QUICK START GUIDE Introduction Topaz Lens Effects is designed to give you the power to direct and focus your viewer s eyes where you want them. With Lens Effects, you get advanced technology
D-555 ZOOM. Advanced Manual DIGITAL CAMERA. Detailed explanations of all the functions for getting the most out of your camera.
 DIGITAL CAMERA D-555 ZOOM Advanced Manual Detailed explanations of all the functions for getting the most out of your camera. Basic Operation Shooting Playing Back Printing Online Pictures Camera Settings
CameraRC Deluxe Version 2.4.3
 CameraRC Deluxe Version 2.4.3 Copyright 2018 J-ProSoftware, LLC Table of Contents CameraRC Deluxe Help - Version 2.4.3 Welcome to CameraRC Deluxe for Nikon Cameras... Getting Started with CameraRC Deluxe...
CANON EOS REBEL T3I/600D FOR DUMMIES
 Page 1 of 10 PHOTOGRAPHY CAMERAS CANON CAMERA CANON EOS REBEL T3I/600D FOR DUMMIES CHEAT SHEET CANON EOS REBEL T3I/600D FOR DUMMIES From Canon EOS Rebel T3i / 600D For Dummies By Julie Adair King Your
B&W Photos from Colour:
 Quick and Dirty Methods for PS, PS Elements and Canon Software 8/1/2007 New Westminster Photography Club Derek Carlin New Westminster Photography Club Page 1 Introduction This is a very brief article on
Adobe Photoshop CC 2018 Tutorial
 Adobe Photoshop CC 2018 Tutorial GETTING STARTED Adobe Photoshop CC 2018 is a popular image editing software that provides a work environment consistent with Adobe Illustrator, Adobe InDesign, Adobe Photoshop,
Introduction to camera usage. The universal manual controls of most cameras
 Introduction to camera usage A camera in its barest form is simply a light tight container that utilizes a lens with iris, a shutter that has variable speeds, and contains a sensitive piece of media, either
inphoto ID Canon and Olympus camera control software Automatic ID photography User Guide
 inphoto ID Canon and Olympus camera control software Automatic ID photography User Guide 2006 Akond company 197342, Russia, St.-Petersburg, Serdobolskaya, 65a Phone/fax: +7(812)600-6918 Cell: +7(921)757-8319
Specifications for Fujifilm FinePix F850EXR 16MP Digital Camera
 Specifications for Fujifilm FinePix F850EXR 16MP Digital Camera Model name FinePix F850EXR Number of effective pixels 16.0 million pixels Image sensor 1/2-inch EXR CMOS with primary color filter Storage
Case Air Wireless TETHERING AND CAMERA CONTROL SYSTEM
 Case Air Wireless TETHERING AND CAMERA CONTROL SYSTEM PRODUCT MANUAL CAWTS03 v3.13 Mac OS ABOUT CASE AIR The Case Air Wireless Tethering System connects and transfers images instantly from your camera
silent seat ecourse & ebook
 silent seat ecourse & ebook Heyyyy!!! Welcome to learn manual mode, a momtographer crash course. I am seriously so excited to help you take your camera out of auto and into manual and start getting those
Adding Content and Adjusting Layers
 56 The Official Photodex Guide to ProShow Figure 3.10 Slide 3 uses reversed duplicates of one picture on two separate layers to create mirrored sets of frames and candles. (Notice that the Window Display
FE-110/X-705 FE-100/X-710
 DIGITAL CAMERA FE-110/X-705 FE-100/X-710 Advanced Manual Detailed explanations of all the functions for getting the most out of your camera. Basic Operation Shooting Playing Back Printing Online Pictures
Mastering Y our Your Digital Camera
 Mastering Your Digital Camera The Exposure Triangle The ISO setting on your camera defines how sensitive it is to light. Normally ISO 100 is the least sensitive setting on your camera and as the ISO numbers
Aperture Priority Mode
 Chapter 3: Shooting Modes for Still Images 23 The Program Shift function is available only in Program mode; it works as follows. Once you have aimed the camera at your subject, the camera displays its