easyhdr 3.13 User Manual Bartłomiej Okonek
|
|
|
- Silvester Morton
- 5 years ago
- Views:
Transcription


1 User Manual Bartłomiej Okonek
2 Table of contents 1. Introduction User interface Workspace Main tabbed panel Additional tone mapping options panel High DPI support HDR radiance map generation Taking the photographs Image sequence loading Loading RAW photos HDR generation Pre-processing Lens correction Alignment HDR image generation options True HDR Smart Merge Image Stacking Tone mapping Global vs. local operator Global Operator: Compression, Gamma & Saturation Global Operator: Tone curve Local Operator: Mask Local Operator: Local Contrast Black & white clip (contrast) Color saturation Color adjustment Vignette d LUT color grading Importing 3d LUT files Applying 3d LUTs Layers Managing layers /74
3 5.2. Painting the mask Tone mapping settings Image transformations Clone/healing tool Post processing Gaussian blur (smoothing) Unsharp mask (sharpening) Median filter (noise reduction) Bilateral filter (noise reduction) Sample/target balance Color management Batch processing Automatic task list creation Tone mapping settings management, presets Saving the result Exporting to external editor Saving and restoring projects Program options Adobe Lightroom plug-in Installation and setup Plug-in usage...72 You can find some additional documentation and other material regarding easyhdr software on the documentation/ website. Tips and Tricks HDR Ghost Effect Removal What is the Exposure Value (EV)? Astrophotography and the HDR image processing techniques. HDR from MARS! Lens Correction 3/74
 and on Mac OS X 10.10 and above. The basic idea of High Dynamic Range image processing is depicted on the graphic below.")
4 1. Introduction EasyHDR is an image processing software that produces and tone maps High Dynamic Range (HDR) images out of photo sequences taken with a digital camera. The program works on Windows XP, Vista, 7, 8, 10 (32 and 64-bit) and on Mac OS X and above. The basic idea of High Dynamic Range image processing is depicted on the graphic below. The first step is to take a set of photographs of the same scene, at different exposure settings. EasyHDR will produce a so called HDR image (radiance map) out of these photos. The radiance map is nothing else than just an artificial photograph, but what makes it different is the dynamic range that it covers. It contains all the detail that was acquired on any photo from the set. The only problem is that it cannot be simply displayed on a computer screen as the dynamic range of this display media is relatively very low. Therefore another step has to be done tone mapping or in other words: dynamic range compression. The tone mapping can utilize a global or local operator to achieve the compression. The global operator can give most realistic results but if the dynamic range is very high it is simply not able to give good looking output as the details and colors get washed out. Therefore the local operators are used in addition. They allow much higher level of compression, because they operate on the local level. The details in the image are amplified, while the overall dynamic range is shrunk. This gives a lot of possibilities. You can either make the result look very dramatic, or just achieve better realism by smartly using the local contrast boost. The modern DSLR cameras are equipped with better and better CMOS or CCD sensors in sense of signal to noise ratio. In many cases just a single photo may be good enough for tone mapping. It means that it is not always necessary to take an image sequence, which may sometimes be difficult because of moving subjects or long exposure time needed. Because of that easyhdr allows you to tone map just a single photograph JPEG or for best results: RAW. 4/74
. The panels are resizeable and detachable. In order to change their width use the grip on the inner border.")
5 2. User interface The user interface of the easyhdr's main window consists of two base parts: workspace (1) and a three-tab panel with tools and settings (2). Additionally, when working in the tone mapping mode a third part appears (3). The panels are resizeable and detachable. In order to change their width use the grip on the inner border. To detach, just catch the upper bar with mouse and move it, or alternatively click on the pin icon in the upper-right corner. Attaching back is done similarly. The position and size of the whole window and the panels is restored when program starts. It is possible to reset the panels back to their default positions by pressing F10 key (or in main menu: View Reset window layout). EasyHDR user interface. The top of the window is occupied by main menu (5) and the tool box (4). The latter contains some of the most important options of the main menu. Optionally, there can also be layers, crop and clone/healing toolboxes visible (7). In the bottom, there is a status bar (6) which contains the main progress bar, zoom control for the workspace and a label showing basic information about the image dimensions and pixel value under the mouse cursor. It also shows the last error or warning message. By clicking on it, you can see the list of all errors and warnings. It is possible to re-enable the warnings to be shown in form of dialog windows, if you previously selected not to see them again. Additionally, when the color management is enabled, there are two buttons visible that allow fast access to color profile options. Hover the mouse cursor over them to see the detailed information about color profiles in use. The bottom of the workspace is also the place where The 3d LUT browser appears. 5/74
 additionally hides the left (preset) and the right (tone mapping) tabs and it also hides all the other tool boxes.")
6 There are two options for workspace maximization. F11 key (View Maximize workspace) hides the status bar, title bar and the main tool box. The F key (View Full screen) additionally hides the left (preset) and the right (tone mapping) tabs and it also hides all the other tool boxes. The layers tool and the 3d LUT browser can be minimized to enlarge the workspace during normal operation Workspace In the workspace you can view the input photos, a gamma-corrected HDR intermediate image and of course the preview of tone mapping. What is visible depends on current st ep of operation, but it's also possible to temporarily switch to other views using Photo before processing option. It gives an easy way to compare the result with inputs. It also provides a way to examine the input images after they are pre-processed (aligned and corrected for chromatic aberration). Photo before processing. Comparing the input photos with achieved result can be even easier with the Before/after split view option. When enabled, the view is divided, by an interactive splitter, into before and after processing parts horizontally or vertically. Before/after split view. 6/74
7 The use of workspace is intuitive. Zooming can be done with mouse wheel, to pan around just press the left or right mouse button. When in cropping mode, double click inside of the crop area to accept, or away to cancel. There is a possibility to change the background color of workspace. Just press the button in the lower, left corner. The images are always shown at full resolution, the detail seen depends only on zoom factor. The view is anti-aliased for best viewing quality. When tone mapping, processed is only the visible part of the image, which ensures the best performance. It's possible to tune the performance of the program by toggling live anti-aliasing and live tone mapping. For these settings please see the Program Options section Main tabbed panel There are three tabs that correspond to three steps of processing. Switching between those tabs changes the mode of operation. The steps are the following: 1. loading, pre-processing and HDR generation, 2. tone mapping, 3. post-processing (optional). In the first step it's possible to create new project, add and remove HDR sequence photos, configure the EV values and finally, after optional pre-processing of the input photos, generate the HDR image. When HDR image is generated and some pre-calculations are made, it's possible to work at the second step the tone mapping. At any time you can go back and i.e. regenerate HDR image with different options, or realign input photos, etc. When you are happy with the parameters you can just save the result to file, or proceed to the last step the post-processing. In both cases the whole image is first processed at full resolution (previously only the visible area was processed). It's still possible to go back to tone mapping or even to the first step. In that case however the applied filtering is lost. Both, the tone mapping and post-processing panels are divided into several groups which can be shown or hidden. In case of tone mapping all the settings are always used (automatically upon any change) to generate the preview image in the workspace. Some of the groups (vignette, color adjustment and color saturation) allow disabling the effect ( eye button). This feature is useful when comparing the impact of the effect on the currently tone mapped image. The other special button the padlock, allows locking of the parameters, so that they are not loaded from presets. Additionally, when lock is enabled, the preset thumbnails are regenerated each time parameters are changed in the given group. The post-processing concept is a bit different. Each group is a separate tool which can be used to apply changes to the current image. It means for example that when you apply Gaussian blur twice, the second iteration is done on image produced by the first iteration. Undoing is possible just one step back, but it's also possible to undo all applied post-processing. To do so, just switch back to tab 2 and again to tab 3. For more details about each step please refer to the corresponding part of this document. 7/74

8 Three-step approach to HDR processing Additional tone mapping options panel This panel appears only when you are working at the tone mapping step. It contains three tabs: Presets, History and Navigator. The preset tab allows not only simple selection of built-in presets, but also defining and using user presets. Preset selection is done by left mouse clicking on a thumbnail. You can edit the name of user presets by just clicking on it. Right click on a user preset to get more options: delete, replace and move to group. More information about presets can be found further in this document. The history tab gives undo / redo functionality. All the tone mapping settings changes are stored here with a short, descriptive text. You can easily revert the parameter changes, while still having the ability 8/74

9 to change your mind. Undo and redo is also accessible with Ctrl+Z and Ctrl+Y shortcuts. The navigator tab contains an interactive, tone mapped, full image, thumbnail preview. The part of the photo, currently visible in the workspace is marked with a rectangle. The selection can be moved by dragging it with mouse, zooming is also possible with mouse wheel. The whole panel can be resized by grabbing the edge and moving it with the mouse. In effect, it allows not only resizing the preset thumbnails, but also changing the way they are displayed when the panel is wider, the thumbnails are organized into more columns. The maximum size of the thumbnails can be tweaked with a slider that appears on the top of the panel, when it's wide enough High DPI support EasyHDR supports high DPI display mode (for example 4K screens). It is enabled by default when the high DPI desktop is detected. If needed, it can be forced to disabled state in the Program Options Appearance. Please note that on high DPI screens the program has to do 4 times more calculations to provide live tone mapping preview. Therefore, it may be good to enable the live tone mapping image resampling in Program Options Performance. 9/74
 is the ratio between the brightest and the darkest part of the photographed scene.")

10 Comparison of the display quality on a HighDPI (left) and standard (right) display. You may need to zoom in to see the difference. 3. HDR radiance map generation 3.1. Taking the photographs The dynamic range (or the luminosity range) is the ratio between the brightest and the darkest part of the photographed scene. The human vision can accommodate (in long term) the dynamic range of 1014 : 1 (from starlight to bright objects in full sunlight). The light accommodation is achieved mostly by chemical means, the iris is simply not as flexible. The human eye covers the dynamic range of about : 1 at one time, just the top dynamic range of most real-world scenes. In comparison the dynamic range of typical digital cameras is about : 1 and in case of computer displays it is even much worse. However, having the ability to cover a very wide dynamic range, the human brain is not able to distinguish small changes in brightness and also human perception is logarithmic rather than linear. Of course the digital camera and computer display design take advantage of that fact. The camera chip (CCD or CMOS) responsivity is more or less linear. A 12-bit RAW image is converted to an 8-bit per channel photo using a compression curve stored in the camera in a Look Up Table (LUT). So the whole dynamic range that the camera can cover is compressed (fitted) into 8-bit (0..255) values. 10/74

11 EasyHDR allows you to create a photo that covers a much wider dynamic range than a single image taken with a typical digital camera. First of all you have to acquire enough luminosity information from the photographed scene. You can do that by taking several photographs at different exposure times so the whole dynamic range is covered. The brightest details have to be clearly visible in the shortest exposure and the darkest should be visible in the longest exposure image. It is recommended to set exposure times such that the Exposure Value (EV) step between the images is about 1 or 2 EV. In most cases 3 images will be sufficient. In order to take the image sequence automatically with your digital camera, you can use the Auto Exposure Bracketing (AEB) option. For best results, the images shouldn't be too misaligned and therefore should be taken with a camera on a tripod. However for easyhdr there is no problem if the photos were taken hand-held, because it has automatic as well as manual alignment tools built-in. Both are able to compensate even for perspective misalignment Image sequence loading In order to load the image sequence just click New and multi-select all of the photo files. It is also possible to add more photos to the already loaded sequence or to remove some of them without the need to start again. If you load only one photo you will be able to enhance it with the tone mapping operators that are normally used with HDR data. This feature is called "LDR enhancement" and simply allows enhancing single shots most preferably single RAW photos. EasyHDR will also load photos dragged and dropped on the main program window or photos for which the paths are provided as runtime parameters (useful for plugging easyhdr as an external editor for other image editing or management software). EasyHDR loads JPEG, JPEG 2000 (JP2 and J2K) photos as well as 8 and 16-bit TIFFs. It also features a built-in RAW converter (using LIBRAW and DCRAW) that is capable of importing almost all of the RAW photo formats by all digital camera vendors. It is also possible to load FITS file format, that is most commonly used in astrophotography. EasyHDR supports additionally High Dynamic Range formats: Radiance RGBE (*.hdr), OpenEXR (*.exr) and 32-bit TIFF. There is a possibility to resize photos on load (only RAWs and JPEG/JPEG2000). In order to be able to use this feature please enable first: Settings Show options when loading photos in the main menu. 11/74

12 When the resizing is disabled, it is possible to load sequences of photos that slightly differ in size. The size difference allowance can be defined in the Program Options Miscellaneous. By default the allowance is set to 0%, meaning that all input photos in the sequence have to have exactly the same dimensions Loading RAW photos EasyHDR, for RAW decoding, uses DCRAW or its compatible successor LIBRAW. By default LIBRAW is selected, but in case of trouble, it s possible to switch back to DCRAW by selecting it in the Program Options Miscellaneous. EasyHDR provides a graphical interface to LIBRAW/DCRAW in a form of a dialog window displayed when a RAW image is being loaded. You can select the target color space for the decoded image. The standard one is srgb, but with ProPhoto you will have a wider color gamut, which will help, while tone mapping, preserve details in the most color-saturated areas. Please note that easyhdr s color management module will make pixels in any color space to be displayed correctly in the workspace. EasyHDR will also embed the image s color space definition into the output image file, so other applications can properly decode it. If you want the final result to be used by a non-color space aware media, you should select automatic conversion to srgb when the result is saved. The white balance correction at the RAW decoding step is the best way to achieve greatest possible color correction quality. It's because the operation is done on raw data. By default, the coefficients measured by the camera, at the time of taking the photograph, are used, but you can either manually modify the multipliers (advanced) or pick a sample from the preview image. The picked color is the targeted neutral point (area that should become de-saturated, or grayscale). In case of noise filtering, it's worth mentioning that the Median filter is useful for removing hot pixels, while the Wavelet filter smooths random noise. The Other options group contains parameters that shouldn t rather be used when processing HDR sequences, but are great when working with single RAW photos. The Recover highlights option allows getting more detail in the overexposed areas, but at the same time it may cause some color shift there. Auto adjust brightness boosts underexposed photos. The Brightness and Contrast parameters allow fully manual correction to adjust the image even more, before it s touched by the tone mapping algorithm. If any further color correction is necessary or you want to remove some more noise, easyhdr allows these at later steps as well advanced color adjustment is possible at the tone mapping level, while more noise filtering can be done at the pre-processing step (in the HDR generation / LDR enhancement window). 12/74

13 RAW image loading DCRAW options. If the imported RAW images look strange (completely bad colors etc.), it may mean that the DCRAW or LIBRAW version used by easyhdr does not support your camera. Please make sure that you use the current easyhdr version, if so please contact easyhdr support HDR generation After loading the photo sequence, a HDR generation window with processing options appears automatically. If the EXIF data of the photos is correct and the calculated EVs (Exposure Values) for the photos are good you are just a click away from generating a HDR image. Otherwise you can go back by closing the dialog and edit the EV values manually, or select one of the auto EV options in the bottom of the Generate HDR tab. The EVs are vital for correct HDR generation. They are most important for ghost removal, but auto alignment also requires them to be more or less correct. If you are going to process just one photo (LDR enhancement), you don't have to worry about EV at all. Those values are needed just for proper image calibration. 13/74

14 Editing the EV values for a 3-photo HDR photo sequence. The photos are automatically sorted by the EV values, from smallest to highest. In the bottom of the Generate HDR tab you can find several options for automatic EV setup. EasyHDR selects by itself the option that seems the best. The options are (from left to the right): EXIF: available when the EXIF headers contain valid data. When selected, the EVs are calculated based on exposure time, ISO and the f-number. EXIF (AEB EV): available when there are EV bias values stored in EXIF (when photos are taken with a camera in Auto Exposure Bracketing mode). When selected, the EV are not calculated, but taken directly from EV bias fields in EXIF. Automatic (robot arm icon): easyhdr calculates the EV values automatically by comparing the loaded photos. Manual EV spacing: when a value is selected from the drop down menu, the photos are sorted from darkest to the brightest and are assigned with EV values accordingly to selected spacing. When AEB sequence of photos is taken, some cameras, sometimes store slightly wrong values of exposure parameters. In such a case easyhdr may warn and automatically select the EXIF (AEB EV) option. If you developed a single RAW image several times to produce two or more differently exposed images, the third party software might have transferred the same EXIF data to all output images. In such a case you should either manually set the EVs, or select the Automatic option. When no EXIF is available, easyhdr attempts to calculate the EV values automatically. You can experiment with HDR generation by disabling some of the already loaded input photos from being used for the HDR. There is no need to remove the photos, just uncheck the checkbox next to the name of the photo. 14/74

15 HDR generation options. The HDR generation step can be divided into two stages: #1 pre-processing, which includes chromatic aberration and lens distortion correction, alignment and #2 the actual HDR radiance map generation, which can be done using three available methods Pre-processing Before generating the HDR image it is possible to pre-process the input photographs. The available options are: lens correction and image alignment. After pre-processing, it is possible to view the modified photos in the main program window by using the Photo before processing option and also to save them with: File Save preprocessed input photos. Both transformations can be undone, allowing re-processing without the need to reload the photos Lens correction The camera lenses are not perfect (especially those cheaper). They have many optical defects, among which there are two most notable, that fortunately can be fixed with easyhdr. The Lens Correction tool allows fixing distortion and chromatic aberration. It can be used right after the photos have been loaded, but before they are aligned or used for generating a HDR image. Lens distortion occurs when a lens is not projecting the light properly, by producing bent lines on the camera's sensor from straight lines in the photographed scene. The defect is stronger in zoom 15/74


16 lenses and it varies with focal length. The fisheye lenses, because of very short focal length characterize with very strong distortion. It shouldn't however be considered purely as a defect, because this is how the fisheye lens works. With easyhdr it is still possible to straighten photos taken with such lenses, but it may make little sense to do it fully, because it may require strong cropping. Chromatic aberration occurs when the lens does not focus all light wavelengths in one point, because of different refractive index for different wavelengths. In the photo it appears as fringes of color around dark-bright boundaries. This effect gets stronger towards the borders of the photo and typically is the lowest (or does not exist at all) in the center of the image. Cheaper lenses, especially the zoom lenses have stronger chromatic aberration. As it is with distortion, chromatic aberration also varies with focal length setting. Camera and lens were detected and found in the database (just distortion model was available). The tool is in the Advanced mode. Camera and lens not detected, tool in simple, manual mode. Lens Correction tool uses the LensFun database of cameras and lenses in order to apply correction parameters automatically for the detected camera-lens pair. If the required information is not found in photo's EXIF meta-data, or the particular hardware is not found in the database, the user can still set the values manually. Of course it is also possible to tweak the parameters if those from the database don't give perfect results. There are several numeric lens models available. For manual editing it's much easier to use those with less parameters: 1. Chromatic aberration correction linear, two parameters, easy to set manually polynomial, four parameters 16/74

17 2. Distortion correction PanoTools lens model, three parameters 3rd order polynomial, one parameter, very easy to set manually 5th order polynomial, two parameters Photo before lens correction. 17/74

18 Photo after lens correction parameters taken automatically from the database. Zoom at photo before chromatic aberration correction. 18/74 Zoom at photo after chromatic aberration correction.

19 Note: The Generate HDR window offers a possibility to use automatic lens correction. Before using this feature please check, using the manual option, whether the camera and lens are properly detected and that the correction parameters are good. It needs to be done only once for particular camera and lens pair. There is no need to do that for all photos that you process. Note: Please make sure that lens correction is applied to a photo only once. For example if you load to easyhdr JPEGs or TIFFs previously developed from RAW using other software, the photo might have already been corrected. Also, some cameras may apply chromatic aberration correction automatically. EasyHDR remembers the last used Lens correction mode (whether it s enabled and whether it s full or limited to just distortion or CA correction). It stores that information for each camera/lens/file format combination. As mentioned before, the most challenging is correction of fisheye lenses. First of all it must be noted that such correction may not be needed, or even anticipated in most cases, however in some it might be possible and might give good results. In the sample below the trick was to move the center point (double right click on the image) to the bottom-center of the image and set just one distortion parameter using the simplest, 3rd degree polynomial model. Photo taken with an 8 mm fisheye lens no correction applied. 19/74
.")
20 Center point moved to the bottom and the distortion parameter tweaked manually in a way to make the horizon straight. The photo still requires some rotation, which can be done later (see Image in the main menu). The final result, corrected distortion and rotation. 20/74

21 Alignment In order to get the best, sharp and fine detailed results, the photo sequence used to generate the HDR radiance map should be taken with a camera on a tripod. Of course it is not always possible. Even the fastest cameras, with exposure bracketing option enabled, still need quite much time to take the full sequence. The slightest move of a hand during that process can cause the acquired photos to be misaligned in respect to each other, which results in artifacts on a generated HDR image. The weirdest artifacts may appear on a HDR created with True-HDR method. They are caused by invalid pixel luminosities i.e. an area that should be darker on a shorter exposure is in fact brighter, which confuses the algorithm. Manual alignment EasyHDR has a built-in manual alignment tool that can be used to align the photos if it's needed. The tool uses planar stretching method that is controlled (by the user) by manual placement of up to 4 pins for image pairs. One of the images, preselected by the user, is called base. All other photos ( to align ) are aligned to the base. The user has to set the pins for each pair of the photos. Crop of a tone mapped HDR blended from misaligned photos. After manual alignment. Below is described the procedure that leads to generation of a HDR radiance map from a misaligned sequence of photographs is described: Load a sequence of photos into the program and click Manual alignment button in the HDR generation window. Choose the base photo to which the remaining images shall be aligned. The base photo appears in the top, left box. By default the middle exposed photo is automatically selected. Decide on the method of transformation (of course you can do it later as well, but please note that the method is common for all photos that are transformed). Compensation for shift requires setting of one pin pair. Shift and rotation needs 2 pin pairs. Perspective matching is achieved by setting all the available, 4 pin pairs. 21/74

22 Photo to be aligned is loaded into the top-right box. The preview style was selected as difference to better show the misalignment. Auto contrast ensures good calibration of both photos' brightness, so it's easier to compare them. Open one of the remaining photographs in the top, right box. This is the photo that will be transformed by the program in order to be aligned to the base image. Set the pins, on the two loaded images (base and photo to align ), so they point exactly at the same object details of the photographed scene. It is a good practice to initially place the pins close to the chosen scene features while the zoom is set to a small value and later fine tune the placement at higher zoom. The pin centering option (see picture below) is useful while fine tuning the positions. The view is automatically centered at the selected pin pair. The keyboard arrows can be used to fine tune the pin positions. Just double-click on the chosen pin to enter the keyboard mode. While the right Shift key is held, the pin jumps several times faster. In order to exit the keyboard mode, press Enter, Space, Esc or double click on the image away from a pin. Please note that the image is correctly transformed only after all the required pin pairs are properly placed. You can disregard what is shown in the preview box until the last pin is set and then use the preview while fine tuning. Repeat the operation described in the previous two points on every photo, that shall be aligned to the base. Note that it is possible to set different pin positions for each image pair. 22/74
23 Click on the Apply button. The photos will be aligned and in the next step you will finally be able to generate the HDR radiance map. Four pins point at exactly the same picture features. The pins are set with sub-pixel accuracy. The auto contrast option calibrates the brightness of both photos currently being aligned so they are easier to compare. Perfectly aligned photos, perfectly calibrated should produce a black Difference preview image. In case of slight misalignment the Difference view shows bright borders around edges. The manual alignment tool can be used in a semi-manual way. Right after the window appears it is possible to use the Auto all button to allow easyhdr place the pins automatically. The user can check whether the automatic algorithm succeeded and if it's necessary, correct the pin positions before applying the alignment. The Auto button, on the other hand, causes automatic pin placement for just the currently selected image pair. When compensating for more than just the shift please note that the pins should be well spread over the photograph. The best case is when they are located near the corners. Placing them too close to each other or setting 3 or 4 of them in one line will result in big alignment errors and therefore should be avoided. A score value (0 to 100) is calculated by the program to help you set the pins correctly. 23/74
 due to the difference in brightness.")
 in the darker of the photos, to match it to the brighter one.")
24 Bad spread of the pins. Pins are almost in one line. Score = 14/100 Bad spread of the pins. Pins are too close to each other. Score = 13/100 Good spread of the pins. Score = 61/100 In a HDR image sequence it might be hard to find the same details in both pictures (base and photo to align ) due to the difference in brightness. If the detail is not overexposed, but rather underexposed in the darker of the photos, you may manually alter gamma setting for the particular image, in order to brighten (or darken) it. Auto contrast option may also be useful. It automatically enhances contrast (not gamma) in the darker of the photos, to match it to the brighter one. Automatic cropping option can be used to cut off the parts of the images that are invalid in one or more of the aligned photos. Such invalid parts have bad influence on the tone mapping process when local operator is used. Automatic alignment The automatic alignment feature is a convenient way to align photos without any user intervention. It always tries to compensate for shift, rotation, scale and perspective. Tip: you can check whether the alignment succeeded before generating the HDR image (which is time consuming). To do so just close the HDR generation window and use the Photo before processing option HDR image generation options The HDR generation step is the moment when the preprocessed, input sequence of photos is finally merged, in order to form a single image the HDR radiance map. It is possible to choose one out of three methods for HDR generation: True-HDR, Smart Merge & Image Stacking. EasyHDR allows also tone mapping of a single LDR photo (i.e. a single RAW or JPEG). In such 24/74

25 a case, a HDR radiance map is not generated of course. Instead, the input image is prepared for being tone mapped. In easyhdr it is called LDR enhancement. The common post HDR generation / LDR enhancement option is noise filtering. This feature reduces the noise level in the already generated HDR image, before it undergoes tone mapping. This approach ensures that the noise itself is not strengthened so much by the Local Contrast tone mapping operator. It allows relatively stronger local contrast boost, while preserving good signal-to-noise ratio in the final photograph. Single RAW image tone mapped with high strength of Local Contrast operator. Without applying noise filtering before the tone mapping (left hand picture) the noise level is very high. If the noise filtering is applied, the image is smooth while the fine details are preserved. In this example the noise filtering strength was set at: 6 and softness was 3. When processing an image which is an already assembled, 360 panorama, the 360 option should be checked. In this case the tone mapping will be done as if the left and right border were connected with each other. Otherwise they wouldn't match when virtual tour was made with the processed image True HDR The True HDR method generates a radiance map that closely represents the real light radiance that was focused by the lens on the image sensor when the scene was photographed. This method requires proper Exposure Values set for the particular photos in the sequence. When the HDR generation window is opened the program reads the appropriate exposure time, 25/74

26 ISO and f-number values from JPEG, TIFF or RAW EXIF headers and utilizes them to calculate the true EV (Exposure Value). If there is no EXIF data embedded in the files, the photos are sorted from the darkest to the brightest and the Exposure Values are set up to meet the spacing requirement. You can also edit each of the EV independently. Note that these values are critical in HDR calculation process, especially when you want to receive a realistic result. Learn more about the Exposure Value. There are a couple of options available only for this algorithm: Selectivity: Controls what parts of the input photos and with what weight are taken into consideration during the HDR image creation process. The none setting means that the importance of all pixels is equal. The balanced setting means smaller weight for under- and over-exposures (weight gets smaller symmetrically towards black and white). Cut off over and under exposures disregards just the worst pixels, while get best exposed favors brighter pixels, where signal to noise ratio is higher, rather than darker pixels. Ghost removal: See below. Saving the HDR image: Check this option and choose the directory, the file name and format (Radiance RGBE or OpenEXR). Saving the HDR image is possible only at this step. Ghost removal When the photos are well aligned some of the objects within the photographed scene may still not match. These objects appear as ghosts in the final HDR image, because they are not in the same position in all of the photos in a HDR sequence. In the ghosted area the input data for HDR image calculation is improper and therefore has to be somehow fixed, otherwise ugly artifacts appear on the final image. A sample sequence of two differently exposed photos, where some subjects moved while the photos were taken. Most common ghost sources are: moving people, cars, etc., leaves or branches moving in the wind, fast moving clouds, smoke, ripples and waves on water, 26/74

27 bad photo alignment, misalignment that cannot be removed by aligning the photos i.e. due to parallax. Normally it should be avoided to take HDR sequences of scenes where ghosts might appear, but it would severely limit usability of HDR techniques. Ghost removal tool in easyhdr allows to create HDR photos even if some of the image area is ghosted. There is a manual as well as automatic ghost removal possibility. When the Generate HDR button is hit and the ghost removal option is checked, easyhdr shows the ghost removal tool window. Of course, if the automatic alignment was also selected, it is done first, so it may take a while before the de-ghost tool is shown. EasyHDR automatically attempts to find ghosts and if detected, they are immediately marked on the deghost preview. Ghost removal tool ghosts detected automatically. Each mask color corresponds to the input image used for patching the painted area. The patching image is carefully calibrated by easyhdr to match it best to the rest of the HDR. The areas not painted with mask are created out of all input images. The user is supposed to visually check the automatically created mask and if it's needed to modify it. Helpful are three view modes: HDR before de-ghosting, HDR after applied de-ghosting the current mask is used, Input photo selected from a drop down menu. The first two are just roughly, gamma-corrected HDR images. The view can be made brighter or darker (to show various areas shadows and over-exposures) by changing the Exposure value. This parameter affects only the preview! 27/74
28 When the Hide automatically option is selected, the mask is shown only if the mouse cursor hovers over the preview. If the automatic ghost detection did not work good enough it is possible to change the detection threshold by tweaking the Strength parameter. The mask is auto regenerated. For the painted mask, it is also possible to select the Base photo - it's a key frame used for the entire photo to patch all the marked ghosts. Selecting Undefined base photo allows easyhdr to auto-assign various inputs for patching the ghosts. The user can also paint the mask manually. The mask painting tool is either a brush of various sizes or a flood-fill tool. The user can explicitly select which input photo to use for the particular mask that is being painted. It is also possible to leave the decision to the program and use the Automatic mask type (default). Mask type: Eraser is of course for clearing already painted masks. Eraser is also enabled when painting with Ctrl key pressed. The flood-fill tool can be used to change the particular mask's target image, or to completely erase the selected, individual masked area. It cannot flood-fill a not masked part of the photo. Manually edited mask - red for -1,58 EV photo (currently selected mask type) and cyan for the other, 0 EV photo. Longer exposure (cyan) is taken for the shadowed area, while the shorter exposure (red) is for the highlights. As it was already mentioned before, the masked area is no longer a real HDR. It's just a well calibrated patch of a single input photo. It means that the best results can be achieved when the ghosts are relatively small and when the image that is selected for patching is well exposed (in the masked area). Underexposed patch means high level of noise and possibly some brightness mismatch. In case of overexposed patch the area will be overexposed in the final HDR image and additionally it will not match in brightness. The overexposed and underexposed areas are repaired (filled with best exposed 28/74

29 pixels, however not coming from the patch image) when Repair over and underexposed option is checked. The Smoothness parameter controls the softness of the patch edges smoother are better blended and therefore less visible, but the patched areas are extended. Tone mapped HDR image before (a) and after (b) manual ghost removal. The ghost removal tool can be used to repair ghosted areas in your HDR photo, but because it is possible to select which photo should be used for patching, there is yet another and very interesting possibility. It can be used to completely remove i.e. moving people or cars from a photograph. It's just a matter of taking photos correctly. The ghost can be removed completely only if the affected area is well exposed and without the moving object itself at least in one of the photos in a sequence (see the example above). 29/74
, f) the ghosted areas were patched in a way to completely remove the people (red mask replaces ghosts with part of a 0 EV photo, while the green mask patches")
30 a), b) and c) Input photos (-2, 0 and +2 EV) differently exposed, people moved while the sequence was taken, d) tone mapped HDR no ghost removal, e) ghosts removed, but in a way to leave the people as in the 0 EV shot (see the red mask), f) the ghosted areas were patched in a way to completely remove the people (red mask replaces ghosts with part of a 0 EV photo, while the green mask patches the area with +2 EV photo). 30/74

31 Smart Merge This method doesn't generate a real HDR radiance map. Instead, the input photographs are merged together by taking the best exposed details with higher weight. The over and under exposed areas are rejected. Ghost removal is not available here because the photos are not calibrated as it is done for the True-HDR method. The user can control the strength of Smart Merge's selectivity. In most cases the low values (0 2) are just perfect. In case of some photo sequences stronger effect may give some further dynamic range compression, but sometimes it may cause unnatural look. The result of the merge may look very natural when only slight local contrast enhancement is used. Of course stronger tone mapping may also be applied in order to get more dramatic look. a), b) and c) Differently exposed photos (photo sequence loaded to easyhdr), d) Result after Smart Merge, strength = 1, e) Result after Smart Merge, strength = 5 (both results processed with default tone mapping settings). 31/74

32 Image Stacking Stacking is a method of blending photos by simply taking the average of the input images. The luminance value for each pixel is a sum of the true signal and of course the noise. If the photographed scene is static, the signal acquired for each pixel is constant for each photo taken at the same exposure settings, while the noise is random. The average of the noise aims for a constant bias and thus is easy to subtract by a slight contrast boost. In other words by taking an average of photos the signal to noise ratio (SNR) is increased. Also the dynamic range is expanded given the image quality improvement for the darkest areas. Top part of a photo taken with Canon 650D at ISO1600 and exposure time 1 sec. Bottom stack of 11 different exposures, taken with exactly the same camera settings, no other processing was applied. You can also try to stack differently exposed photos instead of generating a HDR image. The result will be characterized by improved dynamic range, but cannot be called a High Dynamic Range radiance map, because the input photos are not calibrated and the luminance scale is untrue. Nevertheless the result may be pleasing in some cases. 32/74
33 4. Tone mapping When the HDR radiance map is generated, the next step is to tone map it, so it can be displayed on the computer screen, saved in a typical image format or printed. Thanks to tone mapping the dynamic range of the photographed scene is preserved and fitted into the capabilities of display media (or storage formats). The resulting photo is in fact LDR (Low Dynamic Range), but it contains details present in the whole dynamic range of the photographed scene. Therefore it is wrong to call the result a HDR or either LDR image. It should be called a tone mapped HDR radiance map. Tone mapping does not only apply to the processing of HDR images. A digital camera applies tone mapping (with a global operator in this case a simple curve compression) in order to fit the acquired (i.e.) 12-bit image pixel data into 8-bit per pixel (per channel) picture format. When the HDR image is generated in easyhdr the preview size is automatically adjusted so the previewing process does not take too much time. After finding the best tone mapping settings just click the Process all button. EasyHDR allows you to save and load tone mapping settings. It also has a preset selection feature, which allows faster access to most commonly used settings. To find out more about settings and presets please go to paragraph Global vs. local operator There are 3 operator functions from which to choose. If the Local contrast and Mask checkboxes are unchecked only the global operator is being applied. By checking the aforementioned options the 2 available local operators can be enabled. The global operator works the same for all pixels in the processed image, regardless on their position. The result for each pixel is computed by using only the operator parameters set by the user and the pixel's value. This ensures that there will be no brightness inversions in the output photo, leaving it as natural as it is possible, while fitting the selected scene dynamic range into the display media capabilities. No brightness inversions mean that the areas that were brighter than others in the real, photographed scene, will remain brighter. This limitation makes it very difficult to compress the entire dynamic range, without washing out colors or loosing local contrast. The local operator, on the other hand, is spatially variable. The local parameters are computed for each pixel independently while taking its neighboring pixels into account. Therefore the local operator is capable of greater contrast reduction on wide scale, at the same time preserving local contrasts (details) and colors. When the effect is too strong, however, the photo may become unnatural. It may sometimes be anticipated to achieve a dramatic result, but also sometimes an unwanted halo effect can show up. The local operator works similarly to local, chemical adaptation in the human eye, which is one of the factors that make the human vision capable of sensing very wide dynamic range. Note that in classical digital photography only the global operators are used (i.e. gamma pre-processing inside a digital camera). 33/74
34 The parameters for the global operator in easyhdr are: for the "Local Contrast": Compression, Strength, Gamma, Highlights, Contrast (histogram clipping), Shadows, Color adjustment and color saturation (hue, white balance and selective saturation), Blackness, Range, Tone curve (L, R, G and B channels). Micro. 3d LUT color grading. and for the "Mask" local operator: Highlights, Shadows Global Operator: Compression, Gamma & Saturation Gamma curve adjust is a function available in most image editing software. It brightens or darkens the photo, but at the same time it does not cause any image data to be lost, by clipping the pixel values to black or white. It applies a non-linear (gamma curve) transformation that compresses the whole dynamic range of the processed photo. When the value is higher than 1.00 the pixel luminance in shadows is amplified more than in the bright areas, therefore the compression is achieved. Setting the values below 1.00 makes the photo darker and also the contrast gets stronger. The Compression function applies a similar non-linear transformation as gamma adjust. However as opposed to the gamma function, it preserves and even increases the color saturation. See the example below. Both parameters should be used together in order to get best results. In example, if the photo gets too bright after the Compression is increased, it can be darkened with the gamma setting. 34/74


35 a) Photo tone mapped with default settings (Gamma = 1.00, Compression = 1.00), b) Gamma = 1.80, c) Compression = 2.20, d) Gamma = 0.80, Compression = Global Operator: Tone curve Tone curve adjust is a powerful, but simple in use tool that is implemented in almost every image editing software. It offers much more flexibility than the gamma setting described above. The user manually shapes, using special knee points, the curve that is used to compress the dynamic range of the photo. The points can be created by simply clicking in the curve area with the left mouse button. Knee point removal is done by pressing the right mouse button while the cursor hovers over the selected point. 35/74
.")
36 The curve tool that is implemented in easyhdr operates on HDR rather than LDR (Low Dynamic Range) image data, as it is done in typical photo editing software. Because of that, operations can have different, much better effects, i.e. brightening shadows does not necessarily mean boosting noise level (of course there must be enough shadow information in the HDR composite). The curve tool does not make any changes to the output image when it is in the reset position (straight line). It gives enough flexibility when there are 2 or 3 knee points. EasyHDR allows editing curve either for pixel luminance or for each (red, green and blue) channels separately. There is a set of several ready to use presets that can be the starting points to further curve shaping to access them just press the star button Local Operator: Mask The "Mask" operator works similarly to a gray filter mounted in front of CCD or CMOS device during the exposure. The light coming from the photographed scene is focused on the surface of the imaging sensor, but the filter attenuates it in certain regions more than in the other. The idea is similar to using a gradient, gray filter mounted in front of the camera lens. In case of HDR image processing, the High Dynamic Range radiance map that is recovered from a sequence of photos is the estimated irradiation of the surface of the imaging sensor during the exposure. EasyHDR calculates the complex gray filter mask based on the input HDR image and applies the attenuation. The brighter, large-scale areas are attenuated stronger, than the shadows. Since the mask does not affect the small-scale luminance variations, the local contrasts (details) are preserved they are not flattened. A linear gradient gray filter may be enough in case of the simple scene as shown here. The two photos on the left are real single shots of the same scene taken with different exposure times. On the right side there is a simulated view as if the photo was taken with a gradient, gray filter. The strength of the mask operator is controlled with the "Highlights" and Shadows parameters, selectively for the bright and dark parts of the image. Higher values for highlights mean stronger attenuation of the bright areas (they get darker). Higher values for shadows mean that the darker areas are more strongly intensified (get brighter). 36/74

37 In case of both photos: gamma = 1.00, compression = a) Highlights = 0.00, Shadows = 0.00, b) Highlights = 0.40, Shadows = Local Operator: Local Contrast This operator compresses the global dynamic range of the photograph while enhancing the details at local level. It gives a lot of possibilities ranging from just slight improvement of contrasts (to give better realism) up to achieving very dramatic results. The local contrast operator is very sensitive, so when used with strong settings it may amplify noise, especially if the input images are of low quality (i.e. taken with high ISO, with a poor digital camera, or saved with high JPEG compression settings). In case of processing HDR image sequences please keep in mind that the noise level might be lower if the HDR sequence of images covers the entire dynamic range of the scene so if there are no parts of the scene that are not properly exposed in any of the photos. Noise reduction is also achieved by using normal selectivity in case of the True-HDR method. Even lower noise level should be possible when using the Smart Merge method. a) No local contrast applied, b) Local contrast applied By using the local contrast operator we achieve greater compression of the dynamic range of the photograph, while the details are not only preserved... they are enhanced. The Local Contrast operator is controlled by a number of parameters. The Strength defines the power of dynamic range compression and local contrast boost. The Range controls the extent of the local detail sensing. The higher is the value the bigger areas of the photo are being treated as local. 37/74

38 There is also a pair of parameters that control the brightness- and darkness- sensing thresholds of the operator. The Highlights setting defines how strong should be the contrast enhancement in the brightest parts of the photograph. At the same time it little affects the darkest parts. The Shadows on the other hand controls the level of dynamic range reduction in the dark areas. a) Strength = 0,50, highlights = 0.00, shadows = 0.30, b) Strength = 0.50, highlights = 0.60, shadows = By increasing the highlights parameter the clouds (which are the brightest in this photo) get more dramatic, while by decreasing the shadows setting the darkest areas are more strongly amplified. If the signal to noise ratio in the darkest parts of the photograph (i.e. deep shadows or dark, night sky) is too small, then it might be desirable not to enhance those parts so much because otherwise the noise level would be unacceptable. Not enhancing the shadows too strongly could also preserve the feel of realism. In order to achieve that please try increasing the Shadows value as well as Blackness, which controls the threshold of shadow deepness. a) Blackness = 0,30, b) Blackness = 0,60. There is also an additional parameter: Micro. It controls strength of the smallest detail enhancement. By using it it is possible to make the photo a bit sharper. By using the Mask operator in combination with the Local contrast it is possible to further boost brightness in the shadows and to attenuate the brightest parts of the image, while not bringing up noise so much as it could be happening with the local contrast alone. 38/74


39 4.6. Black & white clip (contrast) The human eye is not able to "see" the whole dynamic range of every scene, so if you want to achieve a natural effect it is sometimes good to clip some shadows to black and some bright areas to white. By loosing some information in those areas you get better a looking, more natural image with better contrast. By default 0.1% of the darkest pixels are cut to black and the 0.2% of the brightest are clipped to white. This makes the result look much more natural and not washed out, while sacrificing only a small fraction of the dynamic range. To set the clipping points just move the markers over the histogram or manually set the desired cut-off pixel percentage, for black and white separately. There is also a possibility to set the clipping points by sampling the image with eyedropper tools. In order to use the eyedroppers click on the appropriate icon and then select the desired point on the image. Using left mouse button selects the point from the currently viewed result image, while using the right mouse button chooses the point from the input HDR image. Example of the histogram clipping. The entire available dynamic range is preserved in the photo a), while in case of photo b) the 4,7% of darkest pixels are clipped to black and 1,8% of the brightest pixels are clipped to white. This means that there is a loss in dynamic range, but at the same time the photo has higher contrast. 39/74


40 If the padlock icon is locked, the clipping is done automatically to the preset percentage values when other tone mapping parameters are changed. When it is in the unlocked position, the markers always stay in the same place, but you can still move them manually. When mouse cursor hovers above the histogram, two checkboxes are shown. When checked, the under and/or overexposed areas are marked on the preview image with blue and red color. Marking the under and overexposed areas. Click on the histogram to toggle the mode right mouse button switches between RGB and Luminance mode, while the left mouse button selects linear or logarithmic Y-axis Color saturation EasyHDR allows advanced control over color saturation. There is not only global saturation setting, but there are also two selective tools: saturation selective by brightness, saturation selective by hue. The small circles mark the currently pointed pixel on the brightness and the hue axes. The status bar shows the pixel value under the cursor. 40/74

 parameter.")
41 The horizontal axes have the meaning of brightness and hue respectively. When the curve is in the middle of the gradient field (as depicted above), the saturation is not altered. Moving the curve up means boosting saturation for the selected types of pixels, while lowering the curve means selective decrease of saturation. a) Saturation settings at reset position, b) Increased saturation for the blue color. The user has control over the shape of the curve by the mean of control points. Each of them defines a separate Gaussian function for which it is possible to set sigma (smoothness) parameter. If the separate curves are close enough to each other, they are glued together, so it is possible to draw straight lines. In order to add a new control point just click with the left mouse button on the tool. To remove a point use the right mouse button. One of the more advanced possibilities that the selective saturation gives is leaving just a single color tone and making the rest of the photograph black and white. Saturation has been reduced to zero for all colors apart from red and violet. 41/74

42 4.8. Color adjustment The camera not always uses the perfect white balance settings when the photos are taken. EasyHDR allows you to fix the color tone at the tone mapping step. Two settings fulfill this task: Temperature and Tint. The first controls the blue-orange tone, while the second of them allows green-magenta balance. If there is a spot on the photo that should be neutral you can sample it with the eyedropper tool. EasyHDR will set the temperature and tint to fulfill the requirement. a) Tone mapped HDR created out of 5 photos that had some bluish tint due to bad white balancing done by the camera, b) white balance corrected automatically by sampling the marked spot. The Hue setting, when used very delicately, can help with achieving best color temperature correction. When tweaked more strongly it creates unreal effects by shifting the colors Vignette Vignette tool can be used either to reduce vignetting caused by camera lens, or to create fancy looking vignetting effect. There are a couple of parameters that give very wide range of possibilities: Amount positive values mean dark vignetting, while negative cause brightening of the edges. By setting the negative values, the user is able to compensate for dark edges caused by the camera lens. Smoothness the higher the value the smoother is the edge of the vignette. Size distance from the middle point, to the edge of the vignette. 42/74

43 Roundness controls the shape. Value -1 means that the vignette is a rectangle with the aspect ratio of the image, with the corners rounded a bit; 0 is an ellipse with aspect ratio of the image and +1 is a circle. When you are fixing the vignetting caused by the lens, you should set roundness to 1. a) No vignette applied, b) Vignette applied (Amount = 2, Smoothness = 1, Size = 0.75, Roundness = -0.75) d LUT color grading Apart from the described before, standard color grading tools like the RGBL tone curves, saturation, hue, temperature and tint, easyhdr allows applying also predefined 3-dimensional color Look-Up Tables (3d LUTs). The 3d LUT is a table that maps RGB colors (triples of R, G and B values) into other RGB colors, allowing totally arbitrary change of color hue, tone, saturation, brightness, etc. The color transformation depends only on input pixel s RGB value and does not vary spatially. The table cannot just map any possible combination of R, G and B values, especially for 16- or even higher bit-depth of pixel values, because such a table would have to take a lot of memory. The colors not defined in the table are therefore interpolated, but the LUTs are typically created in a way that allows good interpolation results Importing 3d LUT files EasyHDR is not an editor nor creator of 3d LUT files, it can only import and use such files (in the *.cube format). Those files can be created with specialized software, or purchased from third parties. There are also many freeware 3d LUTs available for download on the Internet. EasyHDR recognizes files that are copied to a special location: Windows: C:\Users\[name]\easyHDR 3\3dLUT-imports\, OS X: /Users/[name]/Documents/easyHDR3/3dLUT-imports/. The files can be grouped in subfolders (one level of depth). 43/74
.")

44 In order to import the cube files you can just copy them manually to the above mentioned folder, placing them in different subfolders or in the main directory. Alternatively you can use the Import dialog ( Import button in the 3d LUT selector toolbox). The dialog allows creating and removing the subfolders as well as copying the cube files into the selected subfolder, or removing the selected files. In order to create a group just type its name in the Subfolder line edit and click Create. The already existing subfolders can be selected from the drop down menu. The LUT files that exist in the selected subfolder are shown on the list. New files can be added or the selected files can be removed. 3d LUT file import dialog Applying 3d LUTs In order to apply a 3d LUT, the file has to be loaded. To do it, click on the leftmost button. The LUT selector tool box will appear in the bottom of the workspace. The LUT can be cleared by hitting the X button. It is also possible to apply the LUT with smaller strength by controlling the opacity. The LUT selection is stored in easyhdr presets. However, such a preset will work only if the LUT file is present within the imports. That applies also to the project files they do not contain the LUT itself. The 3d LUT group in the tone mapping tab. 44/74


45 The LUT selector tool box shows thumbnails with the 3d LUTs applied. They are generated when the selector is shown. If the base image changes significantly, when the tone mapping parameters are altered, you may hit the Refresh button to re-generate the thumbnails. To make searching simpler, it is possible to filter the shown thumbnails by typing part of the file name, or by selecting a group (subfolder). The LUT selector tool box. The main window with the LUT selector bar shown. A selected LUT is applied. 5. Layers The normal approach is to process the whole photograph with single, user selected tone mapping settings. Sometimes however you may want to process some parts differently i.e. get more dramatic sky, or make one shadow brighter, or even to change color of something, while not altering the rest. In order to do so, you can process the photo several times (with different tone mapping settings) and later 45/74


46 blend those results with Photoshop or GIMP, masking the regions manually. EasyHDR brings layers feature to give exactly this functionality, but with something more live preview and possibility to set tone mapping settings individually for each layer at any step of processing. When a new project is started the layers are always disabled and the program allows processing the whole image with just one set of tone mapping settings. In order to enable the layers, easyhdr must be already in the tone mapping mode. Go to the main menu Layers Enable layers, or press the "Layers" button in the tool box. Layers enabled. You can easily turn off the layers mode by selecting Layers Disable layers, or pressing the tool box icon again. The layers themselves are not removed and the settings are not lost, they are just not applied to the final result nor the preview Managing layers Initially, there are no layers. Just the "Base image" item is selectable. To create one, click the "Add" button. The selection is immediately switched to that new layer item, which means that you can already paint the mask on the image and that all the tone mapping settings visible in the right panel are relevant to that layer. When a new layer is created, the current tone mapping settings are copied and applied to it. There can be up to 9 layers, but please note that more of them mean more memory usage and longer processing time. The layer's global opacity is user-definable. In order to change it, hover with mouse over the thumbnail a slider is shown. When the mouse cursor is away from the item, the opacity value is depicted with a thin bar just below the thumbnail. Layer opacity 46/74

47 Each layer can be individually enabled or disabled (see the check box next to the layers name). It allows easy comparison of the result with and without the layer applied. If you feel it is helpful, the layer's name can be changed. Just click on the name to edit it. More options are available in the item's context menu. It is possible to invert the mask, clear it, or delete the selected layer. It is also allowed to export and import the mask (in PNG file format), so that it can be edited using an external application, or stored for later use. Layer item context menu. Switching between the active layers and the base image is done by just selecting the items Painting the mask When any layer (other than the base) item is selected, the mask can be painted on it. It can be done with either brush, paint bucket or interactive gradient tool. There is also a separate eraser brush. Erasing can also be achieved with the brush itself or with the paint bucket the Ctrl/Cmd key must be held. When the brush or the eraser brush is selected, you can choose its style. The brush size changes automatically with image zoom factor, but there are also 4 different default size classes. The slider next to the brush style drop down menu allows setting opacity of the brush stroke. 47/74


48 In case of both brush strokes the same brush style was used, but they were done at two different image zoom factors. The stroke to the left was painted at 10% zoom, while the one in the right when the zoom was 30%. Mask painted with the intelligent brush. The painting was started in the spot marked with the cursor. 48/74
.")
49 There is a special mode of painting available. When the "Intelligent" option is selected, the opacity of the brush depends on pixel values of the HDR image. The opacity is higher if the pixels under the brush are more similar to values sampled when mouse button was clicked (the sampling point is marked with a cross). It means that with long strokes you can limit to covering similar areas like for example the sky. The slider next to the Intelligent option allows control over the threshold of similarity. The intelligent painting mode is also available with the paint bucket tool (and actually only then usage of this tool really makes sense). It works also with the eraser. The interactive gradient tool gives a possibility to paint image-wide areas with a smooth gradient. The starting and ending points are set with a mouse on the image. There is also a possibility to modify the gradient's middle point with the third pin. When the Intelligent mode is used, you can also move the sampling point (marked with a cross). In order to apply the gradient just press Enter, or click the button that appears in the top left corner of the workspace. For cancellation, hit Esc, or change the painting mode. The Space key can be used to invert the gradient. Gradient tool used to select the clouds, intelligent mode is enabled. By default, the mask is visible as a green area over the background image, with 50% opacity. 49/74
50 The green color may sometimes be an obstacle, so there is a possibility to switch it to red, or blue. There is also an option to show just the mask as a black and white image. The mask may finally be also made invisible, which allows live preview while painting. The mask is automatically made invisible, when mouse cursor hovers over the preset/history panel or the tone mapping panel Tone mapping settings The tone mapping settings visible in the panel on the right hand side are switched accordingly to selected layer item. Any change is applied to the selected layer only. When a preset is selected, it is also applied to the currently selected layer. The only exception is vignette. For all the layers the vignette settings are assumed the same as for the base image. Any change of the tone mapping settings for each layer is stored on the history list. The changes concerning layers are marked with "L[n]", where "[n]" is the layer number. When a new layer is created, a "L[n]: START" record is added and it holds the initial settings. When a layer is deleted, the history entries for it are removed. Example - the layer's mask was painted using the intelligent brush to cover just the sky. Then the layer's settings were changed to make the sky more dramatic and desaturated. 50/74

51 6. Image transformations The image transformations (main menu: Image) can be done at any step right after photos are loaded, during tone mapping or post-processing. It is possible to rotate the photo by 90 left, or right, rotate by 180 and flip it horizontally and vertically. There is also a combined, interactive crop, rotate, distortion and perspective function. Rotation lets you fix tilted photos, distortion allows straightening lines that should be straight and perspective gives even more freedom to visually correct composition, (i.e. in case of architectural photography). When in cropping mode, an additional bar with options is shown. You can find there crop area size with a possibility to block the aspect ratio, rotation angle, distortion and perspective factors. Those values may be edited there, but they can also be set interactively on the image itself: hold down Shift key and drag the image with mouse to set the rotation, hold down Ctrl/Cmd key and drag the image with mouse to tweak distortion, hold down Alt key and drag the image with mouse to set horizontal and vertical perspective. The crop area can be resized by grabbing and moving markers on its edges and corners. To move it, just drag it with mouse. A click away from the crop area starts new selection and a double click away (or Esc key) abandons the cropping mode without applying any changes. To accept transformation click the Apply button or double click inside of the crop area. Image transformation options. Note: it is not possible to undo the cropping and free transformation. Please also note, that applying it several times causes degradation of image details. It's because of anti-aliasing filtering applied. 51/74

52 Photo corrected for distortion, perspective and rotation. 52/74
53 7. Clone/healing tool Whenever any small object spoils the photograph (like people standing in the distance, in a landscape shot, or there is a dust particle on a sensor right in the middle of the clear blue sky), the clone/ healing tool can be used to remove it. The tool is a standard option in the typical photo editors, but having it available at tone mapping stage in HDR processing software allows you to skip further post processing and achieve perfect results using easyhdr alone. Also, not being distracted by the existence of the rogue dust particles, you can find better tone mapping settings. The clone/healing tool options. The tool, as the name suggests, offers two options: Clone brush copies the pixels directly from a different location, Healing brush copies pixels from a different location, but at the same time applies color and tone matching, in order to better fit the surroundings. In order to start painting, you first need to mark the source position. You can do it by just clicking mouse button with Ctrl/Cmd key pressed. Then, simply start the stroke over the object to erase. For both of the brushes it is possible to define the method of alignment: Not aligned the source position is reset to the initial location, when each stroke begins, Aligned the source is always equally separated from the destination, as it was when the first stroke was started, Fixed the source is stationary. The base size of the brush, along with the smoothness and opacity can be controlled with sliders. The size of the brush, as visible on the screen, stays the same while you zoom the image in and out, which means it varies in respect to the image s dimensions. The clone brush makes direct copying of the pixels, which requires the source and the destination to be matched in terms of brightness and color, otherwise the patch will be clearly distinguishable. In most cases it can be achieved by copying some nearby area, but this can cause visible artifacts like doubled patterns (i.e. two or more same pebbles lying on the ground). Human brain easily detects such unusual errors, therefore you need to try copying from various nearby areas. The healing brush shouldn t be used to copy and fix areas with large variations of brightness or colors, like around distinct edges. However, it allows copying areas that look similarly and the object to remove is relatively small as compared with the brush size. For example, you can copy the ground pattern from a shadow and fix something in the sunlit part, or remove a small dust particle from the sky using a larger brush. When the object to erase is large and/or very different from the surroundings, you may try to roughly fix it first with the clone brush, in order to flatten the area s look. Then, do the final touches with the healing brush, by copying patterns from various parts of the photo. 53/74


54 The stairs have been removed with the healing brush, with the stones taken from the shadow. The clone brush is not able to do anything good here with the source pixels taken from the shadow. The clone tool is just the right choice when removing this road sign. 54/74

55 Before repair. After repair removed: person, cable, road sign, bench, fences and the energy pole. 55/74
56 The clone/healing tool can be used only at the tone mapping stage. When it s enabled, changing the tone mapping parameters is disabled. It s also not possible to draw layer masks, or do image transformations. Every stroke can be undone by pressing the Undo button, or by pressing Ctrl+Z. The Reset option undoes all the strokes made since the tool was enabled. When the tool is turned off, all the changes are also lost. Pressing Apply means accepting the changes, clearing up the undo queue and closing the tool. Should you need to start again, just go back to the HDR generation and start over without the need of reloading (incl. lens correcting and aligning) the source photos. 8. Post processing If you are finished with tone mapping, you may do some post processing to the output image before you save it. You can use 4 filters: Gaussian blur, sharpen, median and bilateral filter. EasyHDR allows also manipulation of color tones. After filtering is applied, it is possible to undo (in all cases excluding cropping). If you want to reset all applied post processing you can simply go back to tone mapping step and reprocess the whole image Gaussian blur (smoothing) You can use Gaussian blur filter to introduce some neat smoothing effect to your photo. The higher the "Sigma" value the more blurred is the result. Use the "Opacity" setting to mix the blurred result with the input. a) Input photo: 8MPix, b) Sigma = 6.0, opacity = 100%, c) Sigma = 6.0, opacity = 50%. 56/74
 Input photo, b) Sigma = 1.0, amount = 100%, threshold = 0.00, c) Sigma = 3.")
 If you want to remove salt & pepper noise like hot pixels and you don't have a dark frame, this filter will be just what you need.")
57 8.2. Unsharp mask (sharpening) The sharpening tool is a must in every image editing software. EasyHDR allows sharpening at the tone mapping level, but also in the post processing step. You can change three parameters: "Sigma" extent; "Amount" strength of the effect; "Threshold" cutoff level. a) Input photo, b) Sigma = 1.0, amount = 100%, threshold = 0.00, c) Sigma = 3.0, amount = 100%, threshold = Median filter (noise reduction) If you want to remove salt & pepper noise like hot pixels and you don't have a dark frame, this filter will be just what you need. It scans the masked neighborhood of each pixel and exchanges the luminance of the pixel with the computed, median (most probable) value. You can set the matching threshold, so only pixels that are significantly different than their neighbors are affected. It causes the noise to be wiped out while the other areas of the photo are left unchanged. a) Input photo Orion nebula, b) some dark bad pixels are easily removed with the median filter. Threshold: 0.12, horizontal bar 5 pixels. 57/74
58 8.4. Bilateral filter (noise reduction) The bilateral filter is a great noise removal tool that blurs noise while preserving edges. The example below shows how the filter works. The low-scale areas similar in luminance are blurred, while the significant edges are not affected. Apart from "Opacity", the user can control "Sigma" extent of blurring and "Threshold" edge detection level. a) Input photo, b) Sigma = 2.0, opacity = 100%, threshold = 0.5, c) Sigma = 4.0, opacity = 100%, threshold = Sample/target balance This tool allows to change sampled color tones into target colors (set by the user). For greater flexibility you can apply changes to shadows, highlights or middle tones separately. Additionally you can limit the strength of the color transformation by lowering the "Opacity". 58/74


59 You can set the target color by clicking the left mouse button on the appropriate field. Click on the sample to reset the target color. If the target color is the same as sample the tool has no effect. 9. Color management EasyHDR can properly work with color managed photos and monitor profiles. The Color Management is disabled by default (when the program is installed), but can be enabled by checking the option in the main menu: Color Settings Color Management. Color Management options in the main menu as well as the status bar. The photograph's color space is extracted automatically from the JPEG or TIFF input once the image file is loaded. In case of RAWs, RadianceRGBE and OpenEXR the color space is user-defined at loading. If the color space definition is not embedded it is always possible to manually select the space 59/74
60 from a list (srgb, AdobeRGB, WideGamut or ProPhoto). The monitor color profile can be selected from one of standard profiles (srgb, AdobeRGB, AppleRGB or ColorMatch) or loaded from a ICC or ICM file. The color transform function that is calculated basing on the input and output profiles is used to properly display the image colors in the program's preview window. The color space of the output photo is not changed and is the same as it is in case of the inputs. The color space definition is just rewritten to the output photo, so other color management aware software can display it properly. Raw photos, by definition, do not have any color space. When they are loaded, the image data is decoded into a user-defined RGB color space. EasyHDR can work only with RGB color spaces. Other, like for example: CMYK are not possible to use. Note that all input photos (that are used to create one HDR image) have to be in the same color space, otherwise easyhdr will deny to load them. For best quality process only 16-bit, color managed TIFFs. 10. Batch processing If you want to process many image sequences, especially if the photos are very big, you'll appreciate the advantages of batch processing. The idea is to create a list of many tasks to be done by easyhdr and then let the program do the whole job without user interaction. Below you can see the batch processing window (click File Batch processing). The first step is to create a list of tasks (1). To do so use Auto create tasks option to make tasks automatically out of files from within a defined directory. There is also a possibility to add a single task by directly pointing a HDR image sequence (or a single image for LDR enhancement). The tasks (2) are displayed in a scroll box. Each of them is a separate processing job for easyhdr and has own settings associated (3). Every task has a name that is used as the output file name. The input photos' names are also displayed along with the thumbnails. To change the task name simply click on it. The settings are displayed for all selected tasks. If at least one of them has different settings, a warning message is shown: You can apply then the currently visible settings to all selected tasks. If there are various types of tasks selected at once (both HDR sequences and single photos) always the settings for HDR processing are displayed. Of course some of the options are not valid for single-photo tasks in this case. If tasks consisting of only single photos are selected, then appropriate set of parameters is visible, as depicted in the picture below. 60/74


61 The main batch processing configuration window. Settings for single-photo tasks. There are three possible options for tone mapping settings usage. You can select any settings file (*.ehsx) from your hard drive, you can choose a single preset from drop down list, or finally, you can 61/74

62 select a set of available presets. In the latter case, tasks are processed several times, for each selected settings. The preset name is appended to the output file name. This option is perfect if you want to compare results achieved with several settings and just choose those which you prefer. The task list can be saved and loaded later. There is an option to process only tasks that were not completed previously, so it's possible to continue the once stopped job, even after system restart. It's just important not to change the input photos location on the disk and not to delete or remove the already done results. If the automatic task creator failed to combine some of the photos into tasks correctly, you may fix it manually. Each multi-image task can be split into single-image tasks. Any set of selected tasks can be combined together. These options are available in task's context menu (right click). Configuration common for the whole batch job is available after switching to the Options tab (4). Options common to the whole batch job. The options are: Color space for the imported RAW and HDR images, More DCRAW options for RAW import: white balance, noise filtering and highlights recovery, Destination folder by default each task is saved in the same folder as the input photos, but it can be a different, user specified location, Result file format TIFF, JPEG/JPEG2000. Optionally, also the easyhdr project can be stored in EHPX format. It is also possible to turn off the tone mapping here, allowing to generate and store just the HDR radiance maps in *.hdr or *.exr formats (see in HDR generation options). Option to skip the already completed tasks, Option to choose whether to generate thumbnails for the tasks. In case of huge number of tasks (> 500) better not to generate thumbnails they probably won't be looked at by the user at all and it will just take time and system resources to prepare them (especially in case of RAW photos). 62/74

63 When everything is ready, you can finally start the batch job. It's possible to run all the tasks, or just those selected. There is also an option to shutdown the system on completion. When you use it, please make sure that all of your open documents are saved, or better, that all other applications are closed. This will prevent data loss Automatic task list creation The power of batch processing is handling tens or hundreds of tasks. It wouldn't make much sense if tasks had to be created manually one by one. EasyHDR is able to create the task list automatically. It is possible to add tasks built out of files from within a single directory. The current list is appended, not cleared first, so this feature can be used several times for different inputs. By default a fully automatic method of HDR image sequence detection is in effect. In this mode, the EXIF headers of all the image files found in the defined directory are examined by easyhdr. The photos that were taken within a very short period of time are assumed to be in a single HDR sequence. If you always take your HDR sequences using AEB mode in your camera, you should also select AEB sequences only option. It raises the accuracy because photos taken in continuous shooting mode (but not AEB) or those taken fast one after another are not merged together into single tasks. Automatic task creation options. Another method assumes a fixed amount of photos in each HDR sequence, in the source folder. There is also a simple mode useful when you want to process single photos only (LDR enhancement). Each task consists then out of a single photo. 11. Tone mapping settings management, presets EasyHDR allows you to save the tone mapping settings to files and to import those settings later. The most commonly used settings can be put into a special pool of presets. When the program is 63/74


64 installed, a couple of built-in presets are already there i.e. dramatic-bright or natural. By grabbing and moving the edge of the panel you are able to resize the thumbnails. Additionally, when the panel gets wider, the view changes and the presets are displayed in more columns. In order to add a new, user preset (based on the currently selected tone mapping settings) you can use the plus button in the top-right corner of the panel. You can rename user presets by simply clicking on the names. To replace a preset with current settings or delete it, just click right mouse button on the thumbnail to open a pop-up menu with options. The presets are just ordinary easyhdr settings files (*.ehsx). What makes them different is the place where they are stored: Win XP: C:\Documents and Settings\[name]\easyHDR 3\presets\, Windows: C:\Users\[name]\easyHDR 3\presets\, OS X: /Users/[name]/Documents/easyHDR3/presets. The built-in presets are in the easyhdr appliaction folder: Windows: C:\Program Files\easyHDR 3\built-in presets, OS X: symbolic link - /Users/[name]/Documents/easyHDR3/built-in presets. The user presets can be grouped into user-defined folders. Group selection is possible only when user presets are filtered (third button from the left). To move an existing preset from one group to another just right click on it and choose the target. Management is done with: Settings Setup user preset groups. Using the dialog, you can create or remove the groups. Renaming is possible after double clicking on an existing group name. When removing a group that contains presets you can choose either to delete, or to keep them as not grouped. 64/74

 or OpenEXR (*.exr).")
65 The user groups are just sub-folders in the easyhdr 3/presets location on your hard disk, which means it's very easy to manage all the user presets manually using Explorer (Windows) or Finder (Mac). Please note however, that after manipulating files and folders there, you have to restart easyhdr, so it can refresh it's own lists. The simplicity of user preset handling adds another advantage - you can easily back up or move your presets from one PC to another, or even share them with other people. 12. Saving the result EasyHDR can save the results in TIFF, JPEG and JPEG 2000 image formats. It is also possible to save the generated HDR radiance map as Radiance RGBE (*.hdr) or OpenEXR (*.exr). However it is only allowed in the "HDR generation" window, for the True-HDR method. The difference between TIFF and JPEG format is that the first of them is loss-less (even if the data is compressed). It means that absolutely no detail is lost when the file is saved. The LZW compression works well with 8-bit TIFFs, but for 16-bit data the Deflate method produces, in most cases, smaller files. For best quality you should save in 16-bit TIFF format, especially if you want to do further post processing with other photo editing tools. The less popular format, JPEG 2000 (JP2), allows both lossy and lossless compression of 8 and 16 bit data. The lossless compression is done when the quality is set to 100. When saving in JPEG format it is additionally possible to resize the photo. You can define the longer edge of the photo in pixels. EasyHDR is capable of transferring EXIF headers to the output photographs. It uses an external Exiftool software to achieve this goal. Exiftool is capable of transferring full EXIF data from and to all image formats including RAW photos. If your camera stores location information, but you want to remove it from the particular photograph, you may easily do so by un-checking the Keep geolocation box. It's perfect option if you want to share the photos on the Internet, but you don't want to show everybody the exact location where they were taken (eg. in your backyard). When color management is enabled, it is possible to convert the color space of the photo to srgb. It is useful if photos in other color space were processed and you want the results to be displayed correctly by programs that do not support color management, also when you want to publish them on a web page. 65/74

66 The DPI value definition is for user's convenience. It does not influence the pixel dimensions, or amount of detail. It is just a value that in addition to pixel dimensions defines the physical dimensions of the photo. It is useful to set it to a value that you normally use when preparing for printing, because then you can more easily edit the physical dimensions of the photo when post-processing in an external application. The most commonly used value is 300, it ensures very good print quality (invisible pixelization). Pixel dimension 25.4 DPI Physical dimension[mm] DPI Pixel dimension= 25.4 Physical dimension [mm]= In case of DPI resolution = 300, the pixel dimensions for a 15x10 cm print are: 1772 x 1181 (just 2 megapixels). An 18 megapixel photo can be printed on a ca. 44 x 29 cm paper Exporting to external editor If you want to do further processing on the photo generated with easyhdr you can use the export to external editor option instead of saving to file and manually opening it with the other software. Before this option can be used it must be configured in the Program Options. You have to provide a path to executable of the third party software you want to use. Configuration of the external editor. Export to external editor allows transfer of 8 or 16 bit pixel format. It is user selectable, because not all image editing software support 16 bit photos. It is also possible to select whether conversion to srgb is needed, or the color space should remain the same. 66/74
, along with full EXIF data, color profiles and EV values, HDR generation")
67 13. Saving and restoring projects EasyHDR provides a way to save and restore your work. The project file can be saved and loaded using actions from the File menu. The project contains the following items: Preprocessed input images (aligned and with Chromatic Aberration corrected), along with full EXIF data, color profiles and EV values, HDR generation settings, Ghost removal mask (if set), Generated HDR image (optionally), Layer masks, Tone mapping settings for each layer. When the project file is loaded, the photo can not only be tone mapped again, but also the HDR image may be regenerated, with different settings and different ghost mask. The project file can be very big, especially when the HDR image is embedded. Putting HDR image data into the file makes sense only if you rather do not plan to regenerate HDR and at the same time want to load the file a bit faster. When the HDR data is embedded in the project file, it is optionally possible not to embed the input photos. It allows significant project file size reduction, but makes it impossible to fully reedit the photo when the project is loaded (ghost removal, lens correction, alignment and HDR generation are not available). It is only possible to modify the tone mapping. 14. Program options Most of the program settings are saved automatically when the program is closed (eg. image saving options). There are several options however that are set manually. In order to modify these settings click Settings Program options. 67/74
 allow scaling of all program fonts, buttons and windows.")
68 Program Options window. Appearance By default, easyhdr has a dark gray skin. You can change it here to light gray one. Another two options ( scale and pixel ratio ) allow scaling of all program fonts, buttons and windows. Normally the program takes the system's DPI setting to scale itself, but with the options here you can override the system's values. Dark and bright gray skins. The High DPI option is available only if your desktop supports it (4K screens). When enabled, easyhdr works in full resolution mode, which means that all the icons, fonts, tools and workspaces look much sharper. There is one disadvantage however. The program has to do 4 times more calculations to show the live tone mapping preview. If it causes inconvenience, please enable the live preview resampling (it can be found in the Performance tab). Any change of the appearance settings requires easyhdr to be restarted. Scratch pad memory You can choose here which hard drive (or directory) should be used by easyhdr to store temporary data. The option is set to system temporary directory by default. This setting should be modified only if you have little free space on the hard drive where the operating system is installed. The necessary free 68/74
69 space for the program to work properly depends on how big images you want to load into the program and how many of them are in sequences you blend into HDR. The data is dumped to the disk only if it cannot be stored in memory. It's good to have at least 1 GB of free space. Performance EasyHDR is capable of using several CPU cores, if they are available. By doing parallel processing the performance of the program is greatly improved. It is possible to select the maximal number of cores used by the program in normal or in the batch mode separately. Note that when the maximal number of cores to be used is the same as available number of cores, easyhdr will claim 100% of CPU time during some operations. That means that other processes running on your system will work much slower during that period of time. There are also other performance settings. When live anti-aliasing is enabled the photos are anti-aliased while zooming and panning, otherwise a rough image is displayed and after some timeout an antialiased view appears. The live tone mapping mode means that the tone mapping preview is generated at the same time as the settings change, otherwise a timeout must pass before the view is refreshed. Live tone mapping while zooming and panning does not require any further explanation. There is also a special option that allows live tone mapping of a re-sampled image preview instead of full resolution one. The full resolution image is calculated after a short timeout passes. This feature may be really useful on slow computers, or when the screen resolution is very high then the preview area that needs to be reprocessed live is large and requires more processing time (especially when working on a high DPI screen). External editor See the Exporting to external editor section in this document. New project Auto generate HDR / preprocess for LDR enhancement If you repeatedly use the same HDR generation settings, you may enable automatic HDR generation (or preprocessing for LDR) that will be done immediately after photos are loaded. Optionally, you can also select to automatically apply ghost removal. The option may be limited to easyhdr operation as the Lightroom s plug-in. Reset color adjustment settings for new project When enabled, the Color Adjustment settings (temperature and tint) are reset for new projects. Automatically show file open dialog when starting new project It is enabled by default. Disabling it is useful when you want to load photos mostly by dropping them on the workspace instead of using the New or Add buttons. Saving result Here it is possible to define the default output file name. It is set up in a form of expression with tags (see the tooltip for the line entry to see the details): 69/74
70 %F is a list of file names separated with _ characters, %C common part of the input file names, %L list of uncommon parts of the input file names, separated with _ characters, %0 middle exposed (0 EV) photo file name, %N number of input photos, %E input file extension (format), %P name, preceded with - character, of the current preset in use (if it was not edited by changing any of the tone mapping settings). The %C+%L or %F alone is required to be part of the expression. By default, the expression is: %C%L_easyHDR%P, For example, when the input photo file names are: IMG1234.jpg, IMG1235.jpg and IMG1236.jpg, and the natural preset is used, the default expression results in the following suggested file name: IMG1234_5_6_easyHDR-natural. In this tab, you can also choose whether the output folder shall be the same as the folder of the source photos, or shall it be as the last that was used for saving. Another option lets you decide whether you want the exposure time values be removed from EXIF in case of HDR images. Normally the exposure time makes no sense in case of a HDR, but you can have the value taken from the 0 EV photo, when the removal option is turned off. It is also possible to define the default HDR image format: Radiance RGBE, OpenEXR or 32-bit TIFF. This setting is used in the HDR generation window and in the batch processing to define the (optional) HDR image output format. The Normalize checkbox enables normalization (scaling pixel values down to 0..1 range) of the HDR data for the file needed by some third party software. Finally, you can define the default description added to the EXIF of the result image (can be edited on saving) and the Artist field in EXIF (leave it blank to preserve the value already existing in the input images). Other result saving parameters are stored automatically when the program is closed (i.e. the last used file format, JPEG quality or TIFF compression). Miscellaneous Some other options are available here: Raw decoder Choose between DCRAW and LibRAW (default). Allow input photos to differ in size Percentage-defined allowance of size difference between the photos in a single HDR sequence. When set to 0% (default) the input HDR sequence photos must have exactly the same pixel dimensions. If you want to load photos that are slightly and differently cropped due to some external preprocessing, please define the allowance. 70/74
, zooming requires Ctrl (Windows), or Cmd (Mac OS) key to be held.")
71 Require Ctrl/Cmd key pressed to zoom with mouse wheel By default this option is turned off. In this case zooming the image can be done with mouse wheel. When it's on, mouse wheel is used to scroll the image (up/down and left/right), zooming requires Ctrl (Windows), or Cmd (Mac OS) key to be held. Use system native open/save file dialogs When selected (default), the file dialogs shown by easyhdr are standard system file browsers. Turning off this function makes the Qt framework's dialogs to be shown instead. The latter do not show thumbnails. This option is supposed to changed only if there are problems with the native dialogs. 15. Adobe Lightroom plug-in The plug-in allows exporting photos from Adobe Lightroom (version 3 and higher) to easyhdr. After processing, the results are automatically imported into the Lightroom Catalog Installation and setup Install easyhdr 3 demo if you want to try, or the full version if you are a registered user. During installation on Windows please make sure that Lightroom plug-in option is selected. It is by default if Lightroom is detected in the system. When easyhdr is installed on Mac OS, the plug-in is installed automatically if Lightroom is already installed. Lightroom plug-in Manager The plug-in files are installed in: C:\Users\[name]\AppData\Roaming\Adobe\Lightroom\Modules\ on 71/74
72 Windows, or in /Users/[name]/Library/Application Support/Adobe/Lightroom/Modules, or /Library/Application Support/Adobe/Lightroom/Modules on OS X. It automatically becomes available to Lightroom, you may just need to enable it in the "Plug-in manager" Plug-in usage In Lightroom, select photos you want to process with the plug-in. Then go to File Export and choose Export to : easyhdr 3. An export options panel will show up. Depending on the mode you want to use, you should select a single image, several photos supposed to be merged to HDR, or a set of photos you want to process separately. The plug-in's export options are divided into several groups: 1. Export Method: Selection of the mode of operation for the plug-in: Manually edit the photos with easyhdr 3 the selected photo or a sequence of photos (to be merged to HDR) is loaded into easyhdr. You are responsible for processing and saving the result manually. Once you save the processed image, just exit easyhdr. The image is automatically imported to the Lightroom catalog. Process with easyhdr 3 in background the selected photo or a sequence of photos (to be merged to HDR) is loaded into easyhdr, automatically processed using the provided settings, saved and finally is imported into the Lightroom catalog. EasyHDR program window is visible during the process but cannot be used by the user. Process with easyhdr 3 in background, each selected photo separately each of the photos selected in Lightroom is loaded into easyhdr separately, one by one. No HDR image is generated each photo is processed as LDR. All generated results are imported into Lightroom catalog. 2. EasyHDR 3 Processing Options here you are supposed to define the settings for easyhdr, like image alignment, ghost removal, noise filtering, tone mapping preset and the output file format. 3. File Settings This is a standard Lightroom panel. It allows defining the exported image format (the format of the image that is loaded by easyhdr, not the format of the result!). If you choose Original, the exported photos are not altered before they are loaded into easyhdr, otherwise they are re-formatted using the provided settings. Only TIFF format is allowed here because it makes no sense to loose quality while converting to JPEG. The common cases when you want to change the exported image format are: You want to process RAW images, but you want Lightroom to do RAW conversion instead of leaving it to easyhdr. You want to resize the image before exporting it to easyhdr (see point 4). You want to remove some metadata from the exported images before they are exported (see point 5). You want to change (or set, in case of RAWs) the color space before the photos are 72/74

73 loaded by easyhdr. EasyHDR does not support the image format you want to export. 4. Image Sizing It's available only if format conversion to TIFF is selected. It allows resizing of the images before they are exported to easyhdr. 5. Metadata It's available only if format conversion to TIFF is selected. It allows removal of some EXIF headers like location information etc. before the images are exported to easyhdr. Export options dialog. It's very useful to create own Lightroom presets, based on defined export settings. You have then very easy access to the most commonly used setups. There are two such presets installed along with the plugin. They are available by right-clicking on the image and selecting Export from the popup menu, or from File Export with preset. 73/74
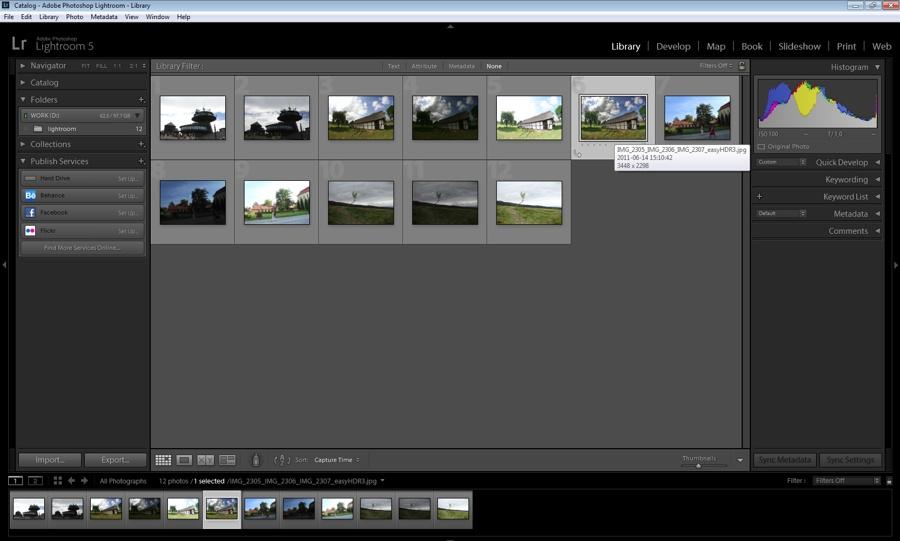
74 74/74
easyhdr 3.3 User Manual Bartłomiej Okonek
 User Manual 2006-2014 Bartłomiej Okonek 20.03.2014 Table of contents 1. Introduction...4 2. User interface...5 2.1. Workspace...6 2.2. Main tabbed panel...6 2.3. Additional tone mapping options panel...8
Photomatix Light 1.0 User Manual
 Photomatix Light 1.0 User Manual Table of Contents Introduction... iii Section 1: HDR...1 1.1 Taking Photos for HDR...2 1.1.1 Setting Up Your Camera...2 1.1.2 Taking the Photos...3 Section 2: Using Photomatix
Machinery HDR Effects 3
 1 Machinery HDR Effects 3 MACHINERY HDR is a photo editor that utilizes HDR technology. You do not need to be an expert to achieve dazzling effects even from a single image saved in JPG format! MACHINERY
Photomatix Pro 3.1 User Manual
 Introduction Photomatix Pro 3.1 User Manual Photomatix Pro User Manual Introduction Table of Contents Section 1: Taking photos for HDR... 1 1.1 Camera set up... 1 1.2 Selecting the exposures... 3 1.3 Taking
Color and More. Color basics
 Color and More In this lesson, you'll evaluate an image in terms of its overall tonal range (lightness, darkness, and contrast), its overall balance of color, and its overall appearance for areas that
Photomatix Pro User Manual. Photomatix Pro 3.0 User Manual
 Photomatix Pro User Manual Photomatix Pro 3.0 User Manual Introduction Photomatix Pro processes multiple photographs of a high contrast scene into a single image with details in both highlights and shadows.
Guidance on Using Scanning Software: Part 5. Epson Scan
 Guidance on Using Scanning Software: Part 5. Epson Scan Version of 4/29/2012 Epson Scan comes with Epson scanners and has simple manual adjustments, but requires vigilance to control the default settings
Photoshop CC Editing Images
 Photoshop CC Editing Images Rotate a Canvas A canvas can be rotated 90 degrees Clockwise, 90 degrees Counter Clockwise, or rotated 180 degrees. Navigate to the Image Menu, select Image Rotation and then
ImagesPlus Basic Interface Operation
 ImagesPlus Basic Interface Operation The basic interface operation menu options are located on the File, View, Open Images, Open Operators, and Help main menus. File Menu New The New command creates a
High Dynamic Range (HDR) photography is a combination of a specialized image capture technique and image processing.
 photography is a combination of a specialized image capture technique and image processing.") Introduction High Dynamic Range (HDR) photography is a combination of a specialized image capture technique and image processing. Photomatix Pro's HDR imaging processes combine several Low Dynamic Range
Introduction High Dynamic Range (HDR) photography is a combination of a specialized image capture technique and image processing. Photomatix Pro's HDR imaging processes combine several Low Dynamic Range
Photoshop Elements Hints by Steve Miller
 2015 Elements 13 A brief tutorial for basic photo file processing To begin, click on the Elements 13 icon, click on Photo Editor in the first box that appears. We will not be discussing the Organizer portion
MY ASTROPHOTOGRAPHY WORKFLOW Scott J. Davis June 21, 2012
 Table of Contents Image Acquisition Types 2 Image Acquisition Exposure 3 Image Acquisition Some Extra Notes 4 Stacking Setup 5 Stacking 7 Preparing for Post Processing 8 Preparing your Photoshop File 9
Adobe Photoshop. Levels
 How to correct color Once you ve opened an image in Photoshop, you may want to adjust color quality or light levels, convert it to black and white, or correct color or lens distortions. This can improve
Photoshop CC: Essentials
 Photoshop CC: Essentials Summary Workspace Overview... 2 Exercise Files... 2 Selection Tools... 3 Select All, Deselect, And Reselect... 3 Adding, Subtracting, and Intersecting... 3 Working with Layers...
By Washan Najat Nawi
 By Washan Najat Nawi how to get started how to use the interface how to modify images with basic editing skills Adobe Photoshop: is a popular image-editing software. Two general usage of Photoshop Creating
Select your Image in Bridge. Make sure you are opening the RAW version of your image file!
 CO 3403: Photographic Communication Steps for Non-Destructive Image Adjustments in Photoshop Use the application Bridge to preview your images and open your files with Camera Raw Review the information
Camera Raw software is included as a plug-in with Adobe Photoshop and also adds some functions to Adobe Bridge.
 Editing Images in Camera RAW Camera Raw software is included as a plug-in with Adobe Photoshop and also adds some functions to Adobe Bridge. Camera Raw gives each of these applications the ability to import
Mullingar Camera Club Basic introduction to Digital Printing using Photoshop CC.
 Mullingar Camera Club Basic introduction to Digital Printing using Photoshop CC. Table of Contents Course aims: 1 Course presentation notes: 1 Introducing Photoshop: 1 Adjusting the Brightness or Contrast
Photomatix Pro 6 User Manual Table of Contents
 Photomatix Pro 6 User Manual Table of Contents 2018 HDRsoft. All rights reserved. TOC link Table of Contents Introduction... 1 1 Taking Photos for HDR... 2 1.1 Setting up the Camera...3 1.2 Exposure...3
2017 HDRsoft. All rights reserved. Photomatix Essentials 4.2 User Manual
 Photomatix Essentials 4.2 User Manual 2017 HDRsoft. All rights reserved. Photomatix Essentials 4.2 User Manual i Table of Contents Introduction... 1 Section 1: HDR (High Dynamic Range) Photography... 2
High Dynamic Range photography software. Photomatix Pro 6.0
 High Dynamic Range photography software Photomatix Pro 6.0 Photomatix Pro User Manual Version 6.0 2017 HDRsoft. All rights reserved. Table of Contents Introduction... 1 1 Taking Photos for HDR... 2 1.1
Adobe Photoshop CC 2018 Tutorial
 Adobe Photoshop CC 2018 Tutorial GETTING STARTED Adobe Photoshop CC 2018 is a popular image editing software that provides a work environment consistent with Adobe Illustrator, Adobe InDesign, Adobe Photoshop,
Photo Editing Workflow
 Photo Editing Workflow WHY EDITING Modern digital photography is a complex process, which starts with the Photographer s Eye, that is, their observational ability, it continues with photo session preparations,
Contents Foreword 1 Feedback 2 Legal information 3 Getting started 4 Installing the correct Capture One version 4 Changing the version type 5 Getting
 Contents Foreword 1 Feedback 2 Legal information 3 Getting started 4 Installing the correct Capture One version 4 Changing the version type 5 Getting to know Capture One Pro 6 The Grand Overview 6 The
Extreme Makeovers: Photoshop Retouching Techniques
 Extreme Makeovers: Table of Contents About the Workshop... 1 Workshop Objectives... 1 Getting Started... 1 Photoshop Workspace... 1 Retouching Tools... 2 General Steps... 2 Resolution and image size...
Adobe Photoshop CC update: May 2013
 Adobe Photoshop CC update: May 2013 Welcome to the latest Adobe Photoshop CC bulletin update. This is provided free to ensure everyone can be kept upto-date with the latest changes that have taken place
Capture NX-D Reference Manual for Version 1.5.0
 Capture NX-D Reference Manual for Version 1.5.0 Introduction What Capture NX-D Can Do for You... 2 Image Adjustments... 4 The Capture NX-D Window... 5 Palettes... 6 The Toolbar... 8 The Status Bar...10
Capture NX-D Reference Manual for Version 1.4.0
 Capture NX-D Reference Manual for Version 1.4.0 Introduction What Capture NX-D Can Do for You... 2 Hiding Changes Made in Capture NX/Capture NX 2... 4 The Capture NX-D Window... 5 Palettes... 6 The Toolbar...
It makes sense to read this section first if new to Silkypix... How to Handle SILKYPIX Perfectly Silkypix Pro PDF Contents Page Index
 It makes sense to read this section first if new to Silkypix... How to Handle SILKYPIX Perfectly...145 Silkypix Pro PDF Contents Page Index 0. 0.Overview and Introduction...9 0.1. Section Names...9 0.1.1.
Contents: Bibliography:
 ( 2 ) Contents: Sizing an Image...4 RAW File Conversion...4 Selection Tools...5 Colour Range...5 Quick Mask...6 Extract Tool...7 Adding a Layer Style...7 Adjustment Layer...8 Adding a gradient to an Adjustment
Lightroom CC. Welcome to Joshua Tree Workshops. Astro & Landscape Lightroom Workflow w/presets
 Welcome to My approach to teaching is to offer small workshops which allow you to explore and discover our amazing planet, while learning photography and timelapse techniques. Astro & Landscape Lightroom
Module All You Ever Need to Know About The Displace Filter
 Module 02-05 All You Ever Need to Know About The Displace Filter 02-05 All You Ever Need to Know About The Displace Filter [00:00:00] In this video, we're going to talk about the Displace Filter in Photoshop.
Capture NX-D Reference Manual for Version 1.4.6
 Capture NX-D Reference Manual for Version 1.4.6 Introduction What Capture NX-D Can Do for You... 2 Hiding Changes Made in Capture NX/Capture NX 2... 4 The Capture NX-D Window... 5 Palettes... 6 The Toolbar...
ADOBE PHOTOSHOP CS TUTORIAL
 ADOBE PHOTOSHOP CS TUTORIAL A D O B E P H O T O S H O P C S Adobe Photoshop CS is a popular image editing software that provides a work environment consistent with Adobe Illustrator, Adobe InDesign, Adobe
Image Processing Tutorial Basic Concepts
 Image Processing Tutorial Basic Concepts CCDWare Publishing http://www.ccdware.com 2005 CCDWare Publishing Table of Contents Introduction... 3 Starting CCDStack... 4 Creating Calibration Frames... 5 Create
PHOTOTUTOR.com.au Share the Knowledge
 THE DIGITAL WORKFLOW BY MICHAEL SMYTH This tutorial is designed to outline the necessary steps from digital capture, image editing and creating a final print. FIRSTLY, BE AWARE OF WHAT CAN AND CAN T BE
How to combine images in Photoshop
 How to combine images in Photoshop In Photoshop, you can use multiple layers to combine images, but there are two other ways to create a single image from mulitple images. Create a panoramic image with
PHOTOSHOP: 3.3 CAMERA RAW
 1 PHOTOSHOP: 3.3 CAMERA RAW Raw image files are uncompressed images that contain all the information of the photo. Raw images give you flexibility in editing and allow you to achieve a better look because
Adobe Photoshop CS5 Tutorial
 Adobe Photoshop CS5 Tutorial GETTING STARTED Adobe Photoshop CS5 is a popular image editing software that provides a work environment consistent with Adobe Illustrator, Adobe InDesign, Adobe Photoshop
CHAPTER 12 - HIGH DYNAMIC RANGE IMAGES
 CHAPTER 12 - HIGH DYNAMIC RANGE IMAGES The most common exposure problem a nature photographer faces is a scene dynamic range that exceeds the capability of the sensor. We will see this in the histogram
Software & Computers DxO Optics Pro 5.3; Raw Converter & Image Enhancer With Auto Or Manual Transmission By Howard Millard March, 2009
 Software & Computers DxO Optics Pro 5.3; Raw Converter & Image Enhancer With Auto Or Manual Transmission By Howard Millard March, 2009 Whether you shoot raw or JPEG, whether you re on the Windows or Mac
HDR Darkroom 2 User Manual
 HDR Darkroom 2 User Manual Everimaging Ltd. 1 / 22 www.everimaging.com Cotent: 1. Introduction... 3 1.1 A Brief Introduction to HDR Photography... 3 1.2 Introduction to HDR Darkroom 2... 5 2. HDR Darkroom
GETTING STARTED. 0 P a g e B a s i c s o f A d o b e P h o t o s h o p A g a P r i v a t e I n s t i t u t e f o r c o m p u t e r s c i e n c e
 GETTING STARTED 0 P a g e B a s i c s o f A d o b e P h o t o s h o p Adobe Photoshop: is a popular image editing software that provides a work environment consistent with Adobe Illustrator, Adobe InDesign,
HDR Darkroom 2 Pro User Manual
 HDR Darkroom 2 Pro User Manual Everimaging Ltd 1 / 28 www.everimaging.com Content: 1. Introduction... 3 1.1 A Brief Introduction to HDR Photography... 3 1.2 Introduction to HDR Darkroom 2 Pro... 5 2. HDR
Advanced Diploma in. Photoshop. Summary Notes
 Advanced Diploma in Photoshop Summary Notes Suggested Set Up Workspace: Essentials or Custom Recommended: Ctrl Shift U Ctrl + T Menu Ctrl + I Ctrl + J Desaturate Free Transform Filter options Invert Duplicate
Bristol Photographic Society Introduction to Digital Imaging
 Bristol Photographic Society Introduction to Digital Imaging Part 16 HDR an Introduction HDR stands for High Dynamic Range and is a method for capturing a scene that has a light range (light to dark) that
Teton Photography Group
 Overview general post-processing (editing) workflow for serious photographers Focus on processes more than software Examples using Adobe Lightroom and Photoshop Teton Photography Group January 2016 Emphasis
Transforming Your Photographs with Photoshop
 Transforming Your Photographs with Photoshop Jesús Ramirez PhotoshopTrainingChannel.com Contents Introduction 2 About the Instructor 2 Lab Project Files 2 Lab Objectives 2 Lab Description 2 Removing Distracting
2. Picture Window Tutorial
 2. Picture Window Tutorial Copyright (c) Ken Deitcher, 1999 Original image Final image To get you started using Picture Window we present two short tutorials. Basic Image Editing This tutorial covers basic
Adobe Lightroom CC Tutorial
 Adobe Lightroom CC Tutorial GETTING STARTED Adobe Lightroom CC is a photo editing program which can be used to manipulate and edit large quantities of photos at once. It has great exporting and metadata
loss of detail in highlights and shadows (noise reduction)
") Introduction Have you printed your images and felt they lacked a little extra punch? Have you worked on your images only to find that you have created strange little halos and lines, but you re not sure
Introduction Have you printed your images and felt they lacked a little extra punch? Have you worked on your images only to find that you have created strange little halos and lines, but you re not sure
Kent Messamore 3/6/2010
 Post Processing Kent Messamore 3/6/2010 What we will cover Post Processing Photoshop, Lightroom, Elements, and others JPEG or RAW Photoshop Elements Workflow Organization, Create, share Photoshop Elements
Using Adobe Photoshop to enhance the image quality. Assistant course web site:
 Using Adobe Photoshop to enhance the image quality Assistant course web site: http://www.arches.uga.edu/~skwang/edit6170/course.htm Content Introduction 2 Unit1: Scan images 3 Lesson 1-1: Preparations
Introduction to Photoshop
 Introduction to Photoshop Instructional Services at KU Libraries A Division of Information Services www.lib.ku.edu/instruction Abstract: This course covers the basics of Photoshop, including common tools
Using Adobe Photoshop
 Using Adobe Photoshop 6 One of the most useful features of applications like Photoshop is the ability to work with layers. allow you to have several pieces of images in the same file, which can be arranged
High Dynamic Range (HDR) Photography in Photoshop CS2
 Photography in Photoshop CS2") Page 1 of 7 High dynamic range (HDR) images enable photographers to record a greater range of tonal detail than a given camera could capture in a single photo. This opens up a whole new set of lighting
Page 1 of 7 High dynamic range (HDR) images enable photographers to record a greater range of tonal detail than a given camera could capture in a single photo. This opens up a whole new set of lighting
Topaz Labs DeNoise 3 Review By Dennis Goulet. The Problem
 Topaz Labs DeNoise 3 Review By Dennis Goulet The Problem As grain was the nemesis of clean images in film photography, electronic noise in digitally captured images can be a problem in making photographs
In order to manage and correct color photos, you need to understand a few
 In This Chapter 1 Understanding Color Getting the essentials of managing color Speaking the language of color Mixing three hues into millions of colors Choosing the right color mode for your image Switching
Creating Stitched Panoramas
 Creating Stitched Panoramas Here are the topics that we ll cover 1. What is a stitched panorama? 2. What equipment will I need? 3. What settings & techniques do I use? 4. How do I stitch my images together
GXCapture 8.1 Instruction Manual
 GT Vision image acquisition, managing and processing software GXCapture 8.1 Instruction Manual Contents of the Instruction Manual GXC is the shortened name used for GXCapture Square brackets are used to
HISTOGRAMS. These notes are a basic introduction to using histograms to guide image capture and image processing.
 HISTOGRAMS Roy Killen, APSEM, EFIAP, GMPSA These notes are a basic introduction to using histograms to guide image capture and image processing. What are histograms? Histograms are graphs that show what
Introduction to Photoshop: Basic Editing & Prepare Images for the Web
 Introduction to Photoshop: Basic Editing & Prepare Images for the Web 1 LEARNING OBJECTIVES Basic tools in Photoshop & Use of Bridge Prepare images for print and web use TOPICS COVERED Photoshop Interface
Produce stunning. Pro photographer Chris Humphreys guides you through HDR and how to create captivating natural-looking images
 Masterclass: In association with Produce stunning HDR images Pro photographer Chris Humphreys guides you through HDR and how to create captivating natural-looking images 8 digital photographer 45 masterclass4produce
What is real? What is art?
 HDCC208N Fall 2018 We ll fix it in post The Digital Darkroom What is real? What is art? We have been discussing this pair of questions at various points this semester, with drawings, paintings, the camera
INSTRUCTION MANUAL MM-A209
 E INSTRUCTION MANUAL 9222-7300-11 MM-A209 2 BEFORE YOU BEGIN Before installing the DiMAGE Viewer software, read the data-transfer section in the camera manual. This section details how to connect the camera
Local Adjustment Tools
 PHOTOGRAPHY: TRICKS OF THE TRADE Lightroom CC Local Adjustment Tools Loren Nelson www.naturalphotographyjackson.com Goals for Tricks of the Trade NOT show you the way you should work Demonstrate and discuss
Black and White using Photoshop
 Topics to be covered: Methods for B&W conversion Improving the image Toning Printer color management Black and White using Photoshop Various ways to get to B&W Adobe Raw Converter (ACR) in from Bridge
in association with Getting to Grips with Printing
 in association with Getting to Grips with Printing Managing Colour Custom profiles - why you should use them Raw files are not colour managed Should I set my camera to srgb or Adobe RGB? What happens
Learning Photo Retouching techniques the simple way
 Learning Photo Retouching techniques the simple way Table of Contents About the Workshop... i Workshop Objectives... i Getting Started... 1 Photoshop Workspace... 1 Setting up the Preferences... 2 Retouching
CHAPTER1: QUICK START...3 CAMERA INSTALLATION... 3 SOFTWARE AND DRIVER INSTALLATION... 3 START TCAPTURE...4 TCAPTURE PARAMETER SETTINGS... 5 CHAPTER2:
 Image acquisition, managing and processing software TCapture Instruction Manual Key to the Instruction Manual TC is shortened name used for TCapture. Help Refer to [Help] >> [About TCapture] menu for software
Neat Image. User guide. To make images look better. Document version 4.2, January 10, Copyright by ABSoft. All rights reserved.
 To make images look better. User guide Document version 4.2, January 10, 2005 Table of contents 1. Introduction...3 1.1. Overview...3 1.2. Features...3 1.3. Requirements...4 2. Key concepts...5 2.1. What
USING GOOGLE'S NIK COLLECTION
 USING GOOGLE'S NIK COLLECTION Workshop Outline Resources Download Source: https://www.google.com/nikcollection/ Video: https://www.youtube.com/user/niksoftwarelessons There will also be a set of eight
Luma User s Guide. Mosaic Imaging 873 Great Road P.O. Box 299 Stow, MA
 Luma User s Guide Mosaic Imaging 873 Great Road P.O. Box 299 Stow, MA 01775-0299 978-461-0110 www.mosaicimaging.com Luma User s Guide Luma Studio Software V1.7 Notice of Rights All rights reserved. This
32 Float v3 Quick Start Guide. AUTHORED BY ANTHONY HERNANDEZ (415)
") 32 Float v3 Quick Start Guide 32 Float v3 Trademark/Copyright Information Copyright 2013 by United Color Technologies, LLC. All rights reserved. Unified Color Technologies, BeyondRGB, and HDR Expose are
32 Float v3 Quick Start Guide 32 Float v3 Trademark/Copyright Information Copyright 2013 by United Color Technologies, LLC. All rights reserved. Unified Color Technologies, BeyondRGB, and HDR Expose are
PASS4TEST. IT Certification Guaranteed, The Easy Way! We offer free update service for one year
 PASS4TEST IT Certification Guaranteed, The Easy Way! \ We offer free update service for one year Exam : 9A0-125 Title : Adobe Photoshop Lightroom 2 ACE Exam Vendors : Adobe Version : DEMO Get Latest &
Unit 7 : Image Painting, Editing and Layers
 Unit 7 : Image Painting, Editing and Layers Introduction This Unit describes about various painting tools; such as selection, cropping and measuring tools, retouching, drawing and type tools, Navigation
GlassSpection User Guide
 i GlassSpection User Guide GlassSpection User Guide v1.1a January2011 ii Support: Support for GlassSpection is available from Pyramid Imaging. Send any questions or test images you want us to evaluate
Essential Post Processing
 Essential Post Processing By Ian Cran Preamble Getting to grips with Photoshop and Lightroom could be described in three stages. One is always learning and going through stages but there are three main
HDR Show & Tell Image / Workflow Review Session. Dave Curtin Nassau County Camera Club October 3 rd, 2016
 HDR Show & Tell Image / Workflow Review Session Dave Curtin Nassau County Camera Club October 3 rd, 2016 Capturing Realistic HDR Images Topics: HDR Review (Brief Summary from HDR Presentation Parts: 1
NOISEWARE 5 USER'S GUIDE PLUG-IN BY IMAGENOMIC
 NOISEWARE 5 PLUG-IN USER'S GUIDE BY IMAGENOMIC 2012 Updated May 17, 2012 Contact Imagenomic at http://www.imagenomic.com/contact Copyright 2004-2012 Imagenomic, LLC. All rights reserved 2 TABLE OF CONTENTS
Professional RAW Editor for ios and icloud Photo Library (v2.0)
") Professional RAW Editor for ios and icloud Photo Library (v2.0) INTRODUCTION Thank you for downloading RAW Power. RAW Power is the first RAW editor for ios 11 that can read and modify the ios Photo Library
Professional RAW Editor for ios and icloud Photo Library (v2.0) INTRODUCTION Thank you for downloading RAW Power. RAW Power is the first RAW editor for ios 11 that can read and modify the ios Photo Library
Picture Style Editor Ver Instruction Manual
 ENGLISH Picture Style File Creating Software Picture Style Editor Ver. 1.18 Instruction Manual Content of this Instruction Manual PSE stands for Picture Style Editor. In this manual, the windows used in
Tablet overrides: overrides current settings for opacity and size based on pen pressure.
 Photoshop 1 Painting Eye Dropper Tool Samples a color from an image source and makes it the foreground color. Brush Tool Paints brush strokes with anti-aliased (smooth) edges. Brush Presets Quickly access
Windows INSTRUCTION MANUAL
 Windows E INSTRUCTION MANUAL Contents About This Manual... 3 Main Features and Structure... 4 Operation Flow... 5 System Requirements... 8 Supported Image Formats... 8 1 Installing the Software... 1-1
TOPAZ LENS EFFECTS QUICK START GUIDE
 TOPAZ LENS EFFECTS QUICK START GUIDE Introduction Topaz Lens Effects is designed to give you the power to direct and focus your viewer s eyes where you want them. With Lens Effects, you get advanced technology
Picture Style Editor Ver Instruction Manual
 ENGLISH Picture Style File Creating Software Picture Style Editor Ver. 1.12 Instruction Manual Content of this Instruction Manual PSE is used for Picture Style Editor. In this manual, the windows used
32 Float v2 Quick Start Guide. AUTHORED BY ANTHONY HERNANDEZ - (415)
") 32 Float v2 Quick Start Guide 32 Float V2 Trademark/Copyright Information Copyright 2011 by United Color Technologies, LLC. All rights reserved. Unified Color Technologies, BeyondRGB, and HDR Float are
32 Float v2 Quick Start Guide 32 Float V2 Trademark/Copyright Information Copyright 2011 by United Color Technologies, LLC. All rights reserved. Unified Color Technologies, BeyondRGB, and HDR Float are
HIGH DYNAMIC RANGE IMAGING Nancy Clements Beasley, March 22, 2011
 HIGH DYNAMIC RANGE IMAGING Nancy Clements Beasley, March 22, 2011 First - What Is Dynamic Range? Dynamic range is essentially about Luminance the range of brightness levels in a scene o From the darkest
Acknowledgements About this book Other Goodies Included with this Book Resources for Nikon Photographers. Part I: Capture NX2 2. Why Capture NX2?
 The Photographer s Guide to Capture NX2 Contents Acknowledgements About this book Other Goodies Included with this Book Resources for Nikon Photographers x xi xii xiii Part I: Capture NX2 2 Why Capture
This talk is oriented toward artists.
 Hello, My name is Sébastien Lagarde, I am a graphics programmer at Unity and with my two artist co-workers Sébastien Lachambre and Cyril Jover, we have tried to setup an easy method to capture accurate
Maine Day in May. 54 Chapter 2: Painterly Techniques for Non-Painters
 Maine Day in May 54 Chapter 2: Painterly Techniques for Non-Painters Simplifying a Photograph to Achieve a Hand-Rendered Result Excerpted from Beyond Digital Photography: Transforming Photos into Fine
Lesson 16 Text, Layer Effects, & Filters
 Lesson 16 Text, Layer Effects, & Filters Digital Media I Susan M. Raymond West High School In this tutorial, you will: Create a Type Layer Add and Format Type within a Type Layer Apply Layer Effects Apply
REALGRAIN 2 USER'S GUIDE PLUG-IN BY IMAGENOMIC
 REALGRAIN 2 PLUG-IN USER'S GUIDE BY IMAGENOMIC 2013 Realgrain 2 Plug-in User's Guide Realgrain 2 Plug-in User's Guide Updated July 12, 2013 Contact Imagenomic at http://www.imagenomic.com/contact Copyright
The original image. Let s get started! The final result.
 Miniature Effect With Tilt-Shift In Photoshop CS6 In this tutorial, we ll learn how to create a miniature effect in Photoshop CS6 using its brand new Tilt-Shift blur filter. Tilt-shift camera lenses are
Use of the built-in Camera Raw plug-in to take your RAW/JPEG/TIFF file and apply basic changes
 There are a lot of different software packages available to process an image for this tutorial we are working with Adobe Photoshop CS5 on a Windows based PC. A lot of what is covered is also available
Mask Integrator. Manual. Mask Integrator. Manual
 Mask Integrator Mask Integrator Tooltips If you let your mouse hover above a specific feature in our software, a tooltip about this feature will appear. Load Image Load the image with the standard lighting
IT154 Midterm Study Guide
 IT154 Midterm Study Guide These are facts about the Adobe Photoshop CS4 application. If you know these facts, you should be able to do well on your midterm. Photoshop CS4 is part of the Adobe Creative
T I P S F O R I M P R O V I N G I M A G E Q U A L I T Y O N O Z O F O O T A G E
 T I P S F O R I M P R O V I N G I M A G E Q U A L I T Y O N O Z O F O O T A G E Updated 20 th Jan. 2017 References Creator V1.4.0 2 Overview This document will concentrate on OZO Creator s Image Parameter
Photoshop CS2. Step by Step Instructions Using Layers. Adobe. About Layers:
 About Layers: Layers allow you to work on one element of an image without disturbing the others. Think of layers as sheets of acetate stacked one on top of the other. You can see through transparent areas
Portrait Professional User Manual
 Portrait Professional User Manual Version 9 Anthropics Technology Ltd www.portraitprofessional.com Contents 3 Table of Contents Part I Getting Started 6 1 Quick Start... Guide 6 2 Top Tips... For Best