CONTENTS NCOMPAS MEDIA 1 USER MANUAL
|
|
|
- Horatio Stanley
- 5 years ago
- Views:
Transcription

1 2015
2 CONTENTS INSTALLATION & ADMINISTRATION... 4 INTRODUCTION... 4 INSTALLATION INSTRUCTIONS... 4 MANAGE THE DATABASE PATH... 5 LOGGING IN... 6 CREATING AND EDITING USERS... 6 MANAGING THE MEDIA PATH SETUP... 9 PHOTO METADATA TOOLS MANAGE ORIENTATION MANAGE REPORT FOOTER CONFIGURE REPORTS HIDE/SHOW PAGE NUMBERS MANAGE PHOTO BORDERS CHECK FOR UPDATES Database Configuration and Set Up TIERS Tier Tier Tier Examples Creating a Project Class (Tier 1 Class) Configuring Tier Names NCompas Media Program Application Forms PROJECTS Manage Employees Manage Contacts Manage Clients Manage Locations Manage Projects (Tier 1) Quick Reports TRACKING OPTIONS Manage Subcontractors Manage Volunteers and Students Manage Sites (Tier 2) Manage Phase Type (Tier 3) Assigning New Site Names and Phase Types to a Project Quick Reports Photo Section MANAGE EQUIPMENT EG. CAMERA OR GPS MANAGE PERMANENT MONITORING STATIONS Creating a New Photo Station NCOMPAS MEDIA 1
3 4.1.1 View Existing Photo Stations Edit a Photo Station Delete a Photo Station AUTO-READER MANAGE PHOTOS Entering Photos into NCompas Media Viewing and Editing Previously Entered Photos in NCompas Batch Importing Photos into NCompas Media Export Tool Rotate Photo Tool View Previous Photo or Next Photo Tool Synchronization SETUP SYNC DOWNLOAD PHOTOS FROM THE FTP SITE OR DROPBOX TO NCOMPAS MEDIA SELECT PHOTOS AND DATA FOR UPLOADING UPLOADING PHOTOS AND DATA TO PHOTO STATION MONITORING APP Documents Section MANAGE DOCUMENTS Adding a New Document to NCompas Media Viewing Previously Entered Documents Creating Document Reports Slide Shows SLIDE SHOWS Viewing a Slide Show Slide Show Options Using the Filter by Function Using the Order By Function Using the Photo Picker Tool Clear (All Restrictions) Reports Section CREATING A NCOMPAS MEDIA REPORT Project Reports and Tracking Options Using the Change Report View function Using the Data Manager function Saving an NCompas Media Document Report Photo Reports Converting a Finished Photo Report to PDF Drag and Drop and Photo Rearranging Differences between Filter By, Photo Picker and Drag and Drop Saving an NCompas Media Photo Report Using Refresh Tools Troubleshooting NCOMPAS MEDIA 2
4 9.0 KEEPING NCOMPAS MEDIA UP-TO-DATE PHOTO REPORT WILL NOT LOAD FILTER BY EXAMPLES TECHNICAL SUPPORT Appendix I - TRACKING OPTIONS GLOSSARY Appendix II - NCompas Media Photo Documentation Sheets Appendix III - NCompas Media Program Application Forms Appendix IV Local vs. Universal Changes in NCompas Media Local Changes: NCOMPAS MEDIA 3
5 INSTALLATION & ADMINISTRATION INTRODUCTION NCompas Media is a database management software system intended to simplify data storage and retrieval through a series of individual client applications accessing a central server based database. Media stored in the database is saved with a referenced attribute table that contains pertinent metadata such as date and time taken, photo description and photographer. The design of the database allows photos, videos and documents to be saved in a tiered structure. The tiered organizational structure of the database allows for efficient data retrieval of annotated photo reports, slide shows and individual file exports. An extension of the NCompas Media software has been developed in the form of an application called the NCompas Photo Station Monitoring App. The app has been developed for ios, Android and Blackberry mobile device and enables users to harness all of the organizational capabilities of NCompas Media. Users on holidays or collecting photo documentation for work or research purposes can collect large amounts of organized media that can be downloaded and synced to the central server. INSTALLATION INSTRUCTIONS Users wishing to install NCompas Media on a Windows XP computer will need to download and install the following pre requisite software first: Windows Installer us/kb/942288/ Microsoft.NET framework 3.5 SP1 The NCompas Media software is sold online and after confirmation of purchase is received by the seller customers are e mailed a URL link to download NCompas Media. Upon download completion the software will be stored in a zippered folder. Users must unzip the compressed file and choose the Setup icon to start installing NCompas Media. NCOMPAS MEDIA 4


6 A setup wizard will be displayed that will guide users through the installation process. Once the installation is complete, the NCompas Media icon will be displayed on the desktop. To open the software, double click the icon with the left mouse button or, click the icon with the right mouse button once and choose the option to OPEN. The NCompas Media login form will be displayed. MANAGE THE DATABASE PATH Upon opening the software for the first time users must identify to the client application where the central server is located. Select the Manage Database IP button. Enter the appropriate information and click Save. Consult a system administrator for assistance if needed in obtaining the required data. ************************************************************************ SHOULD THE LOCATION OF THE DATABASE CHANGE THE DATABASE SERVER IP ADDRESS MUST BE RE DEFINED. ************************************************************************ Select the option to test the connection. NCompas Media will attempt to establish contact with the central server. If communication is established, the program will display a message stating Successful Connection. Select the option to SAVE. NCOMPAS MEDIA 5

7 LOGGING IN The program s initial login must use the default administrator account username and password. Once successfully logged in, individual user and administrator accounts can be created and the default administrator password changed. username: admin Password: admin CREATING AND EDITING USERS ************************************************************************ ONLY ADMINISTRATORS CAN ADD OR MODIFY USER ACCOUNTS ************************************************************************ Select the Administration option. A menu will be displayed in which new users can be created, current users modified and old users deleted. To create a new user: Select the New User button Enter the pertinent information regarding the new user. Identify if the new user will be an: o End User End Users are the most restricted account only providing access to photos and data within the software database. End Users can generate dynamic reports and slide shows but do not have clearance to add or edit tiers, adjust tracking options or save media. o Administrator Administrator accounts are the highest level account. Administrators have access to all NCompas Media functions and NCOMPAS MEDIA 6
8 are the only users that can manage media paths and create new user accounts. o Media Manager Media Managers do not have administrative rights to add or modify users or change tracking options but can add and media to the database Select the Save User button A message will be displayed stating: The information has been saved. Table 1: Different User Types and Their Associated Permissions Administrator Manager End User Set up customized tier names X X Manage photo data options X Manage media paths X X Manage settings Manage database server settings Manage sync settings X Set up accounts X X Add projects/site/phases X X Manage photos X Manage documents X Generate slide show Generate reports To modify a user: Select the Open User option. Select the user that needs modification and then select the option to Open. Make the necessary changes (for example, implementing a new password). Select the Save User button A message will be displayed stating: The information has been saved. To delete a user: Select the Open User option. Choose the user to be deleted from the available list Select the Delete User button. Select the Yes button. A message will be displayed stating: The information has been deleted. NCOMPAS MEDIA 7


9 MANAGING THE MEDIA PATH ************************************************************************ THIS STEP CAN ONLY BE DONE BY AN NCOMPAS MEDIA ADMINISTRATOR ************************************************************************ Before any media can be stored a user with administrator credentials must identify where media is going to be saved. This location is not the same location identified on page 5 (Managing the Database Path). Managing the database tells the client application where the central server is located. Managing the media path identifies to the database where the actual media will be stored. Select Setup from the main menu Select Manage Media Path Select the New Path button. If known, administrators can type the location in the text box. If unknown, administrators can select the button and navigate to the correct location. Select the option to test the connection. Select the option to Save NCOMPAS MEDIA 8


10 SETUP NCompas Media has the ability to request assistance by from the technical support group at M.C.Wright and Associates Ltd. To make this feature functional, users must enter their name, address and outgoing server information. For assistance in acquiring server data contact a system administrator. Select Setup from the main menu Choose the option for Settings Enter the appropriate information and select Save NCOMPAS MEDIA 9


11 PHOTO METADATA NCompas Media allows users to identify which metadata fields will be associated with the saved media. Select Setup from the main menu. Select Photo Data Options The Photo Data Options window will be displayed. All fields checked off will be included in the media metadata Select the Save button to retain changes. (See Appendix I to view details about all photo metadata options) NCOMPAS MEDIA 10


12 FORMATTING THE PHOTO REPORT REPORT FOOTER The NCompas Media software includes a customizable report footer that allows users to insert their organization s logo into the photo report. If users are not using the software for commercial needs then the feature can be turned on or off at the user s leisure. From the main menu select Tools Select Manage Select Report Footer. The Report Footer window will be displayed. If the Browse button is not active select the New button The Browse button should now be active. Choose an image or logo to be inserted into the report footer. Select the Browse button and navigate to the image location. Click on the image chosen for the footer and select the option to Open. The path of the selected photo and a preview of its image will be displayed To toggle the feature on or off add or remove a check mark from the Set Footer box in the bottom left corner of the Report Footer window Select the option to Save NCOMPAS MEDIA 11

13 2.2 CONFIGURE REPORTS Other report parameters can be modified including the font style of the text used for report captions and the number and size of photos displayed per page in the final generated PDF report. In order to manage the font type and number of photos per page of the photo report: In the Tools menu select Manage and choose the Configure Reports. Choose the font to be used in report captions from the PDF Caption Font dropdown menu if needed. Identify the number of photos to be displayed per page in Photos Per Page box. Click Save Note When an odd number of photos per page is chosen, the change will not be visible in the main NCompas Media Photos By Projects Media report view but will be applied when the PDF report is generated. 2.3 HIDE/SHOW PAGE NUMBERS Page numbers on the bottom right corner of a photos by project media report can be turned on or off. To control the display of page numbers: In the Tools menu select Manage. Hide Page Numbers when the checkmark is displayed to the left of Hide Page Number title, the page number will not display on the photo report. NCOMPAS MEDIA 12


14 In order to show page numbers of the report: Click the Hide Page Numbers title again. The checkmark will not display to the left of Hide Page Numbers title. The page numbers will display on each page of the report 2.4 MANAGE PHOTO BORDERS NCompas Media photo reports can be created with or without square borders around each photo. To toggle photo borders on and off: Open Tools from the main file menu and select Manage Photo Borders and select either On or Off. See figure below for an example. If On is checked, the photo will display with square borders. If Off is checked, the photo will display without square borders. NCOMPAS MEDIA 13

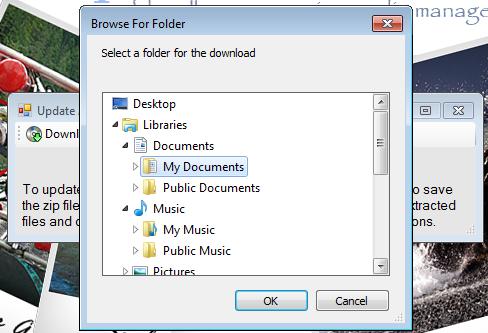
15 2.5 CHECK FOR UPDATES Problems encountered in NCompas Media can often be quickly and easily resolved by ensuring that the program is up to date. To check for updates: Select Tools from the top menu bar and then choose Check For Update. If an update is available you will be prompted to download it. The wizard will prompt you to choose a location to where the update file will be saved. Once downloaded, navigate to the file location, unzip the files and run the Application (setup.exe file) NCOMPAS MEDIA 14

16 NCOMPAS MEDIA 15


17 Database Configuration and Set Up 3.0 TIERS An NCompas Media project can be configured with up to 3 tiers into which photos and data are stored: Tier 1, Tier 2, and Tier 3. Tier structures are used to store photos. Tier 1 is the top tier including sub tiers. Tier 2 is the second tier which will encompass 3 rd level sub tiers. Tier 3 is the third level of categorization for sorting and filtering. Tier titles will be used as section headings in the final NCompas Media photo reports. Tier 1 Tier 2 Tier 3 Example of the NCompas Media Database Tier Structure This following NCompas Media screen shot depicts how unique data fields are tied to a photo in the photo import page. NCOMPAS MEDIA 16
18 Tier 1 Tier 1 is the highest tier level and will include all sub tiers. Tier 1 titles are the coarsest filter which will be used to sort photos and generate reports. Describes the project as a whole To guide your name choice, Ask Yourself: What photos do you want in your final report? Hint Often project names are used as Tier 1 titles. Tier 2 Hint Tier 2 is the second tier which will encompass 3 rd level sub tiers. Tier 2 titles you create will become the main chapters of your photo report and the second coarsest filter for sorting. Ask Yourself: What are the main chapters for my photos? How will I want to sort and organize my Photos within the main Tier? Often site names are used as Tier 2 titles within a Tier 1. Tier 3 Tier 3 is the third level of categorization for sorting and filtering. Tier 3 will be the final subheadings used to organize the media reports. Hint Often dates or description of phases are used as Tier 3 titles. Examples Below are three examples of how the NCompas Media could be structured showing the various ways in which the tire structure can be utilized. Example #1 describes a Project, encompassing multiple sites or locations with multiple work phases. The example given is the Alda Estuary Rehabilitation. The project name is Alda Estuary Rehabilitation. Within this project there is one Tier ( Site ) called NCOMPAS MEDIA 17

 called Fiji and Galapagos Islands. The third tier describes the attraction or activity for each destination of vacation year.")
19 Intertidal Salt Marsh. The third tier describes the work phases for the site of the project. The phase includes As built (2000), Bench Planting (2000), Construction (2000), and Monitoring (2003). Additional tiers could be added to address new work at these sites or the inclusion of new work sites. Example #2 describes a collection of vacation photos. They are sorted by vacation years, then by the various destinations visited during the vacation. The third tier describes the activities at each destination. The vacation year is Vacation Within this vacation year, there are two Tiers ( Destination ) called Fiji and Galapagos Islands. The third tier describes the attraction or activity for each destination of vacation year. The Fiji activities include Navala Village, Resort Special Event, Shigatoka Jet Boat Tour and Spice Market Tour. The attractions of the Galapagos Islands are Darwin Research Station as well as Puerto Ayora. Additional tiers could be added to address new attraction or activity at these destinations or the inclusion of new vacation destination. Example #3 shows how the tier structure could be used to organize family photographers. The first tier identifiers the family name. Tier 2 describes the individual. Tier 3 shows dates and/or notable milestones. The family name is Johnson s Family. Within this family there are three Tiers ( Individuals ) called Jane, Sarah, and Timothy. The third tier describes the date or milestones for each individuals of the family name. The dates of Jane include Grade 10, Grader 11, and Grade 12. The milestones of the Timothy are Engagement 2015, Grade 1, and Scouts Additional tiers could be added to address new dates or milestones for these individuals or the inclusion of new individuals. NCOMPAS MEDIA 18

20 A flow chart like the one below is a great tool to ensure that your tier titles will accommodate your photo sorting/filtering needs to create clear and concise media reports. It is important to ensure that the chosen structure can accommodate additional data in the future. Class Tier 1 Tier 2 A A Tier 2 B Tier 3 A Tier 3 B Tier 3 C Tier 3 A Tier 3 B Tier 3 C Creating a Project Class (Tier 1 Class) *This step can only be done by an NCompas Media Administrator* Note The default Tier 1 class is called Project Class. The text of Tier 1 class will be changed as tier customized (See section for tier name customization). NCOMPAS MEDIA 19

21 Project class is an extra description field above the tier 1 level. In order to create a new project class: Select Projects from the main NCompas Media toolbar Select Manage Project Classes from the side menu. Enter a project class name in the Project Class field. In the Description box provide a thorough summary of the project class. Click Save Project Class To view the list of existing Project Classes: Select Projects in the top NCompas Media toolbar. Select Manage Project Classes from the side menu. Select the Open Project Class icon at the top of the Manage Project Classes Screen Scroll through the list for the name of project class. To edit a project class: Select Projects in the top NCompas Media toolbar. Select Manage Project Classes from the side menu. Select the Open Project Class icon at the top of the Manage Project Classes Screen Select one project class, and click Open button to open the existing project class. Edit the project class information in the fields provided. Click Save Project Class. To delete a project class: Select Projects in the top NCompas Media toolbar. NCOMPAS MEDIA 20


22 Select Manage Project Classes from the side menu. Select the Open Project Class icon at the top of the Manage Project Classes Screen Select one project class, and click Open button to open the existing project class. Click Delete Project Class Configuring Tier Names *This step can only be done by an NCompas Media Administrator* Tier names can be customized in the program to suit your specific needs: Click Setup in the menu bar then click Configure Tiers Modify names of tiers, and click Save to save modified names. NCOMPAS MEDIA 21
23 Taking the time to properly configure your database by defining tiers will ensure that your photos and data are organized how you want them for future retrieval and generation of photo reports. Note Tier settings are universal and apply to all photos in the database (and all users), therefore if all photos in the database share common tier 1, tier 2, and tier 3 names, then tier settings only need to set up once. If the database contains different collections of photos (e.g. family photos, vacation photos and project photos) which require unique tier names, tier settings must be defined before switching between these photo collections to ensure that the correct tier names apply when viewing, editing, creating reports etc. Construction Project Example: Tier 1 = Project Name Tier 2 = Site Name Tier 3 = Phase Name Note Vacation Photos Example: Tier 1 = Vacation Year Tier 2 = Destination Tier 3 = Attraction/Activity Each time tier settings are changed; these changes will be seen on the following NCompas Media screens: Left main screen pane Projects icon top NCompas Media toolbar Manage Screens i. Tier 1 Classes Page (Default: Manage Project Classes ) ii. Tier 1 Names Page (Default: Manage Projects ) iii. Tier 2 Names Page (Default: Manage Sites ) iv. Tier 3 Type Names Page (Default: Manage Phase Types ) v. Tier 3 Names Page (Default: Manage Phases ) vi. Permanent Monitoring Stations (all types) Manage Photos Page Manage Documents Slide Show Picker Reports i. Report Headings Quick Reports All Order By and Filter By menus Important Ensure that the class (section 3.0.0) and location (section 3.1.3) have been created before you attempt to create new project (Tier 1). NCOMPAS MEDIA 22

24 Note When you define your tier names, NCompas Media will force you to log out and log back in to apply the changes NCompas Media Program Application Forms For organizations where multiple users will be accessing NCompas Media, an administrator is typically responsible for assigning tiers and developing the database structure. The addition of new tiers is conducted by an administrator to ensure consistency. NCompas Media manager information forms are intended to enable end users to request to administrator for new tiers. NCompas Media Program Application forms provide all the necessary information for new project or tier set up. NCompas Media Program Application forms (see Appendix III) are submitted to a user who can create the required tiers. 3.1 PROJECTS The following section describes tools and processes found in the Projects Section. Note Within NCompas Media, personnel can be defined in a number of ways. 1) Employees: staff of the organization running the NCompas Media. 2) Contacts: client contacts associated within specific projects 3) Clients: organizations associated with specific projects. 4) Sub contractors: individuals contracted to collect photos or data. 5) Volunteers: individuals who voluntarily submit photos or data. 6) Students Personnel designations apply to all projects and tiers within the database. NCOMPAS MEDIA 23
.")
25 MANAGE ORIENTATION Orientation is one of the data fields which can be applied to a photo. This field is used to identify the orientation of the photo (the relative position from which the photo was taken). To populate the customized list of available orientations for the drop down list: In the Tools menu select Manage and select Orientation option.. If both fields are NOT blank, click the New icon at the top of the manage orientation window.. Enter an orientation description or name and abbreviation in the appropriate fields.. The orientation name will be displayed in the manage photos orientation drop down menu.. Click Save Don t Worry Select from the Orientation drop down list in the Tracking Options on the Manage Photo window, you will see full text of Orientation. After making the selection, the abbreviation will populate in Orientation field. For example, Looking Up Stream at the Transect is seen in Orientation drop down list. LUS->T is seen in Orientation field Manage Employees *This step can only be done by an NCompas Media Administrator* The list of employees is used to populate database fields such as: project manager, photographer which are associated with tiers and photos and can be used for tracking, sorting and filtering. NCOMPAS MEDIA 24

26 To add a new employee: Select Projects in the top NCompas Media toolbar Select Manage Employees from the side menu Enter the employee information in the fields provided Click Save Employee To view the list of existing employees: Select Projects in the top NCompas Media toolbar. Select Manage Employees from the side menu. Select the Open Employee icon at the top of the Manage Employees Screen Use the scrollbar to navigate through the list. Note To sort any list alphabetically, click on that heading. Hint It is recommended that you always check the existing employee list before creating a new entry to prevent duplication. NCOMPAS MEDIA 25
27 To edit an employee: Select Projects in the top NCompas Media toolbar. Select Manage Employees from the side menu. Select the Open Employee icon at the top of the Manage Employees Screen Select one employee, and click Open button to open the existing employee. Edit the employee information in the fields provided. Click Save Employee. To delete an employee: Select Projects in the top NCompas Media toolbar. Select Manage Employees from the side menu. Select the Open Employee icon at the top of the Manage Employees Screen Select one employee, and click Open button to open the existing employee. Click Delete Employee Manage Contacts Contacts are created so that all clients stored in the database have a contact person that is associated with them. To add a new contact: Select Projects in the top NCompas Media toolbar Select Manage Contacts from the side menu Enter the contact information in the fields provided Click Save Contacts To view the list of existing contacts: Select Projects in the top NCompas Media toolbar. Select Manage Contacts from the side menu. Select the Open Contacts icon at the top of the Manage Contacts Screen Scroll through the list for the name of your project contact. NCOMPAS MEDIA 26
28 To edit a contact: Select Projects in the top NCompas Media toolbar. Select Manage Contacts from the side menu. Select the Open Contact icon at the top of the Manage Contacts Screen Select one contact, and click Open button to open the existing contact. Edit the contact information in the fields provided. Click Save Contact. To delete a contact: Select Projects in the top NCompas Media toolbar. Select Manage Contacts from the side menu. Select the Open Contact icon at the top of the Manage Contacts Screen Select one contact, and click Open button to open the existing contact. Click Delete Contact. Hint It is recommended that you always check the existing contact list before creating a new entry to prevent duplication Manage Clients Once the contact person has been created ensure that they are associated with the correct client company. NCOMPAS MEDIA 27

29 To associate a contact with a client company: Select Projects in the top NCompas Media toolbar Select Manage Clients from the side menu Enter the client information in the fields provided, selecting the General Contact from the pre populated drop down menu. Click Save Client To view the list of existing clients: Select Projects in the top NCompas Media toolbar. Select Manage Clients from the side menu. Select the Open Clients icon at the top of the Manage Clients Screen Scroll through the list for the name of your project client. To edit a client: Select Projects in the top NCompas Media toolbar. Select Manage Clients from the side menu. Select the Open Client icon at the top of the Manage Clients Screen. Select one client, and click Open button to open the existing contact. Edit the contact information in the fields provided. Click Save Client. To delete a client: Select Projects in the top NCompas Media toolbar. Select Manage Clients from the side menu. NCOMPAS MEDIA 28
30 Select the Open Client icon at the top of the Manage Clients Screen Select one client, and click Open button to open the existing client. Click Delete Client. Hint It is recommended that you always check the existing client list before creating a new entry to prevent duplication Manage Locations A location describes the general geographic description of where your photos were taken. Each tier #1 project is associated with a location. Before a 1 st tier can be created you must ensure that your location exists or you must create one. To add a new location: Select Projects in the top NCompas Media toolbar Select Manage Locations from the side menu Enter the general location of the projects within the 1 st tier in the Location Name field In the Map box import map or photograph depicting the location In the Comments field write a brief description of the location Click Save Location To view the list of existing locations: Select Projects in the top NCompas Media toolbar. Select Manage Locations from the side menu. Select the Open Location icon at the top of the Manage Locations Screen Scroll through the list for the name of your project location. NCOMPAS MEDIA 29

31 To edit a location: Select Projects in the top NCompas Media toolbar. Select Manage Locations from the side menu. Select the Open Location icon at the top of the Manage Locations Screen. Select one location, and click Open button to open the existing location. Edit the location information in the fields provided. Click Save Location. To delete a location: Select Projects in the top NCompas Media toolbar. Select Manage Locations from the side menu. Select the Open Location icon at the top of the Manage Locations Screen Select one client, and click Open button to open the existing location. Click Delete Location. NCOMPAS MEDIA 30
32 Although the tier labels are user defined to meet the needs of diverse media storage styles, for simplicity, the remainder of the manual has been written using the sample project Alda estuary restoration. The NCompas Media has been configured such that: Tier 1 = Project Tier 2 = Site Tier 3 = Phase Therefore, from this point forward, Tier 1, 2, and 3 will be referred to as Project, Site and Phase Manage Projects (Tier 1) Important Ensure that the class (section 3.0.0) and location (section 3.1.3) have been created before you attempt to create new project (Tier 1). Once all of the necessary background information (location, class, and client) has been entered into NCompas Media in order to create a new project: Select Projects from the main NCompas Media toolbar Select Manage Projects from the side menu Select the correct Project Class (section 3.0.0), Enter the Project name (see Tier 1 on section 3.0), Project Number, Project Manager, Location Name and Client Name in the appropriate fields and drop down menus. There is only one option for the Path, identifying the database location as specified during the database configuration. Choose the default path from the drop down menu. Select the correct Start Date for the project. If all phases of the project have been completed, enter the End Date as well, however if the project is still active leave the end date unchecked Should the drop down lists be missing the appropriate data labels, see section: to define project manager names to define client name to define location name In the Description box, provide a thorough summary of the project. Click Save Projects NCOMPAS MEDIA 31

33 To view the list of existing projects: Select Projects in the top NCompas Media toolbar. Select Manage Projects from the side menu. Select the Open Project icon at the top of the Manage Projects Screen Scroll through the list for the name of your project. To edit a project: Select Projects in the top NCompas Media toolbar. Select Manage Projects from the side menu. Select the Open Project icon at the top of the Manage Projects Screen Select one project, and click Open button to open the existing project. Edit the project information in the fields provided. Click Save Project. To delete a project: Select Projects in the top NCompas Media toolbar. Select Manage Project from the side menu. Select the Open Project icon at the top of the Manage Projects Screen Select one project, and click Open button to open the existing project. Click Delete Project. NCOMPAS MEDIA 32


34 3.1.5 Quick Reports In the left hand menu below Manage Projects is an option to run Quick Reports. Quick reports provide a one click listing of all database entries for a given data field. Within the project section, quick reports run for the following data fields: Employees Contacts Clients Locations Project Classes Projects Additional quick reports for other data fields can be run from the tracking changes section. (See section 2.2 in the manual) To view a specific quick report within the project section: Select Projects in the top NCompas Media toolbar. Click the + sign to the left of the Quick Reports title to expand the list of available quick reports. Click on a heading to run that report. 3.2 TRACKING OPTIONS Manage Subcontractors NCOMPAS MEDIA 33

35 Subcontractors are some people who enter into a subcontractor with the primary contractor. The list of subcontractors is used to populate database fields such as: photographer and writer which are associated with tiers and photos/documents and can be used for tracking, sorting and filtering. To add a new subcontractor: Select Tracking Options in the top NCompas Media toolbar Select Manage Subcontractors from the side menu Enter the subcontractor information in the fields Selecting the Country and Province/State from the pre populated drop down menu if applicable. Click Save Subcontractor To view the list of existing subcontractors: Select Tracking Options in the top NCompas Media toolbar. Select Manage Subcontractors from the side menu. Select the Open Subcontractor icon at the top of the Manage Subcontractor Screen Scroll through the list for the name of subcontractor. To edit a subcontractor: Select Tracking Options in the top NCompas Media toolbar. Select Manage Subcontractors from the side menu. NCOMPAS MEDIA 34
36 Select the Open Subcontractor icon at the top of the Manage Subcontractors Screen Select one subcontractor, and click Open button to open the existing subcontractor. Edit the subcontractor information in the fields provided. Click Save Subcontractor. To delete a subcontractor: Select Tracking Options in the top NCompas Media toolbar. Select Manage Subcontractors from the side menu. Select the Open Subcontractor icon at the top of the Manage Subcontractors Screen Select one subcontractor, and click Open button to open the existing subcontractor. Click Delete Subcontractor Manage Volunteers & Students Volunteers are performing voluntary work. The list of volunteers is used to populate database fields such as: photographer and writer which are associated with tiers and photos/documents and can be used for tracking, sorting and filtering. To add a new volunteer: Select Tracking Options in the top NCompas Media toolbar Select Manage Volunteers from the side menu Enter the volunteer information in the fields, selecting the Country and Province/State from the pre populated drop down menu if applicable. Click Save Volunteer To view the list of existing volunteer: Select Tracking Options in the top NCompas Media toolbar. Select Manage Volunteers from the side menu. Select the Open Volunteer icon at the top of the Manage Volunteers Screen Scroll through the list for the name of volunteers. NCOMPAS MEDIA 35

37 To edit a volunteer: Select Tracking Options in the top NCompas Media toolbar. Select Manage Volunteers from the side menu. Select the Open Volunteer icon at the top of the Manage Volunteers Screen Select one volunteer, and click Open button to open the existing volunteer. Edit the volunteer information in the fields provided. Click Save Volunteer. To delete a volunteer: Select Tracking Options in the top NCompas Media toolbar. Select Manage Volunteers from the side menu. Select the Open Volunteer icon at the top of the Manage Volunteers Screen Select one volunteer, and click Open button to open the existing volunteer. Click Delete Volunteer. Manage Students: Add and delete students the same way as Volunteers and Subcontractors. NCOMPAS MEDIA 36

38 3.2.2 Manage Sites (Tier 2) Once a new project has been created in NCompas Media new Sites and Phase Types can be added/created. To add a new site: Select Tracking Options in the top NCompas Media toolbar Select Manage Sites from the side menu Select the Project Name from the drop down menus and type the Site Name in the field provided. Select the appropriate location. In the Comments field write a description of the site in relation to the overall location as well as any other pertinent information Click Save Site To view the list of existing sites: Select Tracking Options in the top NCompas Media toolbar. Select Manage Sites from the side menu. Select the Open Site icon at the top of the Manage Sites Screen Scroll through the list for the name of sites. To edit a site: Select Tracking Options in the top NCompas Media toolbar. Select Manage Sites from the side menu. NCOMPAS MEDIA 37

39 Select the Open Site icon at the top of the Manage Sites Screen Select one site, and click Open button to open the existing site. Edit the site information in the fields provided. Click Save Site. To delete a site: Select Tracking Options in the top NCompas Media toolbar. Select Manage Sites from the side menu. Select the Open Site icon at the top of the Manage Sites Screen Select one site, and click Open button to open the existing site. Click Delete Site Manage Phase Type (Tier 3) After creating projects and sites, phases can be applied to each site. Before a phase can be applied, however it must be created as a phase type and then assigned to a site. This 2 setp process uses the Manage Phase Types and Manage Phases tools. To add a new phase type: Select Tracking Options in the top NCompas Media toolbar Select Manage Phase Types from the side menu Enter the Phase Type in the field provided along with a description. Click Save Phase Type To view the list of existing phase types: Select Tracking Options in the top NCompas Media toolbar. Select Manage Phase Types from the side menu. NCOMPAS MEDIA 38

40 Select the Open Phase Type icon at the top of the Manage Phase Types Screen Scroll through the list for the name of phase types. To edit a phase type: Select Tracking Options in the top NCompas Media toolbar. Select Manage Phase Types from the side menu. Select the Open Phase Type icon at the top of the Manage Phase Types Screen Select one phase type, and click Open button to open the existing phase type. Edit the phase type information in the fields provided. Click Save Phase Type. To delete a phase type: Select Tracking Options in the top NCompas Media toolbar. Select Manage Phase Types from the side menu. Select the Open Phase Type icon at the top of the Manage Phase Types Screen Select one phase type, and click Open button to open the existing phase type. Click Delete Phase Type. NCOMPAS MEDIA 39
41 Hint Manage Phase Types is used to create a new phase type, and Manage Phases is used to assign a phase type to a project and site Assigning New Site Names and Phase Types to a Project Once all the necessary information (project name, site name, and phase type) has been entered in the previous steps, the Site and Phase Type can be assigned to a project as a phase. To add a new phase: Select Tracking Options in the top NCompas Media toolbar Select Manage Phases from the side menu From the drop down choose the correct Project Name, Site Name and Phase Type in the appropriate drop down menus. Click Save Phases Choose the correct Start Date for the phase. If the phase has been completed, enter an End Date, however, if the phase is still active, leave the end date unchecked. Enter a short description for the current phase Status: e.g. (Active, Pending, or Complete) Additional Comments about the phase may be added. To view the list of existing phases: Select Tracking Options in the top NCompas Media toolbar. Select Manage Phases from the side menu. Select the Open Phase icon at the top of the Manage Phases Screen Scroll through the list for the name of phases. NCOMPAS MEDIA 40

42 To edit a phase: Select Tracking Options in the top NCompas Media toolbar. Select Manage Phases from the side menu. Select the Open Phase icon at the top of the Manage Phases Screen Select one phase, and click Open button to open the existing phase. Edit the phase information in the fields provided. Click Save Phase. To delete a phase: Select Tracking Options in the top NCompas Media toolbar. Select Manage Phases from the side menu. Select the Open Phase icon at the top of the Manage Phases Screen Select one phase, and click Open button to open the existing phase. Click Delete Phase. Note If you receive an error data message when inputting information, check for duplicates. Note Quick Reports of photos of Employee, Subcontractors, Volunteers, Students Phase Types, Sites, and Phases are available in the Tracking Options Section. For more information on quick reports, see section NCOMPAS MEDIA 41


43 3.2.5 Quick Reports In the left hand menu below Manage Phases is an option to run Quick Reports. Within the tracking option section, quick reports run for the following data fields: Employees Subcontractors Volunteers Sites Phase Types Phases For more information, see section Photo Section The following section describes tools and processes found in the Photos section. NCOMPAS MEDIA 42

44 4.0 MANAGE EQUIPMENT EG. CAMERA OR GPS Camera and GPS data fields are used to tag a specific device with an associated photo. GPS and Camera lists must be pre populated before they can be assigned to a photo. To add a new camera or GPS: Select the Photos icon from the top NCompas Media toolbar Select Manage Cameras or Manage GPS Systems from the side menu. Fill in the camera/gps make and model in the field provided as well as a description of the equipment for easy identification (color, age, ownership, rental etc) Click Save Camera/GPS System. The devices will now be shown in the drop down lists of Camera or GPS System. To view the list of existing GPS or Camera: Select the Photos in the top of the NCompas Media toolbar Select Manage Cameras or Manage GPS Systems from the side menu. Select the Open Camera/GPS System icon at the top of the Manage Cameras or Manage GPS Systems window Scroll through the list for the name of phases. NCOMPAS MEDIA 43

45 To edit a camera or GPS: Select the Photos in the top of the NCompas Media toolbar Select Manage Cameras or Manage GPS Systems from the side menu. Select the Open Camera/GPS System icon at the top of the Manage Cameras or Manage GPS Systems Station window Edit the camera or GPS system information in the fields provided. Click Save Camera or Save GPS System. To delete a camera or GPS: Select the Photos in the top of the NCompas Media toolbar Select Manage Cameras or Manage GPS Systems from the side menu. Select the Open Camera/GPS System icon at the top of the Manage Cameras or Manage GPS Systems Station window Click Delete Camera or Delete GPS System. 4.1 MANAGE PERMANENT MONITORING STATIONS *The steps from this point forward no longer require an NCompas Administrator* NCOMPAS MEDIA 44
46 Permanent Monitoring Stations are physical locations from which repeat photos are taken of a specific site to document any changes that have occurred there over time. Culvert, Flow Monitoring Station, Game Cams, HSI, Permanent Cams, Rod and Level Cross Section, Time Lapse, and Photo Stations are examples of different types of permanent monitoring stations available in NCompas Media. These different station types essentially act as additional tags or photo categories beyond the class and 3 tiers. Photos can be sorted by permanent monitoring sties to make filtering and future retrieval easier, producing an output of only those photos taken from the specific monitoring station. Note As all permanent monitoring stations utilize the same data fields, a detailed description will be provided for photo stations. A photo station is a marked, permanent location form which a photo is taken at a specified compass bearing (or series of bearings). Repeat photos can be taken from a photo station to document exact changes over time Creating a New Photo Station In order to create a new photo station: Select the Photos in the top of the NCompas Media toolbar Select Manage Permanent Monitoring Stations from the side menu. Select Manage Photo Stations from the list in the pane along the left side of the screen. Use the + button to expand the list of permanent monitoring stations. NCOMPAS MEDIA 45

47 Select the appropriate Project Name, Site Name and Phase Type from the drop down menus Type the Photo Station Name in the field provided Fill in all additional fields including Date Established and GPS System if applicable. These describe the date that the photo station was established and how the GPS coordinates were determined. The Marker Number is the number on the photo station tag which marks the physical location in the field or leave blank if not applicable Fill in the appropriate Latitude and Longitude for the GPS coordinates of the physical photo station marker and the Compass Declination for the photo azimuths. The box is checked if a Photo Station is currently in use. The box is unchecked if the Photo Station has be destroyed or replaced. This enables you to filter photo stations by active or inactive status. NCOMPAS MEDIA 46
48 Azimuth defines the compass bearing(s) at which repeat photos are to be taken. A single photo station can have multiple photo azimuths. Fill in the appropriate Azimuth for the Photo Station. Click Station. for an azimuth to be added and click Save Photo To add multiple azimuths for a single photo station, enter the second azimuth and click, and enter the third and then click. The azimuths will be added to the large azimuth field. If the user needs to delete an azimuth that has already been entered, select the azimuth from the large azimuth box listing, click and then Save Photo Station and the azimuth will be deleted If applicable fill in the name of the crew member who established the photo station (if known). The Crew field list is populated from the combined of Employee, Volunteer, and Subcontractor list. The selected crew is displayed in the Established By field. To add multiple crew members to the established by list, select the second crew member, and then select the third crew member. If the user needs to remove a crew member that has already been displayed in Established By field, select crew member s name again from the drop down list field and then Save Photo Station and the crew member will be deleted from the Established By field. The Established By field can also be left blank. In the Comments field fill in any additional information about the photo station. Once all information has been entered, click Save Photo Station. When one or more photos are saved to a Permanent Monitoring Station with Project Name, Site Name and no Phase Type, the photo station is available for all phases in that project and site. If saved to a phase, they will only appear under that phase View Existing Photo Stations In order to check to see if a Photo Station has already been entered into NCompas or to update information about an existing Photo Station: Select the Photos in the top of the NCompas Media toolbar Select Manage Permanent Monitoring Stations from the side menu. NCOMPAS MEDIA 47

49 Select Manage Photo Stations from the list in the pane along the left side Select the Open Photo Station icon at the top of the Manage Photo Station window Scroll through the list for your Photo Station number Edit a Photo Station To edit a photo station: Select the Photos in the top of the NCompas Media toolbar Select Manage Permanent Monitoring Stations from the side menu. Select Manage Photo Stations from the list in the pane along the left side Select the Open Photo Station icon at the top of the Manage Photo Station window Select one photo station, click Open button to open the existing photo station. Edit the photo station information in the fields provided. Click Save Photo Station Delete a Photo Station To delete a photo station: Select the Photos in the top of the NCompas Media toolbar Select Manage Permanent Monitoring Stations from the side menu. NCOMPAS MEDIA 48

50 Select Manage Photo Stations from the list in the pane along the left side Select the Open Photo Station icon at the top of the Manage Photo Station window Select one photo station, click Open button to open the existing photo station. Click Delete Photo Station. Most fields in all permanent monitoring stations are essentially identical. There is only one difference between photo stations and other permanent monitoring stations. Azimuth is required for photo station, while it is not required for other permanent monitoring stations. Note Culvert, Flow Monitoring Station, Game Cams, HSI, Permanent Cams, Rod and Level Cross Section, Time Lapse can be managed in the same way of managing Photo Stations. 4.2 AUTO READER NCompas Media has the capability to auto read data stored in the photo file by the camera and can populate certain data field using the Auto Reader function. Fields which the auto reader can populate include: Date Taken, Latitude and Longitude, Compass Declination, Azimuth. You may select which fields are populated by the auto reader by selecting the Auto Reader button and toggling the various fields on or off. Data fields auto populated by the auto reader are displayed in grey and are shown as non editable text. NCOMPAS MEDIA 49

51 All circled fields can be populated by the auto reader. To manually enter a value in place of an auto reader populated value: toggle that field off in the auto reader menu and the field will become editable for manual entry. If a user wishes to overwrite a particular field with the auto reader value, ensure that the field is enabled in the auto reader menu and then click and the autoreader data will replace the existing data for any auto reader enabled fields. A combination of data tagged and normal photos can be batch imported into NCompas Media at the same time. Any fields with manually entered data will be saved to the non data tagged photos. For data tagged photos, these fields will be overwritten with the values obtained by the auto reader. 4.3 MANAGE PHOTOS Now that all the NCompas Media has been fully configured, you are ready to begin importing photos. The Manage Photos window allows you to enter or review and edit photos with their associated data fields. Entering a photo into NCompas compresses the file making for easier storage and rapid accessibility while also storing a separate copy of the raw, uncompressed photograph for future retrieval as required. NCompas Media Photo Documentation Sheets is shown in the Appendix II. Hint Before importing photos, ensure the complete set up of all pre-populated data fields: Project, Site, Phase, Photographer, Photo Station and so on Entering Photos into NCompas Media NCOMPAS MEDIA 50

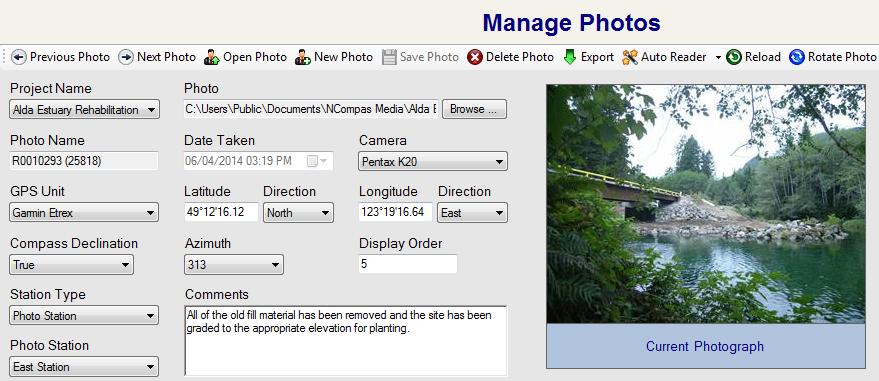
52 Photos can be entered into NCompas Media individually or as a batch importing individually. To add new photos into NCompas Media: Select the Photos in the top of the NCompas Media toolbar Select Manage Photos from the side menu. Select the appropriate Project Name from the drop down menu in the top left of the screen In the Photo box browse for the location of the photo you wish to import and click Open In the bottom Tracking Options window select the Site Name that is associated with the project as well as the appropriate Phase Type if applicable. Both fields are optional, and photos can be entered under just a Project Name or under a Project Name and a Site Name with no phase if desired. If not auto filled, in the Date Taken box click the drop down arrow and select the date on which the photo was taken. (Please see Auto Reader on section 3.1) Fill in remaining applicable data fields as required. (Please see Appendix I for detailed information about photo data options) NCOMPAS MEDIA 51

53 Hint You can manage the visibility of both standard (e.g. GPS Unit) and tracking options (e.g. Site Name, Phase Type). For more information, see section 1.6. Click Save Photo button. There is a window pop up saying Do you want to remove the original photo after it is saved? If you want to delete the photo from original place in local drive, select Yes button. Otherwise, select No button. Check the box next to Always perform this action to conduct same action every time. Figure 1 demonstrates what the screen will look like when importing only one photo at a time Viewing and Editing Previously Entered Photos in NCompas In order to view a photo that has been previously entered into NCompas Media: NCOMPAS MEDIA 52

54 Select the Photos icon from the NCompas Media toolbar Select Manage Photos from the list in the pane along the left side of the screen Select Open Photo. A new Open Photo window will appear which allows you to look through any project to locate photos. Click on sign to expand the tree or the sign to contract. Click on the photo name or thumbnail to bring up a preview in the open photo window. While a photo is being previewed in the Open Photo window you can edit a photo s caption by clicking anywhere in the white text box and making any necessary changes. To retain changes, click Save Photo. Double click the photo in the photo picker to open the photo and edit all associated data fields. Note If you want to open a specific photo with given photo name, you can enter photo name onto the text field next to Search button. Then Press Enter button on the keyboard, the program will direct you to the corresponding photo if there is one. NCOMPAS MEDIA 53
55 4.3.2 Batch Importing Photos into NCompas Media Batch importing is used to import multiple photos to the NCompas Media at a time. Any data fields that are common to all of the selected photos can be updated at one time during the batch importing. In order to import more than one photo click the Photos icon in the main NCompas Media toolbar to go to Manage Photos screen. Select the appropriate Project Name. Browse for the location of the photos you wish to enter. Select all of the photos that you wish to batch importing. Fill in any of the data fields which are common to all of the selected photos. Note Any fields selected or filled in on the Manage Photo screen will apply to all batch imported photos. Photo specific information must be entered into each photo individually after import. NCOMPAS MEDIA 54
 and a tool tip will appear showing which photos are being imported in this batch")
56 All photos will be saved with these specific data fields populated, as shown. This figure demonstrates what the screen will look like when doing a batch import. In order to view which photos are being imported hover your cursor over the Photo field (it will show Batch Import ) and a tool tip will appear showing which photos are being imported in this batch import. In this example, all batch imported photos have the same information in the Project Name, Site Name, Phase Type, Date Taken, and Comments fields. Batch importing saves time by applying these data fields to all 3 batch imported photos, and only photo specific data fields will need to be populated one photo at a time Export Tool The Export Tool provides the user with a simple way to export photos and comments out of NCompas Media and into a folder that is easy to send or share. Photos are exported as individual jpeg files and comments as correlated text files. Export Photos: NCOMPAS MEDIA 55
 that you wish to export by clicking to place a checkmark beside a specific project, site, phase or individual photo.")
57 If you wish to export a photo that has already been entered into NCompas Media click Photos in the main NCompas Media toolbar then Export A new window will appear that lets the user select the photo(s) that you wish to export by clicking to place a checkmark beside a specific project, site, phase or individual photo. Hint If you want to select all of the photos in a particular Project, Site or Phase Type click the button or if you wish to unselect an entire Project, Site or Phase Type click the button Once the photo(s) have been selected click Export Photos and a new Select Photo Types to Export window will appear You now have the option to select one or more photo types. Here you choose if you would like to export the raw (uncompressed image), the compressed image, or the thumbnail image. When you are done select Export Photos. Browse to the location where you want the exported photos. Export Type Raw Compressed Thumbnail Size Original Size Approximate Approximate KB KB A new folder will be created called NCompas Media Export containing the exported photos. A text file will also be created for each photo containing that photo s comments. Export Data: NCOMPAS MEDIA 56


58 The Export Data tool generates a csv text file containing all photo data fields. In order to export this information, select Export in the Manage Photos screen. Then select the photos you wish to export the information for. Once the appropriate photos are selected click the Export Data button and Browse to the location where you wish to save the photo information and click OK A new folder will be created called NCompas Media GIS Export containing the csv text file Rotate Photo Tool Photo can be rotated in NCompas Media. When one photo is open in Manage Photo page, Select. The photo is rotated clockwise. To retain the change of photo, Click Save Photo button View Previous Photo or Next Photo Tool If there is more than one photo under a specific Project/Site/Phase, you have the ability to scroll left and right to view different photos under the same Project/Site/Phase. To view the previous photo with lower number in Display Order field, Click button. To view the next photo with greater number in Display Order field, Click button. NCOMPAS MEDIA 57

59 NCOMPAS MEDIA 58
 is developed to sync with the NCompas Media facilitating photo uploads and downloads.")
60 Synchronization Photo can be collected and imported directly into the NCompas Media using the NCompas Photo Station Monitoring App. The NCompas Photo Station Monitoring App (available for ios mobile devices) is developed to sync with the NCompas Media facilitating photo uploads and downloads. Photos can be downloaded from the NCompas Media to the device for ease of reference and replication. For more information on the NCompas Photo Station Monitoring App, please see the tutorial in the NCompas Photo Station Monitoring App. 5.0 SETUP SYNC Before syncing between NCompas Media and the Photo Station Monitoring App, you must define the Sync Settings. To setup syncing: Select Setup from the main NCompas Media toolbar Select the Setup Sync button NCOMPAS MEDIA 59

61 There are two ways to sync photos between NCompas Media and the Photo Station Monitoring App: using a FTP site or By Dropbox cloud service. If a FTP site is used, click the FTP radiobox. Fill in the appropriate information for the FTP site and click the Save button. If Dropbox is used, click the Dropbox radiobox. Click the Save button. Note Download Photos: Receive photos from NCompas Photo Station Monitoring app to NCompas Media program. Upload Photos and Photo Data: Sending photos and photo data from NCompas Media program to NCompas Photo Station Monitoring app. 5.1 DOWNLOAD PHOTOS FROM THE FTP SITE OR DROPBOX TO NCOMPAS MEDIA Photos taken using the NCompas Photo Station Monitoring app can be quickly and easily downloaded from the device and uploaded into the NCompas Media, eliminating the need for manual data entry. In order to download photos from the FTP site or Dropbox folder (sent by Photo Station Monitoring app) into the NCompas Media: Open NCompas Media. Select Setup from the main NCompas Media toolbar Select Sync with Device button Select Download Files button to start downloading photos from the FTP server or Dropbox. Photos can be edited and saved once downloaded into the NCompas Media. NCOMPAS MEDIA 60

62 5.2 SELECT PHOTOS AND DATA FOR UPLOADING NCompas Media can upload photos to pre populate the app for photo replication and to save time populating data fields for existing projects. Upload photos and the associated photo information onto the app: Select Setup from the main NCompas Media menu Select Sync with Device Select Upload Photo Info The Photo Options window will display after the Upload Photo Info button is clicked. Click Select Project(s) button. Identify the project/site/phase from which you wish to upload photos to the NCompas Photo Point Monitoring App. This will narrow the search criteria for the next step of photo selection. Only photos from the chosen projects will be displayed. Anything which is not a project or phase is a permanent monitoring station. Click the Continue button once your selection is made. NCOMPAS MEDIA 61

63 Click the Select Photo(s) button to choose the specific photos that you would like to download into the app from within your selected project(s). Place a checkmark beside each photo to be synced to the Photo Station Monitoring app. If Select First Photo button is clicked, the first photo for each phase is checked. Click Set Photos to Upload button once finished. Hint If you want to select all of the photos in a particular Project, Site or Phase Type click the button or if you wish to unselect an entire Project, Site or Phase Type click the button NCOMPAS MEDIA 62

64 The next step is to select which data fields you wish to sync with the photo. The list of data fields is shown in the Photo Options window. Sync identifies whether or not that data field will be synced to the app. Required identifies whether or not that will be a required data field in the app. ( i.e. required data fields cannot be left blank) Persistent for Project when selected identifies that the first entry in that data field when using the app will be auto populated into that same field in subsequent photos taken for that project. (E.g. if the Pentax camera is entered in the camera field for all subsequent photos taken for that project) Persistent for Photo Station when selected identifies that the first entry in that data field when using the app will be auto populated into that same field in subsequent photos taken for that photo station. (E.g. if the Nikon camera is entered in the camera field for all subsequent photos taken for that photo station) NCOMPAS MEDIA 63

65 Click Sync button on the top to start syncing once finished. 5.3 UPLOADING PHOTOS AND DATA TO PHOTO STATION MONITORING APP Once all photos and data fields have been identified, this information is now ready to upload to and populate the Photo Station Monitoring app. The next step must be performed in the Photo Station Monitoring app on the mobile device. Setup Sync Setting in your device i. In Settings of the device, scroll up down to find Photo Station Monitoring app and click to select. NCOMPAS MEDIA 64
66 ii. In the Upload Settings section, choose a File Transfer Method which matches that previously selected in the NCompas Media Sync Settings (see section 5.0): either by FTP or by Dropbox by clicking the arrow which indicates the selection. NCOMPAS MEDIA 65

67 If using FTP site: Choose FTP as File Transfer Method. Click FTP Account Tab. Enter the appropriate information. Enter the URL for the FTP site Enter the username for the FTP site Enter the password for the FTP site Open Photo Station Monitoring app. Click Sync Photo Info button to start syncing the selected photos and data to the app. If using Dropbox: Choose Dropbox as File Transfer Method. NCOMPAS MEDIA 66

68 Open Photo Station Monitoring app. Click Sync Photo Info button to start syncing the selected photos and data to the app. Dropbox username and password must be entered for the first time of uploading. Photo Station Monitoring folder must be allowed to be accessed by NCompas Photo Station Monitoring App. NCOMPAS MEDIA 67
69 Documents Section 6.0 MANAGE DOCUMENTS Documents associated with a specific project or set of photos can also be stored in NCompas Media s 3 tiered database. The documents tab allows you to import documents and associate them with a specific project, site, phase, author and date Adding a New Document to NCompas Media Word document and PDF files can be imported as documents into the NCompas Media. To add a document to an existing project: Select the Documents icon in the top NCompas Media toolbar Click the dropdown arrow beside the Project Name box and select the appropriate project to associate the document with in the database. If applicable select the site name and phase type. In the Documents box browse for the location of the document you wish to import by clicking the browse button and selecting the file If you wish to rename the document file in the NCompas Media: In the Rename Document box enter an appropriate name which best describes the document. In the Date Written box click the drop down arrow and select the appropriate date for which the document was composed. In the Comments box, enter a description about the document. If applicable fill in the name of the writers who wrote the document (if known). Writers field list is populated from the combined of Employee, Volunteer, and Subcontractor list. To add multiple writers to the written by list, select the second writer, and then select the third writer. If the user needs to remove a writer that has already been displayed in Written By field, select writer s name again from the drop down list field and then Save Document and the writer will be deleted from the Written By field. The Written By field can also be left blank. When you are satisfied with the information you have entered, click Save NCOMPAS MEDIA 68

 Select the documents by Project Quick Reports in the left")
70 6.0.1 Viewing Previously Entered Documents To view documents previously entered: Select the Documents tab from the top NCompas Media toolbar Click Open Document and you will be able to scroll through documents that have already been entered into NCompas listed by project, site, and phase. Other ways to view saved documents are 1) Select the documents by Project Quick Reports in the left pane NCOMPAS MEDIA 69

. The report display can also be adjusted using Data Manager (See Section 8.0.2) and Change Report View (See Section 8.")
71 2) Click on Reports in the main NCompas Media toolbar then Document Reports and finally Documents By Project You will then be able to select the document you wish to view Creating Document Reports Document Reports provide a list of all documents that have been linked to the projects in the NCompas Media with a link to open each document. To generate a document report: Click the Reports icon In the left menu expand the Document Reports section Select Documents By Report A list of document by project will be generated. This list can be filtered and ordered using the filter by and order by tool (See Section and 7.0.3). The report display can also be adjusted using Data Manager (See Section 8.0.2) and Change Report View (See Section 8.0.1). NCOMPAS MEDIA 70

72 Slide Shows 7.0 SLIDE SHOWS NCompas Media s Slide Show function allows you to select and display photos from one or multiple projects as a full screen slide show. Hovering over any photo brings up the comment caption Viewing a Slide Show Select Slide Show in the top NCompas Media toolbar A new Select Projects window will appear which will enable you to scroll through and select whichever project you wish to include in the Slide Show. If you wish to include multiple projects in a slide show, hold down the ctrl key and select the additional projects you wish to include. The projects will be displayed as separate shows in the Slide Show Theatre. Once you have made your project selection, click Select Projects or if only a single project, double click the highlighted project name Note A new Slide Show Theatre page will open which enables you to select the project to view in the first slide show You can filter and sort photos by using Filter By Tool (see section 7.0.2), Order By Tool (see section 7.0.3), Photo Picker Tool (see section 7.0.4) to get photos in different location (e.g. under different phases) displaying in slideshow. NCOMPAS MEDIA 71

73 In order to view the pictures click on the theatre box containing the project title. A description will appear under the Project Name which was entered when the project was created Once the slide show has begun the program will scroll through each photo that has been entered under the main project name and as defined in the Filter and Order By tools Slide Show Options If you wish to view comments that associate with a photo, hover your cursor over the photo, a box will slide down from the top containing the photo comment, and sequence number and the remaining before the slide changes. NCOMPAS MEDIA 72

74 7.0.2 Using the Filter by Function To stop the slide show, click the button. To start the slide show again, click the title of the project from the slide show theater. To scroll through the pictures more quickly, click the button to advance to the next 9 photos or to return to the last 8 photos. The button returns to the last photo displayed and the button advances to the next photo in the sequence. To show the slide show in full screen, click the button. The button returns to the default previous screen. You can select a specific photo from the listing by selecting the photo from the bottom row of thumbnails and the slide show will be paused, displaying only the selected photo. If the project you are creating a slideshow for has multiple Phase Types or multiple Site Name, you may wish to view only one Phase or Site in your slideshow using the Filter By button. Once clicked a Slide Show Filters box will appear which allows you to filter out any pictures that are not wanted in the slide show. The photos are filtered by Project Name by default. To add a constraint, select the button. A new filter constraints display on the next line. You have the option to filter by any of the data fields such as Project Name, Site Name, Phase Type, Date Taken or by Camera and so on. NCOMPAS MEDIA 73


75 Select the data field to Filter By by highlighting/selecting it. It will now populate the first blank in your filter constraint equation. To add an operator, click operator after constraint. You have the option for operator: Equals, Does not Equal, Is greater than, Is greater than or equal to, Is less than and so on. In the Value box select the values you wish the pictures to be filtered by. For example if you wish to filter by a specific project name and then filter by a specific Phase Type, you would select Project Name first and choose proper operator and project name, (Project Name = ) and then select Phase Type and choose proper operator and the specific phase type that you wish to filter by. (Phase Type = ) NCOMPAS MEDIA 74

76 Once you have added one filter you do have the option to add multiple other filters. In order to do this you must ensure that you choose the highest level or coarsest filter first. Then select the next filter, ensuring that the search criteria is gradually becoming finer and finer. Once you have added all of the appropriate filters select Apply Filter and you will have a new Slide Show. Important To pick the wanted photos using Filter By Tool, the rules listed below must be followed: Add most general filter first (e.g. Project) If applicable, add second, third general filter (e.g. Site, Phase) If applicable, add specific photo data field as filter (e.g. Photo Name, Azimuth) Don t do it in opposite way. For example, if you filter by site name only, it will show all photos in filtered site name under different projects! More than one project could have same site name, so you will see tons of photos under various projects. Hint Don t forget to Apply Filter after all selections are made. See more filter examples in Troubleshooting section Using the Order By Function The order in which photos are displayed can be defined using the Order By function: Select the Order By button and a new Slide Show Order Preferences box will appear. Under the Column Names box you have the option to order your slideshow by any of the existing NCOMPAS MEDIA 75

77 data fields e.g.: camera, date taken, photo name, photo number, roll number, chainage, etc. You can order by a number of data parameters by choosing and adding them one at a time. After selecting each parameter, remember to check the Add Column button to apply it as a filter criterion. Always ensure that you select the coarsest or highest level filter first. Click Apply Order By to apply the reordering criterion and a new slideshow will be created Using the Photo Picker Tool The Photo Picker tool is used to select specific photos that may not be able to be selected using the Filter By tool. The Apply (All Restrictions) button will combine all of the Filter By, Order By, and Photo Picker restrictions together in the slide show. Click Photo Picker in the toolbar and a new window will appear, listing all photos in the database by project, site and phase. Select or deselect photos to determine which will appear in the Slide Show. If you wish to view only a select few photos in your Slide Show, the Deselect All button and all photos within the highlighted Project will be deselected. Then you are able to select the few photos you wish to appear in the slideshow. The photos with green checks beside them will be included and photos without checks beside them will not be included. You are also able at this point to edit any photo captions that you wish to change below the photo preview on the right side of the window. If any edits are made click Save. When you are ready to create the slideshow click Apply Photo Picker and a new slide show will be created NCOMPAS MEDIA 76
78 The Apply (All Restrictions) button will combine all of the Filter By, Order By, and Photo Picker restrictions together in the slide show Hint If you notice photos are missing after you adding them in (importing them). You must click Reload button to have them displayed in the photo picker Clear (All Restrictions) The purpose of this button is to enable the user to clear any or all restrictions (sorting, filtering, ordering) that have been applied to the report. Clearing all restrictions will restore any report back to its default condition and ask you to restart the report from scratch. (Any changes to photo selection, order, captions etc. will be lost if not saved). If you click the Clear (All Restrictions) button when creating a Slide Show or a Photos by Project Media report a new Select Projects window will appear. If you wish to view the same report without the restrictions that had previous been applied, select the project that you were just working on and a new Photo Report, without any restrictions will appear. Reports Section The report section allows you to run a number of different summary reports based on the existing data fields, like the quick reports, the project, tracking options and document reports generate complete lists for each data type. 8.0 CREATING A NCOMPAS MEDIA REPORT Creating a report in NCompas Media is an extremely useful tool. The final report is when all of the organizing you have done in previous steps really pays off. Photos and data are sorted, filtered and displayed according to the various data. Fields entered in the previous steps can be used to now generate detailed or general summary reports. In the Reports section of the top NCompas Media toolbar, the user then can access: Project Reports Tracking Options Reports Photo Reports NCOMPAS MEDIA 77


79 Document Reports Project Reports and Tracking Options Project Reports provide a series of quick summary reports for Employees, Contacts, Clients, Project Classes, Locations, and Projects. Tracking Options Reports provide a series of quick summary reports for Employees, Subcontractors, Volunteers, Sites, Phase Types, and Phases. For either type of report, click on a report name to generate a complete list of all data entries for that field type. Reports can be displayed in two different layouts (columns or rows). The report view is switched using the Change Report View button (See Section 8.0.1). NCOMPAS MEDIA 78
80 8.0.1 Using the Change Report View function The Change Report View function allows the user to generate a report in different orientation. If all data fields are displayed in columns, click Change Report View button, all data fields are displayed in rows. If all data fields are displayed in rows, click Change Report View button, all data fields are displayed in columns. The complete summary reports can be sorted, filtered and re ordered using the Filter By, and Order By tools (See Section 7.0.3). The Data Manager Tool allows you to alter the displayed column headings in any of the reports (See Section 6.1.0) Using the Data Manager function The Data Manager function allows the user to show specific field name in the report. In order to manage field name in the report, click Data Manager from the top toolbar A new Document Data Preference window will appear Select from the column names drop down, the data fields that you wish to include in the report. Click the drop down arrow under the Column Names box, select each individual data field. Fill in Rename Column field for each individual field selected. Then click Add Column to populate the field name list. The order in which you specify data fields in the Document Data Preference window is the order in which this data will be displayed in the report. To remove a data field from the report, highlight it in the window and select remove selected column or remove all columns to delete all data fields from the table to delete all data fields from the table. Once all of the desired data fields are added in the Column Name box select Apply Data Manager. Hint When using Data Manager menu, after make your selection, don t forget to click Apply Data Manager button to apply your selection before closing the window. NCOMPAS MEDIA 79
81 Reports can be saved for future reference/retrieval within the program using the Save Report function or exported to a PDF printout which can be saved outside to program using the Convert to PDF tool Saving an NCompas Media Document Report Document reports can be saved in NCompas Media, allowing you to pick up where you left off and continue making report edits at a later date without having to start from scratch. With your document report open, select. Name your report and provide a description to assist in future retrieval. By doing this you are able to save the document report in its current status and reopen it at a later date without having to edit the report from scratch again. To re open a previously saved report Click the reports button to access the reports toolbar Select then navigate to the photo report you wish to continue editing or make further changes to. Select the report in the list and click Open Report Photo Reports The Photo Reports section allows you to generate additional quick reports on cameras, GPS systems, all photos by project and permanent monitoring stations as was as generate final pdf photo reports of selected photos with associated specific data fields displayed as a photo caption Photos By Project Media The Photos By Project Media function generates photo reports of all photos within a given project or projects. These photo reports are highly customizable to display photos and their associated data in a way that best tells your story. In order to create a Photo Report click Photos by Project Media and a new Select Projects window will appear. Select the project(s) which contain the photos you wish to create a Photo Report for and click Select Project. NCOMPAS MEDIA 80
82 Hint If you wish to create a Photo Report containing photos from more than one project simply hold down the ctrl key, select the projects you wish to view photos of and click Select Project. A new NCompas Media Photos by Project Media report will appear which contains all of the photos that have been entered under them with that Project Name (all sites, all phases). You can also select photos for the photo report using the photo picker tool. (See section 7.0.4) By default, photos will be displayed by site and phase ( alphabetically) and then by display order (the order in which there were entered unless otherwise specified at the time of photo entry) The user is also able to use the Filter By (See section 7.0.2) Order By (See section 7.0.3), Drag and Drop (See section 8.0.6) to modify the order in which photos are displayed. The same Convert To PDF (See section ) function can also be used for Photo Reports if the user wishes to save a copy of the document. Convert a Finished Document Report to PDF NCompas Media allows you to convert document reports to a PDF which can be saved outside the program and easily shared to create a PDF version of your NCompas Media Document Report: click the Convert to PDF button and a preview of the PDF NCOMPAS MEDIA 81

83 report will be generated. Within the PDF preview you can choose to save or print to a specific location. Using the Caption Builder Function The Caption Builder tool allows the user to add captions beneath photos in Photo Reports based on that photo s populated data fields. In order to create captions click Caption Builder from the top toolbar A new Select Photo Report Fields window will appear Select from the column names drop down, the data fields that you wish to include underneath photos as a caption in the photo report. Click the drop down arrow under the Column Names box, select each individual data field to add to the caption and then click Add Column to populate the caption list. The order in which you specify data fields in the Select Photo Report Fields window is the order in which this data will be displayed in the caption. To remove a data field from the caption, highlight it in the window and select remove selected column or remove all columns to delete all data fields from the caption to delete all data fields from the caption. Once all of the desired captions are added in the Column Name box select Apply Caption Builder Hint When using the order by or caption builder menus, after make your selection, don t forget to click Apply Caption Builder button to apply your selection before closing the window. NCOMPAS MEDIA 82
84 Using the Photo Information function The Photo Information tool allows the user to add photo data fields (e.g. Taken by and Entered By field) on the top right corner of photos in Photo Reports. In order to add photo data information, click Photo Information from the top toolbar when there is no photo data information displayed on the photo report. In order to remove photo data information, click Photo Information from the top toolbar when there is photo data information displayed on the photo report. Using the Export Photos function The Export Photos Tool provides the user with a simple way to export photos inside the photo report into a folder that is easy to send or share. Photos are exported as individual jpeg files and comments as correlated text files. For more information, see section Permanent Monitoring Stations Reports Why is it so useful? Permanent monitoring station reports are ideal for showing changes observed over time from a fixed location. Permanent monitoring station reports provide a summary of station reports provide a summary of station information with each photo including: Station Name Description Photo Number Photo File Name Azimuth Date Taken Comment Photos and data are easily summarized in PDF photo reports. NCOMPAS MEDIA 83

85 In order to create a Permanent Monitoring Station Report select Permanent Monitoring Stations By Project Media and select the monitoring station type for which to generate a photo report. A new Select Projects window will appear in which you can then select the project you wish to generate a report for and click Select Project. If you wish to generate a report containing photos from than one project, hold down the ctrl key while selecting the projects, click Select Project. Permanent Monitoring reports are ideal to present photos taken from a specific station as well as any associated information for those photos. The user is also able to Filter By (see section 7.0.2), Order By (see section 7.0.3) Tools to customize the report contents. If the user creates a Photo Station Report and wishes to save it the Convert To PDF button is ideal for this. Simply click Convert to PDF in the top toolbar and you will then be able to save a copy of the document. The order of individual photos within a photo report can be manipulated using the Order By (see section 7.0.3) tool and photos can be manually reordered by changing the Photo # using Apply Photo Swap tool (see subsection below). Individual photos can be added to or removed from a photo report by selecting the photo name within the Filter By (see section 7.0.2) tool. Or individual photos can be deleted by deleting their photo # and apply photo swap tool. (See subsection below) The caption photo # sequence of the report (not the photo order) can be manipulated NCOMPAS MEDIA 84
86 Apply Photo Swap by changing the photo # for the first photo and selecting Reorder Photo Numbers. The Apply Photo Swap tool is used to manually re order photos within a permanent monitoring station reports that cannot otherwise be re ordered using the Order By tool. The Button is only available for photo reports types within the Permanent Monitoring Stations By Project Media category. To re order photos using the Apply Photo Swap tool: Change the numbers in the Photo boxes to reflect the order in which you wish the photos to appear. To remove a photo from the permanent monitoring station report, leave the Photo box blank When the new order has been defined click the report will be created. button and a new Hint Changing the order of the pictures in a monitoring station report will not change the order the photos are saved in the NCompas Media. NCOMPAS MEDIA 85
, adjust photo numbers (see section 2.2) and apply photo swap (see subsection above). Modify photo captions (see section 2.2) Adjust borders, text font, footers etc.")
87 Hint When generating a photo report, use the following sequence: Ensure all data fields and captions correct and edited. Select photos using add/delete/filter by function (see section 7.0.2). Order By (see section 7.0.3), adjust photo numbers (see section 2.2) and apply photo swap (see subsection above). Modify photo captions (see section 2.2) Adjust borders, text font, footers etc. (see section 2.1, 2.3, 2.4) Converting a Finished Photo Report to PDF NCompas Media allows you to convert photo reports or quick reports to a PDF. For more information, see section Drag and Drop and Photo Rearranging You can quickly re arrange the order of the photos in NCompas Media Photo, by clicking once on a photo and dragging it to where you want it to appear in the report. The photo will now appear in the new position in the photo report however this will not change the location or order of where the photo is saved in the NCompas Media Photo database. The photo will retain its default photo number. NCOMPAS MEDIA 86
88 Once you are finished dragging and reordering photos, edit the photo number of the first photo in your report to identify the station number for your photos click the Photo Report. button; the photo numbers will now appear in sequence in the Hint The reorder photo numbers function is useful when integrating a photo report into an existing document that contains photos. You can specify the starting number in your photo report to coincide with the last photo number in your existing document Differences between Filter By, Photo Picker and Drag and Drop Filter By: The Filters can be used to create a dynamic report, meaning that as new photos are added to the database. They will be added to your photo report if they meet the filter criteria by clicking the Refresh button. For example if you created a report that showed all the photos for a given Project Name, Site Name, and Phase Type, saved the report and later imported additional photos to the same Project Name, Site Name, and Phase Type within the database, NCompas Media would indicate these photos in the saved photo report. Photo Picker: The Photo Picker creates a static report. Meaning that the photos you select in the photo picker are the only photos that will show up on that report regardless if additional photos are added to the database after the report is saved. Drag and Drop: Drag and Drop primarily allows you to manually re order photos in a photo report, but you can also select a photo and then click the Remove Photo button that will remove the photo from the report. The Remove Photo button only appears in the menu bar when a photo has been selected. If you initially built the report with the filter by and you remove a photo a filter will be added to exclude this photo. If the report was initially built with the Photo Picker the photo will be removed from the list of selected photos in the photo picker. NCOMPAS MEDIA 87
89 8.0.8 Saving an NCompas Media Photo Report Photo reports can be saved in NCompas Media, allowing you to pick up where you left off and continue making report edits at a later date without having to start from scratch. With your photo report open, select. Name your report and provide a description to assist in future retrieval. By doing this you are able to save the photo report in its current status and reopen it at a later date without having to rearrange and edit the report from scratch again. To re open a previously saved report Click the reports button to access the reports toolbar Select then navigate to the photo report you wish to continue editing or make further changes to. Select the report in the list and click Open Report Using Refresh Tools Saved Reports can be updated when changes are made to the existing photo or document report. By clicking Refresh button on a previously saved report, you can Updates photos in a saved dynamic report. For example, you saved a dynamic photo report before. You add new photos in the specific project. Then you open your saved photo report. New added photos are not displayed in the photo report. After clicking Refresh button, new photos display in the photo report. Updates photo captions in the saved report. For example, you saved a dynamic photo report before. You update the captions of some photos in the specific project. Then you open your saved photo report. Photos with old captions are displayed in the photo report. After clicking Refresh button, photos with updated captions display in the photo report. Troubleshooting The following section provides a list of common problems and their associated solutions. When an error is encountered in the program, an error report is generated and sent to the NCompas Media support desk. NCOMPAS MEDIA 88
90 9.0 KEEPING NCOMPAS MEDIA IS UP TO DATE Patches and software updates are often released to address identified issues in the software as well as to implement new features and processes. For more information, see section PHOTO REPORT WILL NOT LOAD When you try to run a photo report the green progress bar is shown, but the photo report never appears. One or more of the pictures included in the photo report project has lost it sourcing Select the Photos button along the top icon menu Select Open Photo and browse to the project and phase you are attempting to make a photo report for If any photos in the list do not show a thumbnail of the photo then the sourcing has been lost and must be re established before you can view the individual photo or make a photo report for that project The photo must be deleted and re entered Hint If NCompas Media does not look right for some cases, try to log out and log back in to see if it fixes the problem you encountered. 9.2 FILTER BY EXAMPLES Examples: Filter by Different Projects There are two ways to do it: Using OR Select the button. A new filter constraints display on the next line. Select Project to Filter By by highlighting/selecting it. It will now populate the first blank in your filter constraint equation. Select Equal as operator after constraint. Select first project name you may wish to filter by in the Value box. Click any text to the left side of button. Change it to Or. NCOMPAS MEDIA 89
91 Select the button. A new filter constraints display on the next line. Select Project to Filter By by highlighting/selecting it. It will now populate the first blank in your filter constraint equation. Select Equal as operator after constraint. Select second project name you may wish to filter by in the Value box. Click Apply Filter button to make filter work. Using Is any of operator Select the button. A new filter constraints display on the next line. Select Project to Filter By by highlighting/selecting it. It will now populate the first blank in your filter constraint equation. Select Is any of as operator after constraint. Click Value box field and select one from the drop down list to add first project name, Click button to the right of Value box to add new Value box field. Click the new Value box field and select one from the drop down list to add the second project name. Click Apply Filter button to make filter work. Filter by Specific Photos Under Different Phases For example, you want to filter by two specific photos, which are R and DSCN0913. R is under Alda Estuary Rehabilitation Intertidal Salt Marsh Construction (2000) (Tier structure), and DSCN0913 is under Alda Estuary Rehabilitation Intertidal Salt Marsh Monitoring (2003) (Tier structure). The steps to do it: (1) (2) Make sure the text to the left side of button is And. Click And. Select Add Group from the list. A new And displays with indentation. Click And and select Add Group one more time because you need to filter photos in two different criteria. Click any text to the left side of button. Change it to Or. Select the button for the first And. A new filter constraint displays on the next line. Select Project to Filter By by highlighting/selecting it. It will now populate the first blank in your filter constraint equation. Select Equal as operator after constraint. NCOMPAS MEDIA 90
92 Select Alda Estuary Rehabilitation in the Value box. (3) (4) (5) Select the button for the first And again. A new filter constraint displays on the next line. Select Site to Filter By by highlighting/selecting it. It will now populate the first blank in your filter constraint equation. Select Equal as operator after constraint Select Intertidal Salt Marsh in the Value box. Select the button for the first And again. A new filter constraint displays on the next line. Select Phase to Filter By by highlighting/selecting it. It will now populate the first blank in your filter constraint equation. Select Equal as operator after constraint Select Construction (2000) in the Value box. Select the button for the first And again. A new filter constraint displays on the next line. Select Photo Name to Filter By by highlighting/selecting it. It will now populate the first blank in your filter constraint equation. Select Equal as operator after constraint Select R in the Value box. (6) (7) Select the button for the second And. A new filter constraint displays on the next line. Select Project to Filter By by highlighting/selecting it. It will now populate the first blank in your filter constraint equation. Select Equal as operator after constraint. Select Alda Estuary Rehabilitation in the Value box. Select the button for the second And again. A new filter constraint displays on the next line. Select Site to Filter By by highlighting/selecting it. It will now populate the first blank in your filter constraint equation. Select Equal as operator after constraint Select Intertidal Salt Marsh in the Value box. NCOMPAS MEDIA 91
93 (8) (9) (10) Select the button for the second And again. A new filter constraint displays on the next line. Select Phase to Filter By by highlighting/selecting it. It will now populate the first blank in your filter constraint equation. Select Equal as operator after constraint Select Monitoring (2003) in the Value box. Select the button for the second And again. A new filter constraint displays on the next line. Select Photo Name to Filter By by highlighting/selecting it. It will now populate the first blank in your filter constraint equation. Select Equal as operator after constraint Select DSCN0913 in the Value box. Click Apply Filter button to make filter work. 9.3 TECHNICAL SUPPORT Once your Settings have been configured you will be able to click the button any time you are having an issue. Once you have filled out a Support Request form click Send Request and your issue will be automatically sent to the NCompas Support team who will contact you to address your concern. NCOMPAS MEDIA 92
 753 1055 or (250) 591 1056.")
94 Hint Name and address do not need to be entered again since settings has been configured already. Users are able to contact the NCompas Software team by phone at (250) or (250) NCOMPAS MEDIA 93
95 Appendix I TRACKING OPTIONS GLOSSARY The standard option includes: Camera: the camera which was used to take the photo. GPS Unit: the appropriate GPS unit that was to collect for the photo location. Latitude/Longitude: the appropriate coordinates for the photo location. Compass Declination: either True or Magnetic north. If no compass reading was taken, Not Used would be selected. Azimuth: the compass bearing at which the photo was taken. Display Order: a value to each photo you enter under a particular Tier 1, 2 and 3. (i.e. default display order is the order in when photos are imported) Photo Station: a marked, permanent location from which a photo is taken at a specific compass bearing (or series of bearings). Comments: any comments that were recorded at the time the photo was taken or a photo description. The tracking option includes: Tier 2 Name: The main chapters of your report and the second coarsest filter for sorting. These are sub sections below Tier 1 for photo sorting. (see tree figure on section 3.0) Tier 3 Name: Third level headings used to organize photos in the media report. These are the second level sub sections below Tier 2 for photo sorting. (see tree figure on section 3.0) Employee: The name of an individual working for the company who is using NCompas Media to manage photos no company name or address is attached to this individual in the database as the company is implied by the software ownership. Employee name is used to populate database fields such as: project manager, photographer, and writer which are associated with tiers and photos and can be used for tracking, sorting and filtering. Volunteer: A person who voluntarily takes and submits photos to the users of the NCompas Media database. This person is not considered to be a company employee and therefore their mailing address is included as an additional means of contacting this person. Volunteer name is used to populate database fields such as: photographer and writer which are associated with tiers and photos and can be used for tracking, sorting and filtering. Subcontractor: Subcontractors typically perform paid work for another company other than their own. For this reason, a company name is listed for each subcontractor along with relevant contact information. Subcontractor name is used to populate database fields such as: photographer and writer which are associated with tiers and photos and can be used for tracking, sorting and filtering. NCOMPAS MEDIA 94
96 Cross Section: Cross sections are typically used in surveying. This field is intended to identify the cross section number associated with the photo. Flow Taken: identify if a flow measurement was taken with the photo Discharge: The volume rate of water flow. This field identifies the discharge of a waterway at the time the photo was taken. Gauging Station: Gauging stations are used during flow surveys. Gauging surveys typically include multiple photos. This field is intended to identify the gauging station name/identifier for where the photo was taken. Orientation: a short description of where the photo was taken. Reach: identify the stream reach in which the photo was taken. Chainage: appropriate stream length or transect from which the photo was taken. Profile: appropriate survey profile correlating to the photo. Transect: appropriate transect # correlating to the photo. Target: a short description of the photo s target. NCOMPAS MEDIA 95
97 Appendix II NCompas Media Photo Documentation Sheets NCompas Media Photo Documentation Sheets used by M.C. Wright and Associates. These sheets are taken into the field by employees and are filled out as photos are taken. NCOMPAS MEDIA 96
98 IN THE FINAL PDF REPLACE THIS PAGE WITH THE FULL SIZE PDFS OF THESE FORMS SUCH THAT THEY CAN BE EASILY PRINTED NCOMPAS MEDIA 97
99 Appendix III NCompas Media Program Application Forms NCompas Media program application forms help guide users in providing NCompas Media administrators with the necessary information required configure the database for their photos. NCOMPAS MEDIA 98

100 Page 1 IN THE FINAL PDF REPLACE THIS PAGE WITH THE FULL SIZE PDFS OF THESE FORMS SUCH THAT THEY CAN BE EASILY PRINTED NCOMPAS MEDIA 99
METRO TILES (SHAREPOINT ADD-IN)
") METRO TILES (SHAREPOINT ADD-IN) November 2017 Version 2.6 Copyright Beyond Intranet 2017. All Rights Reserved i Notice. This is a controlled document. Unauthorized access, copying, replication or usage
METRO TILES (SHAREPOINT ADD-IN) November 2017 Version 2.6 Copyright Beyond Intranet 2017. All Rights Reserved i Notice. This is a controlled document. Unauthorized access, copying, replication or usage
RosterPro by Demosphere International, Inc.
 RosterPro by INDEX OF PAGES: Page 2 - Getting Started Logging In About Passwords Log In Information Retrieval Page 3 - Select Season League Home Page Page 4 - League Player Administration Page 5 - League
SafetyNet Mobile v3.0
 This guide covers the Predictive Solutions SafetyNet application version 3.0. It is intended to show users how to enter, edit and sync inspections and incidents from a phone or tablet. The application
Using the Desktop Recorder
 Mediasite Using the Desktop Recorder Instructional Media publication: 09-Students 9/8/06 Introduction The new Desktop Recorder from Mediasite allows HCC users to record content on their computer desktop
Submittal Exchange Design Team User Guide
 Submittal Exchange Design Team User Guide Version 17 November 2017 Contents About This Guide... 9 Access/Permissions... 11 What is Submittal Exchange for Design?... 11 How Can I Get Submittal Exchange
Welcome to Storyist. The Novel Template This template provides a starting point for a novel manuscript and includes:
 Welcome to Storyist Storyist is a powerful writing environment for ipad that lets you create, revise, and review your work wherever inspiration strikes. Creating a New Project When you first launch Storyist,
nvision Actuals Drilldown (Non-Project Speedtypes) Training Guide Spectrum+ System 8.9 November 2010 Version 2.1
 Training Guide Spectrum+ System 8.9 November 2010 Version 2.1") nvision Actuals Drilldown (Non-Project Speedtypes) Training Guide Spectrum+ System 8.9 November 2010 Version 2.1 Table of Contents Introduction. Page 03 Logging into Spectrum.Page 03 Accessing the NVision
nvision Actuals Drilldown (Non-Project Speedtypes) Training Guide Spectrum+ System 8.9 November 2010 Version 2.1 Table of Contents Introduction. Page 03 Logging into Spectrum.Page 03 Accessing the NVision
DakStats Web-Sync. Operation Manual. DD Rev 4 12 December 2012
 DakStats Web-Sync Operation Manual DD1670479 Rev 4 12 December 2012 201 Daktronics Drive PO Box 5128 Brookings, SD 57006-5128 Tel: 1-800-DAKTRONICS (1-800-325-8766) Fax: 605-697-4746 www.daktronics.com
Oldham Lifelong Learning Service Frances Hill
 SET UP A MOODLE BOOK Moodle Books are made up of connected web pages. You can therefore build into your book anything which is possible in Page, except that you are not restricted to just one page. The
Legacy FamilySearch Overview
 Legacy FamilySearch Overview Legacy Family Tree is "Tree Share" Certified for FamilySearch Family Tree. This means you can now share your Legacy information with FamilySearch Family Tree and of course
Progeny Imaging Veterinary
 Progeny Imaging Veterinary User Guide V1.14 and higher 00-02-1605 Rev. K1 ECN: ECO052875 Revision Date: 5/17/2017 Contents 1. About This Manual... 6 How to Use this Guide... 6 Text Conventions... 6 Getting
Digital Photo Guide. Version 8
 Digital Photo Guide Version 8 Simsol Photo Guide 1 Simsol s Digital Photo Guide Contents Simsol s Digital Photo Guide Contents 1 Setting Up Your Camera to Take a Good Photo 2 Importing Digital Photos into
DocuSign Setup Admin. DocuSign User Setup Process Overview. Setting up a new DocuSign user
 DocuSign Setup Admin DocuSign User Setup Process Overview 1) CORE-CT Security receives request to set up new supplier contract document creator 2) CORE-CT security team sets up Roles for the User 3) DocuSign
Created by Eugene Stephens iphoto 11. To start iphoto: - Double-click Macintosh HD. Go to Applications > iphoto. Layout
 iphoto 11 To start iphoto: - Double-click Macintosh HD. Go to Applications > iphoto. Layout Library Viewing Area Search Zoom Toolbar - Library Library of imported photos & video clips, folders, albums,
WEB I/O. Wireless On/Off Control USER MANUAL
 Wireless On/Off Control Technical Support: Email: support@encomwireless.com Toll Free: 1 800 617 3487 Worldwide: (403) 230 1122 Fax: (403) 276 9575 Web: www.encomwireless.com Warnings and Precautions Warnings
Getting Started Guide
 SOLIDWORKS Getting Started Guide SOLIDWORKS Electrical FIRST Robotics Edition Alexander Ouellet 1/2/2015 Table of Contents INTRODUCTION... 1 What is SOLIDWORKS Electrical?... Error! Bookmark not defined.
Go Daddy Online Photo Filer
 Getting Started and User Guide Discover an easier way to share, print and manage your photos online! Online Photo Filer gives you an online photo album site for sharing photos, as well as easy-to-use editing
MYSA Direct Member Club Registration Setup Manual. Contents
 MYSA Direct Member Club Registration Setup Manual Contents Introduction... 1 Log into your Account... 2 Creating Teams... 3 Creating Players... 6 Placing Players on a Team... 10 Creating a Coach or Team
Copyright Notice. Trademarks
 Copyright Notice All rights reserved. No part of this publication may be reproduced, stored in a retrieval system, or transmitted in any form or by any means, electronic, mechanical, photocopying, recording,
COPY. Software Guide. for Windows ABC. Special Features. ZoomBrowser EX CameraWindow. Map Utility Movie Uploader for YouTube PhotoStitch
 Software Guide for Windows ZoomBrowser EX CameraWindow Map Utility Movie Uploader for YouTube PhotoStitch Special Features Transfer Images and Movies Insert Text ABC Save Still Images From Movies Edit
Accessing e-books with your e-reader
 e-reader 1 Accessing e-books with your e-reader What you need to know about library e-books is that each one is protected by Digital Rights Management (DRM). This means that access to e-books is restricted
TABLE OF CONTENTS. Logging into the Website Homepage and Tab Navigation Setting up Users on the Website Help and Support...
 TABLE OF CONTENTS Logging into the Website...02 Homepage and Tab Navigation...03 Setting up Users on the Website...08 Help and Support...10 Uploding and Managing Photos...12 Using the Yearbook Ladder...16
Celtx Studios Owner's Manual January 2011
 January 2011 Get the most out of Celtx Studios with the latest version of Celtx - available free at http://celtx.com Screen captures are made using Windows OS. Some image dialogs differ slightly on Mac
How to import and sync your Scrivener projects from your computer via Dropbox?
 SCRIVO PRO HOW TO CREATE AND SYNC SCRIVENER PROJECTS Scrivo Pro can create, import and sync Scrivener projects on your ipad or iphone. This document explains how to create and sync your Scrivener projects
FLIR Tools for PC 7/21/2016
 FLIR Tools for PC 7/21/2016 1 2 Tools+ is an upgrade that adds the ability to create Microsoft Word templates and reports, create radiometric panorama images, and record sequences from compatible USB and
DocuSign for Sugar 7 v1.0. Overview. Quick Start Guide. Published December 5, 2013
 Quick Start Guide DocuSign for Sugar 7 v1.0 Published December 5, 2013 Overview This guide provides information on installing and signing documents with DocuSign for Sugar7. The Release Notes for DocuSign
Hyperion System 9 Financial Data Quality Management. Quick Reference Guide
 Hyperion System 9 Financial Data Quality Management Quick Reference Guide Hyperion FDM Release 9.2.0. 2000 2006 - Hyperion Solutions Corporation. All rights reserved. Hyperion, the Hyperion logo and Hyperion
To Easily Navigate this Presentation See that the Full Page is Showing and then Use Page Up and Page Down Keys or Right and Left Keyboard Arrow Keys
 Top Left Top Right To Easily Navigate this Presentation See that the Full Page is Showing and then Use Page Up and Page Down Keys or Right and Left Keyboard Arrow Keys Bottom Left Bottom Right Unite with
digitization station DIGITAL SCRAPBOOKING 120 West 14th Street
 digitization station DIGITAL SCRAPBOOKING 120 West 14th Street www.nvcl.ca techconnect@cnv.org DIGITAL SCRAPBOOKING With MyMemories Suite 6 The MyMemories Digital Scrapbooking software allows you to create
EMC ViPR SRM. Alerting Guide. Version
 EMC ViPR SRM Version 4.0.2.0 Alerting Guide 302-003-445 01 Copyright 2015-2017 Dell Inc. or its subsidiaries All rights reserved. Published January 2017 Dell believes the information in this publication
User Guide. Version 1.2. Copyright Favor Software. Revised:
 User Guide Version 1.2 Copyright 2009-2010 Favor Software Revised: 2010.05.18 Table of Contents Introduction...4 Installation on Windows...5 Installation on Macintosh...6 Registering Intwined Pattern Studio...7
How to Build a LimeSurvey: The Basics for Beginners
 1 How to Build a LimeSurvey: The Basics for Beginners Login and view a list of your surveys. We will give you 3 templates to start with. These are the ethics compliant templates you need to protect participant
Quick Start Training Guide
 Quick Start Training Guide To begin, double-click the VisualTour icon on your Desktop. If you are using the software for the first time you will need to register. If you didn t receive your registration
House Design Tutorial
 House Design Tutorial This House Design Tutorial shows you how to get started on a design project. The tutorials that follow continue with the same plan. When you are finished, you will have created a
OzE Field Modules. OzE School. Quick reference pages OzE Main Opening Screen OzE Process Data OzE Order Entry OzE Preview School Promotion Checklist
 1 OzE Field Modules OzE School Quick reference pages OzE Main Opening Screen OzE Process Data OzE Order Entry OzE Preview School Promotion Checklist OzESchool System Features Field unit for preparing all
Author Instructions FPIN Editorial Manager
 Author Instructions FPIN Editorial Manager Login Information: www.editorialmanager.com/fpin Your username and password will have been sent to you by the FPIN Project Manager. If you do not have it, please
Software Guide for Windows ZoomBrowser EX PhotoStitch
 Software Guide for Windows ZoomBrowser EX PhotoStitch Special Features Transfer Images and Movies Insert Text ABC Save Still Images From Movies Edit Movies A Print Images Back Up to a CD Attach Images
Copyright 2014 SOTA Imaging. All rights reserved. The CLIOSOFT software includes the following parts copyrighted by other parties:
 2.0 User Manual Copyright 2014 SOTA Imaging. All rights reserved. This manual and the software described herein are protected by copyright laws and international copyright treaties, as well as other intellectual
COPY. Software Guide for Windows ZoomBrowser EX CameraWindow PhotoStitch ABC. Special Features. Transfer Images and Movies. Edit Movies.
 Software Guide for Windows ZoomBrowser EX CameraWindow PhotoStitch Special Features Transfer Images and Movies Insert Text ABC Save Still Images From Movies Edit Movies A Print Images Back Up to a CD Attach
iphoto Getting Started Get to know iphoto and learn how to import and organize your photos, and create a photo slideshow and book.
 iphoto Getting Started Get to know iphoto and learn how to import and organize your photos, and create a photo slideshow and book. 1 Contents Chapter 1 3 Welcome to iphoto 3 What You ll Learn 4 Before
CCG Referral App - Northern Ireland
 CCG Referral App - Northern Ireland For practices in Northern Ireland who use the Referral Screen supplied by the CCG, the way you access the screen has been updated. A Vision App has been created to enable
Progeny Imaging. User Guide V x and Higher. Part Number: ECN: P1808 REV. F
 Progeny Imaging User Guide V. 1.6.0.x and Higher Part Number: 00-02-1598 ECN: P1808 REV. F Contents 1 About This Manual... 5 How to Use this Guide... 5 Text Conventions... 5 Getting Assistance... 6 2 Overview...
SKF TKTI. Thermal Camera Software. Instructions for use
 SKF TKTI Thermal Camera Software Instructions for use Table of contents 1. Introduction...4 1.1 Installing and starting the Software... 5 2. Usage Notes...6 3. Image Properties...7 3.1 Loading images
Faculty Lecture Capture Guide
 Faculty Lecture Capture Guide If you have never used Panopto before, follow this first part. Log into your Blackboard Account and open the course you wish to capture: Open your Course Management Control
How To Handbook For Learners
 How To Handbook For Learners 2017 Contents 3 How do I log in? 4-5 How do I watch a video? 6-9 How do I take an assessment? 10-11 How do I review an assessment I have just written? 12-13 How do I review
House Design Tutorial
 House Design Tutorial This House Design Tutorial shows you how to get started on a design project. The tutorials that follow continue with the same plan. When you are finished, you will have created a
This guide provides information on installing, signing, and sending documents for signature with
 Quick Start Guide DocuSign for Dynamics 365 CRM 5.2 Published: June 15, 2017 Overview This guide provides information on installing, signing, and sending documents for signature with DocuSign for Dynamics
Autodesk Advance Steel. Drawing Style Manager s guide
 Autodesk Advance Steel Drawing Style Manager s guide TABLE OF CONTENTS Chapter 1 Introduction... 5 Details and Detail Views... 6 Drawing Styles... 6 Drawing Style Manager... 8 Accessing the Drawing Style
G e t t i n g S t a r t e d G u i d e. ID Card Managers. Getting Started Guide. 1 P a g e
 G e t t i n g S t a r t e d G u i d e ID Card Managers Getting Started Guide 1 P a g e G e t t i n g S t a r t e d G u i d e P a g e 2 Contents ID Cards: Getting Started... 3 Why manage photo ID Cards
Wahl HSI3000 Series Imager Report Writer Software
 Wahl HSI3000 Series Imager Report Writer Software User Manual WD1024 Rev A 04/18/08 Palmer Wahl Instrumentation Group 234 Old Weaverville Road Asheville, NC 28804 Phone: (828) 658-3131 Fax: (828) 658-0728
Advance Steel. Drawing Style Manager s guide
 Advance Steel Drawing Style Manager s guide TABLE OF CONTENTS Chapter 1 Introduction...7 Details and Detail Views...8 Drawing Styles...8 Drawing Style Manager...9 Accessing the Drawing Style Manager...9
Manager Client. User Guide V
 Manager Client User Guide V1.25 www.mobiletornado.com pushtoexperience Introduction Manager Client provides the ability to manage communications within an organisation, view mobile devices live and historic
Copyright 2011 by Publish It! Online All rights reserved. Published by Family Literacy Press MSVU, Halifax, Nova Scotia.
 1 Copyright 2011 by Publish It! Online All rights reserved. Published by Family Literacy Press MSVU, Halifax, Nova Scotia. No part of this publication can be reproduced in any form without written permission
User Guide. Version 1.4. Copyright Favor Software. Revised:
 User Guide Version 1.4 Copyright 2009-2012 Favor Software Revised: 2012.02.06 Table of Contents Introduction... 4 Installation on Windows... 5 Installation on Macintosh... 6 Registering Intwined Pattern
IRISYS ISI Series Imager Report Writing Software
 IRISYS ISI 4604 4000 Series Imager Report Writing Software User Manual InfraRed Integrated Systems Ltd Park Circle, Tithe Barn Way Swan Valley Northampton NN4 9BG Tel: (0) 1604 594200 Fax: (0) 1604 594210
CHAPTER1: QUICK START...3 CAMERA INSTALLATION... 3 SOFTWARE AND DRIVER INSTALLATION... 3 START TCAPTURE...4 TCAPTURE PARAMETER SETTINGS... 5 CHAPTER2:
 Image acquisition, managing and processing software TCapture Instruction Manual Key to the Instruction Manual TC is shortened name used for TCapture. Help Refer to [Help] >> [About TCapture] menu for software
ANSYS v14.5. Manager Installation Guide CAE Associates
 ANSYS v14.5 Remote Solve Manager Installation Guide 2013 CAE Associates What is the Remote Solve Manager? The Remote Solve Manager (RSM) is a job queuing system designed specifically for use with the ANSYS
IE11, Edge (current version), Chrome (current version), Firefox (current version)
, Chrome (current version), Firefox (current version)") Quick Start Guide DocuSign for SharePoint Online v3.4 Published: October 13, 2017 Overview DocuSign for SharePoint Online allows users to sign or send documents for signature from a SharePoint Online library.
Quick Start Guide DocuSign for SharePoint Online v3.4 Published: October 13, 2017 Overview DocuSign for SharePoint Online allows users to sign or send documents for signature from a SharePoint Online library.
RAZER CENTRAL ONLINE MASTER GUIDE
 RAZER CENTRAL ONLINE MASTER GUIDE CONTENTS 1. RAZER CENTRAL... 2 2. SIGNING IN... 3 3. RETRIEVING FORGOTTEN PASSWORDS... 4 4. CREATING A RAZER ID ACCOUNT... 7 5. USING RAZER CENTRAL... 11 6. SIGNING OUT...
Users Guide. Meditory CORPORATION. Version 2015C v1.0 7/20/2015
 Patent No.: US 8,823,770 B2 & other patents pending Users Guide Version 2015C v1.0 7/20/2015 Meditory CORPORATION 7600 Grand River Road, Suite 230 Brighton, MI 48114 T (810) 225-9720 F (810) 225-9726 Toll
surescan Online Help
 surescan Online Help Table of Contents About surescan Online Help...1 Getting Started with surescan...2 Exit surescan...2 Main Menu...3 Main Toolbar...4 Main Toolbar Icons...4 Start a New Patient Record...6
1. What is SENSE Batch
 1. What is SENSE Batch 1.1. Introduction SENSE Batch is processing software for thermal images and sequences. It is a modern software which automates repetitive tasks with thermal images. The most important
Exercise 1: The AutoCAD Civil 3D Environment
 Exercise 1: The AutoCAD Civil 3D Environment AutoCAD Civil 3D Interface Object Base Layer Object Component Layers 1-1 Introduction to Commercial Site Grading Plans AutoCAD Civil 3D Interface AutoCAD Civil
TECHNOTravel. For Microsoft Word & PowerPoint 2010 Student Workbook. TECHNOeBooks Project-based Computer Curriculum ebooks.
 TECHNOTravel For Microsoft Word & PowerPoint 2010 Student Workbook TECHNOeBooks Project-based Computer Curriculum ebooks www.bepublishing.com Copyright 1993 2010. TechnoKids Inc. in partnership with B.E.
Click here to give us your feedback. New FamilySearch Reference Manual
 Click here to give us your feedback. New FamilySearch Reference Manual January 25, 2011 2009 by Intellectual Reserve, Inc. All rights reserved Printed in the United States of America English approval:
Field Device Manager Express
 Honeywell Process Solutions Field Device Manager Express Software Installation User's Guide EP-FDM-02430X R430 June 2012 Release 430 Honeywell Notices and Trademarks Copyright 2010 by Honeywell International
30 Minute Quick Setup Guide
 30 Minute Quick Setup Guide Introduction. Many thanks for choosing to trial Zahara, our innovative Purchase Order and Invoice Management system for accounting departments. Below you will find a quick start
RESTAURANT MANAGEMENT for WINDOWS. GIFT CARD Version
 RESTAURANT MANAGEMENT for WINDOWS GIFT CARD Version 5.53.00 Introduction Overview What Profitek Gift Card Does? The Profitek Gift Card program will allow you to offer your customers a way of purchasing
Nikon View DX for Macintosh
 Contents Browser Software for Nikon D1 Digital Cameras Nikon View DX for Macintosh Reference Manual Overview Setting up the Camera as a Drive Mounting the Camera Camera Drive Settings Unmounting the Camera
The next time you choose Add New > Create Recording, CaptureSpace will open automatically.
 Make a video with LU play Through LU play you can create different types of videos. You can record yourself using the web camera on your computer, you can record what s on your screen, or you can create
PRINTING ON YOUR IPAD
 PRINTING ON YOUR IPAD TABLE OF CONTENTS I don t have Papercut on my ipad... 1 I can t see any printers when trying to print... 2 The Papercut app wants me to sign in... 3 Can I print double sided?... 4
House Design Tutorial
 Chapter 2: House Design Tutorial This House Design Tutorial shows you how to get started on a design project. The tutorials that follow continue with the same plan. When you are finished, you will have
Google Photos Online Basics
 Google Photos Online Basics Click here to return to the Computer Club s website Adding new photos to your Google Photos - Three Ways Google Photos Uploader From Google Photos website click upload for individual
House Design Tutorial
 Chapter 2: House Design Tutorial This House Design Tutorial shows you how to get started on a design project. The tutorials that follow continue with the same plan. When you are finished, you will have
ISCapture User Guide. advanced CCD imaging. Opticstar
 advanced CCD imaging Opticstar I We always check the accuracy of the information in our promotional material. However, due to the continuous process of product development and improvement it is possible
DRCR.net Image Acquisition Protocol
 DRCR.net Image Acquisition Protocol Optical Coherence Tomography Angiography (OCT-A) Using: Optovue AngioVue Version 3.0 August 14, 2017 DRCR.net OCT-A Optovue AngioVue Procedure Manual 3.0 8-14-17 Table
10.2. Scanning Document Camera Scoring. Page 1 of 5. How do I score answer sheets using a document camera? STEP 1
 Step by Step How do I score answer sheets using a document camera? STEP 1 Click on the Assessment icon in the top navigation bar. STEP 2 To locate your assessment in an assessment list, first select the
Setup and Walk Through Guide Orion for Clubs Orion at Home
 Setup and Walk Through Guide Orion for Clubs Orion at Home Shooter s Technology LLC Copyright by Shooter s Technology LLC, All Rights Reserved Version 2.5 September 14, 2018 Welcome to the Orion Scoring
PaperCut PaperCut Payment Gateway Module - Heartland Quick Start Guide
 PaperCut PaperCut Payment Gateway Module - Heartland Quick Start Guide This guide is designed to supplement the Payment Gateway Module documentation and provides a guide to installing, setting up and testing
Project / Speed Type Inquiry 9.1 Financial System
 Project / Speed Type Inquiry 9.1 Financial System Page 1 of 7 Step 1: Access the Financial System Project/SpeedType Inquiry Using an Internet browser, access the Financial System using the NC State MyPack
WIRELESS PHOTO TRANSFER
 BYU Photo s WIRELESS PHOTO TRANSFER Eye-Fi Pro X2 card + Canon body BEFORE USING THIS GUIDE: a) Acquire an Eyefi Pro X2 card + b) Install Eyefi Center (Download link: https://x2help.eyefi.com/hc/en-us/articles/200398426-download-eyefi-center-for-mac-os-x-or-windows)
Table of Contents. Sound-Eklin rev052511
 User Manual Table of Contents Important Safety Information...1 Chapter 1: Opening TruDR...3 Chapter 2: Patient Information...4 Searching and Adding Patients...4 Editing an Existing Patient s Information...6
Super HUD- User Guide
 - User Guide From Poker Pro Labs Version - 2 1. Introduction to Super HUD... 1 2. Installing Super HUD... 2 3. Getting Started... 7 3.1 Don t have an Account?... 8 3.2 Super HUD Membership(s)... 9 4. Super
EOS 80D (W) Wireless Function Instruction Manual ENGLISH INSTRUCTION MANUAL
 Wireless Function Instruction Manual ENGLISH INSTRUCTION MANUAL") EOS 80D (W) Wireless Function Instruction Manual ENGLISH INSTRUCTION MANUAL Introduction What You Can Do Using the Wireless Functions This camera s wireless functions let you perform a range of tasks wirelessly,
EOS 80D (W) Wireless Function Instruction Manual ENGLISH INSTRUCTION MANUAL Introduction What You Can Do Using the Wireless Functions This camera s wireless functions let you perform a range of tasks wirelessly,
Ansible Tower Quick Setup Guide
 Ansible Tower Quick Setup Guide Release Ansible Tower 3.1.3 Red Hat, Inc. Feb 27, 2018 CONTENTS 1 Quick Start 2 2 Login as a Superuser 3 3 Import a License 5 4 Examine the Tower Dashboard 7 5 The Settings
Image Viewing. with ImageScope
 Image Viewing with ImageScope ImageScope Components Use ImageScope to View These File Types: ScanScope Virtual Slides.SVS files created when the ScanScope scanner scans glass microscope slides. JPEG files
Reviewing Your Tax Return In Your Portal
 Reviewing Your Tax Return In Your Portal 1. Go to our website www.franklinincpa.com and click on the link at the bottom left of the screen for Client Connect. a. This link will take you to the login screen
DocuSign Connector. Setup and User Guide. 127 Church Street, New Haven, CT O: (203) E:
 E:") DocuSign Connector Setup and User Guide 127 Church Street, New Haven, CT 06510 O: (203) 789-0889 E: education@square-9.com Square 9 Softworks Inc. 127 Church Street New Haven, CT 06510 www.square-9.com
DocuSign Connector Setup and User Guide 127 Church Street, New Haven, CT 06510 O: (203) 789-0889 E: education@square-9.com Square 9 Softworks Inc. 127 Church Street New Haven, CT 06510 www.square-9.com
DH HAIR MAKEUP. USER MANUAL updated May, ScriptE Systems, LLC
 DH HAIR MAKEUP USER MANUAL updated May, 2017 ScriptE Systems, LLC READING THIS MANUAL 4 GETTING STARTED 4 CREATE A FILE 5 NAVIGATING THROUGH WINDOWS DH HAIR MAKEUP 5 ADD CHARACTERS & CHARACTER NUMBERS
Getting started with AutoCAD mobile app. Take the power of AutoCAD wherever you go
 Getting started with AutoCAD mobile app Take the power of AutoCAD wherever you go Getting started with AutoCAD mobile app Take the power of AutoCAD wherever you go i How to navigate this book Swipe the
PaperCut PaperCut Payment Gateway Module - CardSmith Quick Start Guide
 PaperCut PaperCut Payment Gateway Module - CardSmith Quick Start Guide This guide is designed to supplement the Payment Gateway Module documentation and provides a guide to installing, setting up and testing
Air Navigation Race Scoring & Visualisation Software
 Air Navigation Race Scoring & Visualisation Software User manual V0.2 Table of contents 1 Introduction... 3 2 Installing the ANR Software... 3 3 Getting Started... 4 4 Managing Competitions... 5 5 Maps...
Introduction to: Microsoft Photo Story 3. for Windows. Brevard County, Florida
 Introduction to: Microsoft Photo Story 3 for Windows Brevard County, Florida 1 Table of Contents Introduction... 3 Downloading Photo Story 3... 4 Adding Pictures to Your PC... 7 Launching Photo Story 3...
WHITE PAPER DOCUSIGN INTEGRATION
 WHITE PAPER DOCUSIGN INTEGRATION CENTERSHIFT INC. DISCLAIMERS & COPYRIGHTS 2001-2013 Centershift Incorporated All rights reserved. This manual, as well as the application described in it, is furnished
ACDSee Pro 3 tutorials: Pro 3 overview for new users
 In ACDSee Pro Photo Manager 3, the Manage, View, Process and s help to accelerate your photography workflow. You can easily switch between modes depending where you are in your workflow. To switch between
AUIG2 User s Manual (ALOS/ALOS-2 Consolidated Edition)
") AUIG2 User s Manual (ALOS/ALOS-2 Consolidated Edition) Ver. No. First edition AUIG2 User s Manual (ALOS/ALOS-2 Consolidated Edition) Revision History Revision Date Revised Pages Revision Details A 2014/11/19
AUIG2 User s Manual (ALOS/ALOS-2 Consolidated Edition) Ver. No. First edition AUIG2 User s Manual (ALOS/ALOS-2 Consolidated Edition) Revision History Revision Date Revised Pages Revision Details A 2014/11/19
Physical Inventory System User Manual. Version 19
 Physical Inventory System User Manual Version 19 0 Physical Inventory System User Manual 1 Table of Contents 1. Prepare for Physical Inventory... 2. Chapter 1: Starting Inventory... 2.1. CDK/ADP... 3.
Term Definition Introduced in:
 60 Minutes of Access Secrets Key Terms Term Definition Introduced in: Calculated Field A field that displays the results of a calculation. Introduced in Access 2010, this field allows you to make calculations
Brightness and Contrast Control Reference Guide
 innovation Series Scanners Brightness and Contrast Control Reference Guide A-61506 Part No. 9E3722 CAT No. 137 0337 Using the Brightness and Contrast Control This Reference Guide provides information and
1 ImageBrowser Software User Guide 5.1
 1 ImageBrowser Software User Guide 5.1 Table of Contents (1/2) Chapter 1 What is ImageBrowser? Chapter 2 What Can ImageBrowser Do?... 5 Guide to the ImageBrowser Windows... 6 Downloading and Printing Images