Kaleidoscope Kreator 2.0
|
|
|
- Kristina Murphy
- 5 years ago
- Views:
Transcription
1 Kaleidoscope Kreator 2.0 Users Guide Revision 1.0
2 Table of Contents 1. Overview What is Kaleidoscope Kreator? Creative Uses for Kaleidoscope Kreator Quick Start Guide Quick Start: 4 Simple Steps Step 1 - Open Image Step 2 - Position Image Step 3 - Preview Kaleidoscope Step 4 - Print Kaleidoscope Detailed Users Guide Workspace Overview Open Image Choose a Shape Position the Image Flip Image buttons Pinwheel Mode Preview Kaleidoscope Change Background Color Print Kaleidoscope Save Kaleidoscope Save Workspace Open Workspace Setting Options Printing Multiple Kaleidoscopes Poster Printing Printing Wedges Separately Appendix System Requirements Supported Image File Types Segment Orientation Tips Understanding Image Size ii

3 1. Overview 1.1 What is Kaleidoscope Kreator? Very simply, Kaleidoscope Kreator makes kaleidoscopes from your digital photos and images. It allows you to view your entire photo while choosing exactly what portion of the image will be used in the kaleidoscope. This makes it ideal for creating kaleidoscopes of people or other distinct subjects for use in quilts, traditional and digital scrapbooks, cards, and many other craft projects. 1
4 2
.")


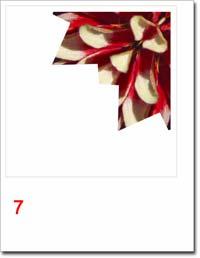
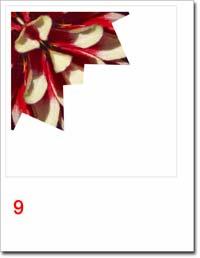
5 1.2 Creative Uses for Kaleidoscope Kreator Kaleidoscopes can be made from any image in digital format including photos and artwork (digital images can be obtained from scanners or digital cameras or created using other graphics/painting computer applications). Here are just a few examples of the many things you can do with Kaleidoscope Kreator: Quilting Kaleidoscope quilts are beautiful to look at but time consuming to make until now. With Kaleidoscope Kreator, kaleidoscope quilts are as easy as 1-2-3! Simply print your kaleidoscopes on inkjet fabric to include in traditional quilt patterns or create your own unique designs. Shape: Square (08) Kaleidoscope Kreator's Poster Printing feature makes it possible to create large kaleidoscope designs for quilts with the click of a button. Simply sew the tiles together to create your own unique quilt tops. Think BIG! (Note: The lettering in this quilt was added using another image editing program. You could just as easily appliqué or embroider the letters after sewing the tiles together.) Shape: Square (08) Traditional Scrapbooking Use Kaleidoscope Kreator to create kaleidoscopes and matching embellishments for your traditional scrapbooks. This kaleidoscope was printed on a standard 8.5 x11 photo printer, then cut out and positioned on the 12 x12 scrapbook page leaving room to scrapbook around it. Kaleidoscope Kreator was also used to make color-coordinated embellishments from the flowers in the background of the main photo. Shape: Scallop (08) 3


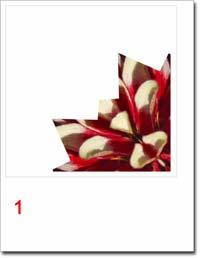
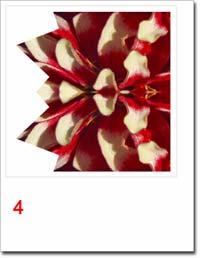
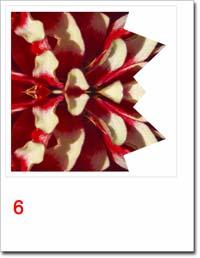
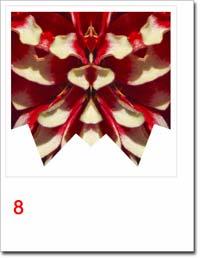
6 Digital Scrapbooking Use Kaleidoscope Kreator to save a kaleidoscope to a file, then open in another image editing application to complete the digital layout. In this case, a photo was added in the center and borders were added around each element. The background was designed to follow the shape of the kaleidoscope. Shape: Star (10) Cards & Other Paper Crafts It s easy to make beautiful cards by simply printing a kaleidoscope and attaching it to a piece of cardstock. But don t let your imagination stop there. The flowers on this card are kaleidoscopes that were created with Kaleidoscope Kreator, then printed using the Print Multiple custom printing option to get different sizes. The kaleidoscopes were then cut out, folded to create 3-dimensional flowers and nested one inside another before attaching to the card. Shape: Lotus (08) Creating your own teabag tiles is easy with Kaleidoscope Kreator. The Print Multiple feature makes it possible to print a full sheet of teabag tiles with just a few clicks of the mouse. Shape: Square (08) 4


7 Fashion Incorporate eye-catching kaleidoscope designs into your wardrobe. Either print on fabric to include in a sewing project or appliqué onto pre-made clothing. (Note: The addition of the photo in the center of the kaleidoscope was accomplished with another image editing program. You could just as easily appliqué a photo in the center of a kaleidoscope.) Shape: Sun Rays (08) Accessories Personalize your handbags, backpacks, tennis shoes, etc. by printing kaleidoscopes on sticky-back inkjet fabric and adhering to your favorite accessories. Shape: Scallop (08) Sun Catchers Print kaleidoscopes on transparencies to make stunning sun catchers! Simply cut out and adhere to a metal hoop or sandwich between glass. You can even combine two different kaleidoscopes for more complex designs. Wrap with ribbon or wire to finish. Shape: Circle (16) As you can see, the creative possibilities are truly endless with Kaleidoscope Kreator! Let your imagination run wild and most of all - have fun! 5
8 2. Quick Start Guide 2.1 Quick Start: 4 Simple Steps It's easy to create kaleidoscopes with Kaleidoscope Kreator! Follow these four simple steps to get started Step 1 - Open Image The first step in creating your kaleidoscope is to open an image. Click on the button in the toolbar: Open Image 6

9 After you click on the button, you will see the standard Windows Open dialog box. Navigate to the folder containing your photo or image file and select it: After opening the file, the workspace will look something like this: 7
10 2.1.2 Step 2 - Position Image Using your mouse, position your image beneath the wedge-shaped segment template. The mouse action changes as you move the mouse over or next to the image. The shape of the mouse pointer changes to indicate which action will occur when you click the mouse button. To resize the image, move the mouse over any of the corners, then click and drag. To rotate the image, click and drag the mouse outside the image boundary. To move the image around the workspace staging area, position the mouse over the image, then click and drag. The goal is to position the image so that the portion you want to use for the kaleidoscope is inside the segment template. Use the thumbnail on the upper right as a quick preview of how the positioning will affect your kaleidoscope. In the example below, the image has been enlarged, moved and rotated to better position the subjects within the segment template: 8

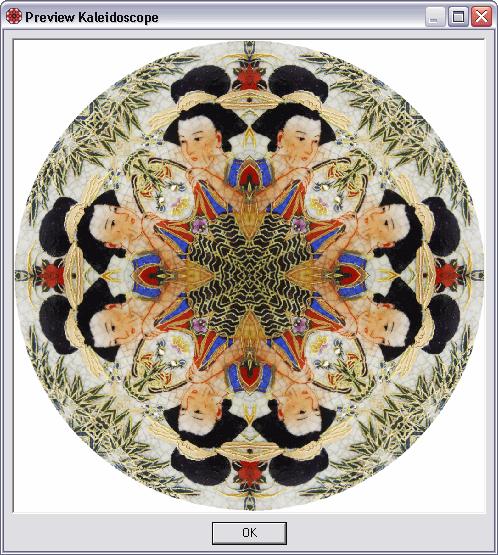
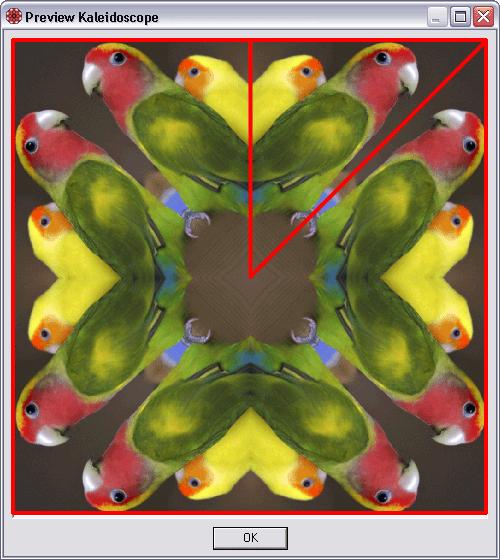
11 2.1.3 Step 3 - Preview Kaleidoscope Click on the Preview button to see what your kaleidoscope will look like. 9

12 To continue, click OK to close the Preview window. 10
13 2.1.4 Step 4 - Print Kaleidoscope Print your kaleidoscope directly from Kaleidoscope Kreator using the toolbar button. Print Kaleidoscope Kaleidoscope Kreator will ask you to specify the size of the kaleidoscope before printing. The default size is 6 inches. Click OK to proceed to the standard Windows Print dialog box. It's that easy! To learn more about the many different features of Kaleidoscope Kreator, see the Detailed Users Guide below. 11

14 3. Detailed Users Guide 3.1 Workspace Overview The Kaleidoscope Kreator workspace is divided into the following areas: A. Staging Area The Staging Area is where all of the action takes place. When you open an image it's displayed here, along with the segment template. By arranging and adjusting your photo beneath this template, you determine which portion of the image will be used in the kaleidoscope. The shape of the segment template corresponds to the kaleidoscope shape you've selected. B. Preview Area The Preview Area contains a small thumbnail view of the kaleidoscope that is constantly updated as the photo is adjusted in the staging area. The current kaleidoscope shape is listed directly beneath the thumbnail, and below that is the Preview Button. Clicking on the Preview button will generate a full-screen version of the kaleidoscope. 12
15 C. Toolbar Area The buttons in the Toolbar Area are used to perform the following actions: Open a photo or image Save the kaleidoscope to a file Print the kaleidoscope Choose a different shape for the kaleidoscope Toggle Pinwheel Mode (controls the "mirroring" that occurs in normal kaleidoscopes) Flip the image vertically Flip the image horizontally Choose a background color for the kaleidoscope 13
16 3.2 Open Image To open an image, either choose the File > Open Image menu item or click on the Open Image toolbar button. Use the standard Windows Open dialog box to browse for the file you want to open; Kaleidoscope Kreator will remember the last folder that you opened. Kaleidoscope Kreator supports BMP, JPEG, PNG and non-compressed TIFF files; files in other formats will result in an error if you attempt to open them. (See Supported Image File Types in the Appendix for more information on file types.) 14

17 If you do not see all of your images on your hard drive, it is possible that you are viewing files of just one file type. In this case, choose "All files" to see all of your files. 15
18 As soon as an image is loaded, the Preview Thumbnail becomes active. The Preview Thumbnail is then continually updated whenever changes are made in the workspace. 16
19 3.3 Choose a Shape Once your photo or image is loaded, select the shape you want for your kaleidoscope by clicking on the Select Shape toolbar button or the Edit > Shape menu item. This displays the Select Kaleidoscope Shape dialog, which contains a table of all available shapes including their names and number of segments. (Kaleidoscope Kreator includes over 50 basic shapes.) Use the scroll bar to find the shape you want, then double-click the shape to select it. Note: The highlighted segment in each shape diagram indicates how the segment template in the workspace staging area will be oriented in the kaleidoscope (See Segment Orientation Tips for more details). 17

20 After you make your selection, the segment template and preview thumbnail in the workspace will display the new shape. In this example, the shape was changed from the 8-segment Circle to the 12-segment Lotus. 18


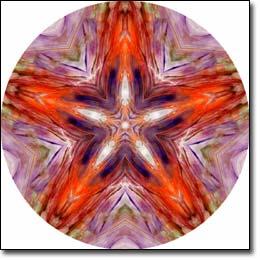
21 When deciding on a kaleidoscope shape, the number of segments you choose can dramatically alter the kaleidoscope's appearance. In the following sequence, the image position, size and orientation all remain the same - the only difference is in the number of segments: Circle(06) Circle(08) 19
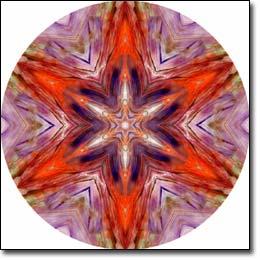
22 Circle(10) Circle(12) 20

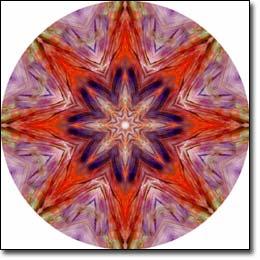
23 Circle(16) 21

24 3.4 Position the Image There are a number of ways you can position your image within the workspace staging area. The goal is to position the image so that the portion you want to use for the kaleidoscope is inside the segment template in the staging area. Note: If the image is positioned such that it does not fill the entire segment template, the empty portion will be filled with the chosen background color in the resulting kaleidoscope. Using the mouse The mouse action changes as you position the mouse over or next to the image. The shape of the mouse pointer changes to indicate which action will occur when you click the mouse button. To resize the image, move the mouse over any corner, then click and drag. Dragging any of the four corners has the same effect; the image is resized from the center point. 22
25 To rotate the image, click and drag the mouse pointer outside the image boundary. 23
26 To move the image around the workspace staging area, move the mouse pointer over the image, then click and drag. Using the keyboard The following keystrokes will allow you to fine-tune the positioning of your image within the segment outline: Resizing + : increases the size of the image by 0.5% - : decreases the size of the image by 0.5% Rotating / : rotates the image counter-clockwise by 1 degree * : rotates the image clockwise by 1 degree 24
27 Repositioning - The following numbers correspond to the arrow keys on the NumPad of most keyboards. (Make sure that NumLock is ON.) 2 : moves the image down by 5 pixels 4 : moves the image left by 5 pixels 6 : moves the image right by 5 pixels 8 : moves the image up by 5 pixels 25
28 3.5 Flip Image buttons The Flip Image buttons are used to "flip" the image in the workspace. The Vertically button flips the image upside down: Flip Image 26
29 The Flip Image Horizontally button flips the image left & right: 27
 The following example shows how the image appeared after it was opened, with the dashed-line indicating the Horizontal Flip axis: 28")
30 Be aware that the Flip Image buttons flip the image with respect to the original orientation of the image (i.e. flip axes rotate and move with the positioning of the photo.) The following example shows how the image appeared after it was opened, with the dashed-line indicating the Horizontal Flip axis: 28

31 After being rotated nearly 90 degrees, the image in the workspace staging area appears as below. Notice the location of the Horizontal Flip axis: 29
32 Now pressing the shown below: Flip Image Horizontally button flips along the Horizontal Flip axis, as 30
.")
33 3.6 Pinwheel Mode Pinwheel Mode disables the mirroring effect that creates kaleidoscopic images. To turn on Pinwheel Mode, choose the Edit > Pinwheel Mode menu item or click on the Pinwheel Mode toolbar button (click the button again to turn Pinwheel Mode off). The preview thumbnail is updated as Pinwheel Mode is toggled on and off. Pinwheel Mode can be used with any kaleidoscope shape, though some shapes work better than others. (As you might guess, the Pinwheel Shapes work best with Pinwheel Mode turned on.) The kaleidoscope shapes that work best with Pinwheel Mode have "PW" in their name. The following two examples show the effect of Pinwheel Mode. The position of the photo in the template is exactly the same in both instances; only the Pinwheel Mode has been changed. 31

34 Kaleidoscope: Because of the mirroring effect of kaleidoscopes, it looks like the boy on the bicycle is running into himself. Pinwheel: With Pinwheel Mode turned on, the boy now appears to be riding around in a circle. 32


35 "Texture photos", i.e. photos with no clear subject, can result in some particularly beautiful pinwheels: Kaleidoscope: Pinwheel: 33
36 3.7 Preview Kaleidoscope Use the Preview feature to verify that you have positioned the image to your liking. Choose the View > Preview menu item or click on the Preview button to see what your kaleidoscope will look like. IMPORTANT: The Preview does not save the kaleidoscope in any way. If you close the Preview window and then move the image in the workspace staging area, the kaleidoscope you previewed is lost. If you want to keep the kaleidoscope you see in the Preview, you must first either save the kaleidoscope or save the workspace before repositioning the image. Note: The quality of the Preview is lower than the quality of a saved or printed kaleidoscope. This is normal and helps to decrease the time that it takes to create the kaleidoscope preview. 34

37 Click the OK button to close the Preview window and continue. 35
38 3.8 Change Background Color The background color is used for the areas adjacent to the kaleidoscope image (including any center gap) and for the print margins. To change the background color, choose the Edit > Background Color menu item or click on the Background Color toolbar button. The Select Background Color window includes both visual and numeric controls for choosing the background color. The color palette wheel controls hue and saturation, and the slider bar controls brightness. Beneath these visual controls are numeric fields that allow you to specify a color using Hue/Saturation/Brightness or Red/Green/Blue (RGB) values. Use the Default button to reset the color values for a white background color. After making your selections, click OK to apply the new background color to the kaleidoscope. 36

39 The new background color is now displayed in the preview thumbnail and will be used when printing or saving the kaleidoscope and when saving the workspace. 37
40 3.9 Print Kaleidoscope You can print your kaleidoscope directly from Kaleidoscope Kreator by either choosing the File > Print menu item or clicking on the Print Kaleidoscope toolbar button. 38
41 This displays the Print Kaleidoscope dialog, where you can specify the size and image quality of the printed kaleidoscope, print margins, and whether the kaleidoscope should be centered on the printed page. Use the Kaleidoscope Size field to specify the desired size of the kaleidoscope. If Print Margins is checked, the kaleidoscope will be surrounded by a margin as specified in the Margin Size field (plus whatever additional margins are required by your printer). If Show Cutlines is checked, a thin cutline will be drawn around the outside of the kaleidoscope or margin. The color of the cutline can be modified via the Options dialog. If Center Kaleidoscope on Page is checked, the kaleidoscope will be centered horizontally and vertically on the printed page. After making your selections, click OK to view the standard Windows Print dialog. Kaleidoscope Kreator will then generate the kaleidoscope and send it to the printer. Note: Kaleidoscope Kreator does not save the kaleidoscope it generates for the printer; instead, it generates a new kaleidoscope each time the print function is selected. If you want multiple copies of the same kaleidoscope, use the Print Multiple custom print option, or set the number of copies to print in the Windows Print dialog. 39
42 3.10 Save Kaleidoscope You can save your kaleidoscope to a file by either choosing the File > Save menu item or clicking on the Save Kaleidoscope toolbar button. This displays the Save Kaleidoscope dialog, where you can specify the size and image quality of the printed kaleidoscope, print margins, and whether the kaleidoscope should be centered on the printed page. 40

43 The Pixel Dimensions field is most useful if your kaleidoscope will be displayed on the web or in an . Images displayed on-screen are sized in pixels. The Kaleidoscope Size fields specify the kaleidoscope's size in inches or centimeters and its resolution in pixels/inch. Use these fields if you are saving the kaleidoscope so it can be printed later or used in a design that is measured in inches or centimeters. For a more detailed discussion on pixel dimensions, image size and resolution, see Understanding Image Size. After making your selections, click OK to view the standard Windows Save As dialog to specify the file location and format. Kaleidoscope Kreator will then generate the kaleidoscope and save it to the specified file. IMPORTANT: If you want to save two kaleidoscopes to the same file name but different file formats, you will need to retype the name rather than click on the name of the first file that you save and then changing the format. Doing the latter will cause the original file to be overwritten with the new file format. Instead choose the file type first, then retype the name. 41
44 3.11 Save Workspace The Save Workspace feature allows you to save a snapshot of your work that you can re-open again later. When you save the workspace, the following elements are saved to the workspace file: current image image size image position image orientation kaleidoscope shape pinwheel mode setting background color To save your workspace, choose the File > Save Workspace menu item. 42
45 You will then be presented with the standard Windows Save As dialog box. Navigate to the folder that the workspace file will be saved to, enter the name of the file, and click on the Save button. In this example, the workspace is saved to the file "Ceramic Latest.kkf" in a folder called "My Workspaces". Kaleidoscope Kreator workspace files always have the.kkf file extension. Note: Saving a workspace is different than saving a kaleidoscope. Use the Save Workspace feature to save "works in progress", or to establish a snapshot that you can go back to after experimenting with subsequent changes. In contrast, Save Kaleidoscope is used to save the "finished product" so it can be printed later or edited in another graphics program. 43

46 3.12 Open Workspace When you open a previously-saved workspace, the image size, position, orientation, kaleidoscope shape, pinwheel mode setting and background color from that workspace are restored. To open a previously-saved workspace, choose the File > Open Workspace menu item. Note: When you open a previously-saved workspace, the current image size, position, etc., will be replaced with the previous values. Kaleidoscope Kreator will notify you if your current work has not yet been saved. You will then be presented with the standard Windows Open dialog box. Double-click on the workspace file that you want to open or highlight it and click on the Open button. Kaleidoscope Kreator workspace files always have a.kkf file extension. 44
47 In this example, the previously-saved workspace file "Ceramic Latest.kkf" is opened and its image and settings are now displayed in the workspace. 45

48 3.13 Setting Options The Options dialog allows you to change the following settings: Enable/disable the template segment outline and change its color Change the color of the cutline used when printing kaleidoscopes Change the measurement units used for kaleidoscope size, print margins, etc. To view the Options dialog choose the Tools > Options menu item. If Display Template Outline is checked, the segment template in the workspace staging area will include a thin outline that highlights the template's edges. This feature is useful when working with light-colored images or images with white backgrounds that would otherwise make the template boundary difficult to see. To change the color used for the template outline, click on the Select button next to the Template Outline Color thumbnail to bring up the Select Outline Color dialog. To change the color used for the cutlines when printing kaleidoscopes, click on the Select button next to the Cutline Color thumbnail to bring up the Select Cutline Color dialog. Use the Units of Measurement field to specify whether Kaleidoscope Kreator will display sizes in inches or centimeters. 46
49 3.14 Printing Multiple Kaleidoscopes The Print Multiple custom print option allows you to print same- or different-sized copies of a kaleidoscope on the same page. This is especially useful for printing patterned paper, or whenever your project requires many copies of the same kaleidoscope. To use this feature, choose the File > Custom Print Options > Print Multiple menu item. The Print Multiple dialog is displayed. Use the numeric fields to specify a particular kaleidoscope size and quantity and then click the Add button to add it to the list. Repeat for each size and quantity that you wish to print. To delete an entry from the list, highlight it and click the Remove button. If Print Margins is checked, each kaleidoscope will be surrounded by a margin as specified in the Margin Size field. Kaleidoscope Kreator will attempt to print as many kaleidoscopes as will fit on a given page, taking the specified margin size (and whatever additional page margins are required by your printer) into account. See the following example for more details. If Show Cutlines is checked, a thin line will be included on the page to indicate the margin boundaries. The color of the cutlines can be changed via the Options dialog. After making your selections, click OK to view the standard Windows Print dialog. 47

50 Example In this example, three different kaleidoscope sizes have been specified: two 3-inch kaleidoscopes, three 2-inch kaleidoscopes, and four 1-inch kaleidoscopes. Each kaleidoscope is to be surrounded by a inch print margin, and cut lines will indicate margin boundaries. With the specified margin size of inches, the resulting printed page would be similar to the following (assumes 8.5x11 paper size): 48
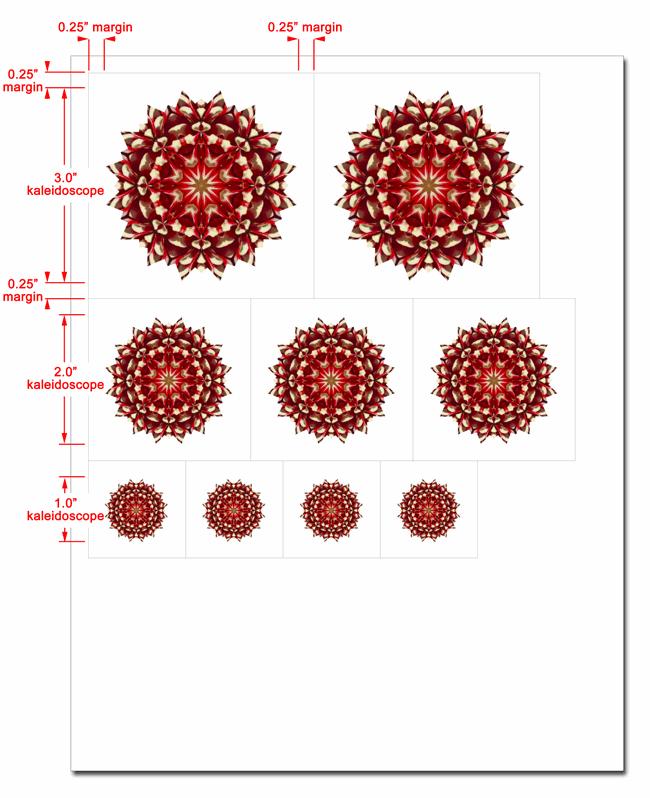
51 49

52 3.15 Poster Printing The Print Poster custom print option allows you to create kaleidoscope posters and other largeformat projects by separating the kaleidoscope into "tiles" that can be printed on individual pages. To use this feature, choose the File > Custom Print Options > Print Poster menu item. The following dialog is displayed. Use the numeric fields to specify the size of each tile and the number of tiles in each row/column. If Print Margins is checked, each tile will be surrounded by a margin as specified in the Margin Size field. Kaleidoscope Kreator will attempt to print as many tiles as will fit on a given page, taking the specified margin size (and whatever additional page margins are required by your printer) into account. See the following example for more details. If Show Cutlines is checked, a thin line will be included on the page to indicate the margin boundaries. The color of the cutlines can be changed via the Options dialog. After making your selections, click OK to view the standard Windows Print dialog. Example In this example, a nine-piece 21-inch kaleidoscope is created by specifying tile size of 7 inches and a 3x3 tile arrangement. With a margin size of inches, the resulting printed pages would be similar to the following (assumes 8.5x11 paper size): 50


53 51

54 3.16 Printing Wedges Separately The Print Separate Wedges custom print option allows you to print each kaleidoscope segment separately. This feature is especially useful when printing kaleidoscopes on fabric that will be used in a quilt, or to combine two or more photos in a kaleidoscope. To use this feature, choose the File > Custom Print Options > Print Separate Wedges menu item. The following dialog is displayed. Use the Wedge Length to specify the length of each wedge. If Print Margins is checked, each wedge will be surrounded by a margin as specified in the Margin Size field. Kaleidoscope Kreator will attempt to print as many wedges as will fit on a given page, taking the specified margin size (and whatever additional page margins are required by your printer) into account. If Show Cutlines is checked, a thin line will be included on the page to indicate the margin boundaries. The color of the cutlines can be changed via the Options dialog. After making your selections, click OK to view the standard Windows Print dialog. 52
55 4. Appendix 4.1 System Requirements Minimum system requirements: Windows XP Home or XP Professional with SP2; Windows 2000 with SP4 800 MHz processor 256 MB of RAM 45 MB of available hard disk space Recommended system requirements: Windows XP Home or XP Professional with SP2 1.0GHz processor or faster 512 MB of RAM or more 45 MB of available hard disk space Windows is a registered trademark of Microsoft Corporation. 53
56 4.2 Supported Image File Types BMP - Windows Bitmap (.bmp) format is an historic file format that is still widely used. It was developed by Microsoft as a device-independent bitmap format, i.e. the image data is stored in such a way that the image can be displayed by Windows on any type of display device. In general, it is not the preferred format to store images because it is not supported on other platforms such as Mac. JPG (or JPEG) The Joint Photographic Experts Group (.jpg) format is optimized for photos and other continuous tone images. That is why it is the format of choice for most digital cameras. Its compression scheme analyzes an image and discards those pixels which the human eye most likely won t notice. However, because it discards information, it is a lossy file format and if the compression is too strongly applied, you will see the effects of it! ("Lossy" simply means that some image data is "lost" in the compression process.) That said, huge savings in files sizes can be had (over TIF) without much noticeable degradation. It should be noted however that repeatedly saving the same file in JPG format will cause a cumulative loss of data which can very quickly become noticeable to the naked eye. If you need to edit a file, it is best to save the intermediate steps as TIF, then save the final version as JPG (if necessary). PNG The Portable Network Graphics (.png) format was developed to replace the GIF format in order to improve the severe lossy compression scheme as well as a counter to the proprietary licensing that GIF format requires. It uses a lossless compression scheme (i.e., no data is "lost" in the compression process) and while it doesn t reduce file sizes as much as GIF, it completely preserves the original data. It also supports transparency and perhaps because of this is a popular format for sharing digital scrapbooking elements. TIF (or TIFF) The Tagged Image File Format (.tif) is a flexible format that can be both compressed and non-compressed. The compression (if applied) is lossless, but is not universally supported. (Kaleidoscope Kreator does not support compressed TIF files.) Because of this, files saved in TIF format are often not compressed and thus quite large. However, TIF is still the standard choice for archiving images that you want to keep for years to come because it is nonproprietary and contains all of the original data, including the color mode and image size information. Windows and Microsoft are registered trademarks of Microsoft Corporation. Mac is a registered trademark of Apple Computer, Inc. 54


57 4.3 Segment Orientation Tips Each shape displayed in the Select Kaleidoscope Shape dialog has a highlighted segment that indicates how the segment template in the workspace will be oriented in the resulting kaleidoscope. Here are the diagrams for some 8-segment shapes: The relationship between the segment template and the resulting kaleidoscope can be confusing at first, especially for non-standard shapes like the Square and Celtic Cross. The trick is to focus on positioning the subject of your photo within the template - and letting Kaleidoscope Kreator do the rest of the work. The following example shows how the template is oriented for the 8- segment Square shape: 55
58 56

59 4.4 Understanding Image Size Image size is composed of three related parts: 1. Pixel Dimensions 2. Print Size 3. Resolution 1. Pixel Dimensions Pixel Dimensions refers to the total number of pixels that make up a digital image. ("Pixels" stands for "picture elements", i.e. the elements that make up a picture.) Pixel dimensions are referenced in terms of width x height, e.g. 600x400. The greater the number of pixels, the more information (or detail) an image contains. 2. Print Size Print Size is perhaps the easiest component to understand because it is simply the dimensions (in inches or centimeters) that an image is printed at. When someone refers to a 4"x6" image, they are referring to the print size. 3. Resolution Resolution refers to how much information is contained in a given amount of space. Resolution is referenced in terms of dots per inch (or dpi). The important thing to remember about resolution is that the higher the resolution, the more detail you will see in your printed images. To better understand resolution, it may be easier to think of the dots as squares - or more specifically as tiles in a mosaic. Imagine that you are remodeling your kitchen and you've decided to put a tiled mosaic on the wall behind your stovetop in a space of about 3'x3' (about the size of the stovetop itself.) You've drawn the outline of a sunflower on the wall to guide the placement of the tile: Now it's time to actually choose the tile for your mosaic. Your goal is to create the mosaic with as much detail as possible while minimizing the amount of tile cutting you will need to do. When 57


 Sunflower mosaic using 4\" tiles Sunflower mosaic using 2\" tiles Sunflower mosaic using 1\" tiles Sunflower mosaic using 1/2\" tiles Why have we spent all this time explaining mosaic tiles?")
60 you get to the store, you discover that tile comes in many different sizes, e.g. 4", 2", 1" and 1/2" (to name just a few.) Imagine trying to create a mosaic of the sunflower using only the 4" tiles. Would you recognize the design as a sunflower or just a bunch of different colored squares? Now imagine trying to create the mosaic design using the 2" tiles. You may be able to recognize the sunflower in the design, but it will probably take some imagination. Now imagine creating the entire mosaic using 1" tiles and then 1/2" tiles. Think of how many tiles that would be!! The following examples provide a visual example of the differences using each of the different tile sizes. (Move your mouse over each of the images, to see the sunflower sketch superimposed on the mosaic.) Sunflower mosaic using 4" tiles Sunflower mosaic using 2" tiles Sunflower mosaic using 1" tiles Sunflower mosaic using 1/2" tiles Why have we spent all this time explaining mosaic tiles? Because pixels are like mosaic tiles! The more pixels you fit into a given space (i.e., the higher the resolution), the more detail your printed image contains. You may have read or heard advice that images destined for the web or should have a resolution of 72 dpi; likewise images destined to be printed should have a resolution of 300 dpi. While these are not hard and fast rules, there is a reason these numbers exist. A computer monitor cannot display more than 72 dots per inch. (Actually, advances in technology have changed this, but that is another discussion.) So creating an image with a higher resolution does not actually provide more detail for the viewer because the computer monitor cannot display 58

61 more detail than 72 dpi. Printers on the other hand (including inkjet printers) can print at least 300 dots per inch (and often more.) That is four times more information (i.e. detail) that can be included in an image to be printed than one destined for the web: Why does all of this matter? Having a good understanding of the relationship between pixel dimensions, print size and resolution will give you greater control over the quality of your images: Pixel Dimension = Print Size * Resolution. A resolution that is too low may result in your printed images looking pixelated, i.e. you can see the individual pixels. A resolution that is too high (thus resulting in a larger number of total pixels) will increase the processing time on an image because more pixels have to be processed than are really necessary. 59

62 Examples Let's take a look at some examples to visually see how this all fits together. In each of the examples below, the size of the image is shown relative to a "printed" 6"x4" grid. Example 1 - We start with an image of 300x225 pixels at 72dpi. If we increase the resolution while keeping the pixel dimensions the same, the print size will decrease. It is important to note that because the pixel dimensions remained the same and the resolution increased, the perceived quality of the image stays the same (or may look better), though the printed image size will be smaller. At 72dpi, the print size is 4.17"x3.13": Print size = Pixels / resolution Print size = 300 px/ 72 dpi = 4.17" Print size = 225 px / 72 dpi = 3.13" Increasing the resolution without changing the pixel dimensions results in a decrease in the print size. Print size = Pixels / resolution Print size = 300 px / 150 dpi = 2" Print size = 225 px / 150 dpi = 1.5" 60

63 Example 2 - We start with an image of 900x675 pixels that prints at 3"x2.25". If we increase the print size while keeping the pixel dimensions the same, the resolution will decrease. It is important to note that when the pixel dimensions stay the same and the resolution decreases, the quality of the image may degrade because the same number of pixels are spread out over a larger area which has the effect of increasing the size of the pixels. If the change is large enough, you may see some pixelation of your image when printed. At 3"x2.25", the resolution is 300 dpi: Resolution = Pixels / print size Resolution = 900 px / 3" = 300 dpi Resolution = 675 px / 2.25" = 300 dpi Increasing the print size while keeping the pixel dimensions the same results in a decrease in resolution. Resolution = Pixels / print size Resolution = 900 px / 6" = 150 dpi Resolution = 675 px / 4.5" = 150 dpi 61

64 Example 3 - We start with an image that is 3"x2.25" and 300dpi. If we decrease the resolution while keeping the print size the same, the pixel dimensions will decrease. It should be noted that any time the pixel dimensions are changed, there is a decrease in the quality of the image because the graphics application must average the correct color values for the remaining pixels. In this case, the averaging of the color values in addition to the decreased resolution further degrades the image quality. Look closely at the stamens of the flower to see the effect of this. At 3"x2.25" and 300dpi, the pixel dimensions of the image are 900x675. Pixels = Print size * resolution Pixels = 3" * 300 dpi = 900 Pixels = 2.25" * 300 dpi =675 Decreasing the resolution while keeping the print size the same results in a decrease in pixel dimensions. Pixels = Print size * resolution Pixels = 3" * 150 dpi = 450 Pixels = 2.25" * 150 dpi =338 62
SCANNING IMAGES - USER S GUIDE. Scanning Images with Epson Smart Panel and PhotoShop [for Epson 1670 scanners]
![SCANNING IMAGES - USER S GUIDE. Scanning Images with Epson Smart Panel and PhotoShop [for Epson 1670 scanners]](/thumbs/89/98942649.jpg "SCANNING IMAGES - USER S GUIDE. Scanning Images with Epson Smart Panel and PhotoShop [for Epson 1670 scanners]") University of Arizona Information Commons Training 1 SCANNING IMAGES - USER S GUIDE Scanning Images with Epson Smart Panel and PhotoShop [for Epson 1670 scanners] p.2 Introduction and Overview Differences
University of Arizona Information Commons Training 1 SCANNING IMAGES - USER S GUIDE Scanning Images with Epson Smart Panel and PhotoShop [for Epson 1670 scanners] p.2 Introduction and Overview Differences
Filigree Pillow. Copyright 2010 Kaleidoscope Collections, LLC. All rights reserved.
 Filigree Pillow Copyright 2010 Kaleidoscope Collections, LLC. All rights reserved. Kaleidoscope Collections, LLC, PO Box 270701, Fort Collins, CO 80527-0701 PH: 970-231-4076 FAX: 970-225-1414 E-mail: inquiries@kalcollections.com
Preparing Images For Print
 Preparing Images For Print The aim of this tutorial is to offer various methods in preparing your photographs for printing. Sometimes the processing a printer does is not as good as Adobe Photoshop, so
Digital Imaging - Photoshop
 Digital Imaging - Photoshop A digital image is a computer representation of a photograph. It is composed of a grid of tiny squares called pixels (picture elements). Each pixel has a position on the grid
Digital Imaging and Photoshop Fun/ Marianne Wallace
 EZ GREETING CARD This tutorial uses Photoshop Elements 2 but it will also work in all versions of Photoshop. It will show how to create and print 2 cards per 8 ½ X 11 sized papers. The finished folded
Generations Automatic Stand-Alone Lace By Bernie Griffith Generations Software
 We are going to create an open Italian lace. Generations software products provide advanced image processing features allowing for the creation of stand-alone lace with just a few simple techniques. A
Adobe Photoshop CS2 Workshop
 COMMUNITY TECHNICAL SUPPORT Adobe Photoshop CS2 Workshop Photoshop CS2 Help For more technical assistance, open Photoshop CS2 and press the F1 key, or go to Help > Photoshop Help. Selection Tools - The
House Design Tutorial
 House Design Tutorial This House Design Tutorial shows you how to get started on a design project. The tutorials that follow continue with the same plan. When you are finished, you will have created a
Photoshop CS6. Table of Contents. Image Formats! 3. GIF (Graphics Interchange Format)! 3. JPEG or JPG (Joint Photographic Experts Group)!
! 3. JPEG or JPG (Joint Photographic Experts Group)!") Photoshop CS6 Table of Contents Image Formats! 3 GIF (Graphics Interchange Format)! 3 JPEG or JPG (Joint Photographic Experts Group)! 3 PNG (Portable Network Graphics)! 3 Pixels! 3 Resolution! 3 Creating
Photoshop CS6 Table of Contents Image Formats! 3 GIF (Graphics Interchange Format)! 3 JPEG or JPG (Joint Photographic Experts Group)! 3 PNG (Portable Network Graphics)! 3 Pixels! 3 Resolution! 3 Creating
House Design Tutorial
 House Design Tutorial This House Design Tutorial shows you how to get started on a design project. The tutorials that follow continue with the same plan. When you are finished, you will have created a
Key Terms. Where is it Located Start > All Programs > Adobe Design Premium CS5> Adobe Photoshop CS5. Description
 Adobe Adobe Creative Suite (CS) is collection of video editing, graphic design, and web developing applications made by Adobe Systems. It includes Photoshop, InDesign, and Acrobat among other programs.
User Guide. Version 1.4. Copyright Favor Software. Revised:
 User Guide Version 1.4 Copyright 2009-2012 Favor Software Revised: 2012.02.06 Table of Contents Introduction... 4 Installation on Windows... 5 Installation on Macintosh... 6 Registering Intwined Pattern
ArcSoft PhotoImpression Table of Contents:
 ArcSoft PhotoImpression Table of Contents: 1. Welcome to PhotoImpression 2. Highlights of PhotoImpression 3. System Requirements 4. Installing PhotoImpression 5. Working with PhotoImpression Getting Started
ImagesPlus Basic Interface Operation
 ImagesPlus Basic Interface Operation The basic interface operation menu options are located on the File, View, Open Images, Open Operators, and Help main menus. File Menu New The New command creates a
Copyright Notice. Trademarks
 Copyright Notice All rights reserved. No part of this publication may be reproduced, stored in a retrieval system, or transmitted in any form or by any means, electronic, mechanical, photocopying, recording,
Home Screen to Get You Started
 Updated User Interface The user interface has been redesigned for faster learning and more complete designing. Its friendly new look introduces large interface elements, customizable workspace, help tips,
Color and More. Color basics
 Color and More In this lesson, you'll evaluate an image in terms of its overall tonal range (lightness, darkness, and contrast), its overall balance of color, and its overall appearance for areas that
Introduction to: Microsoft Photo Story 3. for Windows. Brevard County, Florida
 Introduction to: Microsoft Photo Story 3 for Windows Brevard County, Florida 1 Table of Contents Introduction... 3 Downloading Photo Story 3... 4 Adding Pictures to Your PC... 7 Launching Photo Story 3...
Go Daddy Online Photo Filer
 Getting Started and User Guide Discover an easier way to share, print and manage your photos online! Online Photo Filer gives you an online photo album site for sharing photos, as well as easy-to-use editing
INTRODUCTION TO COMPUTER GRAPHICS
 INTRODUCTION TO COMPUTER GRAPHICS ITC 31012: GRAPHICAL DESIGN APPLICATIONS AJM HASMY hasmie@gmail.com WHAT CAN PS DO? - PHOTOSHOPPING CREATING IMAGE Custom icons, buttons, lines, balls or text art web
Windows INSTRUCTION MANUAL
 Windows E INSTRUCTION MANUAL Contents About This Manual... 3 Main Features and Structure... 4 Operation Flow... 5 System Requirements... 8 Supported Image Formats... 8 1 Installing the Software... 1-1
Adobe Photoshop CC Part 1: The Basics
 CALIFORNIA STATE UNIVERSITY, LOS ANGELES INFORMATION TECHNOLOGY SERVICES Adobe Photoshop CC Part 1: The Basics Summer 2015, Version 1.0 Table of Contents Introduction...2 New Features of Photoshop CC...2
First English edition for Ulead COOL 360 version 1.0, February 1999.
 First English edition for Ulead COOL 360 version 1.0, February 1999. 1992-1999 Ulead Systems, Inc. All rights reserved. No part of this publication may be reproduced or transmitted in any form or by any
Introduction. Let s get started...
 Introduction Welcome to PanoramaPlus 2, Serif s fully-automatic 2D image stitcher. If you re looking for panorama-creating software that s quick and easy to use, but doesn t compromise on image quality,
ADOBE PHOTOSHOP CS 3 QUICK REFERENCE
 ADOBE PHOTOSHOP CS 3 QUICK REFERENCE INTRODUCTION Adobe PhotoShop CS 3 is a powerful software environment for editing, manipulating and creating images and other graphics. This reference guide provides
User Guide. Version 1.2. Copyright Favor Software. Revised:
 User Guide Version 1.2 Copyright 2009-2010 Favor Software Revised: 2010.05.18 Table of Contents Introduction...4 Installation on Windows...5 Installation on Macintosh...6 Registering Intwined Pattern Studio...7
Getting Started. with Easy Blue Print
 Getting Started with Easy Blue Print User Interface Overview Easy Blue Print is a simple drawing program that will allow you to create professional-looking 2D floor plan drawings. This guide covers the
digitization station DIGITAL SCRAPBOOKING 120 West 14th Street
 digitization station DIGITAL SCRAPBOOKING 120 West 14th Street www.nvcl.ca techconnect@cnv.org DIGITAL SCRAPBOOKING With MyMemories Suite 6 The MyMemories Digital Scrapbooking software allows you to create
House Design Tutorial
 Chapter 2: House Design Tutorial This House Design Tutorial shows you how to get started on a design project. The tutorials that follow continue with the same plan. When you are finished, you will have
Digital Portable Overhead Document Camera LV-1010
 Digital Portable Overhead Document Camera LV-1010 Instruction Manual 1 Content I Product Introduction 1.1 Product appearance..3 1.2 Main functions and features of the product.3 1.3 Production specifications.4
Using Adobe Photoshop
 Using Adobe Photoshop 4 Colour is important in most art forms. For example, a painter needs to know how to select and mix colours to produce the right tones in a picture. A Photographer needs to understand
Photoshop CC 2018 Essential Skills
 Photoshop CC 2018 Essential Skills Adobe Photoshop Creative Cloud 2018 University Information Technology Services Learning Technology, Training, Audiovisual and Outreach Copyright 2018 KSU Division of
Here is a video that is very helpful
 This lesson from The Electric Quilt Company accompanies the Electric Quilt s article, Playing with Color and Fabric Choices in EQ7, on page 80 in the Summer 2016 issue of Modern Quilts Unlimited. Enjoy!
Adobe Illustrator CS6
 Adobe Illustrator CS6 Table of Contents Image Formats 3 ai (Adobe Illustrator) 3 eps (Encapsulated PostScript) 3 PDF (Portable Document Format) 3 JPEG or JPG (Joint Photographic Experts Group) 3 Vectors
A. Selecting. Example: Start the GIMP by clicking Start, choose Gimp and GIMP 2 from the menu. Open the Keys.jpg image from your course folder.
 A. Selecting Open the Keys.jpg image from your course folder. From the Layer menu, choose New Layer. Ensure Transparency is ticked Click OK. The Layer dialog now shows two layers. Page 1 Click the Background
Photoshop CC Editing Images
 Photoshop CC Editing Images Rotate a Canvas A canvas can be rotated 90 degrees Clockwise, 90 degrees Counter Clockwise, or rotated 180 degrees. Navigate to the Image Menu, select Image Rotation and then
Monaco ColorWorks User Guide
 Monaco ColorWorks User Guide Monaco ColorWorks User Guide Printed in the U.S.A. 2003 Monaco Systems, Inc. All rights reserved. This document contains proprietary information of Monaco Systems, Inc. No
Movavi Photo DeNoise User Manual. Start here: Quick start guide Remove trial restrictions Remove noise from photos
 Movavi Photo DeNoise User Manual Start here: Quick start guide Remove trial restrictions Remove noise from photos Quick start guide How to edit an image and remove color noise Step 1: Open image Open Movavi
House Design Tutorial
 Chapter 2: House Design Tutorial This House Design Tutorial shows you how to get started on a design project. The tutorials that follow continue with the same plan. When you are finished, you will have
Visioneer OneTouch Scanner. Installation Guide FOR WINDOWS
 Visioneer OneTouch Scanner Installation Guide FOR WINDOWS TABLE OF CONTENTS i TABLE OF CONTENTS Getting Started with your new Scanner....................... 1 Step 1: Installing the Scanner Software.......................
Introducing Digital Scrapbooking. Create beautiful books from your photos using Photoshop Elements
 Introducing Digital Scrapbooking Create beautiful books from your photos using Photoshop Elements 1 Contents Digital Scrapbooking with Photoshop Elements... 3 Using Photoshop Elements... 4 Saving your
PackshotCreator 3D User guide
 PackshotCreator 3D User guide 2011 PackshotCreator - Sysnext All rights reserved. Table of contents 4 4 7 8 11 15 18 19 20 20 23 23 24 25 26 27 27 28 28 34 35 36 36 36 39 42 43 44 46 47 Chapter 1 : Getting
Chapter 14 Inserting Bitmapped Images
 Chapter 14 Inserting Bitmapped Images Introduction This chapter explains how to insert and size bitmapped images in R&R reports. This information is presented in the following sections: Importing an Image
Ornamental Pro 2004 Instruction Manual (Drawing Basics)
") Ornamental Pro 2004 Instruction Manual (Drawing Basics) http://www.ornametalpro.com/support/techsupport.htm Introduction Ornamental Pro has hundreds of functions that you can use to create your drawings.
Ornamental Pro 2004 Instruction Manual (Drawing Basics) http://www.ornametalpro.com/support/techsupport.htm Introduction Ornamental Pro has hundreds of functions that you can use to create your drawings.
Introduction to Photoshop: Basic Editing & Prepare Images for the Web
 Introduction to Photoshop: Basic Editing & Prepare Images for the Web 1 LEARNING OBJECTIVES Basic tools in Photoshop & Use of Bridge Prepare images for print and web use TOPICS COVERED Photoshop Interface
Photoshop: a Beginner s course. by: Charina Ong Centre for Development of Teaching and Learning National University of Singapore
 Photoshop: a Beginner s course by: Charina Ong Centre for Development of Teaching and Learning National University of Singapore Table of Contents About the Workshop... 1 Prerequisites... 1 Workshop Objectives...
Guidance on Using Scanning Software: Part 5. Epson Scan
 Guidance on Using Scanning Software: Part 5. Epson Scan Version of 4/29/2012 Epson Scan comes with Epson scanners and has simple manual adjustments, but requires vigilance to control the default settings
Adobe Photoshop CC 2018 Tutorial
 Adobe Photoshop CC 2018 Tutorial GETTING STARTED Adobe Photoshop CC 2018 is a popular image editing software that provides a work environment consistent with Adobe Illustrator, Adobe InDesign, Adobe Photoshop,
LESSON 04: ORGANIZE IT FOR PSE USERS COMPANION BOOK. Digital Scrapbook Academy. April 2018: Lesson 04 Organize It for Elements Users
 Digital Scrapbook Academy April 2018: Lesson 04 LESSON 04: ORGANIZE IT FOR PSE USERS COMPANION BOOK Page 1 of 15 Table of Contents Table of Contents 2 Welcome to Lesson 04 for Elements Users 3 1: Add Photos,
12. Creating a Product Mockup in Perspective
 12. Creating a Product Mockup in Perspective Lesson overview In this lesson, you ll learn how to do the following: Understand perspective drawing. Use grid presets. Adjust the perspective grid. Draw and
Adobe Photoshop PS2, Part 3
 Adobe Photoshop PS2, Part 3 Basic Photo Corrections This guide steps you through the process of acquiring, resizing, and retouching a photo intended for posting on the Web as well as for a print layout.
Applying mathematics to digital image processing using a spreadsheet
 Jeff Waldock Applying mathematics to digital image processing using a spreadsheet Jeff Waldock Department of Engineering and Mathematics Sheffield Hallam University j.waldock@shu.ac.uk Introduction When
User Guide V10 SP1 Addendum
 Alibre Design User Guide V10 SP1 Addendum Copyrights Information in this document is subject to change without notice. The software described in this document is furnished under a license agreement or
IMAGE SIZING AND RESOLUTION. MyGraphicsLab: Adobe Photoshop CS6 ACA Certification Preparation for Visual Communication
 IMAGE SIZING AND RESOLUTION MyGraphicsLab: Adobe Photoshop CS6 ACA Certification Preparation for Visual Communication Copyright 2013 MyGraphicsLab / Pearson Education OBJECTIVES This presentation covers
Managing images with NewZapp
 Managing images with NewZapp This guide is for anyone using the NewZapp Fixed editor as opposed to the Drag and Drop editor. The Image Manager is where images are uploaded and stored in your NewZapp account
Digital Imaging and Image Editing
 Digital Imaging and Image Editing A digital image is a representation of a twodimensional image as a finite set of digital values, called picture elements or pixels. The digital image contains a fixed
Create new drawing. Select Collection. Manage graphs. Collection Name. Graphs preview
 Create new drawing Select Collection Collection Name Manage graphs Graphs preview Duplicate selection Move selection Delete selection Select All drawings Exit Share selection Selected graphs Add new Collection
March 31, Welcome to the Family Tree Maker Users Group!
 March 31, 2008 Welcome to the Family Tree Maker Users Group! Tonight s Agenda: FTM 2005/2006/v16 Photo Features 1. Saving digitized pictures 2. Using a scanner or digital camera to copy pictures and documents
Impress Guide Chapter 4 Adding and Formatting Pictures
 Impress Guide Chapter 4 Adding and Formatting Pictures This PDF is designed to be read onscreen, two pages at a time. If you want to print a copy, your PDF viewer should have an option for printing two
LESSON 02: GET STRONGER FOR PS USERS COMPANION BOOK. Digital Scrapbook Academy. February 2018: Lesson 02 Get Stronger for Photoshop Users
 Digital Scrapbook Academy February 2018: Lesson 02 LESSON 02: GET STRONGER FOR PS USERS COMPANION BOOK Page 1 of 19 Table of Contents Table of Contents 2 Welcome to Lesson 02 for Photoshop Users 4 1: Add
DOCUMENT SCANNER INSTRUCTIONS. Space. Backup. Count Only. New File. Scanner. Feeding Option Manual Auto Semi-Auto
 E FILM F Scanner A Space Count Only New File Feeding Option Manual Auto Semi-Auto Backup DOCUMENT SCANNER INSTRUCTIONS NOTICE q Copyright 2001 by CANON ELECTRONICS INC. All rights reserved. No part of
Adding Content and Adjusting Layers
 56 The Official Photodex Guide to ProShow Figure 3.10 Slide 3 uses reversed duplicates of one picture on two separate layers to create mirrored sets of frames and candles. (Notice that the Window Display
ITNP80: Multimedia Adobe Photoshop Practical Weeks commencing 26 January and 2 February 2015.
 ITNP80: Multimedia Adobe Photoshop Practical Weeks commencing 26 January and 2 February 2015. The aims and objectives of this practical are four-fold: To give you some practical experience of some of the
Vector VS Pixels Introduction to Adobe Photoshop
 MMA 100 Foundations of Digital Graphic Design Vector VS Pixels Introduction to Adobe Photoshop Clare Ultimo Using the right software for the right job... Which program is best for what??? Photoshop Illustrator
1/31/2010 Google's Picture Perfect Picasa
 The Picasa software lets you organize, edit, and upload your photos in quick, easy steps. Download Picasa at http://picasa.google.com You'll be prompted to accept the terms of agreement. Click I Agree.
Document history Date Doc version Ifx version Editor Change
 Document history Date Doc version Ifx version Editor Change Jan 2008 2 5.21.0300 HV Nov 2015 2.1 5.60.0400 JW Update for 5.60.0400 Inclusion of Epiphan Image Capture Nov 2017 2.2 5.70.0100 JW Update for
How to generate different file formats
 How to generate different file formats Different mediums print, web, and video require different file formats. This guide describes how to generate appropriate file formats for these mediums by using Adobe
How to Avoid Landmines: Managing your Motion Graphics Projects
 How to Avoid Landmines: Managing your Motion Graphics Projects -Richard Harrington, PMP www.rhedpixel.com 703.560.0220 Import Tips Double-Click in Project Window Shift-Click Multiple Items Organize in
House Design Tutorial
 Chapter 2: House Design Tutorial This House Design Tutorial shows you how to get started on a design project. The tutorials that follow continue with the same plan. When we are finished, we will have created
PosterArtist Quick Guide
 PosterArtist Quick Guide Create posters in four easy steps STEP STEP STEP STEP Use Auto Design to Create Posters Simply select a poster type and a design image to automatically create high-quality posters.
Adobe Photoshop CS5 Tutorial
 Adobe Photoshop CS5 Tutorial GETTING STARTED Adobe Photoshop CS5 is a popular image editing software that provides a work environment consistent with Adobe Illustrator, Adobe InDesign, Adobe Photoshop
2. Picture Window Tutorial
 2. Picture Window Tutorial Copyright (c) Ken Deitcher, 1999 Original image Final image To get you started using Picture Window we present two short tutorials. Basic Image Editing This tutorial covers basic
Stitch n Bloom Jacket
 Stitch n Bloom Jacket Created by Debra Rutledge This all-over floral arrangement is designed for embellishing a ready-made denim jacket, but may be easily modified to accommodate any jacket style. Supplies
COMPUTING CURRICULUM TOOLKIT
 COMPUTING CURRICULUM TOOLKIT Pong Tutorial Beginners Guide to Fusion 2.5 Learn the basics of Logic and Loops Use Graphics Library to add existing Objects to a game Add Scores and Lives to a game Use Collisions
Epson Scanner (Expressions Photo) Basic Directions:
 Basic Directions:") Epson Scanner (Expressions 10000 Photo) Basic Directions: Position document face down in the upper Right corner. (Orientation changes with Mode: For Professional mode, turn 90 Clockwise) Launch Photoshop
Epson Scanner (Expressions 10000 Photo) Basic Directions: Position document face down in the upper Right corner. (Orientation changes with Mode: For Professional mode, turn 90 Clockwise) Launch Photoshop
Mastering Your. Embroidery Software V6.0. Owner s Workbook - Part 1
 Mastering Your Mastering Your Embroidery Software V6.0 Owner s Workbook - Part 1 1 Table of Contents Introduction... 3 Class 1: Getting Started... Class Overview... 4 Four Bonus programs in BERNINA Embroidery
Chapter 4 Adding and Formatting Pictures
 Impress Guide Chapter 4 Adding and Formatting Pictures OpenOffice.org Copyright This document is Copyright 2007 by its contributors as listed in the section titled Authors. You can distribute it and/or
Impress Guide. Chapter 4 Adding and Formatting Pictures
 Impress Guide Chapter 4 Adding and Formatting Pictures Copyright This document is Copyright 2005 2012 by its contributors as listed below. You may distribute it and/or modify it under the terms of either
System Requirements These are the minimum system requirements needed to run Movavi Photo Editor:
 System Requirements These are the minimum system requirements needed to run Movavi Photo Editor: Intel-based Mac computer Mac OS X 10.6, 10.7, 10.8 or 10.9 Display graphics minimum resolution of 1024x768;
Recitation 2 Introduction to Photoshop
 Recitation 2 Introduction to Photoshop What is Adobe Photoshop? Adobe Photoshop is a tool for creating digital graphics either by starting with a scanned photograph or artwork or by creating the graphics
Learning Guide. ASR Automated Systems Research Inc. # Douglas Crescent, Langley, BC. V3A 4B6. Fax:
 Learning Guide ASR Automated Systems Research Inc. #1 20461 Douglas Crescent, Langley, BC. V3A 4B6 Toll free: 1-800-818-2051 e-mail: support@asrsoft.com Fax: 604-539-1334 www.asrsoft.com Copyright 1991-2013
SMALL OFFICE TUTORIAL
 SMALL OFFICE TUTORIAL in this lesson you will get a down and dirty overview of the functionality of Revit Architecture. The very basics of creating walls, doors, windows, roofs, annotations and dimensioning.
INSTRUCTION MANUAL MM-A209
 E INSTRUCTION MANUAL 9222-7300-11 MM-A209 2 BEFORE YOU BEGIN Before installing the DiMAGE Viewer software, read the data-transfer section in the camera manual. This section details how to connect the camera
The ideal K-12 science microscope solution. User Guide. for use with the Nova5000
 The ideal K-12 science microscope solution User Guide for use with the Nova5000 NovaScope User Guide Information in this document is subject to change without notice. 2009 Fourier Systems Ltd. All rights
GEO/EVS 425/525 Unit 2 Composing a Map in Final Form
 GEO/EVS 425/525 Unit 2 Composing a Map in Final Form The Map Composer is the main mechanism by which the final drafts of images are sent to the printer. Its use requires that images be readable within
U-MARQ Universal Engraving. Bitmap Function. Chapter 12 Bitmaps. Bitmap Menu. Insert Bitmap
 U-MARQ Universal Engraving Bitmap Function The GEM-RX supports the new and unique U-MARQ Picture Engraving (this is an optional extra and has to be purchased separately), This Dialogue box is not available
Photoshop CS2. Step by Step Instructions Using Layers. Adobe. About Layers:
 About Layers: Layers allow you to work on one element of an image without disturbing the others. Think of layers as sheets of acetate stacked one on top of the other. You can see through transparent areas
33-2 Satellite Takeoff Tutorial--Flat Roof Satellite Takeoff Tutorial--Flat Roof
 33-2 Satellite Takeoff Tutorial--Flat Roof Satellite Takeoff Tutorial--Flat Roof A RoofLogic Digitizer license upgrades RoofCAD so that you have the ability to digitize paper plans, electronic plans and
Template: Quilter Title Overview: Traditional Application
 Template: Quilter Title Overview: Traditional Application Subject Launching Topic Quilter Open Steps BERNINA Embroidery Software. Select Steps the Quilter icon in the Applications Toolbox to launch Quilter.
CONTENTS. Chapter I Introduction Package Includes Appearance System Requirements... 1
 User Manual CONTENTS Chapter I Introduction... 1 1.1 Package Includes... 1 1.2 Appearance... 1 1.3 System Requirements... 1 1.4 Main Functions and Features... 2 Chapter II System Installation... 3 2.1
Premier + Create Create Express Border Applique
 Premier + Create Create Express Border Applique Page 1 Learn to use the Create Express Border Wizard to create a beautiful applique. It s so quick and easy! You can audition your applique fabric right
Lesson 4: Inserting and Modifying Clip Art and Photos
 CNET tech sites: Price comparisons Product reviews Tech news Downloads Site map Home Your Courses Your Profile Logout FAQ Contact Us About Lesson 4: Inserting and Modifying Clip Art and Photos PowerPoint
Developing Multimedia Assets using Fireworks and Flash
 HO-2: IMAGE FORMATS Introduction As you will already have observed from browsing the web, it is possible to add a wide range of graphics to web pages, including: logos, animations, still photographs, roll-over
Contents. Introduction
 Contents Introduction 1. Overview 1-1. Glossary 8 1-2. Menus 11 File Menu 11 Edit Menu 15 Image Menu 19 Layer Menu 20 Select Menu 23 Filter Menu 25 View Menu 26 Window Menu 27 1-3. Tool Bar 28 Selection
4/9/2015. Simple Graphics and Image Processing. Simple Graphics. Overview of Turtle Graphics (continued) Overview of Turtle Graphics
 Overview of Turtle Graphics") Simple Graphics and Image Processing The Plan For Today Website Updates Intro to Python Quiz Corrections Missing Assignments Graphics and Images Simple Graphics Turtle Graphics Image Processing Assignment
Simple Graphics and Image Processing The Plan For Today Website Updates Intro to Python Quiz Corrections Missing Assignments Graphics and Images Simple Graphics Turtle Graphics Image Processing Assignment
Cutwork With Generations Automatic Digitizing Software By Bernadette Griffith, Director of Educational Services, Notcina Corp
 In this lesson we are going to create a cutwork pattern using our scanner, an old pattern, a black felt tip marker (if necessary) and the editing tools in Generations. You will need to understand the basics
Using Dynamic Views. Module Overview. Module Prerequisites. Module Objectives
 Using Dynamic Views Module Overview The term dynamic views refers to a method of composing drawings that is a new approach to managing projects. Dynamic views can help you to: automate sheet creation;
ENGINEERING CO., LTD.
 Software RIP RasterLinkPro5 IP Reference Guide For UJF Series For JF Series For JFX Series This guide explains about features of RasterLinkPro5 IP for the UV Inkjet printer UJF Series, JF Series and JFX
Students will be able to create movement through the use of line or implied line and repetition.
 Title of Unit Digital Imaging Title of Lesson Self Portrait Montage in Photoshop Course Graphic Design 1 Instructor Heidi Stachulak hstachulak@hf233.org Objectives: Composition Students will be able to
Movavi Photo Editor. User guide 2016
 Movavi Photo Editor User guide 2016 Activation When you first install a copy of Movavi Photo Editor, it will be running in trial mode, where you cannot save the edited images. To be able to use the program