Zoom TTL Flash for Nikon
|
|
|
- Coleen Malone
- 5 years ago
- Views:
Transcription


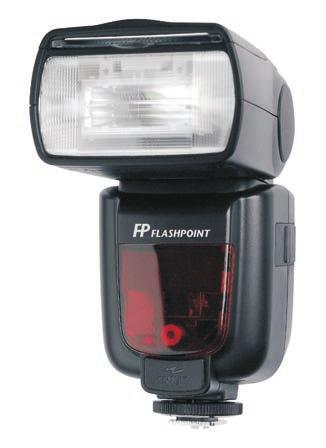
1 Zoom TTL Flash for Nikon FPLFSMZNK
2 Thank you for choosing Flashpoint! The new Flashpoint Zoom TTL Speedlight for Nikon with Integrated R2 Radio Transceiver is a hotshoe speedlight which is fully compatible with the Nikon TTL system. The incredible amount of power contained in these compact and lightweight units as well as their integrated functions and features make them the first choice of professional photographers. If you have any questions or concerns, please feel free to contact us at Brands@Adorama.com Features Extremely Powerful Flash with a GN of 196 Complete Compatibility with The Nikon ITTL System Fully Compatible with All On Camera ITTL Controls Including Automatic TTL Exposure Control, Exposure Bias, Bracketing, Second Curtain Sync, HSS, EXIF Recording, and Modeling Flash Optical ITTL Communication with Nikon Flashes as a Master or Slave Manual Control of Three Different Wireless Groups by Using the Nikon CLS Optical System Remote ITTL and Manual Power Control with the Integrated R2 Radio System s Built In Transmitter and Receiver Industry benchmark range and interference avoidance with the new INTEGRATED 2.4 ghz R2 Radio System Zooming Head for Even Coverage with automatic zoom or manual control HSS for Shutter Speeds Up To 1/8000 Second Regular and Intelligent Optical Slave Modes Backwards Compatible with The Flashpoint R1 Radio Control System for Manual Output Control and Triggering 360 degree rotation and 90+ degree tilt Stable color temperature at 5600±200K over the entire power range Backlit Matrix LCD Multipurpose Buttons with Digital Marking for Faster Navigation Perfect for On and Off Camera Use Faster Recycle with the Flashpoint Blast Pack BP-960 with Canon cord Laser AF Assist Lamp with Crisscross Pattern for Instant Autofocus Even In Complete Dark On Low Contrast Surfaces 1 Year Warranty 01
3 For Your Safety Always keep this product dry. Do not use in rain or in damp conditions. This product contains high-voltage electronic parts. Touching the high-voltage circuit inside it may result in electric shock. Do not disassemble. Should repairs become necessary, this product must be sent to an authorized maintenance center. Stop using this product if it breaks open due to internal shifting, falling or strong impact. STRONG electric shock may occur if you touch the components inside it. You might DIE. Don t risk it. Reincarnation is not covered by the warranty. Do not fire the flash directly into the eyes (especially those of babies and pets) within short distances. Otherwise visual impairment may occur. When taking pictures for babies, keep the flash unit at least 1 meter (3.3 feet) away from them. Using bounce flash to reduce light intensity is also recommended. Plus it will make them look cuter. Because it creates softer light, and larger catchlights in the eyes. And makes them look more angelic. Which is good. Cause they are babies. They are SUPPOSED to look angelic! Also you won t get hard shadows from that ridiculous gigantic bow they decided to stick on the baby s head if you bounce your light. Do not use the flash unit in the presence of flammable gases, chemicals and other similar materials. In certain circumstances, these materials may be sensitive to the strong light emitting from this flash unit and fire may result. A whole new meaning to Flashpoint. Do not leave or store the flash unit if the ambient temperature reads over 50 C (e.g. in automobile in the sun). Otherwise the electronic parts may be damaged. Do not use any power supply other than the intended one to power the unit. Do not insert metal parts into any lighting equipment. Do not touch the electrical contacts on the flash or battery or contact them with any conductive materials. This flash has an over-heat protection circuit, rapid continuous firing will cause the flash to slow operation and trigger a "cool down" period. After this period, the flash will resume normal operation. You may also reboot the flash by cycling the power off and then on. Do not use selective coloring. Do not use the flash to support other equipment. For example, do not lift your camera by the flash. The flash has a locking pin to ensure secure operation. To avoid damage, completely unscrew the locking ring before removing the flash. In case of abnormal function, sparks, excessive heat, flames or smoke, immediately power off the unit and disconnect the battery if safely possible. Have it checked by an authorized technician. Store the flash with the batteries removed. Storing the flash with the batteries in it can lead to battery leakage. 02


4 Name of Parts Body 01. Retractable Bounce Card 02. Retractable Wide Angle Diffuser 03. Flash Head 04. Optical Control Sensor 05. Focus Assist Beam 06. R1 Wireless Control Port 07. Sync Cord Jack Hotshoe 09. Dot-marix LCD Panel 10. Lock Ring 11. Battery Compartment 12. USB Port for Firmware Upgrades 13. Slave Flash Ready Indicator 14. External Power Supply Socket Control Panel 15. < MODE > Mode Selection Button / Lock Button 16. < > Wireless Selection Button 17. Select Dial 18. < SET > Set Button 19. ON / OFF Power Switch 20. < > Test Button / Flash Ready Indicator 21. Function Button Function Button Function Button Function Button 4 03


5 LCD Panel (1)i-TTL Autoflash : Zoom display Focus length : Automatic : High-speed sync : Manual : i-ttl autoflash : Second curtain sync : Aperture : Flash exposure compensation Flash exposure compensation amount Effective flash range The display will only show the settings currently applied. The functions displayed above buttons 1 to 4, such as and, change according to settings status. When a button or dial is operated, the LCD panel is illuminated. (2)M Manual Flash : Manual flash Manual flash output (3)Multi Flash : Stroboscopic flash Number of flashes Flash frequency (Hz=Flashes per Second) 04


6 (4)Radio Transmission Shooting/Optical Transmission Shooting Master Unit Flash mode : Group flash (radio transmission) : Radio transmission wireless shooting : Optical transmission wireless shooting Channel Firing group Slave Unit : Slave icon : Slave Assigned group Included Accessories 1. Flash Unit 2. Mini Stand 3. Protective Case 4. Instruction Manual Accessories R2 Radios R1 Radios Flashpoint Blast Power Pack BP-960 with Canon Cord FPPPBP960CA Flashpoint Grid for Speedlight FPLFSMX02 Flashpoint Flash Diffuser FAFD60 Hexapop/Parapop rapid deployment Softboxes Flashpoint Speedlight Reflector FPLFSMX01 05
7 Attaching to a Camera Attach the Camera Flash. Slip the camera flash s mounting foot into the camera s hotshoe all the way. Secure the Camera Flash. Rotate the lock ring on the mounting foot until it is secure. Detach the Camera Flash. Rotate the lock ring on the mounting foot until it is fully loosened. Power Management Use ON/OFF Power Switch to power the flash unit on or off. Turn off the unit if it will not be used for an extended period of time. Set as a master flash, it will turn the power off automatically after approx. 90 seconds of idle use. Pressing the camera shutter halfway or pressing any flash button will wake up the flash unit. Set as a slave flash, it will enter sleep mode after a certain period (adjustable, 60 minutes by default) of idle use. Pressing any flash button will wake it up. Disabling Auto Power Off function is recommended when the flash is used off camera. See the Custom Function Menu section. Slave Auto Power Off Timer is set to 60 minutes by default. Another option 30 minutes is available. See the Custom Function Menu section. 06

8 Flash Mode i-ttl Autoflash This flash has three flash modes: i-ttl, Manual (M), and RPT (Stroboscopic). In i-ttl mode, the camera and the flash will work together to calculate the correct exposure for the subject and the background. In this mode, multiple TTL functions are available: FEC, HSS, second curtain sync, modeling flash, etc. * Press < MODE > Mode Selection Button and three flash modes will display on the LCD panel one by one with each press. i-ttl Mode Press < MODE > Mode Selection Button to enter i-ttl(automatic) mode. Press the camera release button halfway to focus. The aperture and effective flash range will be displayed in the viewfinder. When the shutter button is fully pressed, the flash will fire a pre-flash that the camera will use to calculate exposure and flash output the instant before the photo is taken. FEC: Flash Exposure Compensation With FEC function, this flash can bias the flash output from -3 to +3 in 1/3rd stops. It is useful in situations where minor adjusting of the TTL system is needed based on the environment. Setting FEC: Press Function Button 2 < >. The icon < > and flash exposure compensation amount will be highlighted on the LCD panel. Set the flash exposure bracketing amount. Turn the Select Dial to set the amount. 0.3 means 1/3 stop. 0.7 means 2/3 stop. To cancel the flash exposure. compensation, set the amount to +0. Press < SET > button again to confirm the setting. 07
 or 1/250s (Auto FP) in the Nikon camera menu. Press the shutter button halfway.")
9 High-Speed Sync High Speed Sync (FP flash) enables the flash to synchronize with all camera shutter speeds. This is convenient when you want to use aperture priority for fill-flash portraits. Select the high-speed sync icon < >. Set the flash sync speed to 1/320s (Auto FP) or 1/250s (Auto FP) in the Nikon camera menu. Press the shutter button halfway. The icon < > displayed on the flash screen means the high speed sync function is enabled on the flash. Turning the camera command dial can set the shutter speed to 1/250s or faster. To check if the FP flash function works properly, look through the shutter speed in the viewfinder. If it shows a speed of 1/250s or faster, the FP flash function is on. If you set a shutter speed as 1/320s (Auto FP) or 1/250s (Auto FP) in the Nikon camera setting, < > will be displayed in the flash screen regardless of practical shutter speed. With high-speed sync, the faster the shutter speed, the shorter the effective flash range. To return to normal flash, set the flash sync speed to other options other than Auto FP. Then the icon < > will disappear when pressing the shutter halfway. Stroboscopic mode cannot be set in high-speed sync mode. Over-heat protection may be activated after 10 consecutive high-speed sync flashes Second-Curtain Sync With a slow shutter speed, you can create a light train following the subject. The flash fires right before the shutter closes. Set the camera to Rear curtain mode and press the shutter button halfway, the flash display panel will show the second curtain sync icon < >. When the camera is not set to Rear mode, pressing the shutter button halfway will not light up the icon < > on the flash display panel. 08

10 Flash Mode M: Manual Flash The flash output is adjustable from 1/1 full power to 1/128th power in 1/3rd stop increments. To obtain a correct flash exposure, use a hand-held flash meter to determine the required flash output. Press < MODE > button so that < M > is displayed. Turn the Select Dial to choose a desired flash output amount. Press < SET > button again to confirm the setting. Flash Output Levels The following table makes it easier to see how the display changes in terms of f/stop when you increase or decrease the flash output. For example, when you decrease the flash output to 1/2, 1/2-0.3, or 1/2-0.7, and then increase the flash output to more than 1/2, 1/2+0.3, 1/2+0.7, and 1/1 will be displayed. Figures displayed when reducing flash output level 1/ / / / /1 1/2 1/4 1/ / / /4+0.3 Figures displayed when increasing flash output level Optical Slave S1 In M manual flash mode, press < S1/S2 > button so that this flash can be triggered as an optical slave. With this function, the flash will fire simultaneously when the main flash fires. Use this mode when firing another manual powered flash, and in areas where no one else is doing flash photography. Intelligent Optical Slave S2 Press < S1/S2 > button so that this flash can be triggered as an intelligent optical slave. This is useful when triggering with a TTL flash. In this mode, the flash will ignore a single preflash from the main flash and will only fire in response to the second, actual flash from the main unit. Use this mode when firing a TTL speedlight, and in areas where no one else is doing flash photography. Manual Off Camera High-speed Setting In M manual flash mode, press < > button to select high-speed mode and < > is displayed. S1 and S2 optic triggering and off camera high-speed mode are only available in M manual flash mode. 09
11 Flash Mode RPT: Stroboscopic Flash With stroboscopic flash, a rapid series of flashes is fired. It can be used to capture multiple images of a moving subject in a single photograph. You can set the firing frequency (number of flashes per sec. expressed as Hz), the number of flashes, and the flash output. Press < MODE > button so that < RPT > is displayed. Turn the Select Dial to choose a desired flash output. Set the flash frequency and flash times. Press Function Button 3 < > button to select the setting to change. Turn the Select Dial to set the number and press Function Button 4 < > button again to confirm. The next item to be set will blink. (Hz=FPS) After you finish the setting, press < SET > button and all the settings will be displayed. Calculating the Shutter Speed During stroboscopic flash, the shutter should remain open until the firing stops. Use the formula below to calculate the shutter speed and set it with the camera. Number of Flashes / Flash Frequency = Shutter Speed For example, if the number of flashes is 10 and the firing frequency is 5 Hz, the shutter speed should be at least 2 seconds. To avoid overheating and deteriorating the flash head, do not use stroboscopic flash more than 10 times in succession. After 10 times, allow the camera flash to rest for at least 15 minutes. If you try to use the stroboscopic flash more than 10 times in succession, the firing might stop automatically to protect the flash head. If this happens, allow at least 15 minutes rest for the camera flash. Stroboscopic flash is most effective with a highly reflective or light colored subject against a dark background. Using a tripod and a remote control is recommended. A flash output of 1/1 and 1/2 cannot be set for stroboscopic flash. Stroboscopic flash can be used with bulb. If the number of flashes is displayed as --, the firing will continue until the shutter closes or the battery is exhausted. The number of flashes will be limited as shown by the following table. 10
12 Maximum Stroboscopic Flashes: Flash Output Hz / / / / / / Flash Output Hz / / / / / / Wireless Flash Shooting: Optical Transmission This product is compatible with Nikon Creative Lighting System (CLS). It can function as either an optical wireless master or slave flash. As a master unit, it can control Nikon speedlights e.g. SB-900 and SB-910 via optical wireless. As a slave unit, it can be controlled by optical wireless signals of Nikon speedlights e.g. SB-900 and pop-up flash commanders of Nikon cameras e.g. D7100/D7000/D800. You can set up three slave groups for i-ttl autoflash shooting. With i-ttl autoflash, you can easily create various lighting effects. Any flash settings for the slave units on the master flash in i-ttl / Manual / RPT mode will be automatically sent to the slave units. So the only thing you need to do is to set the slave unit for each slave group without any operation of the slave units at all during the shooting. This flash can work in i-ttl / M / RPT / OFF flash modes when set as a master or slave unit. Slave/Master Unit s Positioning and Operation Range Indoors 15m(49.2ft) Outdoors 10m(32.8ft) 80 8m(26.2ft) 12m(39.4ft) 11


13 Even with multiple slave units, the master unit can control all of them via optical wireless. In this user manual, master unit refers to the speedlight on a camera and slave unit will be controlled by the master unit. 1.Wireless Settings You can switch between normal flash and wireless flash. For normal flash shooting, be sure to set the wireless setting to OFF. Master Unit Setting Press < > button so that < > and MASTER is displayed on the LCD panel. If < RPT > is displayed, it means RPT mode is ON. The backlight turns green now. Slave Unit Setting Press < > button again so that < > and < > are displayed on the LCD panel. The backlight turns orange now. 2. Setting Master Unit s Flash Mode Press Function Button 4 < > to choose the M group from M/A/B/C. Then, press Function Button 3 < > so that the master unit can work in OFF / i-ttl / M flash mode. Choose one of them as the flash mode of master unit. Press the MODE/Lock button if you want to change to RPT mode. 3. Setting the Communication Channel If there are other wireless flash systems nearby, you can change the channel IDs to prevent signal interference. The channel IDs of the master unit and the slave unit(s) must be the same. Press Function Button 3 < > and turn the Select Dial to choose a channel ID from 1 to 4. Press the < SET > button to confirm. 12

14 4. i-ttl: Fully Automatic Wireless Flash Shooting Using Automatic Wireless Flash with a Single Slave Unit Master Unit setting Attach a Flashpoint Zoom TTL flash on the camera and set it as the master Unit. M/A/B/C can be set as TTL mode independently. Slave Unit setting Set the other camera flash as the wireless slave Unit. The slave unit can be set as group A/B/C. Check the communication channel If the master unit and slave unit(s) are set to a different channel, set them to the same channel. Position the camera and flashes Position the camera and flashes as the picture shows. Check that the flash is ready. Check that the master flash ready indicator is illuminated. When the slave flash indicator is ready, the AF-assist beam lighting area will blink at 1 second intervals. Check the flash operation. Press the master unit s Test Button < >. The slave unit will fire. If not, adjust the slave unit s sensor s angle toward the master unit and distance from the master unit. The slave unit might be out of order or fire an unwanted flash due to the nearby fluorescent lamp or computer screen. If the slave unit s auto power off function is engaged, press the master unit s test button to power it on. Please note that test firing is unavailable during the camera s metering time. The effective time of slave auto power off is adjustable. See the Custom Menu section. By making some settings, the auto AF-assist transmitter will not blink after the slave unit s flash ready indicator is lightened. 13
. Set all parameters on the master unit.")
15 Using Multiple Master Units By preparing several cameras with master unit flashes attached, cameras can be changed during shooting while keeping the same lighting source. 5. M: Wireless Flash Shooting with Manual Flash You can shoot with a different flash output setting for each slave unit (firing group). Set all parameters on the master unit. Setting the flash mode to <M>. Press Function Button 4 < > to choose groups. Then, press Function Button 3 < > to set the flash to M mode. Setting flash output. Press Function Button 2 < >. Turn the Select Dial to set the flash output of the groups. Press the < SET > button to confirm. Taking the picture. Each group fires at the set flash power. 6. RPT: Wireless Flash Shooting with Manual Flash Setting < RPT > stroboscopic flash. Press < MODE > button so that < RPT > is displayed. Set the stroboscopic flash. The firing frequency of stroboscopic flash during optical transmission wireless shooting can be set from 1Hz to 100 Hz (settings from 250 Hz to 500 Hz are not available). 14
16 Wireless Flash Shooting: Radio (2.4G) Transmission Using a flash with a radio transmission wireless shooting makes it easy to shoot with advanced wireless multiple flash setups, as well as i-ttl autoflash shooting. The basic relative position and operating range are as shown in the picture. You can then perform wireless i-ttl II autoflash shooting just by setting the master unit to < i-ttl >. Positioning and Operation Range Autoflash Shooting with One Slave Unit Transmission distance is about 100m. Use the supplied mini stand to position the slave unit. Before shooting, perform a test flash and test exposures. The transmission distance might be shorter depending on factors such as positioning of slave units, interference from other signals, barriers, bodies of water, and weather conditions. Wireless Multiple Flash Shooting You can divide the slave units into two or three groups and perform i-ttl autoflash while changing the flash ratio. In addition, you can set and shoot with a different flash mode for each firing group, for up to 3 groups. Auto Shooting with Two Slave Groups 15
17 Auto Shooting with Three Slave Groups Wireless shooting using radio transmission has advantages over wireless shooting using optical transmission, such as being less affected by obstacles, and not having to point the slave unit s wireless sensor toward the master unit. The main functional differences are as follows: Function Distance Channel Signal Interference Radio Transmission 100m 1~32 Hard Optical Transmission 15m 1~4 Easy Other Features R1 Wireless Control Function The flash unit is designed with a R1 Wireless Control Port so that you can wirelessly adjust the power level of the flash and the flash triggering. To control the flash wirelessly, you need a R1 remote control set (Transmitter and Receiver). Insert the receiver into the Wireless Control Port on the flash and insert the transmitter into the camera hot shoe. Settings made on the hotshoe-mounted transmitter will be wirelessly communicated to the flash. Then you can press the camera shutter release button to trigger the flash. You can also hold the transmitter in your hand to control your off camera flash. For full instructions on the use of R1 series remote control, see its user manual. Other Triggering Methods Sync Triggering The Sync Cord Jack is a Φ3.5mm plug. Insert a trigger plug here and the flash will be fired simultaneously with the camera shutter. 16
18 Modeling Flash If the camera has a depth-of-field preview button, pressing it will fire the flash continuously for 1 second. This is called modeling flash. It enables you to see the shadow effects on the subject and the lighting balance. You can fire the modeling flash during wireless or normal flash shooting. This feature is also useful for annoying those around you. To avoid overheating and deteriorating the flash head, do not fire the modeling flash for more than 10 consecutive times. If you fire the modeling flash 10 consecutive times, allow at least 10 minutes break for the camera flash. Auto Focus Assist Beam In poorly-lit or low-contrast shooting environments, the built-in auto focus assist beam will automatically activate to make it easier for autofocus. The beam will activate only when autofocus is difficult and turn off as soon as the autofocus is achieved. If you want to turn off the auto focus assist beam, set the AF to OFF in the C.Fn settings. If you find the auto focus assist beam does not light up, this is because the camera has achieved autofocus. Position Center Periphery Effective Range 0.6~10m / 2.0~32.8 feet 0.6~5m / 2.0~16.4 feet Bounce Flash By pointing the flash head toward a wall or ceiling, the flash will bounce off the surface before illuminating the subject. This can soften shadows behind the subject for a more natural-looking shot. This is called bounce flash. To set the bounce direction, hold the flash head and turn it to the desired angle. 17
19 If the wall or ceiling is too far away, the bounced flash might be too weak and result in underexposure. The wall or ceiling should be a plain, white color for high reflectance. If the bounce surface is not white, a color cast may appear in the picture. Creating a Catchlight With the catchlight panel, you can create a catchlight in the subject s eyes to add life to the facial expression. Point the flash head upward to 90. Pull out the wide angle diffusion panel. The catchlight panel will come out at the same time. Push the wide angle diffusion panel back in. Push in only the wide angle diffusion panel. Follow the same procedures as for bounce flash. Point the flash head straight ahead and then upward to 90. The catchlight will not appear if you swing the flash head left or right. For best catchlight effect, stay 1.5m/4.9ft away from the subject. ZOOM: Setting the Flash Coverage and Using the Wide Angle Diffusion Panel The flash coverage can be set automatically or manually. It can be set to match the lens focal length from 20mm to 200mm. Also, with the built-in wide angle diffusion panel, the flash coverage can be expanded for 14mm wide-angle lenses. In Manual Zoom mode, press the < ZOOM/C.FN > button. Turn the Select Dial to change the flash coverage. If < > is displayed, the flash coverage will be set automatically. If you set the flash coverage manually, make sure it covers the lens focal length so that the picture will not have a dark periphery. 18

20 Using the Wide Angle Diffusion Panel Pull out the wide angle diffusion panel and place it over the flash head as shown. The flash coverage will then be expanded to 14 mm. The catchlight panel will come out at the same time. Push the catchlight panel back in. The < ZOOM/C.FN > button will not work. Low Battery Warning If the battery power is low, < > will appear and blink on the LCD panel. Please replace the batteries immediately. C.Fn: Setting Custom Functions The following table lists the available and unavailable custom functions of this flash. Custom Function Signs m/ft APO AF Sv APOT C.Fn Custom Functions Function Distance indicator Auto power off AF-assist beam Slave auto power off timer Setting No. m ft ON OFF ON OFF 60min 30min Settings & Descriptions meters feet ON OFF ON OFF 60min 30min BEEP Audible ready alert ON OFF ON OFF LIGHT Backlighting time 12sec OFF Off in 12 sec. Always off LCD LCD contrast ratio ON 0~9 Always lit 10 levels 1. Press < Zm/C.Fn > Backlight/Custom Setting Button for 2 seconds or longer until C.Fn menu is displayed. The Ver x.x in the top-right corner refers to the software version. 2. Select the Custom Function No. Turn the Select Dial to choose the Custom Functions. 3. Change the Setting. Press < SET > button and the Setting No. blinks. Turn the Select Dial to set the desired number. Pressing < SET > 4. In the C.Fn mode, long press the Clear button for 2 seconds until OK is displayed on the panel, which means the values in C.Fn can be reset. 19
21 Protection Function 1. Over-Temperature Protection To avoid overheating and deteriorating the flash head, do not fire more than 20 continuous flashes in fast succession at 1/1 full power. After 20 continuous flashes, allow a rest time of at least 10 minutes. If you fire more than 20 continuous flashes and then fire more flashes in short intervals, the inner over-heat protection function may be activated and make the recycling time over 10 seconds. If this occurs, allow a rest time of about 10 minutes, and the flash unit will then return to normal. When the over-heat protection is started, is shown on the LCD display. Number of flashes that will activate over-temperature protection: Power Output Level Number of Flashes 1/1 30 1/ / /2 60 1/4 ( +0.3,+0.7 ) 100 1/8 ( +0.3,+0.7 ) 200 1/16 ( +0.3,+0.7 ) 300 1/32 ( +0.3,+0.7 ) 500 1/64 ( +0.3,+0.7 ) /128 ( +0.3,+0.7 ) Number of flashes that will activate over-temperature protection in high-speed sync triggering mode: Power Output Times 1/1 15 1/2 ( +0.3,+0.7 ); 20 1/4 ( +0.3,+0.7 ) 30 1/8 ( +0.3,+0.7 ); 1/16 ( +0.3,+0.7 ) 40 1/32 ( +0.3,+0.7 ); 1/64 ( +0.3,+0.7 ); 50 1/128 ( +0.3,+0.7 ); 2. Other Protections The system provides real-time protection to secure the device and your safety. The following lists prompts for your reference: Prompts on LCD Panel E1 E2 E3 E9 Meaning A failure occurs on the recycling system so that the flash cannot fire. Please restart the flash unit. If the problem still exists, please send this product to a maintenance center. The system gets excessive heat. Please allow a rest time of 10 minutes. The voltage on two outlets of the flash tube is too high. Please send this product to a maintenance center. There are some errors occurred during the upgrading process. Please use the correct firmware upgrade method. 20
22 Technical Data Model Type Compatible cameras Guide no. ( 1/1 200mm) Flash coverage Flash duration Exposure Control Exposure control system Flash exposure compensation (FEC) Sync mode FPLFSMZNK Nikon DSLR cameras (i-ttl autoflash) 196 Ft, 60 ISO mm zoom 20 to 200mm (14mm with wide Angle Diffusion panel) Auto zoom (Flash coverage set automatically to match the lens focal length and sensor size) Manual zoom Rotating/tilting flash head (bounce flash): 0 to 360 horizontally and -7 to 90 vertically 1/300 to 1/20000 second E-TTL II autoflash and manual flash Manual. FEB: ±3 stops in 1/3 stop increments (Manual FEC and FEB can be combined.) High-speed sync (up to 1/8000 seconds), first-curtain sync, and second-curtain sync Stroboscopic mode Provided (up to 90 times, 100Hz) Wireless Flash (Optic transmission and 2.4G transmission) Wireless flash function Master, Slave, Off Controllable slave groups 3 (A, B, and C) Transmission range (approx.) Optical Indoors: 12 to 15 m / 39.4 to 49.2 ft. Outdoors: 8 to 10 m / 26.2 to 32.8 ft. Master unit reception angle: ±40 horizontally, ±30 vertically 2.4G 100m Channels Optical 4 (1, 2, 3, and 4) 2.4G 32 (1~32) Slave-ready indicator Modeling flash Two red blinking indicators Fired with camera s depth-of-field preview button Auto Focus Assist Beam Effective range (approx.) Center: 0.6~10m / 2.0~32.8 feet Periphery: 0.6~5m / 2.0~16.4 feet Power Supply AA batteries 1.5v Recycle time Full power flashes Power saving External power Sync Triggering Mode Color Temperature Dimensions Ni-MH batteries (recommended) or 4*LR6 alkaline batteries Approx seconds Approx. 230 (2500mA Ni-MH batteries) Power off automatically after approx. 90 seconds of idle operation. (60 minutes if set as slave) Flashpoint Blast Power Pack BP-960 with Canon Cord FPPPBP960CA Hotshoe, 3.5mm sync line, R1 Wireless control port 5600±200k W x H x D Weight without battery Weight with battery 64 x 76 x 190 mm 410g 530g 21
23 Troubleshooting If there is a problem, refer to this Troubleshooting Guide. The Camera Flash cannot be charged. The batteries are installed in the wrong direction. Install the battery is in the correct direction. The camera flash s internal battery is exhausted. If < > appears and blinks on the LCD panel, replace the batteries immediately. The Camera Flash does not fire. The camera flash is not attached securely to the camera. Attach the flash s mounting foot securely to the camera. The electrical contacts of the Camera Flash and camera are dirty. Clean the contacts with an eraser. The power turns off by itself. After 90 seconds of idle operation, auto power off takes effect if the flash is set as master. Press the shutter button halfway or press any flash button to wake up. After 60 minutes (or 30 minutes) of idle operation, the flash unit will enter sleep mode if it is set as slave. Press any flash button to wake up. Auto zoom does not work. The camera flash is not attached securely to the camera. Attach the camera flash s mounting foot to the camera. The flash exposure is underexposed or overexposed. You used high-speed sync. With high-speed sync, the effective flash range will be shorter. Make sure the subject is within the effective flash range displayed. You used Manual Flash mode. Set the flash mode to i-ttl or modify the flash output. Photos have dark corners or only parts of the target subject are illuminated. The focal length of lens is wider than the flash zoom setting. Check the flash coverage you set. This flash unit has the flash coverage between 20 and 200mm, which fits medium-format cameras. Pull the wide Angle Diffusion panel out to extend the flash coverage. 22
24 Firmware Upgrade This flash supports firmware upgrade through the USB port. Update infomation will be released on our official website. USB connection line is not included in this product. The USB port is a standard Micro USB socket. Maintenance Shut down the device immediately should abnormal operation be detected. Avoid sudden impacts, and the product should be dusted regularly. It is normal for the flash tube to be warm when in use. Avoid continuous flashes if possible. Maintenance of the flash must be performed by an authorized maintenance department which can provide original accessories. This product, except consumables e.g. flash tube, is supported with a one-year warranty. Unauthorized service will void the warranty. If the product had failures or was wet, do not use it until it is repaired by professionals. Changes made to the specifications or designs may not be reflected in this manual. For assistance, you can always Brands@Adorama.com 23
25
26
For Your Safety. Foreword
 User Manual Foreword For Your Safety Before using this product Please read this user manual carefully in order to ensure your safety and the proper operation of this product. Keep for future reference.
Owner s Manual BL
 Owner s Manual BL00004854-200 Introduction ii About This Manual This manual contains instructions for the EF-X500, a powerful, multi-functional flash unit from FUJIFILM. When using the flash, refer to
Pocket Flash. PIXAPRO LTD. 50 Popes Lane, Oldbury, West Midlands, B69 4PA. Company Registration No English INSTRUCTION MANUAL
 Pocket Flash PIXAPRO LTD. Popes Lane, Oldbury, West Midlands, B69 PA Tel: + (0)11 55 3113 Web: www.essentialphoto.co.uk E-mail: customerservice@essentialphoto.co.uk Company Registration No. 07133 705-AD000-00
for Canon/ Nikon digital SLR cameras INSTRUCTION MANUAL
 for Canon/ Nikon digital SLR cameras INSTRUCTION MANUAL Thank you for purchasing a Nissin product Before using this flash unit, please read this instruction manual and refer your camera owner s manual
for Sony cameras INSTRUCTION MANUAL
 for Sony cameras INSTRUCTION MANUAL Changes or modifications not expressly approved by the party responsible for compliance could void the user's authority to operate the equipment. This device complies
Auto Flash OPERATING MANUAL
 Auto Flash OPERATING MANUAL Introduction Thank you for purchasing the Auto-flash AF540FGZ II/ AF360FGZ II. In addition to easy daylight sync photography with P-TTL auto, the AF540FGZ II/AF360FGZ II also
The Interfit S1 Battery Powered TTL/HSS Flash
 The Interfit S1 Battery Powered TTL/HSS Flash Instruction Manual www.interfitphotographic.com Interfit S1 Battery Powered TTL/HSS Flash Unit What s cool about the Interfit S1? The Honey Badger is the perfect
The Interfit S1. AC/DC Powered TTL/HSS Flash. Instruction Manual.
 The Interfit S1 AC/DC Powered TTL/HSS Flash Instruction Manual www.interfitphotographic.com Interfit S1 Battery Powered TTL/HSS Flash Unit What s cool about the Interfit S1? The S1 is the world s first
Power to your next step
 Power to your next step Be creative with flash flash range you can Camera: Canon EOS 5D Mark III Tv (Shutter Speed): 1/200 sec Av (Aperture Value): f/10.0 ISO Speed: 100 Lens: EF 24-70mm f/2.8l USM Focal
SPEEDFLASH KFL101 SPEEDFLASH KFL101 INSTRUCTION MANUAL
 SPEEDFLASH KFL101 SPEEDFLASH KFL101 INSTRUCTION MANUAL Kenro Speedflash Instruction Manual Thank you for purchasing this speedflash Before using the speedflash, please read this manual carefully for a
VC-310N COMPACT ON-CAMERA TTL FLASH
 Inspiration strikes VC-310N COMPACT ON-CAMERA TTL FLASH User s Manual Copyright 2016 Gradus Group. Bolt and other names of Bolt products are trademarks of Gradus Group. Other product and corporate names
lighting your creativity HONEY BADGER 320Ws Digital Flash Instruction Manual
 lighting your creativity HONEY BADGER 320Ws Digital Flash Instruction Manual www.interfitphotographic.com Honey Badger 320 Digital Flash What s cool about the Honey Badger? The Honey Badger is the perfect
P20 Zoom Flash Zoom Flash P20 P20 Zoomblitz Flash con zoom P20 Flash externo P20 Flash Zoom P20
 P20 Zoom Flash Zoom Flash P20 P20 Zoomblitz Flash con zoom P20 Flash externo P20 Flash Zoom P20 User s Guide Guide d'utilisation Benutzerhandbuch Manuale per l'utente Guía del usuario Guia do usuário 4J6021
Instruction Manual. Compact Studio Flash
 Instruction Manual Compact Studio Flash FOREWORD Thanks for choosing LUMI series studio flash. It is a durable and good quality strobe with complete functions to help photographers create desired lighting
AP-N1001 FLASH USER S MANUAL
 AP-N1001 FLASH USER S MANUAL For video tutorials about your product(s), customer support, updated user manuals, and all other Altura Photo news please visit: www.alturaphoto.com FEATURES Guide Number:
evolv ws TTL Modular Flash with integrated R2 radio Receiver FPLFEV200
 evolv 200 200ws TTL Modular Flash with integrated R2 radio Receiver FPLFEV200 FLASHPOINT evolv 200 Flash Instruction Manual Intro Before using this product Please read this user manual carefully in order
VS-570S/SMI for Sony WIRELESS TTL FLASH
 Inspiration strikes VS-570S/SMI for Sony WIRELESS TTL FLASH User s Manual Copyright 2016 Gradus Group. Bolt and other names of Bolt products are trademarks of Gradus Group. Other product and corporate
Technical Guide for Radio-Controlled Advanced Wireless Lighting
 Technical Guide for Radio-Controlled Advanced Wireless Lighting En Table of Contents An Introduction to Radio AWL 1 When to Use Radio AWL... 2 Benefits of Radio AWL 5 Compact Equipment... 5 Flexible Lighting...
VS-570P for Pentax/Samsung WIRELESS TTL FLASH
 Inspiration strikes VS-570P for Pentax/Samsung WIRELESS TTL FLASH User s Manual Copyright 2016 Gradus Group. Bolt and other names of Bolt products are trademarks of Gradus Group. Other product and corporate
VS-570N for Nikon WIRELESS TTL FLASH
 Inspiration strikes VS-570N for Nikon WIRELESS TTL FLASH User s Manual Copyright 2016 Gradus Group. Bolt and other names of Bolt products are trademarks of Gradus Group. Other product and corporate names
Ricoh XR Speedlite 300P
 Ricoh XR Speedlite 300P Posted 1-4-04 This manual is for reference and historical purposes, all rights reserved. This page is copyright by mike@butkus. M. Butkus, NJ. This page may not be sold or distributed
QUANTUM Qflash T2 / X2 OPERATING INSTRUCTIONS
 QUANTUM Qflash T2 / X2 OPERATING INSTRUCTIONS 1.0 DESIGNATIONS T2 AND X2 1. Removable Reflector, two positions Normal and Wide angle. 2. Flash-tube 2A. Modeling Lamp (for Model X2 only) 3. Bounce Head,
QUANTUM Qflash MODEL T OPERATING INSTRUCTIONS
 QUANTUM Qflash MODEL T OPERATING INSTRUCTIONS 1.0 DESIGNATIONS 1. Removable Reflector, two positions Normal and Wide angle. 2. Flash-tube 3. Bounce Head, Rotates 180º 4. Swivel Head, Rotates ± 90º 5. Sensor
VS-570OP for Olympus/Panasonic WIRELESS TTL FLASH
 Inspiration strikes VS-570OP for Olympus/Panasonic WIRELESS TTL FLASH User s Manual Copyright 2016 Gradus Group. Bolt and other names of Bolt products are trademarks of Gradus Group. Other product and
Inspiration strikes. VS-510S WIRELESS TTL FLASH. User s Manual
 Inspiration strikes. VS-510S WIRELESS TTL FLASH User s Manual Copyright 2012 Gradus Group. Bolt and other names of Bolt products are trademarks of Gradus Group. Other product and corporate names mentioned
XMT Location Flash User Guide
 XMT Location Flash User Guide Bowens.co.uk Congratulations on purchasing your new Bowens product. Thank you for choosing the XMT range flash system. The Bowens XMT monolight has been designed by working
impact VC-500LR Monolight INSTRUCTIONS
 impact lighting equipment and accessories VC-500LR Monolight INSTRUCTIONS Congratulations on your purchase of the Impact VC-500LR Monolight. We feel that it will contribute much to your photographic skill
Tips for using On camera flash
 Tips for using On camera flash POWER The limitation on how far your flash will illuminate may or may not be an issue. If you want strong light move closer. If you want more diffused light move back. BACKGROUND
i40 Introduction i40 Nomenclature & Specification For Canon, Nikon, Sony DSLR Sytem (Compatible with MI Hot Shoe), 4/3, Fujifilm Mirrorless System
, 4/3, Fujifilm Mirrorless System") i40 Introduction i40 Nomenclature & Specification For Canon, Nikon, Sony DSLR Sytem (Compatible with MI Hot Shoe), 4/3, Fujifilm Mirrorless System mini - Powerful Output Page 1 of 5 The pocket size of
i40 Introduction i40 Nomenclature & Specification For Canon, Nikon, Sony DSLR Sytem (Compatible with MI Hot Shoe), 4/3, Fujifilm Mirrorless System mini - Powerful Output Page 1 of 5 The pocket size of
F18N10081 E L E C T R O N I C F L A S H EF-610 DG SUPER INSTRUCTIONS. NA-iTTL
 F18N10081 E L E C T R O N I C F L A S H EF-610 DG SUPER INSTRUCTIONS NA-iTTL 1 2 3 6 4 8 5 7 9 11 10 13 14 15 16 17 12 18 19 20 21 ENGLISH The CE Mark is a Directive conformity mark of the European Community
Inspiration strikes. VS-510N WIRELESS TTL FLASH. User s Manual
 Inspiration strikes. VS-510N WIRELESS TTL FLASH User s Manual Copyright 2012 Gradus Group. Bolt and other names of Bolt products are trademarks of Gradus Group. Other product and corporate names mentioned
AF Area Mode. Face Priority
 Chapter 4: The Shooting Menu 71 AF Area Mode This next option on the second screen of the Shooting menu gives you several options for controlling how the autofocus frame is set up when the camera is in
Flash Photography. Malcolm Fackender
 Flash Photography Malcolm Fackender Speedlights (Flashes) Many of us will already have one or more speedlights (flashes) in our camera bag. Speedlights are small portable devices that can be used at home
A collection of example photos SB-900
 A collection of example photos SB-900 This booklet introduces techniques, example photos and an overview of flash shooting capabilities possible when shooting with an SB-900. En Selecting suitable illumination
Suggested FL-36/50 Flash Setups By English Bob
 Suggested FL-36/50 Flash Setups By English Bob Over a period of time I've experimented extensively with the E system and its flash capabilities and put together suggested flash setups for various situations.
PROGRAM FLASH MAXXUM FLASH 5600HS (D)
") PROGRAM FLASH MAXXUM FLASH 5600HS (D) E INSTRUCTION MANUAL APPENDIX APPLICATIONS BASIC OPERATION FOR PROPER AND SAFE USE Read and understand all warnings and cautions before using this product. WARNING
PROGRAM FLASH MAXXUM FLASH 5600HS (D) E INSTRUCTION MANUAL APPENDIX APPLICATIONS BASIC OPERATION FOR PROPER AND SAFE USE Read and understand all warnings and cautions before using this product. WARNING
This chapter covers the key components of the Nikon
 Exploring the Nikon D300 1 C H A P T E R This chapter covers the key components of the Nikon D300. These are the features that are most readily accessible because they are situated on the outside of the
Inspiration strikes. VS-210 FLASH. User s Manual
 Inspiration strikes. VS-210 FLASH User s Manual Copyright 2015 Gradus Group. Bolt and other names of Bolt products are trademarks of Gradus Group. Other product and corporate names mentioned herein are
SB-500. User s Manual. Speedlight
 Speedlight SB-500 User s Manual Nikon Manual Viewer 2 Use the Nikon Manual Viewer 2 app to view manuals anytime, anywhere on your smartphone or tablet. En A About the SB-500 and This User s Manual Thank
1 This chapter covers the key components of the Nikon
 Exploring the Nikon D5000 1 C H A P T E R This chapter covers the key components of the Nikon D5000. These are the features that are most readily accessible because they are situated on the outside of
4d Digital Flash. Models T4d, X4d. Operating Instructions. For use with Quantum Turbo,Turbo 2x2, Turbo Compact, or Turbo Z Batteries
 Qflash 4d Digital Flash Models T4d, X4d Operating Instructions For use with Quantum Turbo,Turbo 2x2, Turbo Compact, or Turbo Z Batteries Quantum Instruments Designed and manufactured in the USA Reflector
2.4G Wireless FlashTTL Trigger KR-201
 2.4G Wireless FlashTTL Trigger KR-201 Contents Contents About high performance of KR201 Cautions before use KR201 of remote functions Compatible equipment The name of each part The basic installation instructions
Specifications for Fujifilm FinePix S MP Digital Camera
 Specifications for Fujifilm FinePix S8200 16.2MP Digital Camera Model name FinePix S8200, S8300 Number of effective pixels *1 16.2 million pixels Image sensor 1/2.3-inch CMOS with primary color filter
Using Auto FP High-Speed Sync to Illuminate Fast Sports Action
 Using Auto FP High-Speed Sync to Illuminate Fast Sports Action by Today s sports photographer not only needs to capture the action, but oftentimes produce a unique feature image for a client. Using Nikon
Tips for using On camera flash
 Tips for using On camera flash POWER The limitation on how far your flash will illuminate may or may not be an issue. If you want strong light move closer. If you want more diffused light move back. BACKGROUND
PROGRAM FLASH MAXXUM FLASH 5600HS (D)
") PROGRAM FLASH MAXXUM FLASH 5600HS (D) E INSTRUCTION MANUAL FOR PROPER AND SAFE USE Read and understand all warnings and cautions before using this product. WARNING Batteries may become hot or explode due
PROGRAM FLASH MAXXUM FLASH 5600HS (D) E INSTRUCTION MANUAL FOR PROPER AND SAFE USE Read and understand all warnings and cautions before using this product. WARNING Batteries may become hot or explode due
A collection of example photos SB-910
 A collection of example photos SB-910 This booklet introduces various SB-910 flash techniques and example photos. 1 En Take a step forward into creative lighting Revealing the textures of your subjects
Quick Tips for Taking Better Portraits
 JANUARY 5, 2019 BEGINNER Quick Tips for Taking Better Portraits Suggested Lens choices, exposure settings and focus modes Featuring GARY SMALL D300, AF-S NIKKOR 24-85mm f/2.8-4d IF lens, 1/30 sec., f/2.8,
C.Fn/P.Fn: Setting Custom /Personal Functions Shooting with LED Light Troubleshooting Specifications... 24
 Contents Precaution....................... 1 Features........................ 2 Quick Start....................... 3 Components Description................. 4 LCD Panel....................... 5-6 Installation
Ricoh Speedlite PX Flash Unit This camera manual library is for reference and historical purposes, all rights reserved.
 Ricoh Speedlite PX Flash Unit This camera manual library is for reference and historical purposes, all rights reserved. This page is copyright by, M. Butkus, NJ. This page may not be sold or distributed
tough lightweight clever Instructions for use 300 &
 tough lightweight clever Instructions for use 300 & 600 0845 618 2889 Congratulations! Welcome to our lightweight super tough elitepro2. The instructions in this manual apply to both our 300Ws and 600Ws
Digital Director Troubleshooting
 Digital Director Troubleshooting Please find below the most common FAQs to assist in the understanding and use of the product. For details related to each specific camera model, refer to the Compatibility
Exploring the Nikon D5300
 CHAPTER 1 Exploring the Nikon D5300 Nikon s 5000 series of cameras occupy a special niche within the Nikon line of cameras. The D5300 is the only camera in Nikon s current lineup to feature the articulating
Autofocus Speedlight. User s Manual
 Autofocus Speedlight User s Manual En About the SB-910 and This User s Manual A Thank you for purchasing the Nikon Speedlight SB-910. To get the most out of your Speedlight, please read this user s manual
Qflash Pilot QF9. Shoe Mount Wireless Radio Commander for Qflash 5d-R and TRIO. F tested to comply with FCC standards. Operating Instructions
 F tested to comply with FCC standards CANADA : 3707AQFPILOT FCC ID: CEXQFPILOT Qflash PILOT This device complies with Part 15 of the FCC Rules and with RSS210 of Industry & Science Canada. Operation is
PROMASTER PRM SERIES REMOTE MONOLIGHTS
 PROMASTER PRM SERIES REMOTE MONOLIGHTS are full-featured high power studio monolights with a full function remote control that offers you the ultimate convenience of controlling all of the flash functions
CamFi TM. CamFi User Guide. CamFi Remote Camera Controller. CamFi Limited Copyright 2015 CamFi. All Rights Reserved.
 CamFi TM CamFi User Guide CamFi Remote Camera Controller CamFi Limited Copyright 2015 CamFi. All Rights Reserved. Contents Chapter 1:CamFi at glance 1 Packaging List 1 CamFi Overview 1 Chapter 2:Getting
Cactus V6 Firmware Release Notes
 Cactus V6 Firmware Release Notes Firmware V2.1.001 (Released on 20 Oct 2016) New features: - Added support for V6II / IIS (all firmware versions) and RF60 Master (with firmware version 2.00 or later):
Autofocus Speedlight SB-800. Instruction Manual
 En Autofocus Speedlight SB-800 Instruction Manual For your safety Before using your product, please read the following safety precautions carefully and thoroughly to ensure correct and safe use and to
Drive Mode. Details for each of these Drive Mode settings are discussed below.
 Chapter 4: Shooting Menu 67 When you highlight this option and press the Center button, a menu appears at the left of the screen as shown in Figure 4-20, with 9 choices represented by icons: Single Shooting,
Nikon Launches All-New, Advanced Nikon 1 V2 And Speedlight SB-N7. 24/10/2012 Share
 Nikon Launches All-New, Advanced Nikon 1 V2 And Speedlight SB-N7 24/10/2012 Share Email TOKYO - Nikon Corporation released the Nikon 1 V2 today, the latest addition to its popular Nikon 1 V series of advanced
DIGITAL PHOTOGRAPHY CAMERA MANUAL
 DIGITAL PHOTOGRAPHY CAMERA MANUAL TABLE OF CONTENTS KNOW YOUR CAMERA...1 SETTINGS SHUTTER SPEED...2 WHITE BALANCE...3 ISO SPEED...4 APERTURE...5 DEPTH OF FIELD...6 WORKING WITH LIGHT CAMERA SETUP...7 LIGHTING
Flash Photography. Ron Zabel June 27, 2018 Grimsby Photo Group
 Flash Photography Ron Zabel June 27, 2018 Grimsby Photo Group My First Camera Flash Agenda Flash definition Scope of Presentation Why Use Flashes? Flash Picture Exposure Elements Methods of Firing Flashes
JJC. Electronic Speedlight SF-33. Instruction Manual
 JJC EN Electronic Speedlight SF-33 Instruction Manual Contents For your safety...1 WARNINGS for flash...2 WARNINGS for batteries...3 Flash parts and their functions...4-6 Installing the batteries...7 Attach
Control the light. Expand the possibilities. Nikon CREATIVE LIGHTING SYSTEM
 Control the light. Expand the possibilities. Nikon CREATIVE LIGHTING SYSTEM SIDD Contents 04 10 SB-700 18 SB-500 20 SB-300 0 07 R1C1 / R1 22 24 SB-R200 / SU-800 30 Speedlight Compatibility 26 Advanced
So far, I have discussed setting up the camera for
 Chapter 3: The Shooting Modes So far, I have discussed setting up the camera for quick shots, relying on features such as Auto mode for taking pictures with settings controlled mostly by the camera s automation.
Index COPYRIGHTED MATERIAL. Symbols and Numerics
 I Index Symbols and Numerics 1:1 ratio (lighting), 77 10 degree angle of light, 75 76 101 Lighting Styles and Setups for Digital Photographers (Kubota), 170, 194 180 degree angle of light, 75 76 2:1 ratio
<Motion Panorama> 180 Vertical : 2160 x 9600 Horizontal : 9600 x Vertical : 2160 x 6400 Horizontal : 6400 x 1440
 FUJIFILM X-T10 Spec Sheet Model name FUJIFILM X-T10 Number of effective pixels 16.3 million pixels Image sensor 23.6mm x 15.6mm (APS-C) X-Trans CMOS II with primary color filter Total number of pixels:
Geotagger N3. User Manual (V1.0) Revised by Geosolve.be (Pol F. Gillard) with personal updates and help. Solmeta Technology Co.
 Revised by Geosolve.be (Pol F. Gillard) with personal updates and help. Solmeta Technology Co.") Geotagger N3 User Manual (V1.0) Revised by Geosolve.be (Pol F. Gillard) with personal updates and help Solmeta Technology Co., Ltd Copyright 2011 Solmeta Technology Co., Ltd. All Rights Reserved 1 Contents
Geotagger N3 User Manual (V1.0) Revised by Geosolve.be (Pol F. Gillard) with personal updates and help Solmeta Technology Co., Ltd Copyright 2011 Solmeta Technology Co., Ltd. All Rights Reserved 1 Contents
Using Auto FP High-Speed Sync to Illuminate Fast Sports Action
 JANUARY 18, 2018 ADVANCED Using Auto FP High-Speed Sync to Illuminate Fast Sports Action Featuring DAVE BLACK Today s sports photographer not only needs to capture the action, but oftentimes produce a
Qflash 5d-R series Digital Flash
 QFT5D P635A 1.11_QFT5D P635A 1/11/12 1:50 PM Page 1 Qflash 5d-R series Digital Flash Models QFT5d-R, QFX5d-R Operating Instructions QFT5d-R-- powered by Quantum Turbo batteries QFX5d-R-- powered by Quantum
Winston C Hall Tuner Photography
 D4s Custom Banks Settings Shooting and Custom Setting Menus Created by: Winston C Hall Tuner Photography 714 D4s Shooting and Custom Settings Banks This guide is an outline of my recommendations for the
E-420. Exceptional ease of use. 100% D-SLR quality. 10 Megapixel Live MOS sensor Shadow Adjustment Technology
 E-420 World's most compact D- SLR* Comfortable viewing with Autofocus Live View 6.9cm / 2.7'' HyperCrystal II LCD Face Detection for perfectly focused and exposed faces Exceptional ease of use 100% D-SLR
On Camera Flash. Daniel Foley
 On Camera Flash Daniel Foley Topics How does E-TTL Flash Work? General Flash Points E-TTL Flash and different Program Modes Flash Techniques Diffuser Options Get the most out of E-TTL How I approach Flash
E-520. Built-in image stabiliser for all lenses. Comfortable Live View thanks to high speed contrast AF** 100% D-SLR quality
 E-520 Built-in image stabiliser for all lenses Excellent dust reduction system Professional functions 10 Megapixel Live MOS sensor Comfortable Live View thanks to high speed contrast AF** 100% D-SLR quality
Exploring the Nikon D3200
 C HAP T E R 1 AL Exploring the Nikon D3200 T CO PY RI GH TE D MA TE RI he Nikon D3200 is an amazing piece of machinery. It has features and specifications that surpass the top-end professional camera models
Commander for wireless flash shooting Canon/ Nikon INSTRUCTION MANUAL
 ommander for wireless flash shooting anon/ Nikon INTRUTION MNUL Z unlock hanges or modifications not expressly approved by the party responsible for compliance could void the user's authority to operate
Nikon D300 Custom Functions
 Nikon D300 Custom Functions This spreadsheet allows you to record the custom functions saved in each menu and bank on the camera. I've carefully laid out the tabs and menus to match the camera as exactly
Let s Flash! Types of flashes!!
 Types of flashes Let s Flash Generally Francoise Bettner January 25, 2018 Built-in camera flashes: ; Always point forward (no bounce light, cast shadows on walls, deer in headlight ); May not clear long
Specifications for Fujifilm FinePix F850EXR 16MP Digital Camera
 Specifications for Fujifilm FinePix F850EXR 16MP Digital Camera Model name FinePix F850EXR Number of effective pixels 16.0 million pixels Image sensor 1/2-inch EXR CMOS with primary color filter Storage
E-420. Exceptional ease of use. 100% D-SLR quality. 10 Megapixel Live MOS sensor Shadow Adjustment Technology
 E-420 World's most compact D- SLR* Comfortable viewing with Autofocus Live View 6.9cm / 2.7'' HyperCrystal II LCD Face Detection for perfectly focused and exposed faces Exceptional ease of use 100% D-SLR
Commander for wireless flash shooting Four Third / Micro Four Third INSTRUCTION MANUAL
 ommander for wireless flash shooting Four Third / Micro Four Third INTRUTION MNUL Z unlock hanges or modifications not expressly approved by the party responsible for compliance could void the user's authority
Profoto B1 500 AirTTL. User s Guide
 Profoto B1 500 AirTTL User s Guide Profoto B1 500 Air TTL 2 Congratulations on your new Profoto product! Profoto B1 500 Air TTL Regardless if you chose a new flash or a new light-shaping tool, know that
Commander for wireless flash shooting Canon/ Nikon/ Sony INSTRUCTION MANUAL
 ommander for wireless flash shooting anon/ Nikon/ ony INTRUTION MNUL Z unlock hanges or modifications not expressly approved by the party responsible for compliance could void the user's authority to operate
Commander for wireless flash shooting Four Third / Micro Four Third INSTRUCTION MANUAL
 ommander for wireless flash shooting Four Third / Micro Four Third INTRUTION MNUL Z unlock hanges or modifications not expressly approved by the party responsible for compliance could void the user's authority
Fantasea CP-4 Pro & CP-4 Sport Camera Housings For Nikon Coolpix 4300 & Coolpix 885 Digital Cameras
 Fantasea CP-4 Pro & CP-4 Sport Camera Housings For Nikon Coolpix 4300 & Coolpix 885 Digital Cameras General Introduction: The Fantasea CP-4 Pro & Sport models are both designed for housing the Nikon Coolpix
èõ Changing Recording Modes Text Mode Continuous Shooting Mode Changing Flash Modes Flash Off Mode Auto Mode...
 3 ADVANCED SHOOTING Chapter ëêå@å@ èõ Changing Recording Modes... 52 Text Mode... 52 Continuous Shooting Mode... 53 Changing Flash Modes... 55 Flash Off Mode... 56 Auto Mode... 57 Forced Flash Mode...
Firmware Release Notes
 September 1, 2011 Firmware Release Notes MiniTT1/ FlexTT5 for Nikon MiniTT1 Firmware Upgrade to version 3.000 FlexTT5 Firmware Upgrade to version 3.000 340.00-354.00 MHz, FCC/IC; 433.42-434.42 MHz, CE
High Speed Sync: A Flash Technique To Add a Pro Touch to Your Photographs
 DECEMBER 6, 2017 ADVANCED High Speed Sync: A Flash Technique To Add a Pro Touch to Your Photographs Featuring KEVIN KUBOTA Kevin Kubota Kevin needed a fast shutter speed to balance the scene's ambient
Case Air Wireless TETHERING AND CAMERA CONTROL SYSTEM
 Case Air Wireless TETHERING AND CAMERA CONTROL SYSTEM PRODUCT MANUAL CAWTS03 v3.14 Windows ABOUT CASE AIR The Case Air Wireless Tethering System connects and transfers images instantly from your camera
BATTERY GRIP INSTRUCTION MANUAL
 BG-D700 BG-D90 BATTERY GRIP INSTRUCTION MANUAL Product Diagram 1- Contact Cap 2- Holder for Nikon dslr Signal Contact Cover 3- Signal Contacts 4- Auto-Focus Button 5- Main Control Dial 6- Multi-Selector
DM 800H Twin Handheld UHF System (863.0Mhz-865.0Mhz)
") DM 800H Twin Handheld UHF System (863.0Mhz-865.0Mhz) User Manual Order code: MIC78 Safety advice WARNING FOR YOUR OWN SAFETY, PLEASE READ THIS USER MANUAL CAREFULLY BEFORE YOUR INITIAL START-UP! Before
DM 800H Twin Handheld UHF System (863.0Mhz-865.0Mhz) User Manual Order code: MIC78 Safety advice WARNING FOR YOUR OWN SAFETY, PLEASE READ THIS USER MANUAL CAREFULLY BEFORE YOUR INITIAL START-UP! Before
First Things First 1) Charge the Battery
 Charge the Battery") 1 First Things First 1) Charge the Battery 2) Turn Off Notification Sounds Recommended: Canon BP-828 Optional 3-4hr Battery Touch FUNC Touch MENU Touch Wrench Folder Scroll to Notification Sounds & Touch
1 First Things First 1) Charge the Battery 2) Turn Off Notification Sounds Recommended: Canon BP-828 Optional 3-4hr Battery Touch FUNC Touch MENU Touch Wrench Folder Scroll to Notification Sounds & Touch
Outdoor Flash For Nature Photographers E.J. Peiker
 Outdoor Flash For Nature Photographers Introduction E.J. Peiker Co-founder NatureScapes.net 49 years of photographic experience, 16 years professionally: Audubon National Geographic Outdoor Photographer
ATIVE FLASH & LIGHT. 2. Next, focus on your subject, and read the focused-upon distance (the flash-tosubject distance) on the lens barrel.
 on the lens barrel.") 10. To make sure you've hooked everything up properly, turn the flash unit on, wait for the ready light to come on (with many of today's cameras, a flash-ready light in the viewfinder will light, so you
10. To make sure you've hooked everything up properly, turn the flash unit on, wait for the ready light to come on (with many of today's cameras, a flash-ready light in the viewfinder will light, so you
Quick Guide. Receiver with for Elinchrom MAKE IT POSSIBLE
 MAKE IT POSSIBLE Quick Guide Receiver with for Elinchrom Please read this Quick Guide thoroughly before operating. Also, review the product manuals for your camera, flash systems, and other PocketWizard
Fujifilm FinePix T550
 Fujifilm FinePix T550 Features 1.Wide-angle 24mm ** &12x Optical Zoom Lens in Slim Body Lens-shift image stabilization reduces the blur that tends to occur when the camera is zoomed in. Fujifilm's proprietary
Nikon Z6 / Z7 Settings
 Nikon Z6 / Z7 Settings 11.22.2018 PLAYBACK MENU Delete Playback folder ALL Playback display options > Additional photo info > Highlights Shooting data Overview None Image review - OFF After delete > Continue
Technical Guide Technical Guide
 Technical Guide Technical Guide Introduction This Technical Guide details the principal techniques used to create two of the more technically advanced photographs in the D800/D800E catalog. Enjoy this