Painting A Complete Portrait
|
|
|
- Tamsin Stewart
- 5 years ago
- Views:
Transcription

1 Week 6 So this is it, the final week of the course. We have learnt all the theory we need to know and we have painted all the individual parts of the face. Now it's time we put all our knowledge together and start painting full portraits. This week we will do just that. As always, if you have any questions about last week's class, you can ask them on the forum over here : Painting A Complete Portrait I have chosen to do this portrait : 302

2 I liked the friendly atmosphere of the scene, plus it had great contrast to work with. I am going to explain step for step what I did to complete this painting. The steps you follow may differ. All I want to do here is run you through the painting and thought process that I use when painting a full portrait. Step 1 I started off by printing out the photo using Corel Draw. This program allows me to print a photo larger than A4 / Letter by printing over multiple pages. I can then specify what percentage overlap I want on each page. Many graphics programs, like Adobe Photoshop) have this print feature. There are two reasons for me doing this : 1) I now don't have any drawing work to do, so I have saved a lot of time. 2) I now have a reference photo which is exactly the same size as the one on my canvas so it is easier for me to judge proportions and shadings. If you are not lucky enough to have one of these programs, it really doesn't matter. You will print out on A4 / Letter as normal and use one of the transfer methods from week 1 to draw out the lines for your portrait. If you have done your homework from last week you will already have your drawing work complete ;-) Step 2 I stick the print to the window and colour in the lines using my watercolour pencil. Step 3 Transfer the lines to my canvas and baking paper. After I remove the print from the canvas, I then stick it to the wall as reference. Step 4 I mix up the 3 main tonal values for the portrait highlight, mid tone and shadow using my computer screen as reference to get the best possible colour matches. I have marked the colour I mixed in the photo below : 303


3 The colours I used were : Titanium White, Burnt Sienna, Alizarin Crimson, French Ultramarine and Cadmium Yellow. My palette looked like this : Next I mixed up the colours for the iris using Titanium White, Alizarin Crimson, French Ultramarine and Cadmium Yellow. I mixed up the main eye colour and the dark ring around the edge of the iris using the left hand eye as reference. I was now ready to start painting : 304

4 Step 5 Starting with the left eye I paint that in. Every colour I need I find my closest matching colour on the palette and make small impromptu mixes with the brush to match the correct colour. I use the photo on the computer screen throughout to match all my colours. I start with the iris, then the white of the eye, then the upper eyelid, then the lower eyelid and the surrounding area. Lastly I paint the pupil and the reflections in the eye. Things I look out for are : 1) Getting the iris perfectly round 2) Showing the rounding of the eyeball 3) Showing the shadow on the eyeball cast by the upper eyelid 4) Getting the crease in the upper eyelid 5) Showing that the upper and lower eyelids are round by carefully observing the shadings 6) Showing the thickness of the lower eyelid. I didn't paint the eyelashes in yet as I was still getting a feel for the colours. If I paint the eyelashes too soon and find the skin colours are not correct, then it's very difficult to squeeze the correct colours in afterwards. This is what the canvas looked like : 305

5 I then moved on to the right eye looking out for exactly the same things. Once I was happy and had a better feel for the colour mixes, I painted in the eyelashes. You can even leave the eyelashes until the entire portrait is complete before painting them in if you wanted to. Things I look out for while painting the eyelashes are : 1) Making them look natural by clumping them together 2) Carefully observing there directions 3) Carefully observing their lengths. This is what the eyes looked like : 306
 Lost and found lines 2) Showing all three planes 3) Getting the moulding on the tip of the nose correct 4) Showing the looking in effect")
6 Step 6 I then closed the gap between the eyes by painting the nose. Here I concentrated on : 1) Lost and found lines 2) Showing all three planes 3) Getting the moulding on the tip of the nose correct 4) Showing the looking in effect at the nostrils 5) Showing an reflections and reflected light This is what the nose looked like : 307
 The rounding caused by the cheek bone on the front of the face 2) Any imperfections on the flat surface on the side of the face 3) The tonal value change")
7 Step 7 Moving outward I painted in the two cheeks and the upper lip. When painting the cheeks I try to show : 1) The rounding caused by the cheek bone on the front of the face 2) Any imperfections on the flat surface on the side of the face 3) The tonal value change between the front and side of each cheek. 4) Any reflections and reflected light effects. When painting the upper lip I look out for : 1) The tonal value difference between the left and right side 2) Showing the concave effect created by the philtrum 3) Ensuring there are no found lines 4) Showing any shadow cast by the nose. 5) Indicating the furrow correctly As I don't know the model I decide to leave out the beauty spot on her left cheek. This is what the painting looks like so far : 308
8 Step 8 Continuing my path downwards I paint the mouth and chin. While painting the mouth I look out for : Top Lip : 1) Showing the looking in effect created by showing the inside of the lip darker 2) Showing the tonal value differences caused by the angle change on each side 3) Softening the edge where the upper lip and top lip meet so I don't get a lipstick look. 4) Painting in the highlight on the upper lip where it meets the top lip. 5) Showing the darkening effect in the corners of the mouth Bottom Lip: 1) Showing the roundness of the lip left to right by looking for the tonal changes. 2) Showing the fullness of the bottom lip by looking for the tonal changes from front (inside where it meets the teeth) to back (outside). There is always a lighter area showing this. 3) Further showing the fullness by indicating the cracks in the lips 4) Showing the darkening effect in the corners of the mouth 5) Softening the edge where the lower lip and bottom lip meet so I don't get a lipstick look. 6) Painting in any reflections on the bottom lip Teeth: 1) Showing the different tonal values in each tooth as each tooth is at a different angle because of the rounding of the mouth. 2) Showing the roundness of each tooth 3) Getting the colour correct on each tooth 4) Getting the angle of each tooth correct 5) Showing the subtle roundness of the gums 6) Making the gums meet the teeth naturally by softening the edge where they meet 7) Showing depth in the mouth with a very dark skin tone. 8) Making the teeth gleam by looking out for the reflections Chin and Lower Lip: 1) Showing the tonal value change between the 3 planes on the lower lip as well as on the chin. 2) Tying up the areas where the upper and lower lip meet. 3) Tying in the area where the chin and cheek meet including any dimples 4) Showing the tonal change between the center of the lower lip and chin, looking out for any lost / found lines 5) Showing the dimple on the center of the chin 6) Looking out for any reflections on the chin 7) Looking out for any reflected light effects on the chin and lower lip. 8) Showing the underside of the chin by completing the rounding on the underside (darken the edge to show it curls underneath). This helps show the distance of the face away from the neck. 309

9 The painting now looks like this : I also decided to be pro-active and paint in the shadow cast by the left thumb. 310

10 Step 9 I then use my original shadow mix and a lighter version to suggest the shape of the neck : 311
 Showing the rounding of the forehead by looking out for the change in tonal values 2) Looking out for the keystone effect 3) Showing")
11 Step 10 At this point I removed the baking paper to paint the forehead (the baking paper was only wide enough to cover the main facial features. I then painted in the forehead paying special attention to : 1) Showing the rounding of the forehead by looking out for the change in tonal values 2) Looking out for the keystone effect 3) Showing any reflections and reflected light effects. 4) Looking for any shadows cast by the hair. This is what the painting looks like now : 312


12 Step 11 Now it's time for the hair. As my palette is currently pretty full from all the impromptu mixes : I decide to clean it. Even though I have completed the face, I still need the original skin tones for the hands so I scoop the 3 original piles to the side like this : 313

13 I now mix the main colours I see in the hair as shown below as well as the grey for the background: 314

14 My palette now looks like this : I paint in the background and then the hair. I start off with values only, blending them into each other. I then suggest the detail in the hair with thinned down paint and a rigger brush. To get the vignetting effect I gradually show less and less detail towards the back of the head. I look out for : 1) Contrasts that will show me the moulding / curves in the hair 2) Clumps of hair 3) Highlights and shadows next to each each other that will show depth 4) Directions of the hair 315

15 This is what the left hand side looks like : 316

16 Here is a close up so you can see the vignetting effect better : 317

17 Before I can paint in the right hand side I need to paint the shirt and background. I decide that the plain white background looks boring so I add a touch of shading to it using the grey mixed for the left hand background plus white. I then paint the shirt being careful not to add too much detail. The colours I used where Viridian Green, Alizarin Crimson, Titanium White and French Ultramarine. With that complete I paint in the hair on the right hand side as well as on the neck. Again I use the vignetting effect to add detail next to the face and less the further away from the face I move: At this point it feels like the painting should be finished, but there is still a way to go the hands, but at least I can get a good feel for what the final painting will look like so that is great motivation to continue. 318


18 Step 12 As my palette now looks like this and I need space to work with skin tones again, I move the hair colours off to the side again and clean the canvas : 319
.")
19 The original skin tone mixes are starting to become a bit too thick now so I mix up a fresh batch using the original mixes as reference. I then paint in the hands without any detail like creases or folds to ensure that they don't compete with the main features in the face (our focal point). The hands are just there to add a fun touch to the scene and help frame the face. With that the portrait is complete and I sign it feeling pretty satisfied with the results of the past 14 hours worth of painting : 320

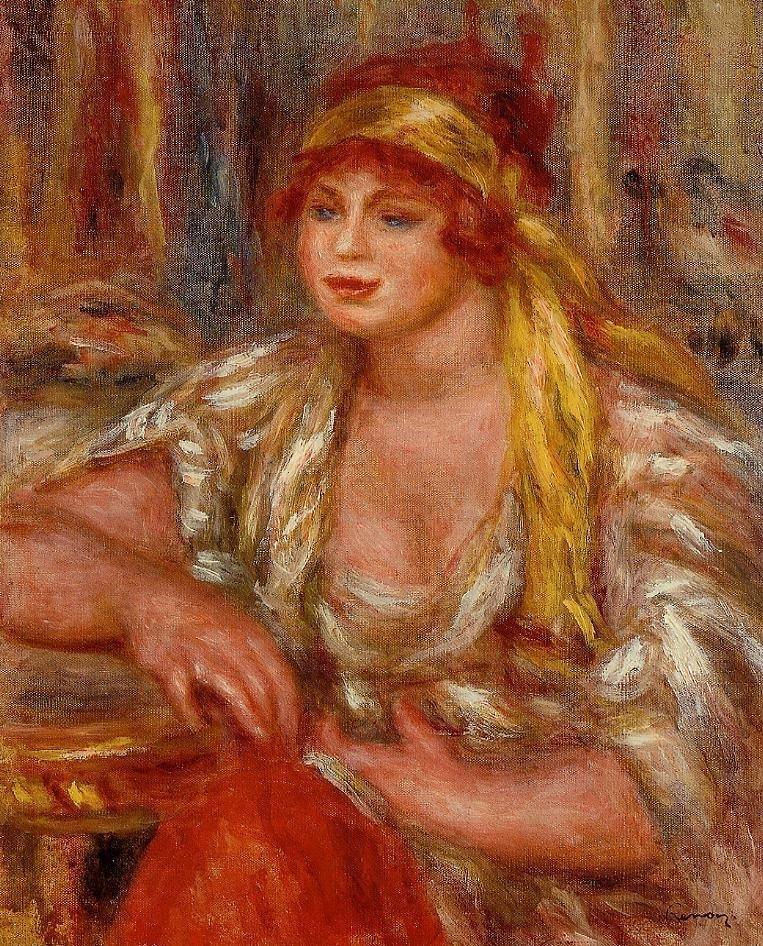
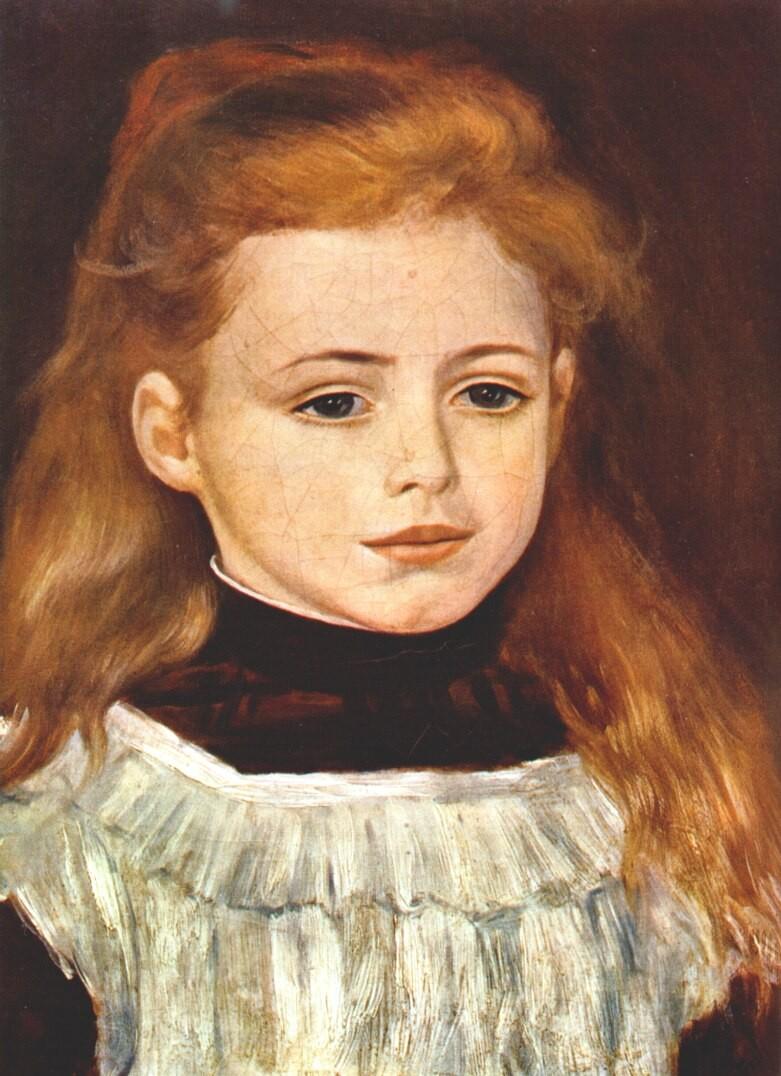
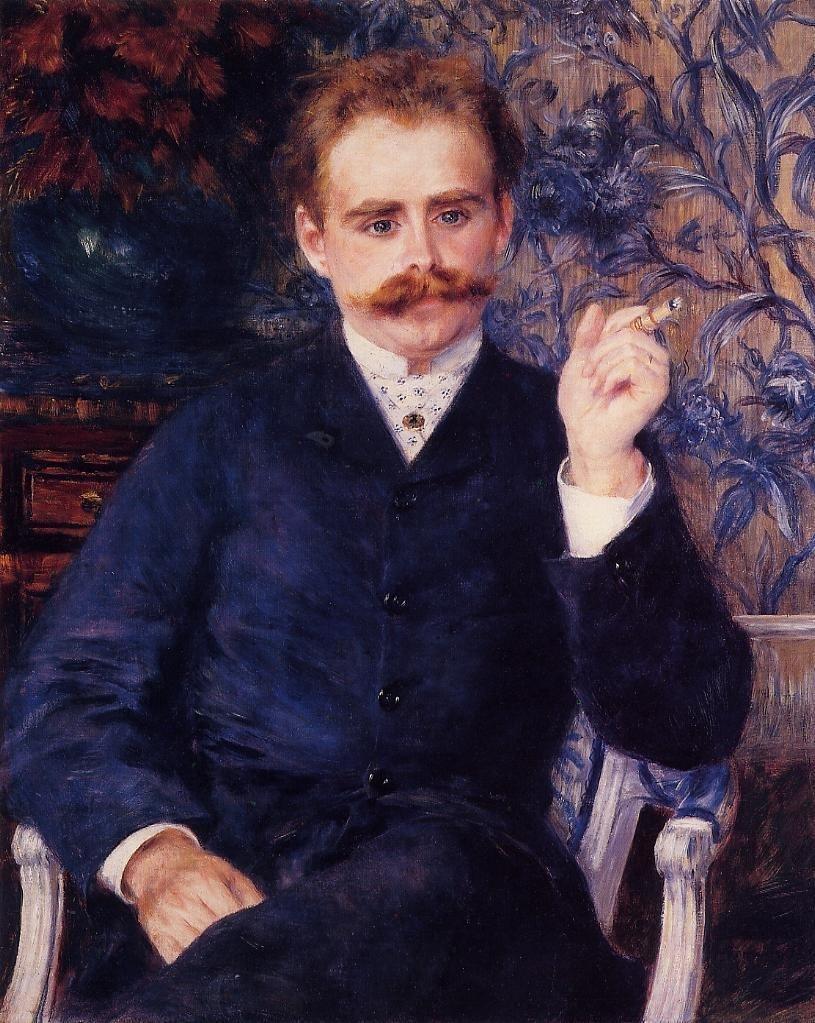
20 Renoir's Progress We have been working very hard over the past 6 weeks to catch up to the years of trial and error that Renoir had to put into his portraits to become a master portrait artist. Let's take a look at his progress over the years to see how he progressed : 321
21 322
22 323
23 324
24 If however you look through the chronological order of Renoir's paintings you will actually see a huge fluctuation between many paintings of the same period. The only explanation I have for this is either that the dating of the paintings is incorrect or that Renoir sometimes just painted from memory. What is certain is the fact that Renoir did not fully understand perspective, if at all, and this shortcoming is clearly visible in the portraits where he did not paint from a model for the entire duration of the painting. What is also clear is that not every portrait Renoir painted was a master piece, in fact I estimate that at least 50% of the portraits we know of are anything but master pieces. We don't even know about any paintings that may have ended up in the bin. He did however paint enough master pieces over a span of many years to ensure himself a place in the history books of art. Throughout the course we have learnt just as much from Renoir's flops as from his master pieces and I hope you will continue this tradition. Not every portrait you paint is going to be a master piece, and that is fine. As long as you learn from your mistakes, you will always continue to improve. All that is left now is for you to put all you have learn into practice, starting with the portrait you drew onto your canvas last week. Good luck and please remember to continue to post your portraits on the forum so I can continue to give you feedback on your progress : Have fun Nolan Clark 325
Pastel Pencil Skintones
 Pastel pencils and portraiture go hand in hand; enabling the artist to achieve both detail and subtle blended effects. As a forgiving medium they allow you to take away or add colour and texture without
Lesson #1 Secrets To Drawing Realistic Eyes
 Copyright DrawPeopleStepByStep.com All Rights Reserved Page 1 Copyright and Disclaimer Information: This ebook is protected by International Federal Copyright Laws and Treaties. No part of this publication
The Difficult Lesson - After Bouguereau
 The Difficult Lesson - After Bouguereau www.kingslan.com Kingslan painting@kingslan.com & Gibilisco Publications 2009 William Bouguereau - The Difficult Lesson Surface Portrait grade 18 x 24 portrait grade
After Bouguereau: The Bohemian
 After Bouguereau: The Bohemian www.kingslan.com painting@kingslan.com The Bohemian Surface Portrait grade 20x24 portrait grade canvas. Transfer Information Transfer the design to the surface with gray
After Bouguereau: Italian Girl
 After Bouguereau: Italian Girl www.kingslan.com painting@kingslan.com Italian Girl at the Well Surface Portrait grade 22x28 portrait grade canvas. Transfer Information Transfer the design to the surface
After Bouguereau: The Little Sulk II
 After Bouguereau: The Little Sulk II www.kingslan.com painting@kingslan.com The Little Sulk II Surface Portrait grade 24 x 30 portrait grade canvas. Transfer Information Transfer the design to the surface
After Bouguereau: The Knitter
 After Bouguereau: The Knitter www.kingslan.com painting@kingslan.com The Knitter Surface Portrait grade 18 x 24 portrait grade canvas. Transfer Information Transfer the design to the surface with gray
After Bouguereau: The Nut Gatherers.
 After Bouguereau: www.kingslan.com painting@kingslan.com Surface Portrait grade 24 x 36 portrait grade canvas. Transfer Information Transfer the design to the surface with gray graphite. Palette Set up
HOW TO MAKE REALISTIC LINE DRAWINGS OF ANY FACE
 HOW TO MAKE REALISTIC LINE DRAWINGS OF ANY FACE Use This PROVEN TECHNIQUE That Has Helped Beginning and Experienced Artists Create an Accurate, Proportional Line Drawing of ANY Face, EVERY Time! By Jack
HOW TO DRAW A FACE. By Samantha Bell.
 HOW TO DRAW A FACE By Samantha Bell HOW TO DRAW A FACE To draw a face (or portrait), you will need: Pencils (2B is a good one to start with) Pink Pearl or Art Gum Eraser Kneaded Eraser Drawing Paper Copies
After Bouguereau: The Bretons
 After Bouguereau: The Bretons www.kingslan.com painting@kingslan.com The Bretons Surface Portrait grade 24 x 36 portrait grade canvas. Transfer Information Transfer the design to the surface with gray
Painting WatercolorPortraits Kathy Jurek
 Painting WatercolorPortraits Kathy Jurek Thanks for joining me as I demonstrate the techniques I use to paint watercolor portraits. I ve been enthralled with the medium and painting watercolor portraits
William Bouguereau s The Little Sulk
 William Bouguereau s The Little Sulk Surface Portrait grade 24 x 36 portrait grade canvas Transfer Information Transfer the design to the surface with gray graphite. Palette Set up and mixing The original
How to paint a fairy sculpture with Acrylic Paint and Water Mixable Oil Paint
 How to paint a fairy sculpture with Acrylic Paint and Water Mixable Oil Paint www.montmarte.net Materials List... The materials for this lesson can be found at a Gold or above art centre. Go to www.montmarte.net
Rest at Harvest - After Bouguereau
 www.kingslan.com painting@kingslan.com Rest at Harvest - After Bouguereau William Bouguereau eau - Rest at t Harvest Surface Portrait grade 24 x 36 portrait grade canvas Transfer Information Transfer the
? What is covered in this module?
 MODULE 6 The Eye - Frontal View? What is covered in this module? It has been said that the eyes are the windows to the soul. Clearly, rendering the eye with accuracy is incredibly important in portrait
What You Need. Pick up all these materials at a Gold or above art centre near you
 Budgicorn Sci Fi Painting. What You Need Pick up all these materials at a Gold or above art centre near you cmmd7510 mont marte double thick canvas 76x101 cm macr0002 mont marte foam roller 50 mm mcg0063
Create a Portrait. of JUMPIN JACK. Sketch Puppy Proportions. Outline a puppy s face, shade his eyes and nose, and add texture to his fur with hatching
 Level: Beginner Flesch-Kincaid Grade Level: 6.79 Flesch-Kincaid Reading Ease: 70.04 Drawspace Curriculum 6.2.A11-12 Pages and 41 Illustrations Create a Portrait of JUMPIN JACK Outline a puppy s face, shade
Focus, as you work, on getting many gradations of dark and light in your piece to guarantee something that is super interesting to the eyes.
 Hello! My name is Effy Wild, and Kara has tasked me with creating a mixed media face with an emphasis on building a lot of value contrast through the use of lights and darks (and glazes) to create depth
Copyright of Mont Marte International Pty Ltd ACN
 Traditional bouquet in Oils pick up these materials from any gold mont marte art centre Cmmd6076 Mont Marte double thick canvas 60 x 72cm bmhs0019 mont marte gallery series brush pack 6pce bmhs0024 mont
How to Create a Geometric, WPAP Vector Portrait in Adobe Illustrator
 How to Create a Geometric, WPAP Vector Portrait in Adobe Illustrator - Tuts+ Design & Illustration Tutorial Not e bo o k: Cre at e d: URL: Photoshop 3/11/2015 9:45 AM http://design.tutsplus.com/tutorials/how-to-create-a-geometric-wpap-vector-portrait-in-a
winter soul flakes with tamara laporte - How to create a medium skinned lollipop girl with her wolf friend -
 H ello fabulous creative friend! Welcome to Winter Soul Flakes, a wintery snowy sparkly class with me, Tam! :) Hi! In this class I will demonstrate how to create 3 wintery lollipop girls with their whimsical
CHAPTER SEVEN THE EYES
 CHAPTER SEVEN THE EYES Eyes are beautiful! They are my favorite things to draw. An entire drawing can be made around a single eye. In the drawings below, you can see the eye is just shapes. An eye looks
Complete Drawing and Painting Certificate Course
 Complete Drawing and Painting Certificate Course Title: Unit Four Portraiture Foundations Medium: Drawing in graphite and charcoal Level: Beginners Week: Two Course Code: Page 1 of 15 Week Two: General
Fiona Peart Detailed Hedgerow studies using watercolour.
 Detailed Hedgerow studies using watercolour. Introduction As the summer moves towards autumn, but before the colours all change, is a wonderful time to find painting subjects in our hedgerows. There is
Complete Drawing and Painting Certificate Course
 Complete Drawing and Painting Certificate Course Title: Unit Three Shading and Form Medium: Drawing in graphite pencil Level: Beginners Week: Two Course Code: Page 1 of 15 Week Two: General overview Last
Candlelight Angel. by Sandra Malone
 Candlelight Angel by Sandra Malone Candlelight Angel By Sandra Malone Palette: Deco Art Americana Acrylics Alizarin Crimson #13179 Antique Gold #13009 Black Green #13157 Boysenberry Pink #13029 Burgundy
Happy Fall Pup. by Barb Halvorson
 Happy Fall Pup by Barb Halvorson Happy Fall Pup By Barb Halvorson Oil paints have always been my preferred medium of choice and what I feel most proficient with. Recently, I started to design and paint
How to paint a Horse in Traditional Oil Paint
 How to paint a Horse in Traditional Oil Paint www.montmarte.net Copyright of Mont Marte International Pty Ltd ACN 101589897 Materials List... The materials for this lesson can be found at a Gold or above
How to Draw Eyelashes
 How to Draw Eyelashes By Darlene Nguyen - November 30, 2016 Hey guys! Today, I m going to show you how to draw eyelashes and also how not to draw them. The format of this tutorial will be: examples with
Tracing a Vector Face From a Reference Photo - Envato Tuts+ Design & Illustration Tutorial
 Tracing a Vector Face From a Reference Photo - Envato Tuts+ Design & Illustration Tutorial A few times a each month we revisit some of our reader s favorite posts from throughout the history of Vectortuts+.
How to paint a Realistic GIANT Bee in Satin Series Acrylic Paint
 How to paint a Realistic GIANT Bee in Satin Series Acrylic Paint www.montmarte.net Copyright of Mont Marte International Pty Ltd ACN 101589897 Materials List... The materials for this lesson can be found
Drawing Goats. Proceedings of the 28th Annual Goat Field Day, Langston University, April 27, 2013
 Drawing Goats Mr. Kenneth Williams Science Illustrator Science Graphics and Design Drawing goats or any other subject depends on accurate observation and correct proportional placement of shapes and lines.
> photo morph. > curricular focus: This lesson emphasizes the effective blending of multiple images resources using the Clone tool and Healing Brush
 > objective(s): Students will seamlessly morph two photo sources into one image with all changes and integrations undetectable even when zoomed in > curricular focus: This lesson emphasizes the effective
After Waterhouse: Destiny
 www.kingslan.com painting@kingslan.com After Waterhouse: Destiny After Waterhouse: Destiny Surface Portrait grade 18 x 24 portrait grade canvas. Transfer Information Transfer the design to the surface
Term 3 Grade 6 Visual Arts
 Term 3 Grade 6 Visual Arts Contents Self-Portrait... 2 What is a self-portrait?... 2 Layout and Medium... 2 Featured Artists... 3 Rembrandt van Rijn... 3 Vincent Willem van Gogh... 4 Drawing Faces... 4
Retouching and Restoring Images
 Beauty Retouching Open the Woman.psd file. Retouching and Restoring Images When retouching images first evaluate the faults that need to be eliminated vs. the ones that need to be minimized. First we will
Celebrating with Whimsies
 Celebrating with Whimsies Hello gorgeous one! Technique wise we're going to create some Welcome to November. Can you believe the year is almost over? I can't believe how fast whimsy characters, yay! I
First steps. I divided the bust into three parts for better painting; the head, the cap and the body of the model, which I glued on the wood base.
 First steps I bought this model in 2011 when I was at a foreign competition. I hadn t painted busts by that time. I had always a respect to it. There is much skin colour on the face, everything is large
Winter Wolf. by Barb Halvorson
 Winter Wolf by Barb Halvorson Winter Wolf By Barb Halvorson Palette: DecoArt Americana Acrylics Burnt Sienna #13063 Cadmium Yellow #13010 Cocoa #13253 Lamp Black #13067 Slate Grey #13068 Traditional Burnt
Shade a Basic Dog Eye
 Flesch-Kincaid Grade Level: 7.5 Flesch-Kincaid Reading Ease: 65.2-6 Pages and 16 Illustrations Shade a Basic Dog Eye Create a simple drawing of a dog s eye based on a detailed photo Resource: Module 3.1
by Dave Lesko Thanks, Detective, for making us look good.
 by Dave Lesko Dave Lesko is a detective in a large police department just outside of Chicago. There are only two things that rival his enthusiasm for his family: the Chicago Bears, his job and monster
Create a Beautiful Abstract Portrait in Photoshop - Psd Premium Tutorial
 Create a Beautiful Abstract Portrait in Photoshop - Psd Premium Tutorial By: Wojciech Pijecki In this tutorial we will combine several stock images to create an artistic, abstract portrait of a woman.
ACRYLICS DEMONSTRATION
 ACRYLICS DEMONSTRATION PALETTE KNIFE STILL LIFE By Will Kemp In this lesson we re going to look at a still life floral arrangement, but we re going to practice loosening up with our acrylic painting, so
Watercolour. Part 7 Make the Ordinary. Fast and Loose. transform any scene into a spectacular painting
 Watercolour Fast and Loose Part 7 Make the Ordinary transform any scene into a spectacular painting No course covering the great impressionistic watercolourists of the 20 th century would be complete without
balance your intention with your intuition
 d e m o n s t r a t i o n t h r e e balance your intention with your intuition After completing a few thumbnail pencil studies, you have a destination a clear intention. What actually takes place on the
Glass Painting Techniques & Secrets from an English Stained Glass Studio by David Williams & Stephen Byrne Dog roses, Daffodils & Poppies
 Glass Painting Techniques & Secrets from an English Stained Glass Studio by David Williams & Stephen Byrne Dog roses, Daffodils & Poppies Copyright 2010 Williams & Byrne Limited Hello and Welcome! Thanks
How to paint a Francoise Nielly inspired Portrait in H20 Oil Paints and Fluro Acrylics
 How to paint a Francoise Nielly inspired Portrait in H20 Oil Paints and Fluro Acrylics Materials List... The materials for this lesson can be found at a Gold or above Art Centre. Go to to find the one
Dutch Old Master. with Urn
 Dutch Old Master with Urn First Stage of all objects - paint all objects to this level before adding shines and shadows Dutch Old Master with Urn - Page 2 Dutch Old Master with Urn - Page 3 Dutch Old Master
> 2: photo morph > objective(s): > curricular focus: > specifications: > instruction: see procedure on page 2
: > curricular focus: > specifications: > instruction: see procedure on page 2") > objective(s): Students will seamlessly morph two photo sources into one image with all changes and integrations undetectable even when zoomed in > curricular focus: This lesson emphasizes the effective
> objective(s): Students will seamlessly morph two photo sources into one image with all changes and integrations undetectable even when zoomed in > curricular focus: This lesson emphasizes the effective
POLAR BEAR. by Barb Halvorson
 POLAR BEAR by Barb Halvorson EXCLUSIVE Polar Bear by Barb Halvorson PALETTE Buttermilk #13003 Traditional Burnt Umber #13221 Lamp (Ebony) Black #13067 Lavender #13034 Light Buttermilk #13164 Slate Grey
Paint Neat Edges. on Zebra Stripes. Draw a Symmetrical Zebra Face
 Level: Intermediate Flesch-Kincaid Grade Level: 7.5 Flesch-Kincaid Reading Ease: 62.1 Drawspace Curriculum 8.2.A6-10 Pages and 33 Illustrations Paint Neat Edges on Zebra Stripes Outline the contours of
Painting the Wolf Man in Grayscale. Master Sculptor Jeff Yeager & Painter Jeff Camp, at Resintopia2. By Jeff Camp
 Painting the Wolf Man in Grayscale Master Sculptor Jeff Yeager & Painter Jeff Camp, at Resintopia2 By Jeff Camp Life-size Wall Hanger Bust of Lon Chaney Jr. as The Wolf Man, Sculpted by Jeff Yagher and
1. Draw the scene with a 2B pencil. Mask the flowers and the boat with masking fluid and a masking fluid brush.
 Venetian Doorway To keep this Venetian scene simple, I have chosen a squareon view so I do not have to worry about the perspective. This step-by-step demonstration offers an opportunity to create plenty
Mega Markers Pear Artwork
 Mega Markers Pear Artwork Micador Mega Markers create amazing results when mixed with water. Follow these steps and learn how to produce beautiful watercolour effects with this pear artwork, and create
winter soul flakes with tamara laporte - How to create a light skinned lollipop girl with her whimsical friends -
 H ello fabulous creative friend! Welcome to Winter Soul Flakes, a wintery snowy sparkly class with me, Tam! :) Hi! In this class I will demonstrate how to create 3 wintery lollipop girls with their whimsical
How to paint the Blue Mountains
 How to paint the Blue Mountains What You Need CMMD6018 Mont Marte Double Thick Canvas 60 x 180 cms MCG0059 Mont Marte Palette Knife # 4 MAXX0007 Mont Marte Stainless Steel Brush Washer MCG0022 Mont Marte
How to paint a Rainbow Eucalyptus Tree with Acrylic paint
 How to paint a Rainbow Eucalyptus Tree with Acrylic paint www.montmarte.net Copyright of Mont Marte International Pty Ltd ACN 101589897 Materials List... The materials for this lesson can be found at a
How to Upcycle a Painting.
 How to Upcycle a Painting.. Materials list: You can get all of these materials at a Bronze or above art centre go to www.montmarte.net/stockist mcg0036 mont marte Oil paints 12 pce bmhs0009 mont marte
Norse s 7 Step Painting Guide
 Norse s 7 Step Painting Guide Well, as luck would have it, I worked very closely with Mike Fubar Thorp on the design specs for the Fantasy Football Wizard and Toad, so when the chance came to paint these
Module All You Ever Need to Know About The Displace Filter
 Module 02-05 All You Ever Need to Know About The Displace Filter 02-05 All You Ever Need to Know About The Displace Filter [00:00:00] In this video, we're going to talk about the Displace Filter in Photoshop.
Drawing the Face WORKSHEET. Upper Palpebral Groove. Lacrimal Caruncle. Pupil. Iris Sclera. Helix Bridge. Tragus. Ala N ostril.
 Drawing the Face WORKSHEET Proportions of the Face - This refers to how large and small facial features and areas of the face are in relation to each other. There are basic rules that you can learn to
Artsy Painted Birds. Sign up for the free newsletter at
 Artsy Painted Birds I love painting birds. I like to give them crazy colors and use loose, painterly brushstrokes. The fun-colored birdies make me happy! Don t fret if you can t draw a bird. You can trace!
PASTELS DEMONSTRATION
 PASTELS DEMONSTRATION Sky Painting By Michael Howley In this lesson I will be demonstrating how to develop a skyscape using blending, layering and scumbling techniques. Soft Pastels are a perfect choice
Peaches and Green Glass Still Life. Kingslan & Gibilisco 4670 Hickory Street Omaha NE
 Peaches and Green Glass Still Life Kingslan & Gibilisco 4670 Hickory Street Omaha NE 68106 402.397.0298 painting@kingslan.com www.kingslan.com Palette Set up and mixing The original piece was painted with
Create a Cute Furry Vector Monster in Illustrator
 Create a Cute Furry Vector Monster in Illustrator Other labs from this author can be found at http://www.blog.spoongraphics.co.uk/tutorials/create-a-cute-furry-vector-monster-inillustrator Follow these
Blue & White Tea Cup in Trompe L oeil
 Blue & White Tea Cup in Trompe L oeil by Kingslan & Gibilisco Studio Painting a Day Challenge XI - Page 34 Preparation 8 x 10 Masonite or Small Cabinet Blue & White Tea Cup in Trompe L oeil With a fine
Painting Techniques: Ways of Painting
 Techniques: Ways of There are so many ways of painting that no book can possibly do justice to them all. However there are certin basic techniques that every painter should master. Opaque Technique: The
ello there wonderful friend! :)
") H ello there wonderful friend! :) Welcome to my lesson today. My name is Tamara Laporte and I run Willowing Arts Ltd where lots of wonderful art & personal development classes are run. I'm super excited
H ello there wonderful friend! :) Welcome to my lesson today. My name is Tamara Laporte and I run Willowing Arts Ltd where lots of wonderful art & personal development classes are run. I'm super excited
Name VALUE. Vocabulary. (also on drawing vocab worksheet)
") Name VALUE Value is the relative lightness and darkness of a color or grey tone. Color as well as black and white, has value. When you turn a color photo into a black and white version you can see the
Name VALUE Value is the relative lightness and darkness of a color or grey tone. Color as well as black and white, has value. When you turn a color photo into a black and white version you can see the
COLOURED PENCIL DEMONSTRATION
 COLOURED PENCIL DEMONSTRATION Hare Today By Jane Lazenby In this step-by-step guide we re going to paint a hare in coloured pencil. As per usual with my coloured pencil demonstrations we re going to create
The Letters of Adolf Bernd
 The Letters of Adolf Bernd November 12-13, 2008 Peter Thornton ADOLF BERND born 1909, died 1994 15 20 of his best works are in the Klingspor Museum he did not start making these decorated letters till
Day 19. Use shorter flicks for shorter hair and longer flicks for longer hair.
 Day 19 Drawing Animals Drawing animals can be a very rewarding experience and it can be very profitable. Almost everybody has a pet or animal they care for and would love to have immortalized on paper.
Farm to Canvas to Table: Apple Cider Still Life
 Farm to Canvas to Table: Apple Cider Still Life Kingslan & Gibilisco 4670 Hickory Street Omaha NE 68106 402.397.0298 painting@kingslan.com www.kingslan.com Palette Set up and mixing The original piece
Video Lesson Supplemental Lesson: White Rose & Vase
 Video Lesson Supplemental Lesson: White Rose & Vase by Kingslan & Gibilisco Studio www.kingslan.com Preparation Surface: 16 x 20 Oval Masonite - Available from Kingslan & Gibilisco at www.kingslan.com
Assignment Project Due & Critique 3.18 Retouching Photo Due 3.4
 Portraits Assignment Project Due & Critique 3.18 Retouching Photo Due 3.4 For this project, you will be exploring the subject of portraits with three different objectives. 1. In the style of Arnold Newman:
Draw Keiko, a Manga Baby
 Flesch-Kincaid Grade Level: 8.4 Flesch-Kincaid Reading Ease: 64.3 Drawspace Curriculum 2.1.A17-10 Pages and 19 Illustrations Levels: Beginner to Advanced Draw Keiko, a Manga Baby Sketch accurate proportions
Turn Beautiful Artist's Paper into a Book
 Turn Beautiful Artist's Paper into a Book Let's start... 1. Have all of your materials at your work station ready to use. 2. Remove five pages from the A3 pad. Take one sheet and fold the paper in half
THE MAKING OF SUPER MODEL. Portraiture
 THE MAKING OF SUPER MODEL Portraiture Mrs. Gilder will be photographing each of you. Why? Because, she s fast. That is why. She will then place your image onto the student resource file, R Why, so that
by Conny Valentina Thanks, Conny, for making Black Heart look good.
 by Conny Valentina Conny Valentina is one of our down under GK sisters and living in Adelaide, Australia. She is an artist by trade and works mainly in 2D art, always in traditional media. She started
HISTOGRAMS. These notes are a basic introduction to using histograms to guide image capture and image processing.
 HISTOGRAMS Roy Killen, APSEM, EFIAP, GMPSA These notes are a basic introduction to using histograms to guide image capture and image processing. What are histograms? Histograms are graphs that show what
Introduction. Recall that your pretest was to draw a human face from your memory. You can compare them at the end of this unit.
 Introduction This unit will be worth 2 credits. You will have to have done the perspective for artists unit since this unit requires you to understand the concept of proportion. In faces there are certain
SNEAKING A PEEK. by Barb Halvorson
 SNEAKING A PEEK by Barb Halvorson EXCLUSIVE Sneaking A Peek by Barb Halvorson PALETTE DecoArt Americana Acrylics Honey Brown #13163 Lamp Black #13067 Traditional Burnt Umber #13221 Ultramarine Blue #13225
Focus on 1 COPYRIGHT Milan TAIKO Dufek
 The eye is probably the most catching thing about the human face. It is where we are looking when we are talking to people. It is where tears emerge from. It is where we indicate what we are looking at
How to Paint a Succulent with Premium Watercolour
 How to Paint a Succulent with Premium Watercolour Materials List... The materials for this lesson can be found at a Gold or above Art Centre. Go to to find the one nearest to you. PMHS0054 Mont Marte Watercolour
Complete Drawing and Painting Certificate Course
 Complete Drawing and Painting Certificate Course Title: Unit Three Shading and Form Medium: Drawing in graphite pencil Level: Beginners Week: Three Course Code: Page 1 of 12 Week Three: General overview
Rendering a perspective drawing using Adobe Photoshop
 Rendering a perspective drawing using Adobe Photoshop This hand-out will take you through the steps to render a perspective line drawing using Adobe Photoshop. The first important element in this process
Painting Flats: The Effective Use of Light and Shadow in Color Value
 Painting Flats: The Effective Use of Light and Shadow in Color Value (Originally printed in Historical Miniature Magazine September/October 2003, No. 39, and reprinted with the Stephen Weakley and Greg
How to paint a Tiger on a rock
 How to paint a Tiger on a rock Materials List... The materials for this lesson can be found at a Gold or above Art Centre. Go to to find the one nearest to you. MCG0120 Mont Marte Taklon Filbert # 16 BMHS0033
COPYRIGHT 2008 PAUL BURNETT - ALL RIGHTS RESERVED
 Detailed layout drawings, toned for proper modeling in two sizes. Packet contains anatomical drawings and facts to help you to achieve realistic tooling and coloring results. Twelve A WILDLIFE STUDY ROCKY
Mid Value Cube. What you need:
 Mid Value Cube This exercise is where we start to put all the value judging practice we've done in previous exercises together into a real world painting. We might be just painting a mid value grey cube,
8 Pages 10 Illustrations
 NEWLY HATCHED DUCKLING Jeanette Jobson After hours of struggle, a tiny Pekin duckling breaks free of the shell that s been its home for 30 days and staggers into the world. Once the down starts to dry,
How to Paint Koi with Premium Watercolour
 How to Paint Koi with Premium Watercolour Materials List... The materials for this lesson can be found at a Gold or above Art Centre. Go to to find the one nearest to you. PMHS0053 Mont Marte Watercolour
How to Paint a Field of Poppies with Studio Acrylic Paint
 How to Paint a Field of Poppies with Studio Acrylic Paint Copyright of Mont Marte International Pty Ltd ACN 101589897 Materials List... The materials for this lesson can be found at a Gold or above Art
Retouching Portraits in Photoshop
 Retouching Portraits in Photoshop I Removing Blemishes When removing blemishes, acne or other imperfections on the skin, our goal is to maintain as much of the original skin texture as possible. That way,
This project is recommended for artists from age 10 to adult, as well as home schooling, academic and recreational fine art educators.
 Brenda Hoddinott F-05 BEGINNER: HATCHING This project guides you through the process of setting up proportional guidelines, and using symmetry to draw the facial features and hair of a male anime character
An Easy Method for Mixing Acrylic Paint for Skin Tones
 An Easy Method for Mixing Acrylic Paint for Skin Tones By using the simple method detailed in this tutorial, you'll learn how to mix skin tones using different ratios of the primary colors. This easy method
REALISTIC DRAWING WITH CHARCOAL with Kirsty Partridge
 REALISTIC DRAWING WITH CHARCOAL with Kirsty Partridge SUPPLY LIST Part 3- Drawing Animals with Charcoal Strathmore 300 Series Bristol Vellum Paper Lyra Rembrandt Charcoal Pencils 2B & H Lyra Rembrandt
COLORED PENCIL WITH MIXED MEDIA with Sarah Becktel
 COLORED PENCIL WITH MIXED MEDIA with Sarah Becktel Supply List: Lesson 2: Adding Fluid Acrylics to Colored Pencil Strathmore 500 Series Mixed Media Board or Strathmore 400 Series Mixed Media Paper This
Watch Ron s video explaining his class and the supplies you ll need.
 SUPPLY LIST Introduction to Oil Painting Instructor: Ron Hauser Watch Ron s video explaining his class and the supplies you ll need. Beginning Oil Painting This class is for beginning and intermediate