e C Preservation Nineteenth in a Series Finished Quilt: 100"x100"
|
|
|
- Evan Blankenship
- 6 years ago
- Views:
Transcription


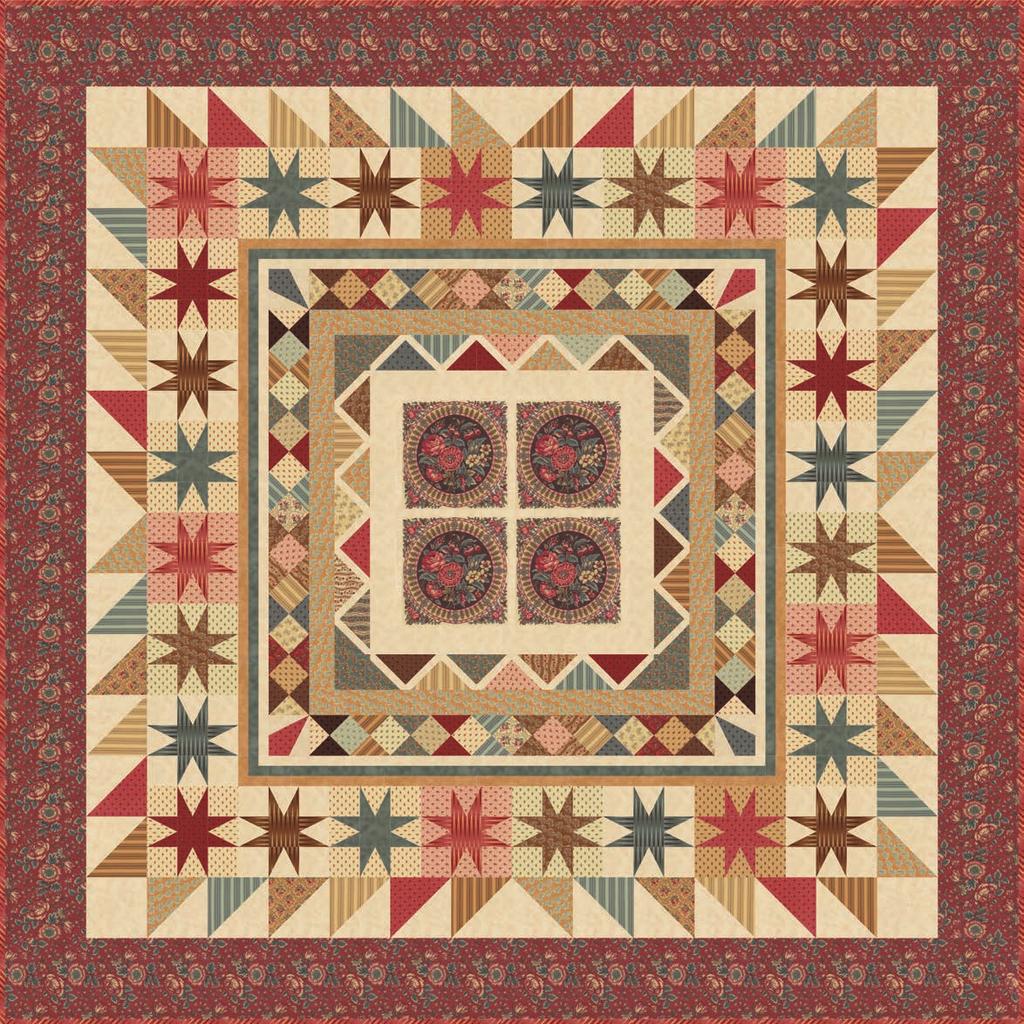
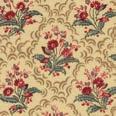
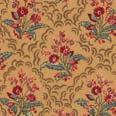
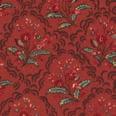
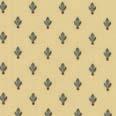
1 ction for a Cau e l l o s C Preservation (H e oward Marcus ) Nineteenth in a Series Finished Quilt: 100"x100"

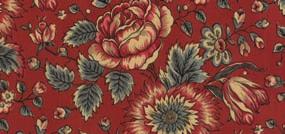
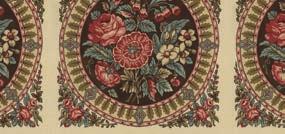
2 Collection for a Cause Preservation (Howard Marcus) Dating to 1830, the original Medallion quilt from England that inspired this Preservation collection features a series of five different pieced borders framing a unique, pre-printed panel that remains uncut. This is a classic style of Northumberland patchwork from the first half of the nineteenth century. Cutting Finished Size: 100" x100" Label pieces as they are cut. Include both size and the rounds where they are used. Quilter Basics Read instructions before beginning a project. All instructions include a ¼" seam allowance. Press as you go. Press seams in one direction. 22" measurement is approximate. WOF = Width of Fabric Panel Cutting instructions are given in Construction and Assembly on page 6. Fabric 1 Cut 4-5"xWOF strips for RD 1 squaring border Cut 4 4"xWOF strips Subcut 32 4"x4" background squares for RD 2 Cut 1 4¾"xWOF strip Fold strip in half selvage to selvage and cut 4-Template B pairs for RD 4 Cut 6 1½"xWOF strips for RD 5 border Cut 5 3½"xWOF strips for RD 6 From 3 strips subcut 36 3½" x 3½" squares for bkgd corners Fold the remaining strips in half. From each strip cut 9 pairs of peaks using for star blocks. (36 total) Cut 1 6½"xWOF strip Subcut 4 6½"x6½" squares for RD. 7. Cut 5 7"xWOF strips Subcut 24 7"x7" squares for RD. 7 Half Square Triangles. Fabric 2 From the fat quarter cut: 2 3½"x 22" strips. Subcut 5 3½"x 3½" squares from each strip. for RD "x 22" strip. Subcut 4 4"x4" corner squares and 1 3½"x 3½" square for RD "x 22 strip Subcut 4 4"x 4" squares cut once diagonally. for RD. 4 From the remainder of the strip cut 1 3½"x 3½" square for RD 2. Fabric 3 Cut 2-3½"xWOF strips. Fold strips in half selvage to selvage. Using cut 16 spike pairs for the star blocks in RD 6. From the remainder of the strip cut 1-3½"x3½" square for star block center in RD 6. Cut 1-4"xWOF strips. Subcut 4-4"x4" squares; cut once diagonally for RD 4. From the remainder of the strip cut 7 3½"x3½" squares, 4 for RD 2 and 3 for RD 6 1
3 Cutting cont. Fabric 4 Cut 4-3"xWOF strips for RD 3. Cut 1 7"xWOF strip Subcut 4 7"x7" squares for RD 7. From the remainder of the strip cut 4 3½"x 3½" squares for RD 2. Fabric 5 From the fat quarter cut: 1 3½"x22" strip. Subcut 4 3½"x 3½" squares for RD ¼"x22" strip Subcut 4 3¼"x 3¼" squares for RD "x22" strip Subcut 2 4"x 4" squares; cut once diagonally for RD 4. Fabric 6 From the fat quarter cut: 1 3½"x22" strip and Subcut 4 3½"x 3½" squares for RD "x22" strip Subcut 4 4"x 4" squares; cut once diagonally for RD 4 1 4¾"x22" strip Subcut 1 2⅞"x 2⅞"square cut once diagonally for RD 4. Fold remainder of strip in half selvage to selvage and cut 1-Template A pair for RD 4. Fabric 7 From the fat eighth cut: 1 3½"x22" strip Subcut 4 3½"x 3½" squares for RD "x22" strip Subcut 4 4"x 4" squares; cut once diagonally for RD 4. Fabric 8 From the fat eighth cut: 1 4"x22" strip Subcut 4 4"x 4" squares; cut once diagonally for RD 4. Fabric 9 Cut 2 3½"xWOF strips. From one strip cut 7 3½"x 3½" squares 4 for RD 2 and 3 for RD 6. Fold the second strip in half. Using cut 12 pairs of spikes for RD 6. Cut 1 4"xWOF strip Subcut 4 4"x 4" squares. Cut once diagonally for RD 4. FOLD Selvage 3½" Cutting Diagrams for Templates C and D FOLD Selvage 3½" 2
4 Cutting cont. Fabric 10 Cut 2 3½"xWOF strips. From 1 strip cut 6 3½"x 3½" squares 4 for RD 2 and 2 for RD 6. Fold the second strip in half. Using cut 8 pairs of spikes for RD "xWOF strip Subcut 4 7"x 7" squares for RD 7 From remainder of strip cut 1 4¾"x14" strip. Fold strip in half selvage to selvage and cut 1-Template A pair and 1 2⅞" square; cut once diagonally for RD. 4. Fabric 11 From the fat eighth cut: 1 3½"x22" strip Subcut 2 3½"x 3½" squares for RD ¼"x22" strip Subcut 4 3¼"x 3¼"squares for RD 4. Fabric 12 From the fat eighth cut: 1 3¼"x22" strip Subcut 4 3¼"x 3¼" squares for RD 4. Fabric 14 Cut 1 4"xWOF" strip Subcut 4 4"x 4" squares; cut once diagonally for RD 4. From remainder of strip cut 4 3½"x 3½" squares for RD 2. Cut 1 7"xWOF strip Subcut 4 7"x 7" squares for RD 7. Fabric 15 Cut 1 3½"xWOF" strip. Subcut 4 3½"x 3½" squares for RD 2 From remainder of strip cut 4 3¼"x 3¼" squares for RD 4. Cut 1 7"xWOF strip Subcut 4 7"x 7" squares for RD 7. Fabric 16 Cut 1 4"xWOF strip Subcut 4 4"x 4" squares. Cut once diagonally for RD 4. From remainder of strip cut 2 3½"x 3½" squares for RD 2. Cut 1 7"xWOF strip Subcut 4 7"x 7" squares for RD 7. Fabric 13 Cut 5-3½"xWOF strips From 1 strip cut 4 3½"x 3½" squares for RD 2 and 4 3¼"x 3¼" squares for RD 4. Fold 2 of the strips in half. Using cut 10 pairs of peaks for RD 6. (20 total) From the last 2 strips subcut 20 3½"x3½" squares for RD 6. Fabric 17 From the fat eighth cut: 1 3½"x22" strip Subcut 4 3½"x 3½" squares for RD 2. Fabric 18 From the fat eighth cut: 1 3½"x22" strip Subcut 2 3½"x 3½" squares for RD 2. 3


5 Cutting cont. Fabric 19 From the fat eighth cut: 1 3½"x22" strip Subcut 2 3½"x 3½" squares for RD "x22" strip Subcut 4 4"x 4" squares; cut once diagonally for RD 4. Fabric 20 From the fat eighth cut: 1 3¼"x22" strip Subcut 4 3¼"x 3¼" squares for RD 4. Fabric 21 From the fat quarter cut: 2 7"x22" strips From each strip subcut 2 7"x 7" squares for RD 7 Fabric "x22" strip Subcut 4 4"x 4" squares, cut once diagonally for RD 4. Fabric 23 Cut 3-3½"xWOF strips From 2 strips cut 16 3½"x 3½" squares for RD 6 and 4 3¼"x 3¼" squares for RD 4. Fold the remaining strips in half selvage to selvage. Using the enclosed cut 8 pairs of peaks from the folded strips for RD 6. (Total 16 peaks ) Fabric 24 Cut 1 4"xWOF strip Subcut 2 4"x 4" squares. Cut once diagonally for RD 4 From remainder of strip; cut 4 3¼"x 3¼" center squares for RD 4 Cut 5 3½"xWOF strips From 3 strips cut 32 3½"x 3½" squares for RD 6. Fold the remaining 2 strips in half. Using cut 8 pairs of peaks from each folded strip for RD 6. Fabric 25 Cut 2 3½"xWOF strips From 1 strip cut 8 3½"x3½" squares for RD 6 and 4 3¼"x 3¼" squares for RD 4. Fold the remaining strip in half. Using cut 4 pairs of peaks for RD 6. (Total of 8 peaks ) Fabric 26 Cut 2 3½"xWOF strips From 1 strip cut 4 3½"x3½" squares for RD 6. Fold the remainder of the strip in half. Using cut 4 pairs of spikes for star blocks. Fold the remaining strip in half selvage to selvage. Using cut 12 pairs of spikes for star blocks for RD 6. (Total of 32 spikes )
6 Cutting cont. Fabric 27 Cut 3 3½"xWOF strips From 1 strip cut 5 3½"x3½" squares for RD 6. Fold the remaining 2 strips in half. Using cut 10 pairs of spikes from each folded strip for RD 6. (Total of 40 spikes ) Fabric 29 Cut 6 1½"xWOF strips for RD 5. Cut 3 3½"xWOF strips From 1 strip cut 5 3½"x3½" squares for RD 6. Fold the remaining 2 strips in half. Using cut 10 pairs of spikes from each folded strip for RD 6. (Total of 40 spikes ) Fabric 28 Cut 3 3½" xwof strips From 1 strip cut 5 3½"x3½" squares for RD 6. Fold the remaining 2 strips in half. Using cut 10 pairs of spikes from each folded strip for RD 6. (Total of 40 spikes ) From the remainder of the fabric cut enough 2½" bias strips to measure 440" for binding. If you choose not to use a bias binding, cut 11 2½" strips for binding. Fabric 30 Cut 6 1½"xWOF strips for RD 5. Fabric 31 Following directions on page 14; Fussy cut 4 8½" x Length of fabric strips. 5


7 Construction and Assembly This quilt is constructed in Rounds starting with the center panel and working outward through 7 rounds plus the border and binding. As you assemble the blocks and pieces in each round they will be added to the quilt center. Instructions for each round begin with a list of all cut pieces required for that round. For easy piecing, be sure to sort and label pieces when cutting.. Center and Round 1 Requires: 1 Panel 4-5" xwof strips Fabric (F) 1 Cut ¼" beyond outside edge of printed image Center and Round 1 The center requires four floral motifs from the panel of six. 1. Trim ¼" beyond the outside printed edge of the block of four floral motifs. 2. Measure the length of the center floral motif. Cut 2 5"xWOF Fabric 1 strips to that measurement (approx. 23"). 3. Stitch the cut strips to opposite sides of the center. Press toward border strips. 14¼" 4. Measure the center from side to side including the just added border strips. Cut the remaining border strips to that measurement. Add to top and bottom of center. Press toward border strips. 5. Find and mark the center of the four motifs. Measure outward from the center 14¼" in all directions. Mark measurement on Fabric 1 border. 14¼" center 14¼" 6. Use a rotary cutter and ruler to trim center to measure 28½"x 28½". Trim and measure carefully as all rounds to follow are based the 28½"x 28½" center square. 14¼" Trim center to measure 28½" x28½"
8 Making an Easy Corner Triangle Block Steps below are for 1 block. Repeat steps to make 32 ECT blocks 16 left and 16 right. sew 1. Using a mechanical pencil draw a diagonal line on the wrong side of all of the RD 2 3½" print squares. 2. Pair a 4" Fabric 1 background square with 2 marked print squares, according to the diagram below. 3. With right sides together align a print square with the corner of the F1 background square. Note direction of marked line and striped fabric. 4. Stitch on marked line. Trim away middle layer of fabric leaving a ¼" seam allowance. Press triangle toward corner. Do not cut away background fabric. 5. Repeat Steps 3 & 4 with the second print square. Make a total of 32 ECT blocks. Make 16 with a left slant of the background stripe and 16 with a right slant. 3½" sew Make 16 Left 3½" trim {See chart below for fabric placement.} trim Make 16 Right Round 2 Requires: 32 4" squares F1 4 4" corner squares 12 3½" squares 4 3½" squares from F3, 4, 5, 6, 7, 9, F10,13,14,15 and ½" squares from F11,16,18 and 19 Round 2 Zig Zag Border This border is constructed using easy corner triangles (ECT) on a Fabric 1 background square. In order to create the matching larger triangle units which are made when blocks are joined, layout each row before beginning to sew. Note: Each row begins and ends with the same fabric as the corner squares (). See the diagram below for color placement or create your own arrangement. Each row includes 4 left blocks and 4 right blocks. Left Right Left Right Left Right Left Right Top Row F14 F14 F9 F9 F13 F13 F4 F4 F11 F11 F3 F3 Left Side Row F17 F17 F18 F18 F10 F10 F5 F5 F4 F4 F15 F15 F3 F3 Right Side Row F17 F17 F5 F5 F10 F10 F7 F7 F16 F16 Bottom Row F9 F9 F14 F14 F19 F19 F13 F13 F15 F15 F7 F7 7


9 Construction and Assembly cont. Round 2 cont. Assemble Zig Zag Borders Arrange the blocks into 4 rows of 8 blocks as shown, matching fabrics. Sew and press seams in one direction. Rows should measure 4"x28½" with seams. Refer to quilt image. Stitch 2 rows to opposite sides of quilt center. Press seams toward cream border. Add 4" squares to opposite ends of remaining 2 rows. Press seam toward corner square. Add borders to top and bottom of quilt center. Quilt top should measure 35½"x35½" with seams. Top Row Left Side Row Right Side Row Bottom Row Round 3 Requires: 4-3" xwof strips F4 Round 3 Borders 1. Cut 2-3"xWOF strips to measure 3"x35½". Stitch to opposite sides of the quilt center. Press toward print border. 2. Measure quilt from side to side through the center including the borders. Cut the 2 remaining border strips to that measurement and stitch to the top and bottom of quilt center. Press toward print border. Quilt top should measure 40½"x40½" with seams. 8


10 Construction and Assembly cont. Round 4 Requires: 4-Template B pairs F1 1-Template A pair, squares cut once diagonally, 3, 6, 7, 8, 9, 14, 19 and squares cut once diagonally F5 and ⅞ square cut once diagonally and ¼ squares F5,11,12, 13, 15, 20, F 23, 24 and 25 Round 4 Hour Glass Border Piecing the Hourglass Border 1. Lay out the triangles and squares as shown in diagram. 4" square cut once diagonally F7 2 F19 F3 F14 F9 F16 F5 5 F5 F15 F F12 3 F11 4 F7 2 F19 F3 F14 F9 F16 3¼" square F5 F7 5 2 F5 F15 F19 F13 F3 0 F14 4 F9 F12 3 F16 F11 4 F7 2 F19 F3 F14 F9 F16 Refer to diagram above for fabric placement. Piece 4 identical border units. 2. Select a 3¼"square and 2 triangles. Align square edge of triangle with the square, as shown. Triangles are slightly over sized and will extend beyond the edge of the square. Press toward center square. See diagram. 3. Continue sewing triangles and squares until you have 9 units. Make 9 units from assorted prints for each border. 1 unit 4. With right sides together align edge of the units, as shown, so that the seam allowances butt together. Stitch using a scant ¼" seam. Trim away triangle points. Press toward arrow. 5. Stitch 2 triangles together matching short edges to make 2 end caps for each border. Press toward arrow. Add to opposite ends of each border making sure the light triangle faces the pieced corner block. Press toward end caps. Make a total of 8 end caps. Stitch Align Align Seams cut away triangle points Make 4 end units with lights on the left. Make 4 end units with lights on the right Repeat Steps 2-5 to create a total of 4 borders. Each border should measure 4½"x40½" with seams. End unit Add end unit. Make 4 9 unit borders.
11 Piecing Corner Blocks 1. Stitch a pair of Template B Fabric 1 pieces to opposite sides of the Template A print cone. Press seams toward Fabric 1 pieces. See diagram. 2. Center and add the matching 2⅞"triangle to top of the cone to complete the block. Press seam toward triangle. Corner block should measure 4½"x4½" with seams. 3. Repeat Steps 1 & 2 to make total of 4 corner blocks 2 with Fabric 6 cones and 2 with Fabric 10 cones. Template B F1 F10 Template B F1 or F10 Template A or F10 Make 2 Make 2 Block should measure 4½"x4½" with seams. F10 4. Add pieced hourglass border to opposite sides of the quilt top. Press seams toward center. 5. Add a red and blue corner block to opposite ends of remaining borders. Press toward the corner block. Refer to quilt image for color placement. Stitch borders to top and bottom of quilt center. Quilt top should measure 48½"x48½" with seams. Round 5 Requires: 6 1½" xwof strips each F1, 29 and 30 Round 5 Border Corner Blocks Make 4 From 1 strip of fabrics F1, 9 and F30 cut the following pieces: F1: 4 1½"x1½" squares 9: 4 1½"x2½" rectangles and 4 1½"x1½" squares F30 : 4 1½"x2½" and 4 1½"x3½" rectangles Step 3 1½"x3½" 1½"x2½" 1½"x1½" Step 1 Follow stitching and pressing diagram for Steps 1, 2 &3 on the right to make four nine patch corner blocks. Each block should measure 3½"x3½" with seams. Step 2 F30 9 F1 Make 4 Block should measure 3½"x3½" with seams. 10
12 Construction and Assembly cont. Round 5 Border- cont. Assemble Borders 1. Cut one of the 1½"xWOF strips of Fabric 1 in half at the fold. 2. Join 2 strips plus the half strip of Fabric 1together end to end. Press seams open. Repeat with the remaining 2½ strips of the same color. 3. Repeat Steps 1 and 2 with the remaining two colors Fabrics 29 and Select three pieced strips one of each color. Stitch together in the following order F30, 9 and F1. Press seams away from Fabric 1. Repeat with the second set of From each pieced strip set cut 2 3½"x48½" border strips for a total of Stitch a border to opposite sides of quilt top. The Fabric 1 strip should be next to the quilt center. See quilt image. Press toward border strip. 7. Add corner blocks to opposite ends of the remaining border strips, as shown below. Press toward border. 8. Stitch border strips to top and bottom of quilt top and press toward the border strips to complete Round 5. Quilt top should measure 54½"x54½" with seams. Fabric 1 should face quilt center Step 7: Add corner blocks to opposite ends of the remaining border strips. Press toward border. 11
13 Construction and Assembly cont. Round 6 Requires: 10- pairs F pairs F1 16- pairs 4 8- pairs 3 4- pairs pairs 7, 28 and pairs F3 and pairs F9 8- pairs F ½ squares F1 32 3½ squares ½ squares F ½ squares 3 8 3½ squares 5 5 3½ squares 7, 28 and ½ squares F3 and ½ squares F9 2 3½ squares F10 Round 6 Star Border Steps below are for 1 block. Repeat steps to make 28 star blocks. 1. Stitch two matching spikes to opposite sides of a background peak. Press seams toward background. Repeat to make 4 matching units. Unit should measure 3½"x3½" with seams. = Unit should measure 3½"x 3½" with seams Make 4 matching units. 2. Lay out pieced units, center square and background squares to make a star block. 3. Stitch units to make 3 rows of 3. Join rows to make the star block. Press toward arrows. Block should measure 9½"x9½" with seams. Row 1 Row 2 Row 3 Star # Star Fab. Bkgd Make 1 8 F F F1 4 5 F F F Star block should measure 9½"x 9½" with seams 4. Refer to quilt image for block placement or choose your own arrangement. Piece 2 rows of eight star blocks and 2 rows of six blocks. The eight block rows should measure 9½"x72½" with seams. Six block rows should measure 9½"x54½" with seams. 5. Stitch the shorter rows to opposite sides of quilt center. Press toward quilt center. Add longer rows to top and bottom of quilt and press toward the center. Quilt top should measure 72½"x72½" with seams. Star 1 Make 5 Star 2 Make 5 Star 3 Make 5 Star 4 Make 4 Star 5 Make 4 Star 6 Make 3 Star 7 Make 2 12

 blocks. Press toward print. 5.")
14 Construction and Assembly cont. Round 7 Requires: 24 7" x7" squares F1 4 6½" x6½" squares F1 4 7" x7" squares each F4, 10, 14, 15, 16 and 21 Round 7 Half Square Triangle Border 1. Using a mechanical pencil draw a diagonal line on the wrong side of 24 Fabric 1-7" squares. 2. With right sides together align edges to pair each of the marked Fabric 1 squares with a 7"x7" print square. Because most of the fabrics are directional, stitch 2 pairs of blocks with diagonal line to the left and 2 pairs with diagonal line to the right. See diagram. 3. Stitch a scant ¼" on opposite sides of the marked line. 4. Using a ruler and rotary cutter cut stitched block on marked line to yield 2 half square triangle (HST) blocks. Press toward print. 5. Trim and square HST blocks to measure 6½"x6½" with seams. Make a total of 48 HST blocks. 6. Refer to quilt image for block placement. Note direction of HSTs and stitch 4 rows of 12 blocks. Row should measure 6½"x72½" with seams. 7. Stitch 2 rows to opposite sides of quilt top. Print triangles should point outward. Press seams toward triangle border. 8. Add the Fabric 1-6½"squares to opposite ends of remaining triangle rows. Press toward triangles. Stitch rows to top and bottom of quilt top. Quilt top should measure 84½"x84½" with seams. Make 4 rows. Each row should measure 6½"x72½" with seams 8

15 Outer Border and Finishing Outer Border 1. Open Fabric 31 to full width with the tan printed selvage on the left, move slightly to the right and select a starting motif. Clip fabric. 2. Measure over 8½" and clip fabric again. Continue to the right approximately 2¾" to find a repeat of the starting motif and clip again. Repeat to mark 4 8½" borders. See diagram. 3. Tear the clipped fabric down the lengthwise grain to yield 4 8½"x108" border strips. Width of Fabric Clip "starting" motif Clip Clip "starting" motif Clip Clip Clip Clip Length of Fabric 8½" 8½" 8½" 2¾" 2¾" 2¾" 8½" HINT: Since there is a little extra length in the border strips, you might wish to audition each border for the best placement of the motifs before cutting the final border lengths. 4. Measure quilt top from top to bottom through the center. Cut 2 borders from the prepared border strips to that measurement. Add prepared strips to opposite sides of quilt. Press seams toward border. 5. Measure quilt top from side to side through the center including the borders. Cut 2 borders from remaining prepared border strips to that measurement. Add prepared strips to top and bottom of quilt. Press seams toward border. 3. Quilt top should measure 100½"x100½" with seams. Finishing 1. Using a diagonal seam, join binding strips end to end. Press seams open. Fold prepared strip in half wrong sides together and press to make the binding. 2. Layer, Quilt, and Bind 14
16 Templates Size Up It this box should measure 1"x1" when printed Template A Actual size. Includes seam allowance Template B Actual size. Includes seam allowance Collection for a Cause Preservation Actual size. Includes seam allowance Actual size. Includes seam allowance

 Supporting")


17 Collection for a Cause Preservation (Howard Marcus) Supporting the Cause Collection for a Cause Preservation is the 19th in the series, and will benefit the International Quilt Study Center & Museum in Lincoln, Nebraska. Created to be a dynamic learning center for teachers, scholars, artists and quilters, the Study Center houses a comprehensive and accessible collection of quilts, related textiles and documents for the purpose of study, insight and inspiration. Fabric Requirements Finished Size: 100"x100" Fabric 1 3¼ yds Fabric 2 FQ Fabric 3 ⅓ yd Fabric 4 ⅝ yd Fabric 5 FQ Fabric 6 FQ Background Fabric 7 Fabric 8 Fabric 9 ⅓ yd Fabric10 ½ yd Fabric 11 Fabric Fabric 13 ⅝ yd Fabric 14 ⅓ yd Fabric 15 ⅓ yd Fabric 16 ⅓ yd Fabric 17 Fabric Fabric 19 Fabric 20 Fabric 21 FQ Fabric 22 Fabric 23 ½ yd Fabric 24 ⅝ yd Fabric 25 ¼ yd Fabric 26 ¼ yd Fabric 27 ⅓ yd Fabric 28 1¼ yds Fabric 29 ⅝ yd Fabric 30 ⅓ yd Blocks/Binding Fabric 31 3 yds 1 Panel Skill Level: Intermediate Outer Border Kit yardage may vary from amounts given on this project sheet. PS46230 Suggested Retail $10.00
Finished Size: 75"x 75"
 Finished Size: 75"x 75" Finished Size: 75"x 75" Block Size: 1"x1" and 6"x6" Quilters Basics Read instructions before beginning a project. All instructions include a ¼" seam allowance. Press as you go.
Finished Size: 71" x 82"
 Finished Size: 71" x 82" Fabric Requirements 38020-12 38027-11 38020-14 38022-14 38021-11 38023-13 Fabric 1 Fabric 5 Fabric 9 Fabric 13 Fabric 17 Background Fabric 21 Strip Set 1 ⅓ yd. ⅓ yd. 38021-12 38025-11
"Spike" Template 17. Template 17 "Spike" Template 17. "Spike"
 1 2 3 4 5 6 7 8 Cutting Note: Label pieces as they are cut. Finished Quilt 79" x79" Finished Block 9" x 9" Quilters Basics Read instructions before beginning a project. All instructions include a ¼" seam
Finished Size: 60 x70
 Finished Size: 60 x70 Finished Size: 60" x 70" Finished Block Size: 10" x 10" Cutting Label pieces as they are cut Quilters Basics Read instructions before beginning a project. All instructions include
Quilt 70"x70" Hartfield. Barbara Brackman
 Quilt 70"x70" Hartfield Barbara Brackman Quilt Size 70"x70" Hartfield Barbara Brackman Quilter Basics Read instructions before beginning a project. All instructions include a ¼" seam allowance. Press as
A new quilting collection inspired by the archives of the Victoria and Albert Museum exclusively for Moda Fabrics. Finished Quilt: 72"x 80"
 A new quilting collection inspired by the archives of the Victoria and Albert Museum exclusively for Moda Fabrics Finished Quilt: 72"x 80" Cutting Finished Size: 72" x80" Quilter Basics Read instructions
Stars& Coxcombs. Finished Size: 60. Terry Clothier Thompson
 Stars& S Terry Clothier Thompson "x60" Finished Size: 60 Stars & Quilter Basics Finished Size: 60"x60" Read instructions before beginning a project. Label each group of cut pieces. All instructions include
Compassion st in a Series Finished Quilt: 63"x70" Benefitting the National Multiple Sclerosis Society
 Collection for a Cause Compassion 1850-1860 (Howard arcus) 21 st in a Series Finished Quilt: 63"x70" Benefitting the National ultiple Sclerosis Society Compassion Collection for a Cause 1850-1860 Finished
Finished Size 72"x72" PS44160
 Finished Size 72"x72" PS44160 Finished Size 72"x72" Quilters Basics Read instructions before beginning a project. All instructions include a ¼" seam allowance. Press as you go. Press seams in one direction.
Cutting. Construction CREAMS
 Size: "x " Size: "x " Quilter Basics Please read all instructions before beginning. Label your cut pieces All instructions use ¼" seam allowance. Press all seams toward dark fabric. CREAMS Cutting Fabric
PS Finished Size 51"x56"
 PS19820 Finished Size 51"x56" Finished Size 51"x 56" Quilters Basics Read instructions before beginning a project. All instructions include a ¼" seam allowance. Press as you go. Press seams in one direction.
Love Grows Here Quilt
 SIZE 67½" X 81½" Pg 1 Finished Size: 67½"x 81½" 26298 H one 24 repeat 2/3 YARD Numbers within gray box = Number of Bolts needed to make 12 kits; based on continuous cuts FABRIC REQUIREMENTS 26299 H 7/8
QTfabrics.com QT Fabrics All rights reserved Pg 1. Designed by: Georgie Gerl. SIZE 77" X 63" for ½"binding 76½" x 62½" for ¼" binding
 SIZE 77" X 63" for ½"binding 76½" x 62½" for ¼" binding Jerry Gadamus Pg 1 Finished Size: 77"x 63" 26649X One Panel FABRIC REQUIREMENTS 26652K 3/4YARD 26653 X 1/4 YARD 26650 R 1 5/8 or 2 YARDS 1 BOLT 1
Cherish Nature. Cherish Nature. Fabric Requirements. FINISHED SIZE: 64"x 76" Finished Size: 64"x 76"
 Finished Size: 64"x 76" Fabric Requirements Fabric 1 Panel Fabric 2 Light Aqua Sponge Print center border ¼ yd. Light Butterfly Print ⅝ yd. Aqua Dots ⅓ yd. Fabric 5 Brown Egg Print ½ yd. Fabric 6 Brown
Finished Size: 86" x101" A 19th-century reproduction collection, recalling the past in tintype blues and sepia browns
 Finished Size: 86" x101" A 19th-century reproduction collection, recalling the past in tintype blues and sepia browns Quilters Basics Read instructions before beginning a project. All instructions include
Patterns. Wallhanging & Chapel in the Pines. Deb Strain
 2 Patterns Wallhanging & Chapel in the Pines Deb Strain Chapel in the Pines Deb Strain Wallhanging 35 x 52 40 x 40 Cutting Directions Quilter Basics Read instructions before beginning a project. All instructions
Canterbury Table Runner
 Canterbury Table Runner SIZE 20 X 46½ Designed by: Janice Averill quiltingtreasures.com quiltingtreasures All rights reserved. Pg 1 24539 B FABRIC REQUIREMENTS Design Yardage 24539 B ½ 24540 G ⅜ 24540
Featuring Puppy Love By Exclusively Quilters
 PUPPY LOVE 63 x 85 Finished BY DRAGONFLY FIBERART Featuring Puppy Love By Exclusively Quilters 4040 60969 90 1 1/2 Yards Outer Border & Center Panel 4040 60970 95 ¾ Yard & Letter Blocks 4040 60968 80 1
Be sure to read the entire pattern before beginning. All seam allowances are ¼-inch. Press seams to one side. WOF = Width of Fabric
 Sophia Sophia is a blazing star quilt variation featuring fabrics inspired by Jinny s travels to Ukraine. The stars are beautifully shaded and the quilt also boasts intricate-looking but easy-to-make medallions
Finished Size: 66"x66" Quilt is 66" x 66".
 Finished Size: 66"x66" Quilt is 66" x 66". Finished Size: 66" x 66". Quilter Basics Read instructions before beginning a project. All instructions include a ¼" seam allowance. Press as you go. Press seams
Quilts finish 53" x 66" (rose) & 56" x 69" (teal)
 & 56 x 69 (teal)") Quilts finish 53" x 66" (rose) & 56" x 69" (teal) Jinny Beyer s May Baskets quilt is a classic basket design made completely new with her border print fabrics. The border print fabric is featured in three
Quilts finish 53" x 66" (rose) & 56" x 69" (teal) Jinny Beyer s May Baskets quilt is a classic basket design made completely new with her border print fabrics. The border print fabric is featured in three
Woven Ribbons Featuring the Sand In My Shoes Fabric Collection by McKenna Ryan for Hoffman Fabrics Quilt Design by Denise M.
 Woven Ribbons Featuring the Sand In My Shoes Fabric Collection by McKenna Ryan for Hoffman Fabrics Quilt Design by Denise M. Russart Quilt: Approx. 72" x 84" Block size: 12" finished * includes binding
All a Flutter Quilt SIZE 64½" X 79½" QTfabrics.com QT Fabrics All rights reserved. Pg 1. Designed by: Wendy Sheppard
 SIZE 64½" X 79½" Pg 1 26358 R 1/3 YARD Finished Size: 64½" x 79½" FABRIC REQUIREMENTS 26359 P 26359 Q piecing only 26359 Q backing only 5 YARDS 1 BOLT 1 BOLT 1 BOLT 4 BOLTS 26360 Q 26360 R includes binding
Featuring fabrics from the Carriage House collection by Pat Speth
 P R O J E C T by Pat Speth Featuring fabrics from the Carriage House collection by Pat Speth Carriage House Quilt Size 72" x 72" Block Size 14" 2007 Pat Speth Materials Light (background) fabrics - 10
Coastal Chic Batiks Collection by Monique Jacobs
 FREE Quilt Pattern 52" x 65" quilt designed by Monique Jacobs Coastal Chic Batiks Collection by Monique Jacobs Coastal Chic Batik Quilt Instructions For best results, read the pattern completely first.
Fanfare SIZE 63½" X 75½" quiltingtreasures.com Quilting Treasures All rights reserved. Pg 1. Designed by: Wendy Sheppard
 SIZE 63½" X 75½" Pg 1 Finished Size: 63½"x 75½" 26060 Z 2 YARDS FABRIC REQUIREMENTS 26061 Q 1/4 YARD 26062 Q 2/3 YARD 26062 Z backing only 4-5/8 YARDS 2 BOLTS 1 BOLT 1 BOLT 4 BOLTS 26063 Q 3/8 YARD 26063
All a Flutter Table Runner
 SIZE 48½" X 21½" Pg 1 Finished Size: 48½" x 21½" 26358 R FABRIC REQUIREMENTS 26359 P 26359 Q 26360 Q piecing only 1 BOLT 1 BOLT 1 BOLT 1 BOLT 26360 Q backing only 1-5/8 YARDS 26360 R includes binding 5/8
Flying Geese. Size 66" X 76" QTfabrics.com QT Fabrics All rights reserved. Pg 1. Designed by: Wendy Sheppard
 Flying Geese Size 66" X 76" Pg 1 FABRIC REQUIREMENTS 26711 N piecing only 1-1/4 YARDS 26711 N backing only 4-3/4 YARDS 4 BOLTS 26712 A 1/2 YARD 26712 W 1/2 YARD 26713 E 3/8 YARD 26713 G 5/8 YARD 26713
Stars and Stripes. Finished Quilt Size: 65½" x 65½" Finished Block Size: 13" x 13"
 Stars and Stripes Finished Quilt Size: 65½" x 65½" Finished Block Size: 13" x 13" The red-white-and-blue color scheme gets you ready to celebrate all of those patriotic holidays! Materials Yardage is based
Abundant Blessings. Midnight Sky Patchwork Quilt by Kim Diehl. Finished Quilt Size: 611/2" x 611/2" A Free Project Sheet from
 Abundant Blessings Midnight Sky Patchwork Quilt by Kim Diehl Finished Quilt Size: 611/2" x 611/2" A Free Project Sheet from 49 West 37th Street, New York, NY 10018 tel: 212-686-5194 fax: 212-532-3525 Toll-free:
Red and Blue...and Roses, Too!
 #MakeItWithMarcusFabrics Diamonds Quilts 79 x 95 PAGE 2 of 7 Fabric Requirements & Cutting Instructions Version 1 Cream Border TEMPLATES - Page 6 and 7 Fabric A- Paisley Red 8400-0511 7/8 yard Fabric B-
Cut squares as indicated:
 Quilt Designed by Deb Mosa Finished Quilt Approx. 68 x 80 - Finished Block Size: 12 x 12 Night Owls fabrics by Exclusively Quilters - Style #3804 Fabric Requirements: Based on 42 wide fabric 2-1/4 yards
Section 1, Center Section Make One. Fabric Fabric # of Cutting Directions ID Location Strips
 Please read all instructions carefully prior to beginning quilt. All piecing uses a very accurate scant quarter inch seam allowance. In this quilt, accuracy is absolutely critical, so sew several sample
A Star in the Forest Table Topper 23 x 23 - A fat quarter project
 A Star in the Forest Table Topper 23 x 23 - A fat quarter project Read instructions before beginning. This project requires six fat quarters plus ¾ yard of backing fabric. Binding comes from one of the
From 1 fat quarter Cut 1 2½"xWOF strip
 Finished i Size: 60½" x 66" 6" Cutting Houses are cut on page 3. Trees (4 Fat Quarters) From each of the assorted green Fat Quarters cut 3 3" x 22" strips From the strips, cut 8 3" x 5½" Brown Ground and
Old Glory One Stamp. Alternate Piano Key Border. Morning Glory Designs by Reeze L. Hanson Quilts of Valor Pattern 65 x 79
 Old Glory One Stamp Alternate Piano Key Border Morning Glory Designs by Reeze L. Hanson Quilts of Valor Pattern 65 x 79 Instructions for cutting and piecing Quilt Panel and Border 1 1. Trim the quilt panel
Fiddlesticks and Fancies
 Fiddlesticks and Fancies by Kim Diehl Finished Quilt Size: 701/2" x 701/2" Finished Block Size: 14" x 14" A Free Project Sheet from 49 West 37th Street, New York, NY 10018 tel: 212-686-5194 fax: 212-532-3525
Bloom Lap Quilt. Design by Shannon Ownby of Fabrics N Quilts Skill Level: Confident Beginner Number of Blocks: 6 Block Size: 24" (finished)
") Approximate Quilt Size: 53" x 78½" Design by Shannon Ownby of Fabrics N Quilts Skill Level: Confident Beginner Number of Blocks: 6 Block Size: 24" (finished) 1 Amy Lee Weeks FABRIC REQUIREMENTS 23929 EH
Approximate Quilt Size: 53" x 78½" Design by Shannon Ownby of Fabrics N Quilts Skill Level: Confident Beginner Number of Blocks: 6 Block Size: 24" (finished) 1 Amy Lee Weeks FABRIC REQUIREMENTS 23929 EH
Dazzling Diamonds Quilt
 Dazzling Diamonds Quilt Featuring the Vintage Finds - Vivid Brights Collection by Katia Hoffman for EBI Fabrics Corporation Designed & Patterned by Helle-May Cheney 2015 Helle-May Designs 51 x 51 Fabric
56" x 72" quilt designed by Debbie Beaves. Aubergine Collection by Debbie Beaves. Aubergine Pattern Maywood Studio all rights reserved.
 56" x 72" quilt designed by Debbie Beaves Aubergine Collection by Debbie Beaves Page 1 Aubergine Free Quilt Pattern Instructions For best results, read the pattern completely first. Flying Geese Block
Uses Contempo s Anything Goes collection by Ann Lauer Finished Size: 57 x 57
 2016 Benartex, LLC It s easy to create your own art quilt with Ann Lauer s exciting new Anything Goes collection. Just follow the simple instructions and you ll have a fresh new modern wallhanging, perfect
Quilt meets Quilts of Valor size requirements.
 Monroe SIZE 60½" x 80½" Designed by Wendy Sheppard for Quilting Treasures Quilt meets Quilts of Valor size requirements. quiltingtreasures.com quiltingtreasures All rights reserved. Pg 1 FABRIC REQUIREMENTS
- 1 - Sewing Directions: 1. Trim each 8-1/2 square with the Outer Edge Template. Trim each 6-1/2 square with the Quarter Circle Template.
 Quilt Designed by Lucy A. Fazely Finished Quilt Approx. 70 x 80 - Finished Block Size: 8 x 8 Sing the Blues fabrics by Exclusively Quilters - Style #4039 Fabric Requirements: Based on 42 wide fabric 1-2/3
Figgy Pudding #131. Finished quilt size is 69-1/2 x 69-1/2. Materials Needed:
 #131 Figgy Pudding Finished quilt size is 69-1/2 x 69-1/2 Materials Needed: 10 fat quarters 2-3/4 yards background fabric 1 fat quarter for corner blocks 1 yard border fabric 2/3 yard binding fabric 4-1/2
How to use your GO! Qube with this Pattern
 How to use your GO! Qube with this Pattern Use this chart to find which GO! Qube dies are compatible with the dies listed on the pattern 1 2 3 4 5 6 7 8 Quilt Shape By Number 1 2 3 4 6 7 8 5 GO! Qube Item
Unit A. Unit B. Wide. Fabric 11. Narrow. Unit C
 r03.2016 Elephants, giraffes and zebras traverse this delightful crib-size quilt measuring 45" x 50". The large patches feature subtle images of friendly African animals, and are easily cut and pieced
 Bella! Finished Quilt Size 43" x 43" Featuring fabrics from the Bella Flora collection by Project Fabric Requirements 1550-33... 5 8 Yard 1551-66... 1 8 Yard 1552-33... ½ Yard 1553-33... ½ Yard 1554-33...
Shenandoah Baskets - Month 12 Quilt Assembly
 Shenandoah Baskets - Month 12 Quilt Assembly It s time to finish up the elements of the quilt top and put everything together! Step 1: Framing the Blocks Before being sewn together, each of the Shenandoah
Fourth of July Star A JINNY BEYER STUDIO Mini-Pattern
 Fourth of July Star A JINNY BEYER STUDIO Mini-Pattern Yardage is provided below (small/large). Instructions are provided for the small size with changes for the large size indicated in parentheses ().
59 x 74 quilt designed by Judy Livingston Graceful Moments fabric collection by Maywood Studio
 Graceful Stars 59 x 74 quilt designed by Judy Livingston Graceful Moments fabric collection by Maywood Studio Graceful Stars (59 x 74 ) Quilt Quilt designed by Judy Livinston. Graceful Moments fabric collection
Chloe Collection by Maywood Studio
 70" x 82" quilt designed by Denise Russell for Maywood Studio Chloe Collection by Maywood Studio Chloe Quilt Instructions For best results, read the pattern completely first. Press in the direction of
WHALE WATCHER. Navy Boat Cut 6 strips 3½" x WOF for Border 2. Blue Anchor Cut 1 strip 4¼" x WOF. Cut the strip into 6 squares 4¼" x 4¼".
 FINISHED QUILT SIZE 65" x 74" Finished Block Size 9" x 9" Measurements include ¼" seam allowance. Sew with right sides together unless otherwise stated. Please check our website www.rileyblakedesigns.com
All That Glitters Quilt
 All That Glitters Quilt SIZE 59 x 69 Red Design Gold Design quiltingtreasures.com quiltingtreasures Pg 1 KIT REQUIREMENTS Quilt Design 12 Kits Gold Red Yards Bolts 24435 R 24435 Z ⅜ 1 24437 R 24437 Z ⅞
Cut squares as indicated:
 Quilt by Deb Mosa Finished Quilt Approximately: 52" x 52" - Finished Block Size: 9" x 9" Cupcake Cuties fabrics by Exclusively Quilters - Style #3893 Fabric Requirements: Based on 44" wide fabric 7/8 yard
Morningmoon Unicorns. Quilt Designed by equilter. 56 1/2" x 62 1/2"
 Morningmoon Unicorns Quilt Designed by equilter 56 1/2" x 62 1/2" Skill Level: Intermediate Finished Quilt Size: 56 1/2" x 62 1/2" Finished Block Size: 10 1/2" x 12" Number of Blocks: 16 Please read all
CHRISTMAS CANDY. Quilt Finished Size: 64" x 80" Block Finished Size: 8" x 8"
 CHRISTMAS CANDY Quilt design and instructions by Wendy Sheppard Specification: Advanced Beginner Quilt Finished Size: 64" x 80" Block Finished Size: 8" x 8" Cutting Instructions: From Fabric A, cut for
HOW DOES YOUR GARDEN GROW Quilt
 HOW DOS YOUR GARDN GROW Quilt Size: 54 W x 66 H Designed by: Heidi Pridemore Level: Intermediate Free Pattern available on michaelmillerfabrics.com Materials "How Does Your Garden Grow" Quilt by Heidi
Rosy Cheeks Quilt Finished Quilt Size: 54 ½" x 70 ½"
 Designed by Jocelyn Ueng Rosy Cheeks Quilt Finished Quilt Size: 54 ½" x 70 ½" Quilt Fabric Materials White Tonal Floral* Red Large Rose Floral Red and Black Floral Black Small Floral Black Small Diamonds
The Flower Fields Quilt Featuring Flower Fields collection Finished Size: 66 x 78 Designed by Lynne Goldsworthy for Lecien
 The Flower Fields Quilt Featuring Flower Fields collection Finished Size: 66 x 78 Designed by Lynne Goldsworthy for Lecien Materials One FQ bundle of Lecien Flower Fields (scrappy binding is also made
Love & Glory. Fabric by Faye Burgos Quilt by Nancy Rink of Nancy Rink Designs FREE PROJECT. 49" x 49"
 FREE PROJECT Love & Glory Fabric by Faye Burgos Quilt by Nancy Rink of Nancy Rink Designs 49" x 49" Love and Glory Fabric by Faye Burgos Quilt by Nancy Rink Page 2 of 6 FABRIC REQUIREMENTS & CUTTING GUIDE
Let Freedom Ring. Navy Stars Cut 1 strip 4¼" x WOF. Cut the strip into 2 squares 4¼" x 4¼" and 1 square 3½" x 3½".
 FINISHED QUILT SIZE 64" x 81" Finished Block Size 15" x 15" Measurements include ¼" seam allowance. Sew with right sides together unless otherwise stated. Please check our website www.pennyrosefabrics.com
Sandi Blackwell s So Proudly We Hail
 Sandi Blackwell s So Proudly We Hail Designer: Sandi Blackwell www.stitchedbuy.com So Proudly We Hail Size 63 x 80 So Proudly We Hail A Square-agonals Design 63 x80 This pattern is constructed using the
Family Life Quilt. Design by Julia LaBauve Skill Level: Beginner Number of Blocks: 12. quiltingtreasures.com. Julia Cairns
 Design by Julia LaBauve Skill Level: Beginner Number of Blocks: 12 1 Approximate Size: 48½" x 56½" Julia Cairns 23744 QX 23742 X 23743 X 23745 S 23746 HG QUILT KIT REQUIREMENTS 12 Kits 18 Kits 24 Kits
Sassy Runner. Design by Wendy Sheppard Skill Level: Confident Beginner Number of Blocks: 8 Block Size: 8" x 8" (finished) quiltingtreasures.
 quiltingtreasures.") Approximate Size: 24½" x 42¼" Design by Wendy Sheppard Skill Level: Confident Beginner Number of Blocks: 8 Block Size: 8" x 8" (finished) 1 Studio 8 FABRIC REQUIREMENTS 24194 W 24195 N 24196 S 24196 N
Approximate Size: 24½" x 42¼" Design by Wendy Sheppard Skill Level: Confident Beginner Number of Blocks: 8 Block Size: 8" x 8" (finished) 1 Studio 8 FABRIC REQUIREMENTS 24194 W 24195 N 24196 S 24196 N
Central. Fabric. Dot to Dot Quilt. Supplies Needed. Instructions. Skill Level 2: Experience necessary. Project Instructions
 Fabric Project Instructions Central Dot to Dot Quilt Skill Level 2: Experience necessary Crafting Time: Weekend Project Supplies Needed 1 Fabric Central Dot Bundle 1 1 Fabric Central Dot Bundle 2 Fabric
ZOLA. Designed by: Wendy Sheppard exclusively for Ink and Arrow Fabrics. approximate SIZE: 57" x 61" because fabric should be fun!
 because fabric should be fun! approximate SIZE: 57" x 61" exclusively for Ink and Arrow Fabrics Pg 1 26106 CP includes binding 2/3 YARD Finished Size: 57" x 61" FABRIC REQUIREMENTS 26106 HG 1/8 YARD 26139
Designed by Robert Kaufman Fabrics
 Just STAR Kisses PARTY Designed by Robert Kaufman Fabrics www.robertkaufman.com Featuring Finished quilt measures: 56-1/4 x 56-1/4 For questions about this pattern, please email Patterns@RobertKaufman.com.
Chelsea. Quilt. quiltingtreasures.com 1. Christine Graf
 Designed By: Wendy Sheppard Specification: Confident Beginner Finished Size: 56" x 69" Finished Block Size: 10" x 10" (total of 12 blocks) 1 Christine Graf FABRIC REQUIREMENTS 23528 EA 24007 Q 24007 R
account for shrinkage, straightening, cutting errors and 3/4 yard yellow tonal (# )
") a My Universe b Quilt by Deb Mosa Finished Quilt Approximately: 52" x 52" - Finished Center Size: 32" x 32" My Universe fabrics by Exclusively Quilters - Style #3813 Fabric Requirements: Based on 44" wide
a My Universe b Quilt by Deb Mosa Finished Quilt Approximately: 52" x 52" - Finished Center Size: 32" x 32" My Universe fabrics by Exclusively Quilters - Style #3813 Fabric Requirements: Based on 44" wide
Susannah Bee Quilt. Quilt designed by Terri Butler Finished size is approximately 43" x 60" A DIVISION OF HAMIL GROUP
 Susannah Bee Quilt Quilt designed by Terri Butler Finished size is approximately 43" x 60" A DIVISION OF HAMIL GROUP Quilt designed by Terri Butler Materials and Cutting Note: WOF is width of fabric from
Pompeii. Mist Colorway. Fabric Requirements: Cutting Instructions: Block Assembly:
 Pompeii Mist Colorway Quilt designed by Debby Kratovil for Blank Quilting Finished Quilt Size: 59" x 59" Block Size: 37 Center Star 8" Border Stars Fabric Requirements: Fabric A: 1 yd 6243-Cocoa (star
Sunflower Garden Topper
 Quilt designed by: Sue Harvey and Sandy Boobar of Pine Tree Country Quilts Finished quilt size: 26" x 26" Finished block size: 6 ½" x 6 ½" Number of blocks: 9 Angela Anderson 1 FABRIC REQUIREMENTS Design
Confetti Blossoms SIZE 61½" X 73½" QTfabrics.com QT Fabrics All rights reserved. Pg 1. Designed by: Wendy Sheppard
 SIZE 61½" X 73½" Pg 1 Finished Size: 61½"x 73½" FABRIC REQUIREMENTS 26233 H 1 YARD 26234 H 3/8 YARD 26234 Z 1-5/8 YARDS 26235 H 3/8 YARD 1 BOLT 1 BOLT 2 BOLTS 1 BOLT 26236 P includes binding 1 YARD 26236
Cheri Good Quilt Design s Ribbon Star
 Cheri Good Quilt Design s Ribbon Star Designer: Cheri Good Quilt Designs Ribbon Star Size 56 x 56 #110A Ribbon Star Strip Quilt Supplies Finished quilt size: 56 x 56 Cotton thread to match fabrics Basic
Christine Graf. Sausalito. Finished Quilt Size: 46½ x 54½. Finished Pillow Size: 18 x 18.
 Finished Quilt Size: 46½ x 54½ Finished Pillow Size: 18 x 18 22220 R 22221 S 22221 E 22216 J 22217 O 22221 O 22218 J 22220 G 22218 Z 22213 J 22215 J Sausalito Quilt FABRIC REQUIREMENTS Design Yards 22220
Yardage for Antique colorstory Quilt for Vintage colorstory quilt Fabric A blocks 1 panel ACF ACF
 Bird Song quilt pattern, featuring Nature s Poetry by Chad Barrett Quilt designed by Jean Ann Wright Quilt size: 72" x 86" Block size: 12" Yardage for Antique colorstory Quilt for Vintage colorstory quilt
Floral Cluster. windhamfabrics.com. June Designed by Wendy Sheppard Featuring Botany by Kelly Ventura FREE PROJECT
 June 2018 Designed by Wendy Sheppard Featuring Botany by Kelly Ventura size: 70 x 70 windhamfabrics.com FREE PROJECT this is a digital representation of the quilt top, fabric may vary. please note: before
Lone Star Quilt from a Jelly Roll. Written by Donna Jordan for Jordan Fabrics Finished Size: 58 x 74
 Lone Star Quilt from a Jelly Roll Written by Donna Jordan for Jordan Fabrics Finished Size: 58 x 74 Required Materials: 36 2 ½ Strips WOF Background and border: 3 ½ yards Binding: 5 /8 yard Backing: 3
A Scout Is Patriotic. Designed by: Wendy Sheppard Finished Size: 62 x 78 Skill Level: Intermediate.
 Designed by: Wendy Sheppard Finished Size: 62 x 78 Skill Level: Intermediate 1 Boy Scouts of America, the Universal Emblem, Prepared. For Life. and other BSA trademarks are trademarks or registered trademarks
Stack-n-Whack. Kyoto Fans. by Bethany S. Reynolds
 Stack-n-Whack Kyoto Fans by Bethany S. Reynolds The traditional fan block gets an elegant new look when it s designed for diamond-shaped blocks! Queen and Throw sizes are included in this pattern. Use
Miyako Quilt Fabric Requirements
 Topaz Garnet Turquoise 3210-01 3214-05 3214-02 3211-05 3212-01 3208-06 3210-01 3214-05 3214-02 3209-02 3213-03 3208-03 Miyako Quilt Fabric Requirements 3210-01 3214-05 3214-07 3209-04 3213-04 3208-01 Wall
Quilt designed by Sue Harvey and Sandy Boobar of Pine Tree Country Quilts Yardages and Cutting
 Fowl Play 54" x 60" Quilt designed by Sue Harvey and Sandy Boobar of Pine Tree Country Quilts www.pinetreecountryquilts.com Yardages and Cutting Note: WOF means width of fabric from selvage edge to selvage
Circus Circus. Just Color! Fabric and Materials Needed. Featurning fabric from the Circus Circus collection. /Artworks! Licensing
 Circus Circus Panel: 2018-17 Flags and Blocks: 2019-11 Lt. Blue Tossed: 2020-11 Red Tossed: 2020-88 Yellow Print: 2021-4 Lt. Blue Tonal: 2023-11 *Med. Blue Tonal: 2023-17 Lime Tonal: 2023-66 Red Tonal:
Pompeii. Parchment Colorway. Fabric Requirements:
 Pompeii Parchment Colorway Quilt designed by Debby Kratovil for Blank Quilting Finished Quilt Size: 59" x 59" Block Size: 37 Center Star 8" Border Stars Fabric Requirements: Fabric A: 1 yd 6244-Patina
Make Templates: Trace templates onto template plastic. Cut out and label.
 Quilt Designed by Deb Mosa Finished Quilt Approx. 61-1/2 x 61-1/2 - Finished Center Size: 40 x 40 Cotillion fabrics by Exclusively Quilters - Style #3999 Fabric Requirements: Based on 44" wide fabric 1-2/3
Original Recipe. Option A - 30" x 30" Option B - 12" x 36" Luck of the Irish Table Toppers by Ribbon Candy Quilt Company
 Original Recipe Option A - 30" x 30" Option B - 12" x 36" Luck of the Irish Table Toppers by Ribbon Candy Quilt Company Option A 1 green fat quarter for shamrocks 4 fat quarters for pieced border 3/8 yard
A Free Project Sheet From. Finished Basket Quilt Size: 57" x 57"
 Finished Basket Quilt Size: 57" x 57" A Free Project Sheet From 49 West 37th Street, New York, NY 10018 tel: 212-686-5194 fax: 212-532-3525 Toll Free: 800-294-9495 www.henryglassfabrics.com Finished Quilt
Fabric and Supplies. Featuring fabrics from the Ellie II collection by Sue Penn for.
 s r e h t a e F Elegant Featuring fabrics from the Ellie II collection by Sue Penn for Finished Quilt Size 50" x 50" Quilt design by Abigail Dolinger for Studioe Fabrics ay Black Colorw Fabric and Supplies
Shenandoah Baskets General Instructions
 General Instructions Before Starting Read these General Instructions before starting and refer to them as necessary when making each month s blocks. Illustrations show the dark background version of the
Handful of Stars. by Kim Diehl. Finished Quilt Size: 621/2" x 621/2" Finished Star Block Size: 8" x 8" A Free Project Sheet from
 Handful of Stars by Kim Diehl Finished Quilt Size: 621/2" x 621/2" Finished Star Block Size: 8" x 8" A Free Project Sheet from 49 West 37th Street, New York, NY 10018 tel: 212-686-5194 fax: 212-532-3525
Franklin BY KATHY HALL. Free Pattern Download Available. Franklin Quilt designed by: Kathy Hall. Quilt Size: 66" x 66" andoverfabrics.
 Franklin BY KTHY HLL Franklin Quilt designed by: Kathy Hall Quilt Size: 66" x 66" andoverfabrics.com Free Pattern Download vailable 1384 Broadway New York, NY 10018 Tel. (800) 223-5678 andoverfabrics.com
... Had a Little Lamb
 ... Had a Little Lamb Quilt designed by Sue Harvey & Sandy Boobar of Pine Tree Country Quilts Finished size is approximately 50 x 56 A DIVISION OF HAMIL GROUP Quilt designed by Sue Harvey and Sandy Boobar
Tulip Paths. Designed by Wendy Sheppard Featuring the Doodle Pop collection by Lori Gardner Woods
 Tulip Paths Designed by Wendy Sheppard Featuring the Doodle Pop collection by Lori Gardner Woods Finished quilt measures 81 x 93 Note: This quilt is a digital representation. Your finished quilt may vary
Kimono Collection MATERIALS. Finished quilt size CUTTING
 Kimono Collection Colourful Japanese fabrics take the place of traditional paper in these tiny origami kimonos and a simple nine-patch quilt shows them off to perfection. MATERIALS Nine pieces of assorted
Finishes 80" square. Available in two colorways.
 Finishes 80" square. Available in two colorways. Jinny eyer s Chelsea quilt is based on an asymmetrical log cabin block so the construction is straightforward. Strongly contrasting colors on the two halves
Designed by Elise Lea for RK
 JustAND Kisses STARS STRIPES Designed by Elise Lea for RK www.robertkaufman.com Featuring Finished quilt measures: 72 x 82 For questions about this pattern, please email Patterns@RobertKaufman.com. Fabric
Crescendo Pin Wheel Quilt
 Crescendo Pin Wheel Quilt Pinwheel quilts are the perfect example of a quilt pattern inspired by a real object. Whimsical and decorative, pinwheel quilts create gorgeous motifs that any quilter will love.
Harmony Medallion Quilt
 Harmony Medallion Quilt Quilt Designed By: Shannon Ownby Approximate Finished Quilt Size: 71" x 75" Finished Block Size: 20" x 20" Number of Blocks: 5 quiltingtreasures.com quiltingtreasures All rights
LIVE.LOVE.SEW FEATURE BLOCKS B.O.M PROGRAM
 LIVE.LOVE.SEW FEATURE BLOCKS B.O.M PROGRAM FEATURE BLOCKS Congratulations on finishing your twelve Feature Blocks! It has been so much fun sewing along with you all this past year, learning more about
Original Recipe. Fandango Filing Cabinet Cover by Cara Wilson
 Original Recipe Fandango Filing Cabinet Cover by Cara Wilson Hey everyone! I'm Cara from CaraQuilts {http://www.caraquilts.com} and I've got a great project today to hide that ugly filing cabinet we all