SketchBook for Galaxy
|
|
|
- Marlene Joy Dorsey
- 5 years ago
- Views:
Transcription

1 SketchBook for Galaxy
2 Copyrights and Trademarks SketchBook for Galaxy v Autodesk, Inc. All Rights Reserved. Except as otherwise permitted by Autodesk, Inc., this publication, or parts thereof, may not be reproduced in any form, by any method, for any purpose. Certain materials included in this publication are reprinted with the permission of the copyright holder. Trademarks The following are registered trademarks or trademarks of Autodesk, Inc., and/or its subsidiaries and/or affiliates in the USA and other countries: SketchBook, SketchBook Copic Edition, SketchBook Designer, SketchBook Express, SketchBook Express for ipad, SketchBook Express for Android, SketchBook Mobile, SketchBook Mobile Express, SketchBook MobileX, SketchBook Ink, SketchBook Pro, SketchBook Pro for ipad, SketchBook Pro for Android, and SketchBook for Galaxy. All other brand names, product names or trademarks belong to their respective holders. Disclaimer THIS PUBLICATION AND THE INFORMATION CONTAINED HEREIN IS MADE AVAILABLE BY AUTODESK, INC. AS IS. AUTODESK, INC. DISCLAIMS ALL WARRANTIES, EITHER EXPRESS OR IMPLIED, INCLUDING BUT NOT LIMITED TO ANY IMPLIED WARRANTIES OF MERCHANTABILITY OR FITNESS FOR A PARTICULAR PURPOSE REGARDING THESE MATERIALS. Published by: Autodesk, Inc. 111 McInnis Parkway San Rafael, CA 94903, USA ENU version
3 Contents What s New 5 Introduction 7 Sketching 8 The canvas 8 Toolbars 9 Clutch 9 Corner tools 10 Undo brushstrokes 10 Redo brushstrokes 10 Double Puck 11 Info/Settings 12 Create a new sketch 12 Using PEN.UP 12 Pen Mode 12 Gestures 13 Zoom into and out of the canvas 13 Reposition the canvas 13 Brushes 14 The Brush Editor 15 Select a brush 15 SWAP BETWEEN BRUSHES 15 Smudge 15 Creating favourites 15 Customise brushes 16 Change brush properties 16 Colours 17 The Colour Editor 18 Create a custom colour 18 Using the Colour Picker 18 Turning a brush into an eraser 18 Change RGB and HSB 18 Accessing the Swatch panel 19 The Copic Colour Library 20 Select a colour 20 Select a swatch 20 Change your view 21 Zoom in and move around a sketch 22 Zoom out of a sketch 23 View the full canvas 23 Naming your sketch 25 Creating a sketch 25 Importing an image 25 What else can I do? 26 Thumbnail view 27 Transferring files from an older version of SketchBook to version Folders 30 The Trash folder 32 Sketching and painting tools 33 Selection 34 Use your selection to make a mask 34 Adding to a selection 35 Removing sections from a selection 35 Replacing a selection 35 Repositioning your selection 36 Invert a selection 37 Symmetry 38 Styles 39 Time-lapse Recording 40 Time-lapse Controller 40 Importing and sharing 42 Troubleshooting 42 Flood fill 43 Changing flood fill tolerance 43 Filling one or all layers 44 Transform 45 Text 46 Importing a sketch 47 Placing your imported file 47
4 Guides 47 Using layers 48 Layers and the Layer Editor 49 What are layers? 49 How do I use layers? 49 Hide and show a layer 50 Preserve layer transparency 50 Add a layer 50 Setting a background colour 51 Copy and paste layer content 51 Cut and paste layer content 51 Duplicate a layer 52 Clearing a layer 52 Merge layers 52 Delete a layer 53 Setting a layer colour 53 Using templates 53 Reorder layers 54 Change layer opacity 54 Blend modes 55 Multiply layers 55 Add layers 55 Screen layers 55 Apply blend modes 55 Transforming a layer 56 Move, rotate, or scale a layer 56 Save, export, and post sketches 57 Saving 58 Export your sketch 58 Sharing an image 58 Changing preferences 59 Factory Defaults 60 About 60 Getting SketchBook information 61 Help 62 Support 62 News 62

5 What s New This chapter introduces new features and a list of improvements & enhancements that can be found in this release of SketchBook for Galaxy.

6 Here s the updates you ll find in this version of SketchBook: When in Pen Mode, you will see a reminder We now support 64-bit devices The brush preview has been updated and improved Capture time-lapse footage, as you draw. Every 16 frames you capture, creates one second of footage. Import from camera - take a picture with your camera and bring it into SketchBook as a background, inspirational image, or just as something to draw over Various bug fixes

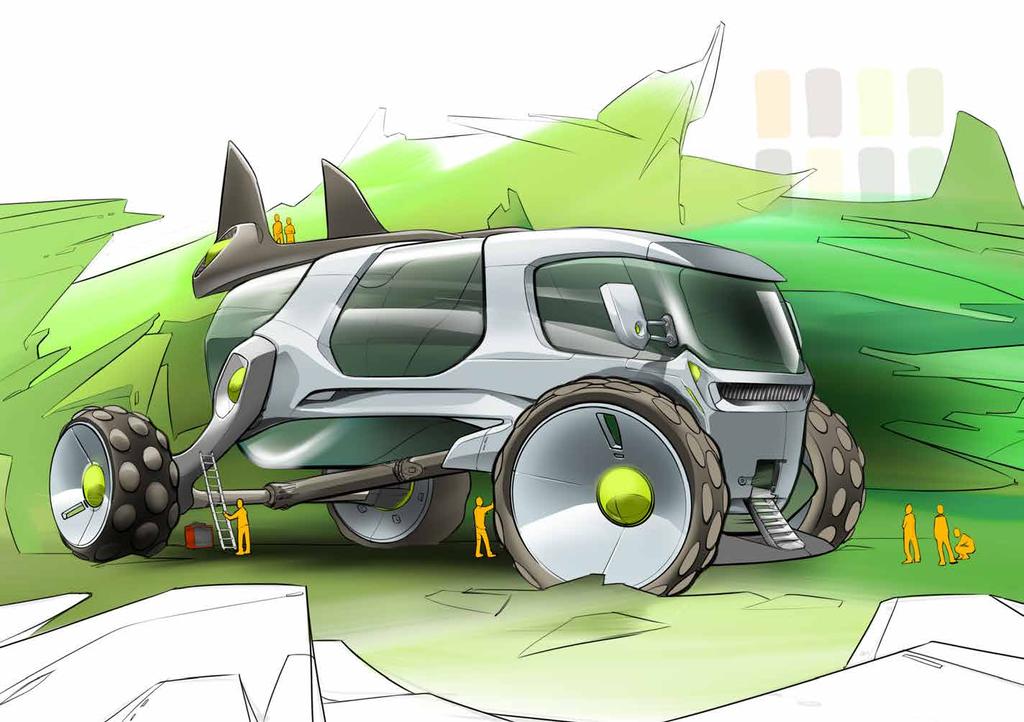
7 Introduction Welcome to SketchBook for Galaxy. Enjoy the same SketchBook desktop experience on your Samsung Galaxy device with a professional-grade stroke engine, and produce stunning quality results.

8 Sketching Drag your finger to start sketching. A default brush and colour are used. To change the brush or colour, see Colours. The canvas When you open SketchBook, the device you are on will determine the layout of the canvas. For mobile users, you will see a toolbar and the clutch. Use these to access everything within SketchBook for Galaxy. For tablet users, you will see the toolbar, a scrollable palette containing the full brush palette, which includes advanced brushes and the customisable Brush Library, and colours, which accesses the Colour Editor, along with the Layer Editor with blend modes, and transparent colour.


9 Toolbars Use the tools in the toolbar to create, edit, and access an assortment of editors, and tools. Many tools have their own contextual toolbars, containing tools and options specific to that tool. NOTE The toolbar may look different, depending on the type of device you re using. Due to the size of some devices, you may have to swipe left or right in these toolbars to access more options. The toolbar contains the following tools: to create a new sketch, access the Gallery, share to and access the PEN.UP Gallery, access the Preferences, turn on or off pen mode, or access the Help. to either hide or display the interface. to access tools. to access the Brush Editor. to access the Colour Editor. to access the Layer Stack. Due to the size of some devices, swiping left or right in these toolbars to access more options. Clutch For mobile users, tap (Clutch) to access the corner tool and Double puck (see Double Puck). Double-tap a corner to access its corner tool.

10 Corner tools For mobile users, when you tap, the Corner tools are visible. Access a corner tool without making it visible by double-tapping a corner of the screen. The default corner quick tool mappings are: Top left Top right Bottom left Bottom right Customise the corner tools Tap-hold a corner tool to display a list of all available tools. Select one. This new tools will replace the previous one. Undo brushstrokes SketchBook is more forgiving than paper or canvas. When you place a stroke and decide it s not what you had in mind, you can undo it. You have 10 levels of undo. To undo an action, do one of following: Double-tap the bottom left corner of the screen. To undo the previous action, tap, then tap. Redo brushstrokes If you undo a stroke and decide you want it back, unlike traditional sketching, you can get it back. You have 10 levels of redo. To back out of undos (redo), do one of the following: Double-tap the bottom right corner of the screen. Tap, then tap.


11 Double Puck 1. Brush size and opacity 2. Current brush 3. Current colour Use the Double Puck for changing the size of a brush and its opacity, using the top portion, and saturation and luminance/brightness of a colour, using the bottom. For mobile users, tap to access the Double Puck. For tablet users, tap. Tap the canvas to exit the Double Puck. What can I do with the Double Puck? Use the Double Puck to: Resise a brush From within the top section of the puck, tap-drag right to increase brush size and left to decrease it. Change paint opacity From within the top section of the puck, tap-drag up to increase opacity and down to decrease it. NOTE To change layer opacity, see Change layer opacity. Change colour saturation From within the bottom section of the puck, tap-drag right to increase colour saturation and left to decrease it. Change colour brightness From within the bottom section of the puck, tap-drag top to increase colour luminance/brightness and bottom to decrease it. Access the Brush Editor and Colour Editor From within the Double Puck, tap the top section of the puck to open the Brush Editor. Tap the bottom section to open the Colour Editor.

12 Info/Settings After tapping, the Info/Settings menu appears. It contains the following options: New Sketch - Create a new sketch. For more information, see Create a new sketch. Gallery - Access the Gallery. For more information, see Gallery. Share - Share your sketch to your device, PEN.UP, or other places. For more information, see Save, export, and post sketches. PEN.UP - Open the PEN.UP app to access its community. For more information, see Using PEN. UP. Preferences - Customise tools and application settings. For more information, see Changing preferences. Using PEN.UP PEN.UP is a Samsung community where you can share your work, chat with others, and browse through the work of other artists. Pen Mode For users of devices with a build in own stylus. Responds to the pen pressure if sketching with a pressure-sensitive stylus. In Pen Mode, you can only sketch with a pen. This is to prevent your fingers from leaving accidental strokes. NOTE You can still use your fingers to open the menu, pick different brushes, and for multi-touch gestures. Ensure Enable multi-touch gestures is enabled in the Pen Mode dialog. Tap, then Pen Mode to turn pen mode on or off. Pen Mode - Responds to the pen pressure, if sketching with a pressure-sensitive stylus. For more information, see Pen Mode. Support - Access the in-app help. For more information, see Getting SketchBook information. Create a new sketch To create a sketch, tap, tap, and select a canvas size. The maximum number of layers is displayed next to the canvas size. For a custom canvas, tap Other > Custom. Enter a length and width. The file size and maximum number of layers is displayed. Tap. Tap the last entry again to create the canvas.


13 Gestures In the canvas, double-tap the corners of the screen to access different tools or use two fingers for zooming, moving, and rotating. Zoom into and out of the canvas On the screen, pinch together or expand two fingers to zoom in or out. Pinch and expand your fingers to zoom in. Pinch your fingers together to zoom out. Reposition the canvas With two fingers, drag in different directions to change your view of the canvas. Keep in mind, this does not change the placement of layers on the canvas. For this, see Move, rotate, or scale a layer.

14 Brushes


15 The Brush Editor Select a brush Select brushes from the Brush Editor. 1. Access brush attribute sliders 2. Swap between brushes 3. Close editor 4. Favourites 5. Scrollable Brush Library Use the Brush Editor for an assortment of others, and changing the properties of a brush. To access the Brush Editor, in the toolbar, tap. TIP Another way to access the Brush Editor is to tap to access the Double Puck. Tap the top portion of the puck to access the Brush Editor. 1. In the Brush Editor, drag up or down to scroll through and access other brushes. 2. Tap a brush. 3. Tap the canvas to continue. SWAP BETWEEN BRUSHES Use one brush, then return to a previous one. After using a brush, select another, then flick toward between them. Smudge to move In the Brush Editor, drag up to scroll through the brush list. Tap one of the Smudge brushes to paint over an area to blend it, simulating the effect on a finger dragging over the charcoal line of a drawing. Creating favourites For those brushes you always use and really love, we created the Favourites section in the Brush Editor. Now, you can drag and drop these brushes here, so they are front and centre, for whenever you need them.


16 Customise brushes Looking for something different? Change the settings of a brush to customise it. Within the Brush Editor, there are tools for changing the radius, opacity, spacing, and colour of a brush. To reset brushes to their default settings, see Factory Defaults. Change brush properties Use the sliders, in the Brush Editor, to change the properties of a brush. Tap-drag up to scroll through the sliders. 1. To open the Brush Editor, tap. 2. Tap a brush. 3. Tap, then do either of the following: Tap-drag the slider to the right to increase its value or tap the + to the right of the slider to increase it by a set amount. Tap-drag the slider to the left to decrease its value or tap the - to the left of the slider to decrease it by a set amount. NOTE The properties panel scrolls to list more parameters. 4. Use the Hardness slider to change the brush tip.
17 Colours

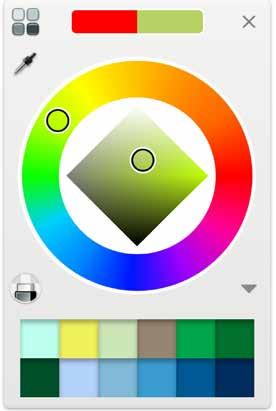
18 The Colour Editor 1. Copic Colour Library 2. Colour Picker 3. Saturation/Brightness 4. Transparent Colour 5. Swatches 6. Close Colour Editor 7. Hue 8. HSB/RGB/Swatch toggle 9. Previous/Current colour Create a custom colour Use the panels of the Colour Editor to create or choose a colour. 1. Tap. 2. Do any of the following: Tap-drag within the diamond to change the saturation and luminance. Tap, then tap-drag the sliders to change the RGB or HSB values. Tap-drag within the ring to change the hue. The Colour Editor contains a colour wheel for selecting a colour, colour picker for grabbing a colour, Copic Colour Library, and sliders for setting RGB and HSB values. Flip the panel to access colour swatches and create a custom library of colour. Colours created in the Colour Wheel can be stored as swatches for future use. See Create and change a swatch. Using the Colour Picker Tap. Tap-drag the Colour Picker over a colour to select it. Turning a brush into an eraser Once you have a brush selected, tap to assign a transparent colour to the current brush and create a custom eraser. It removes pixels from that layer. Change RGB and HSB You can create a colour by setting RGB and HSB values. Do one of the following: Tap, then HSB to access the HSB sliders. Tap, then RGB to access the RGB sliders. Tap-drag the sliders to set a value.

19 Accessing the Swatch panel The Swatch panel houses a selection of pre-defined colour chips. As you create swatches, they replace others and appear in this panel. IMPORTANT You must close out of the Editor to save your swatches. Do this by either selecting another tool from the toolbar, sketching, saving, or letting the editor close on its own. When working on projects where the client has provided a colour palette, capture and store swatches of these colours for future use. After a project is completed, to remove swatches, there are two methods: Reset preferences Replace the swatches Select a swatch After you have accessed the Colour Editor, use the Swatches to select a colour swatch. 1. Tap, then to access the Swatches, if not already visible. 2. Tap a swatch, then start painting. Create and change a swatch After creating a colour, save it by creating a swatch. The swatches you add, replace existing ones. 1. Do any of the following: Create a colour using the Colour Wheel. Capture a colour using (eyedropper). 2. Tap, then to access the Swatches, if not already visible. 3. Tap-drag the colour ribbon onto or between swatches to add the colour to the list.


20 The Copic Colour Library 1. Access Colour Wheel 2. Current colour family 3. Current colour name 4. Close Colour Editor 5. Current colour 6. Complementary colour The Copic Colour Library houses a selection of predefined colour chips. Select a colour After selecting a brush, select a colour in the Colour Editor. Tap-drag to scroll through colours. Select a swatch After you have accessed the Colour Editor, use the Copic Colour Library to select a colour swatch. 1. In the Colour Wheel, tap to flip to the Copic Colour Library. To access different colour palettes, tap-drag the slider. To select the complementary colour, tap a colour chip to load its complementary colour. Tap the complementary colour to select it. NOTE Not every colour will have an assigned complementary colour. For those without, a selection of colours similar to its complementary or nothing will appear. 2. Tap a swatch, then start painting.

21 Change your view Zoom in on or out of an area of your sketch, or move around the canvas and change your view.


22 Zoom in and move around a sketch Zoom in to see details and have finer control when sketching and painting. With two fingers, drag and expand on the canvas to zoom in. NOTE To zoom in further, repeat this action as many times as necessary. With two fingers, drag the canvas to change its placement.
 and tap it")


23 Zoom out of a sketch View the full canvas Set a corner tool to Frame Canvas (see Customise the corner tools) and tap it to instantly change the view and display the full canvas. Use zooming out for when you want to have a better view of the overall composition. With two fingers, pinch the canvas. NOTE To zoom out further, repeat this action as many times as necessary.
24 Gallery


25 The Gallery is where your sketches are saved. If you worked on something and want to go back to it, if it is not still on your canvas, you can find it in the Gallery. Do either of these to access the Gallery: In the toolbar, tap, then Gallery. Pinch the canvas until your sketch opens in the Gallery, if this preference is enabled. NOTE To ensure your image is saved to the Gallery, swipe to the left. This automatically saves it. Any other action will not. When you open the Gallery, your sketch appears. Naming your sketch To name our sketch, tap Untitled and enter another name. The dimensions and number of layers your sketch has appears below. Tap the check to save the changes. Creating a sketch From the Gallery, to create a sketch, tap the canvas size. Importing an image From the Gallery, to import an image, tap or New from camera., select New Sketch, and set and select New from image


26 What else can I do? You can stay in this view and swipe left or right to see other sketches, create a new sketch, or use the options here to share a sketch, rotate it, create a duplicate, export to PSD, or delete it. To edit a sketch, tap a sketch to select and load it onto the canvas. To switch to thumbnail view and organise your sketches into folders, pinch the screen or tap the folder name along the top. To quickly delete a sketch, drag it to the top of the screen. To undo this, tap the red bar along the top. To share, view a slide show, rotate an image, create a duplicate, export a PSD, or delete an image, tap.
27 Thumbnail view From within the Gallery, pinch the screen to enter the thumbnail view. This view opens up all sorts of options, from organising your sketches into folders and renaming them, to sharing, rotating, duplicating, exporting as PSD, and deleting any sketches. Tap a sketch to return to the previous view. Selecting sketches To select one or more sketches in the thumbnail view, tap, then tap the sketches. A blue bar appears at the bottom of the screen. 1. Show/Hide Folders 2. Sketches 3. Selection 4. Add 5. Import legacy data To share or delete an image, tap. To exit selection mode, tap.

28 Deleting a sketch Tap-drag a thumbnail up to the top of the screen to delete it. To undo this, tap the red bar along the top. Accessing folders Tap Untitled (the folder name) to access the Trash and other folders.


29 Transferring files from an older version of SketchBook to version 3.2 For anyone with sketches from SketchBook 2.9 or earlier, who wants to continue working on them in this version, you must tap Import legacy data, find the sketch, then tap Import. Now, you are ready to work in the current version of SketchBook. Via Dropbox The Dropbox app must be installed for this workflow. 1. In SketchBook v2.9, from the Gallery, select a sketch and tap, select Share as PSD, then Dropbox. 3. Select the file and tap and select SketchBook for Galaxy to open the sketch in version In Dropbox, tap Upload. In the dialog that appears, you will see the image name.


30 Folders At the top of the thumbnail view, you will see Untitled. Tap this to access folders, orgganise your sketches, delete sketches or folders, or restore mistakenly deleted sketches. 1. Trash folder 2. Folder contents 3. Selection 4. Add 5. Import legacy data 6. Show/Hide Folders 7. Create Folder Creating a folder Tap to create a folder for your sketches. Renaming a folder To rename a folder, tap the folder name, enter the new name, and tap.

31 Adding sketches to a folder To add sketches to a folder, tap to enter Selection mode, tap all the sketches you want added to the folder, tap-hold a sketch, then drag onto a folder. Deleting a folder When you delete a folder it and all its contents are permanently deleted. There is no way to recover the deleted content. 1. To delete a folder, tap-hold the folder until appears in the toolbar below. 2. Tap to delete the folder. 3. Tap Yes to delete or Cancel not to. Deleting sketches 1. To delete one or more sketches, tap, then the sketch or sketches from the Gallery or from within a folder. 2. Tap and select Delete. The sketch appears in the Trash folder.


32 The Trash folder 1. Trash folder 2. Restore selected sketch 3. Deleting options 4. Settings 5. Show/Hide Folders 6. Add folder 7. Folder contents The Trash folder houses all sketches you ve initially deleted from the Gallery. When you delete a sketch, this is where is goes. However, if you ever mistakenly delete something, you can get it back with Restore selected sketch. When you tap the Trash folder, thumbnails of its content appear. At this point, you can do any of the following: Tap a sketch,, then Restore selected sketch to remove the sketch from Trash and return it to where it was before. Tap a sketch,, then Delete selected sketch to permanently delete it from Trash and the app. Tap a sketch,, then Empty Trash to permanently delete the contents of Trash and the app. Tap to set how many files are kept in Trash at any one time. If the number of sketches exceeds this number, the first sketches will be permanently deleted.


33 Sketching and painting tools Tap in the toolbar to choose for a collection of tools for helping you build your sketch. You will find selection, symmetry, style, fill, transform, text, image import and guide tools.

34 Selection There are two types of selection: Tap-drag selection - It includes Rectangle, Oval, and Lasso, and you tap-drag the area you want to select. You can add to, remove sections from, or replace the current selection, as well as invert or transform a selection. Magic Wand selection - With Magic Wand, you tap to select a region of colour. Like with tap-drag selection, you can add to, remove sections from, or replace the current selection, as well as invert or transform a selection. What is unique to magic wand selection is the tolerance setting and abillity to select from either the current layer or all layers. Change the tolerance to add more colour to a selection or reduce the range of colour added to a selection. Choose whether to selection colour from the current layer only or to grab it from all layers. Tap, then to access and select a Selection tool. Select an option from the toolbar. Either tap-drag or tap to make your selection. Use the assorted selection editing tools in the Selection toolbar to work with your selection. You can use another tool, while staying in selection mode. See Use your selection to make a mask for more information. Use your selection to make a mask You can use another tool, while staying in selection mode. For example, make a selection, change your brush and colour, then sketch. Notice how the strokes stay within the selection? Instant mask - pretty cool! 1. Choose a type of selection (,,, or ). 2. Tap-drag and make your selection. 3. Tap, then select another tool, such as or, and use it.

35 Adding to a selection Once you made a selection, tap,, then either tap-drag to add to it or for Magic Wand selection, tap other areas. Tap to accept the changes or to decline. Removing sections from a selection Once you made a selection, tap,, then either tap-drag to remove sections from it or for Magic Wand selection, tap areas you want de-selected. Tap to accept the changes or to decline. Replacing a selection Replace is the default selection setting. So, when would I ever use Replace outside of my initial selection? Say you have made a selection, added to it a few times and realised that that just wasn t working. You want to start again. tap, and tap-drag to capture a new selection, instead of cancelling the selection, choosing a Selection tool, and then tap-dragging. It saves you time.


36 Repositioning your selection There are two tools that are similar and allow you to move your selection. The second,, moves the selection and the content it encompasses. Once is selected, another toolbar appears for helping with the placement of the content. The first is Nudge, which move the selection itself, not its content. Make a selection, tap, then drag the puck to place the selection. If you want to use another tool, such as Symmetry, select and used it. Tap to accept the changes or to decline. You can move, flip, mirror, and rotate the selected content. If you want to use another tool, such as Symmetry, select and used it. Tap to accept the changes or to decline.


37 Invert a selection Say you have a large area to select, using Invert can save you time and make it easier to make your selection. Just select the smaller area and tap Invert to change what is selected. This is useful in combination with and, especially when doing a fill. Tap to accept the changes or to decline.


38 Symmetry The Symmetry tool enables you to turn symmetry on and off as you sketch. Anything drawn on one side of the axis is mirrored. Tap, then and select one of the following types of symmetry: Either before or during sketching, you may want to show or hide the lines of symmetry or allow strokes to either cross over or stop at it. Use either of the following tools: Extend/Stop strokes at centre line - When enabled, the stroke go beyond the line of symmetry. When disabled, the stroke stops at the line of symmetry. To extend your strokes across the line of symmetry, if is not visible, tap. Horizontal symmetry - Use to draw one side of an object or scene and have it mirrored to the other side of the line of symmetry. The axis of symmetry always appears at the centre of the canvas. To stop your strokes from crossing the line of symmetry, if is not visible, tap. Show/Hide symmetry lines - When enabled, the lines of symmetry are visible. When disabled, they are not visible. To hide the lines of symmetry, tap hide them. to Tap them. to display Vertical symmetry - Use to draw part of an image and have it reflected either above or below the line of symmetry. The axis of symmetry always appears at the centre of the canvas. Tap to stay in the Symmetry tool or to exit the tool.
39 Styles Use the Styles to aid with drawing lines, rectangles, and ellipses, as well as return to freeform stroke mode. 1. Tap, then Styles. 2. Tap one of the following styles, then tap-drag to draw: to draw a straight line. to draw a rectangle. to draw an ellipse. 3. Do one of the following: Tap-drag to draw a shape. To stay in the tool and change the brush and/or colour, tap, then tap or.. NOTE You will notice you are still in the tool. To exit the tool, tap. appears below the toolbar to indicate

40 Time-lapse Recording Time-lapse captures a movie and saves it to where you select. As you work, it captures frames only when you are drawing. Every 16 frames captured, gives you one second of footage. Tap, then Time-lapse. Time-lapse Controller Use the controller to start a recording, pause it, add frames, and stop it. Inactive To close it, tap. To minimise it, tap. Recording Starting to record When you start recording, the orientation of your movie is set by the orientation of your device. So, if you start drawing in portrait, your movie will be captured in portrait. 1. Tap to start recording. It changes to. 2. Start sketching. The Frame readout updates as your strokes are captured. Pausing recording When you pause a recording, everything you draw during this period appears at once to the view, when watching the recording. Use Pause for times when something repetitive or unimportant needs to be done before continuing to the next point in the recording. It enables you to gloss over things and jump to the next key part of your recording. 1. Tap to pause recording. 2. Tap it again to continue recording.


41 Adding frames When recording, use (Add Frame) to hold on the current frame for a set amount of time. Use this to hold on a view, so your viewers can study what s on screen for longer. 1. Tap to add frames between segments. 2. Select the length of the delay. 3. Continue drawing. Zooming in As you draw, if you zoom in to do detailed work, the recording catches it. You may want to add frames to create a pause before you zoom. Feedback The controller provides feedback on the actual time recorded, so you can keep track of the length of your movie. Actual Time displays the running time of your recording. Frames displays the number of frames captured. NOTE Actual Time and Frames are linked. For every 16 frames recorded, you ve captured one second of footage. Saving a movie When finished recording, save your movie as a.mov (H.264 movie) file, with a resolution of 1024 x 768. Tap to stop recording. A window appears enabling you to either save your recording to where you selected or discard it.

42 Importing and sharing There are a few different ways to import and share your movies. Their resolution is dependent upon the method used for this. From your device, import or share movies to YouTube or directly from your device. The resolution is changed to 480 x 360. Troubleshooting When using Time-lapse, if your device enters sleep mode or you leave the app, the captured session is ended and the movie is saved. You can bring any saved captures into a movie editing package to create a movie from them.
43 Flood fill Fill the active layer with colour, speeding up the painting process, working like a mask. You can select the flood colour before or during the fill. 1. Tap, then Fill. 2. Select one of the following fills: Solid fill - Fills an area with paint. Linear fill - Fills an area with paint, using a colour ramp and applying it linearly from the origin to the end point. Radial fill - Fills an area with paint, using a colour ramp that radiates from the origin to the end point. NOTE Fill manipulators can be added, moved, or removed. To add a manipulator, tap anywhere along the fill line. To move a manipulator, tap-drag it to the new position. To remove a manipulator, tap-drag it away from the fill line. It will disappear. 3. Tap an area to fill it. NOTE To change the colour of the paint, tap, then tap where you to fill that area. You are still in the Fill tool. 4. Tap to accept the changes or to decline. Changing flood fill tolerance Change the tolerance of your fill to determine the range of colours affected. Set what region is flooded and the size of the gaps between the fill paint and pixels creating the boundary of the fill. The minimum tolerance, 1, selects and fills only pixels of that colour value. The maximum tolerance, 255, selects and fills all pixels regardless of the region. In the Fill toolbar, tap, then tap-drag the slider to change flood fill tolerances.


44 Filling one or all layers In the Tolerance tool, you can determine whether the current layer or all layers are filled. Set Sample All Layers to fill either for all layers. for the current layer or


45 Transform Transform affects the current layer. With it, you can move, flip, or rotate the entire layer. For transforming specific content on a layer, see Selection. 1. Tap, then to help reposition your content. Tap-drag the canvas to freely move in any direction. Tap to nudge the content one pixel at a time, by tapping an arrow or tap-drag from the middle to move in any direction or on an arrow to move in that direction. Tap to flip the image vertically. Tap to flip the image horizontally. Tap to rotate the image counterclockwise. Tap to rotate the image clockwise. 2. Tap to accept the changes or to decline.


46 Text Add text to any image you like. Set the font, colour, size, and placement. Use the Text tools to achieve this. 1. Tap, then. 2. Tap to set the colour and tap-drag the sliders to change size and opacity. 3. Tap to set the font and enter your text in the text field. 4. Tap to close the Text window. 5. Choose any of the following tools to position your text: Tap to nudge the content one pixel at a time, by tapping an arrow or tapdrag from the middle to move in any direction or on an arrow to move in that direction. Tap to flip the text vertically. Tap to flip the text horizontally. Tap to rotate the text counterclockwise. Tap to rotate the text clockwise. 6. Tap to accept the changes or to decline.

47 Importing a sketch 1. In the toolbar, tap, then Import Image. 2. Select a source to import the image from. 3. Locate and tap an image to import it. Placing your imported file Use the Import tools to rotate, position, flip, and scale your image. Once you have imported an image, use any of the following tools to get the perfect imported image. 1. Tap, then to help reposition the image. Tap-drag the canvas to freely move in any direction. Tap to nudge the content one pixel at a time, by tapping an arrow or tap-drag from the middle to move in any direction or on an arrow to move in that direction. Tap to flip the image vertically. Tap to flip the image horizontally. Tap to rotate the image counterclockwise. Tap to rotate the image clockwise. 2. Tap to accept the changes or to decline. Guides Use these guides to help you as you draw. You can trace anywhere on the canvas, without tracing directly on a guide, to create a stroke. To reposition a guide, tap-drag the manipulators. 1. Tap,, then select a guide. 2. Tap-drag to draw using the guide. 3. Tap to exit the tool or to stay in the tool and go on to another tool.

48 Using layers

49 Layers and the Layer Editor 1. Add Layer 2. Current layer 3. Lock Transparency 4. Show/Hide Layer 5. Background layer What are layers? Layers provide a way to mark up or make changes to an image without modifying the rest of the composition. Use multiple layers for building complex sketches or testing variations of a design. Layers are created, duplicated, merged, turned on and off, reordered, blended, and deleted using the Layer Editor. As content is added to a layer, the Layer Editor Preview updates, displaying the content and making it easier to identify a layer. Access the Layer Editor and its layers with from the toolbar. Use layers to build a sketch with individual elements. Simplify changes and explore variations with them. Empty layer Layer with content How do I use layers? 1. Tap to open the Layer Editor. The current layer is highlighted. NOTE Upon startup, the Layer Editor will have one layer displayed. Use to add more layers. 2. Tap a layer to access the layer tools. 3. Do any of the following: Copy and paste layer content Delete a layer Duplicate a layer Clearing a layer Merge layers Cut and paste layer content Apply blend modes Setting a layer colour Using templates


50 Hide and show a layer Create different variations of an idea by changing a colour, add a logo, place something else in the scene, or remove an element. Hiding and showing layers allows you this flexibility, making it possible to see only what you want to see. 1. Tap to open the Layer Editor. The current layer is highlighted. 2. Use one of these: Tap to hide a layer. Tap to show a layer. Preserve layer transparency Use Lock Transparency to make edits to only the visible contents of a layer. Any transparent pixels on a layer remain transparent when this option is enabled, instead of becoming white and opaque. This makes it easier to composite various layers together, combining backgrounds and foreground images with blending occurring between pixels with various levels of transparency. When applied to a layer containing paint, only the painted portions of the layer are filled. 1. Tap to open the Layer Editor. The current layer is highlighted. 2. Tap the layer you want to affect. 3. Tap to lock transparency. The icon appears on the layer you have locked. Add a layer Create a new empty layer. 1. Tap to open the Layer Editor. The current layer is highlighted. 2. Tap. In the canvas, the new layer appears over the other layers. To reposition it, see Reorder layers.


51 Setting a background colour Tap in the bottom layer to access the Colour Editor and set a background colour. Cut and paste layer content Cut the content from one layer onto another. 1. Tap to open the Layer Editor. 2. Tap the layer you want to cut content from. 3. Tap to remove the content from the layer. NOTE If you want to paste the content onto another layer, either create a new layer or select a layer and tap. Copy and paste layer content Copy a layer, then paste and reposition the copied content onto that layer. 1. Tap to open the Layer Editor. 2. Tap the layer you want to copy and access the layer tools. 3. Tap, then use the layer tools to reposition it.


52 Duplicate a layer Create a copy of the active layer. 1. Tap to open the Layer Editor. The current layer is highlighted. 2. Tap the layer you want to duplicate and access the layer tools. 3. Tap. A duplicated layer is created and becomes the active layer. Clearing a layer Remove all content from a layer. Double-tap the top left corner. Merge layers Once the content of a layer is finalised, use Merge to combine layers or to merge all layers. This frees up layers for creating other content. 1. Tap to open the Layer Editor. The current layer is highlighted. The layer to be merged must be above the one it will be merged with. If it isn t, reposition it. See Reorder layers. 2. Tap a layer to access the layer tools. 3. Tap to merge two layers or to merge all. 4. Tap OK.


53 Delete a layer Remove layers to make room for new ones. 1. Tap to open the Layer Editor. The current layer is highlighted. 2. Tap a layer to make it active. 3. Tap the layer again to access the layer tools. 4. Tap and OK. Setting a layer colour To help you keep track of your layers, in the layer tools, use Colour Label. 1. Once you have the layer to be labelled selected, tap the layer to access the layer tools. 2. Tap Colour Label and select a colour from the list. 3. Tap elsewhere to exit the tool. Using templates For SketchBook for Galaxy users only. Select a template to use with your project. For animators, use the storyboard template. If you are about to start a perspective drawing, use the perspective template to help with that. 1. In the Layer Editor, tap a layer to access the layer tools. 2. Tap Templates and select one. NOTE The template is only applied to the current layer.


54 Reorder layers Change the layer order by dragging layers above or below one another within the Layer Editor. To make a layer appear in front of another, move it above another. To make a layer appear behind another, move it below another. 1. Tap to open the Layer Editor. The current layer is highlighted. 2. Drag the layer into position. Change layer opacity Change the transparency of a layer to create a striking or subtle effect. 1. Tap to open the Layer Editor. The current layer is highlighted. 2. Tap the layer you want to affect. 3. Tap the layer again to access the Layer tools. 4. Drag the Opacity slider: left to increase transparency right to decrease transparency
55 Blend modes Use blend modes to determine how layers are composited together. Create complex multi-layered textures. Choose from Normal, Multiply, Add, and Screen. Apply them and experiment without the fear of permanently altering your composition. When layers are combined, the results can vary. Change the order and experiment with the settings to achieve the result you want. Multiply layers Add layers Screen layers Use Multiply to produce an overall darkening effect to the layer appearance. When using Multiply, the value for each pixel in the layer is darkened by a value equal to or greater than the value of pixels on other layers occupying the same location in the layer stack. It produces a similar effect to combining one or more photographic transparencies together and looking through them. Use Add to lighten the overall composition, similar to Screen, but in a more extreme manner. When using Add, each pixel is brightened by a value equal to or lesser than the value of pixels on other layers occupying the same location in the layer stack. This is applied as a linear calculation. Use Screen to produce an overall lightening effect to the composition. When using Screen, each pixel in the layer is brightened by a value equal to or lesser than the value of pixels on other layers occupying the same location in the layer stack. It produces an effect opposite to that of Multiply. Apply blend modes To add a blend mode, do the following: 1. Tap a layer to access the layer tools. 2. Select a blend mode. 3. Draw.

56 Transforming a layer Rotate, scale, and move a layer, using Transform. Resise a layer, pivot it, or reposition it without affecting the content on other layers. Don t confuse this with transforming a canvas, which changes the view, without affecting the placement or size of the layers. Move, rotate, or scale a layer You can use your finger(s) to freely move, scale, and rotate the layer or use the Transform tools to move in a constrained direction, flip, or rotate 90 degrees in either directions. See Transform for information on the Transform tools. To rotate, drag in a circular manner with two fingers. To move, drag up, down, left, or right with one finger. To scale, with two fingers, pinch the canvas for a smaller layer and expand your fingers for a larger layer. NOTE When transforming a layer, keep in mind that any content that is resised and expands beyond the size of the canvas (not your view) will be cropped off. Undoing this action will restore the content; otherwise, it is lost.

57 Save, export, and post sketches
58 Save sketches to your Gallery, then export and post them. The Gallery is a component of SketchBook for Galaxy. If you accidentally delete the app, your Gallery and all the sketching within it are deleted. So, we recommend: Exporting to your SD card and Dropbox. Taking snapshots of your canvas to save the image in your Screenshots folder. Saving SketchBook auto saves after 10 strokes. 1. Tap, then. 2. A dialogue appears. Select an option. Save current sketch - updates the saved file. Save current sketch as a copy - creates a new file and saves the sketch with the changes to that file, while preserving the original. Discard changes - deletes any modifications to the original file. A new file is created and you can start sketching. NOTE SketchBook auto saves after 10 strokes. However, to save a sketch to the Gallery, once in the Gallery, swipe to the left to save your sketch to the Gallery. Export your sketch Export to your SD card, Dropbox, or another destination. 1. Tap, then. 2. Tap the thumbnail view of the sketch. 3. Tap and select Export PSD. 4. Choose a method for exporting or sharing your sketch. 5. Following the onscreen instructions. Sharing an image When you share an image with layers, the image that is sent gets flattened to one layer. 1. Tap, then. 2. Swipe to the thumbnail view of the sketch you want to export. 3. Tap and select Share. 4. Select a method of sharing and following the onscreen instructions.
59 Changing preferences
60 Use the preferences to customise application settings. To access your preferences, tap and Preferences. To return to the canvas, tap the Back button on your device. General To turn on a preference, tap the box next to it to add a check. Help Improve Our Products - Approve collection of usage information. Show tool tips - Use to display or hide tool tips as you sketch. Tap-hold for Colour Picker - Use to turn on or off the Colour Picker that appears. The Colour Picker does not appear by default. However, when turned on, it does. Rotate Canvas - Use to rotate the canvas with two fingers. When disabled, you need to use the Transform tool to do this. Pinch to Gallery - Use to access the Gallery. in a pinch. Pinch your sketch until the Gallery appears. Corner Shortcuts - Assign frequently used tools to the four corners of the canvas for quick access. Factory Defaults Use the Factor Defaults to reset all your colour swatches and brushes to their original state. If you don t want to restore all the brushes, you can reset individual ones. Tap the following: Reset Colour Swatches to change your colour swatches back to their original state. Reset Favourite Brushes to change your Favourites section of brushes back to their original state. Reset Brush Settings to change brushes back to their original state. Reset Preference Settings to change back all your preferences to their original state. IMPORTANT For tablet users, before using Reset Colour Swatches, keep in mind, it resets the Colour Palette. About Tap to get information on the version of the app you are running, as well as our data collection policy, trademarks, patents, attributions, and other legal stuff. To return to the Preferences, tap the Back button on your device.

61 Getting SketchBook information

62 Select, then Support to access the following: Help Tap, then and Help to access an in-product version of the help. For a complete version of the User Guide, tap here. Support Tap Support to open and access SketchBook documentation, tutorial content, tips, tricks, and how-to videos, the knowledge base for articles on installation and licensing, workflows, ui, saving and exporting, and other general topics. Finally, you can visit the blog and check out other user s work in the Gallery. News Tap News to open for the latest SketchBook documentation and information on the SketchBook family of products, upcoming events, and show-cased users.
Autodesk. SketchBook Mobile
 Autodesk SketchBook Mobile Copyrights and Trademarks Autodesk SketchBook Mobile (2.0.2) 2013 Autodesk, Inc. All Rights Reserved. Except as otherwise permitted by Autodesk, Inc., this publication, or parts
Autodesk SketchBook 3.2
 Autodesk SketchBook 3.2 Copyrights and Trademarks Autodesk SketchBook 3.2 2015 Autodesk, Inc. All Rights Reserved. Except as otherwise permitted by Autodesk, Inc., this publication, or parts thereof, may
Copyrights and Trademarks
 Mobile Copyrights and Trademarks Autodesk SketchBook Mobile (2.0) 2012 Autodesk, Inc. All Rights Reserved. Except as otherwise permitted by Autodesk, Inc., this publication, or parts thereof, may not be
Autodesk SketchBook Pro
 Autodesk SketchBook Pro Contents SketchBook Pro for Android Sketching... 5 For users of the SketchBook Pro for Galaxy Note... 5 S Pen menu... 6 Easy Clip... 6 Clutch... 6 Toolbar... 7 Information toolbar...
Android. Tips & Tricks
 Android Tips & Tricks Contents What s New 3 Tips Before You Begin 4 Getting Started 5 Create a canvas 5 Navigating 5 Hide the UI 5 Color 6 Customize the color palette 6 Selecting a color 6 Capturing a
Autodesk. SketchBook INK. Tips & Tricks. ios
 Autodesk SketchBook INK Tips & Tricks ios Contents What s New 3 Tips Before You Begin 4 Getting Started 5 Create a canvas 5 Navigating 5 Hide the UI 5 Color 6 Customize the color palette 6 Selecting a
Autodesk SketchBook Pro. English
 Autodesk SketchBook Pro English Contents What s New 4 Introduction 5 Sketching 5 Clutch and corner tools 5 Toolbar 6 Gestures 7 Palm Rest 9 Zoom into and out of the canvas 9 Reposition the canvas 10 Brush
Copyrights and Trademarks
 SketchBook Express Copyrights and Trademarks Autodesk SketchBook Express 2013 Autodesk, Inc. All Rights Reserved. Except as otherwise permitted by Autodesk, Inc., this publication, or parts thereof, may
SketchBook Express V6.2
 SketchBook Express V6.2 Line and Shape tools Resize a brush Change your view Move, rotate, or scale a selected area How do I use layers? Tool selection Tool summary Save location options Reset Preferences
Adobe Photoshop CC 2018 Tutorial
 Adobe Photoshop CC 2018 Tutorial GETTING STARTED Adobe Photoshop CC 2018 is a popular image editing software that provides a work environment consistent with Adobe Illustrator, Adobe InDesign, Adobe Photoshop,
What s New Line and Shape tools Resize a brush Change your view Move, rotate, or scale a selected area How do I use layers? Tool selection Tool
 What s New Line and Shape tools Resize a brush Change your view Move, rotate, or scale a selected area How do I use layers? Tool selection Tool summary Hotkey shortcuts Resize an image Create custom Do-It-Yourself
Adobe Photoshop CS5 Tutorial
 Adobe Photoshop CS5 Tutorial GETTING STARTED Adobe Photoshop CS5 is a popular image editing software that provides a work environment consistent with Adobe Illustrator, Adobe InDesign, Adobe Photoshop
Digital Design and Communication Teaching (DiDACT) University of Sheffield Department of Landscape. Adobe Photoshop CS5 INTRODUCTION WORKSHOPS
 University of Sheffield Department of Landscape. Adobe Photoshop CS5 INTRODUCTION WORKSHOPS") Adobe INTRODUCTION WORKSHOPS WORKSHOP 1 - what is Photoshop + what does it do? Outcomes: What is Photoshop? Opening, importing and creating images. Basic knowledge of Photoshop tools. Examples of work.
Adobe INTRODUCTION WORKSHOPS WORKSHOP 1 - what is Photoshop + what does it do? Outcomes: What is Photoshop? Opening, importing and creating images. Basic knowledge of Photoshop tools. Examples of work.
Autodesk SketchBook 7.2.1
 Autodesk SketchBook 7.2.1 COPYRIGHTS AND TRADEMARKS AUTODESK SKETCHBOOK 7.2.1 MAS 2015 Autodesk, Inc. All Rights Reserved. Except as otherwise permitted by Autodesk, Inc., this publication, or parts thereof,
Introduction to Photoshop
 Introduction to Photoshop Instructional Services at KU Libraries A Division of Information Services www.lib.ku.edu/instruction Abstract: This course covers the basics of Photoshop, including common tools
COPYRIGHTS AND TRADEMARKS
 Autodesk SketchBook COPYRIGHTS AND TRADEMARKS AUTODESK SKETCHBOOK 2015 Autodesk, Inc. All Rights Reserved. Except as otherwise permitted by Autodesk, Inc., this publication, or parts thereof, may not be
Copyrights and Trademarks. Autodesk Pixlr. Trademarks. Disclaimer. Published by: Autodesk, Inc.
 Copyrights and Trademarks Autodesk Pixlr 2015 Autodesk, Inc. All Rights Reserved. Except as otherwise permitted by Autodesk, Inc., this publication, or parts thereof, may not be reproduced in any form,
Morpholio Quick Tips TracePro. Morpholio for Business 2018
 m Morpholio Quick Tips TracePro Morpholio for Business 2018 m Morpholio Quick Tips TracePro 01: Hand Gestures 02: Apple Pencil 03: Start a New Drawing 04: Setting The Scale 05: Project Settings 06: Setting
Cricut Design Space App for ipad User Manual
 Cricut Design Space App for ipad User Manual Cricut Explore design-and-cut system From inspiration to creation in just a few taps! Cricut Design Space App for ipad 1. ipad Setup A. Setting up the app B.
ADOBE PHOTOSHOP CS TUTORIAL
 ADOBE PHOTOSHOP CS TUTORIAL A D O B E P H O T O S H O P C S Adobe Photoshop CS is a popular image editing software that provides a work environment consistent with Adobe Illustrator, Adobe InDesign, Adobe
Adobe Photoshop CS5 Layers and Masks
 Adobe Photoshop CS5 Layers and Masks Email: training@health.ufl.edu Web Page: http://training.health.ufl.edu Adobe Photoshop CS5: Layers and Masks 2.0 Hours The workshop will cover creating and manipulating
Organizing artwork on layers
 3 Layer Basics Both Adobe Photoshop and Adobe ImageReady let you isolate different parts of an image on layers. Each layer can then be edited as discrete artwork, allowing unlimited flexibility in composing
Concepts for Windows 10 Manual. Welcome to Concepts! for advanced, natural design
 Concepts for Windows 10 Manual for advanced, natural design Welcome to Concepts! Few things in life satisfy like creating with your hands. Concepts is a power tool for your quickest and most intricate
Autodesk SketchBook 7.2
 Autodesk SketchBook 7.2 COPYRIGHTS AND TRADEMARKS AUTODESK SKETCHBOOK 7.2 - Subscription Version 2015 Autodesk, Inc. All Rights Reserved. Except as otherwise permitted by Autodesk, Inc., this publication,
NMC Second Life Educator s Skills Series: How to Make a T-Shirt
 NMC Second Life Educator s Skills Series: How to Make a T-Shirt Creating a t-shirt is a great way to welcome guests or students to Second Life and create school/event spirit. This article of clothing could
The original photo. The final result.
 giving a photo painted edges In this Adobe Photoshop tutorial, we re going to combine a couple of different effects. First, we ll give the photo easy-tocreate painted edges, and then we ll make it look
ArcSoft PhotoImpression Table of Contents:
 ArcSoft PhotoImpression Table of Contents: 1. Welcome to PhotoImpression 2. Highlights of PhotoImpression 3. System Requirements 4. Installing PhotoImpression 5. Working with PhotoImpression Getting Started
Perspective Guides. Perspective Contextual Toolbar. 1-Point Perspective
 WHAT S NEW 1. Perspective Guides 2. Flipbook Animation 3. Gradient Flood Fills 4. Layer Workflow Enhancements - Layer Grouping - Extended Blending Modes - Background Color - Multi-Layer Select 5. Distort
Morpholio Quick Tips TracePro. Morpholio for Business 2019
 m Morpholio Quick Tips TracePro Morpholio for Business 2019 m Morpholio Quick Tips TracePro 01: Hand Gestures 02: Apple Pencil 03: Start a New Drawing 04: Setting The Scale 05: Project Settings 06: Setting
Enhance AutoCAD Designs with Autodesk SketchBook Designer
 Enhance AutoCAD Designs with Autodesk SketchBook Designer Jerry Berns EMA Design Automation, Inc. AC3525-L AutoCAD and SketchBook Designer offer interoperability tools that allow you to take AutoCAD geometry
Photoshop 1. click Create.
 Photoshop 1 Step 1: Create a new file Open Adobe Photoshop. Create a new file: File->New On the right side, create a new file of size 600x600 pixels at a resolution of 300 pixels per inch. Name the file
Autodesk SketchBook 7.1.1
 Autodesk SketchBook 7.1.1 COPYRIGHTS AND TRADEMARKS AUTODESK SKETCHBOOK 7.1.1 2015 Autodesk, Inc. All Rights Reserved. Except as otherwise permitted by Autodesk, Inc., this publication, or parts thereof,
Create new drawing. Select Collection. Manage graphs. Collection Name. Graphs preview
 Create new drawing Select Collection Collection Name Manage graphs Graphs preview Duplicate selection Move selection Delete selection Select All drawings Exit Share selection Selected graphs Add new Collection
BRUSHES AND LAYERS We will learn how to use brushes and illustration tools to make a simple composition. Introduction to using layers.
 Brushes BRUSHES AND LAYERS We will learn how to use brushes and illustration tools to make a simple composition. Introduction to using layers. WHAT IS A BRUSH? A brush is a type of tool in Photoshop used
GIMP (GNU Image Manipulation Program) MANUAL
 MANUAL") Selection Tools Icon Tool Name Function Select Rectangle Select Ellipse Select Hand-drawn area (lasso tool) Select Contiguous Region (magic wand) Selects a rectangular area, drawn from upper left (or lower
Selection Tools Icon Tool Name Function Select Rectangle Select Ellipse Select Hand-drawn area (lasso tool) Select Contiguous Region (magic wand) Selects a rectangular area, drawn from upper left (or lower
Corel PHOTO-PAINT BERNINA Page 1 DL
 Corel PHOTO-PAINT 2018 BERNINA Page 1 Corel PHOTO-PAINT Corel PHOTO-PAINT is part of BERNINA Embroidery Software and gives users many tools for editing photos or bitmap artwork. Corel PHOTO- PAINT can
Key Terms. Where is it Located Start > All Programs > Adobe Design Premium CS5> Adobe Photoshop CS5. Description
 Adobe Adobe Creative Suite (CS) is collection of video editing, graphic design, and web developing applications made by Adobe Systems. It includes Photoshop, InDesign, and Acrobat among other programs.
By Washan Najat Nawi
 By Washan Najat Nawi how to get started how to use the interface how to modify images with basic editing skills Adobe Photoshop: is a popular image-editing software. Two general usage of Photoshop Creating
Photoshop CS2. Step by Step Instructions Using Layers. Adobe. About Layers:
 About Layers: Layers allow you to work on one element of an image without disturbing the others. Think of layers as sheets of acetate stacked one on top of the other. You can see through transparent areas
Unit 7 : Image Painting, Editing and Layers
 Unit 7 : Image Painting, Editing and Layers Introduction This Unit describes about various painting tools; such as selection, cropping and measuring tools, retouching, drawing and type tools, Navigation
Extreme Makeovers: Photoshop Retouching Techniques
 Extreme Makeovers: Table of Contents About the Workshop... 1 Workshop Objectives... 1 Getting Started... 1 Photoshop Workspace... 1 Retouching Tools... 2 General Steps... 2 Resolution and image size...
Using Adobe Photoshop
 Using Adobe Photoshop 6 One of the most useful features of applications like Photoshop is the ability to work with layers. allow you to have several pieces of images in the same file, which can be arranged
GETTING STARTED MAKING A NEW DOCUMENT
 Accessed with permission from http://web.ics.purdue.edu/~agenad/help/photoshop.html GETTING STARTED MAKING A NEW DOCUMENT To get a new document started, simply choose new from the File menu. You'll get
PHOTOSHOP TUTORIAL: DIGITAL DARKROOM TECHNIQUES
 PHOTOSHOP TUTORIAL: DIGITAL DARKROOM TECHNIQUES STEP BY STEP TRAINING Learn by doing step by step exercises. Includes downloadable class files that work on Mac & PC. EDITION 1 Copyright Info Published
FLAMING HOT FIRE TEXT
 FLAMING HOT FIRE TEXT In this Photoshop text effects tutorial, we re going to learn how to create a fire text effect, engulfing our letters in burning hot flames. We ll be using Photoshop s powerful Liquify
CATEGORY SKILL SET REF. TASK ITEM
 ECDL / ICDL Image Editing This module sets out essential concepts and skills relating to the ability to understand the main concepts underlying digital images and to use an image editing application to
Adobe PhotoShop Elements
 Adobe PhotoShop Elements North Lake College DCCCD 2006 1 When you open Adobe PhotoShop Elements, you will see this welcome screen. You can open any of the specialized areas. We will talk about 4 of them:
All Creative Suite Design documents are saved in the same way. Click the Save or Save As (if saving for the first time) command on the File menu to
 command on the File menu to") 1 The Application bar is new in the CS4 applications. It combines the menu bar with control buttons that allow you to perform tasks such as arranging multiple documents or changing the workspace view.
1 The Application bar is new in the CS4 applications. It combines the menu bar with control buttons that allow you to perform tasks such as arranging multiple documents or changing the workspace view.
5 Masks and Channels
 5 Masks and Channels Adobe Photoshop uses masks to isolate and manipulate specific parts of an image. A mask is like a stencil. The cutout portion of the mask can be altered, but the area surrounding the
Getting started with AutoCAD mobile app. Take the power of AutoCAD wherever you go
 Getting started with AutoCAD mobile app Take the power of AutoCAD wherever you go Getting started with AutoCAD mobile app Take the power of AutoCAD wherever you go i How to navigate this book Swipe the
GETTING STARTED. 0 P a g e B a s i c s o f A d o b e P h o t o s h o p A g a P r i v a t e I n s t i t u t e f o r c o m p u t e r s c i e n c e
 GETTING STARTED 0 P a g e B a s i c s o f A d o b e P h o t o s h o p Adobe Photoshop: is a popular image editing software that provides a work environment consistent with Adobe Illustrator, Adobe InDesign,
Morpholio Quick Tips TracePro. Morpholio for Business 2017
 m Morpholio Quick Tips TracePro Morpholio for Business 2017 m Morpholio Quick Tips TracePro 00: Hand Gestures 01: Start a New Drawing 02: Set Your Scale 03: Set Your Pens 04: Layer Controls 05: Perspective,
The original image. The final rainbow effect.
 ADD A realistic rainbow to a photo In this Photoshop photo effects tutorial, we re going to learn how to easily add a rainbow, even a double rainbow, to a photo. Of course, as with most photo effects,
ArtRage*, part of Intel Education User Guide
 ArtRage*, part of Intel Education User Guide Copyright 04 Intel Corporation. All rights reserved. Intel and the Intel logo are registered trademarks of Intel Corporation in the United States and Disclaimer
Overview of Photoshop Elements workspace
 Overview of Photoshop Elements workspace When you open Photoshop Elements, the Welcome screen offers you two options (Figure 1): The Organize button opens the Organizer. In the Organizer you organize and
digitization station DIGITAL SCRAPBOOKING 120 West 14th Street
 digitization station DIGITAL SCRAPBOOKING 120 West 14th Street www.nvcl.ca techconnect@cnv.org DIGITAL SCRAPBOOKING With MyMemories Suite 6 The MyMemories Digital Scrapbooking software allows you to create
AGENDA. :: Homework Critiques (5 minutes each) :: Photoshop Lesson 3. A-1 Gorgeous! [ COMPOSITE DEMO ] :: 7mins. I. SELECTIONS [ Common Law ]:
![AGENDA. :: Homework Critiques (5 minutes each) :: Photoshop Lesson 3. A-1 Gorgeous! [ COMPOSITE DEMO ] :: 7mins. I. SELECTIONS [ Common Law ]:](/thumbs/93/112781712.jpg "AGENDA. :: Homework Critiques (5 minutes each) :: Photoshop Lesson 3. A-1 Gorgeous! [ COMPOSITE DEMO ] :: 7mins. I. SELECTIONS [ Common Law ]:") CLASS :: 09.24 2018 AGENDA :: Homework Critiques (5 minutes each) A-1 Gorgeous! Upload A-1 Project to Student Folder :: Photoshop Lesson 3 [ COMPOSITE DEMO ] :: 7mins. I. SELECTIONS [ Common Law ]: a.
CLASS :: 09.24 2018 AGENDA :: Homework Critiques (5 minutes each) A-1 Gorgeous! Upload A-1 Project to Student Folder :: Photoshop Lesson 3 [ COMPOSITE DEMO ] :: 7mins. I. SELECTIONS [ Common Law ]: a.
The original image. As I said, we ll be looking at a few different variations on the effect. Here s the first one we ll be working towards:
 DIGITAL PIXEL EFFECT In this Photoshop tutorial, we re going to look at how to create a digital pixel effect, which is often used in ads that sell anything to do with digital. We re going to first pixelate
XXXX - ILLUSTRATING FROM SKETCHES IN PHOTOSHOP 1 N/08/08
 INTRODUCTION TO GRAPHICS Illustrating from sketches in Photoshop Information Sheet No. XXXX Creating illustrations from existing photography is an excellent method to create bold and sharp works of art
Creating Transparency for Glass in an Illustration with. SketchBook Designer
 Autodesk Design Suite 2012 Autodesk SketchBook Designer 2012 Tip Guides Creating Transparency for Glass in an Illustration with SketchBook Designer In this section you will learn the following: How to
WORN, TORN PHOTO EDGES EFFECT
 Photo Effects: CC - Worn, Torn Photo Edges Effect WORN, TORN PHOTO EDGES EFFECT In this Photoshop tutorial, we ll learn how to take the normally sharp, straight edges of an image and make them look all
AGENDA :: MULTIMEDIA TOOLS :: CLASS NOTES. :: Homework Critiques (5-7 minutes each) :: Photoshop Lesson 3. A-1 Gorgeous! [ COMPOSITE DEMO ] :: 7mins.
![AGENDA :: MULTIMEDIA TOOLS :: CLASS NOTES. :: Homework Critiques (5-7 minutes each) :: Photoshop Lesson 3. A-1 Gorgeous! [ COMPOSITE DEMO ] :: 7mins.](/thumbs/86/93336476.jpg "AGENDA :: MULTIMEDIA TOOLS :: CLASS NOTES. :: Homework Critiques (5-7 minutes each) :: Photoshop Lesson 3. A-1 Gorgeous! [ COMPOSITE DEMO ] :: 7mins.") CLASS :: 03 02.10 2017 AGENDA :: Homework Critiques (5-7 minutes each) A-1 Gorgeous! Upload A-1 Project to Student Folder :: Photoshop Lesson 3 [ COMPOSITE DEMO ] :: 7mins. I. SELECTIONS [ Common Law ]:
CLASS :: 03 02.10 2017 AGENDA :: Homework Critiques (5-7 minutes each) A-1 Gorgeous! Upload A-1 Project to Student Folder :: Photoshop Lesson 3 [ COMPOSITE DEMO ] :: 7mins. I. SELECTIONS [ Common Law ]:
Photo Editing in Mac and ipad and iphone
 Page 1 Photo Editing in Mac and ipad and iphone Switching to Edit mode in Photos for Mac To edit a photo you ll first need to double-click its thumbnail to open it for viewing, and then click the Edit
Now, we need to talk about the Juxtaposer menu and the tools you have at your disposal. 1. The Layers button looks like two squares
 Apps taught in the class: Diptic ($1) Juxtaposer ($3) Mextures ($2) RePix (Free) LensLight/AlienSky ($3 ea) FlowPaper ($1) Additional tools: Stylus PT 1: Creating a canvas with Diptic 1. Open the Diptic
ArtRage part of Intel Education
 ArtRage part of Intel Education Intuitive digital art creation Getting started with ArtRage ArtRage part of Intel Education provides intuitive tools that simulate the use of real materials to create digital
VERY. Note: You ll need to use the Zoom Tools at the top of your PDF screen to really see my example illustrations.
 VERY This tutorial is written for those of you who ve found or been given some version of Photoshop, and you don t have a clue about how to use it. There are a lot of books out there which will instruct
ITEC185 INTRODUCTION TO DIGITAL MEDIA
 1 ITEC185 INTRODUCTION TO DIGITAL MEDIA ADOBE PHOTOSHOP ITEC185 - Introduction to Digital Media ITEC185 - Introduction to Digital Media 2 What is Adobe Photoshop? Photoshop is the leading professional
Downloaded From : Working with Photoshop 7.0
 Adobe Photoshop 1. Introduction What is Adobe Photoshop? Adobe Photoshop is a web designing software used for giving effects and filters to an image to make it more appealing and attractive. Brought out
Digital Photography 1
 Digital Photography 1 Photoshop Lesson 3 Resizing and transforming images Name Date Create a new image 1. Choose File > New. 2. In the New dialog box, type a name for the image. 3. Choose document size
Using Adobe Photoshop
 Using Adobe Photoshop 4 Colour is important in most art forms. For example, a painter needs to know how to select and mix colours to produce the right tones in a picture. A Photographer needs to understand
Adobe Photoshop CC update: May 2013
 Adobe Photoshop CC update: May 2013 Welcome to the latest Adobe Photoshop CC bulletin update. This is provided free to ensure everyone can be kept upto-date with the latest changes that have taken place
Filters. Learning Objectives. Introduction
 6 Painting Tools and Filters Learning Objectives After completing this chapter, you will be able to: Apply paint to an image using the Brush Tool. Select and modify brush styles using the Brush Preset
A quick note: We hope that you will find something from the Tips and Tricks that will add a little pizazz to your yearbook pages!
 A quick note: The following pages are tips and tricks for Basic Photoshop users. You may notice that some instructions indicate that non-awpc fonts were used, and that some colors were created using the
The KolourPaint Handbook. Thurston Dang, Clarence Dang, and Lauri Watts
 Thurston Dang, Clarence Dang, and Lauri Watts 2 Contents 1 Introduction 1 2 Using KolourPaint 2 3 Tools 3 3.1 Tool Reference............................. 3 3.2 Brush.................................. 4
The horse image used for this tutorial comes from Capgros at the Stock Exchange. The rest are mine.
 First off, sorry to those of you that are on the mailing list or RSS that get this twice. I m finally moved over to a dedicated server, and in doing so, this post was lost. So, I m republishing it. This
Project 25 Page 1 ` JAZZ POSTCARD
 Project 25 Page 1 ` JAZZ POSTCARD Reset all tools! Create the Background 1. Create a new RGB document, 4.25 in. wide by 5.75 in. high at 100 dpi with a white background. 2. Click the foreground color swatch
IMAGE CORRECTION. You can find this and more information with video tutorials at
 IMAGE CORRECTION You can find this and more information with video tutorials at http://www.adobe.com/support/photoshop/ P H O T O S H O P T O O L S CLONE STAMP TOOL The Clone Stamp tool paints one part
The KolourPaint Handbook. Thurston Dang, Clarence Dang, and Lauri Watts
 Thurston Dang, Clarence Dang, and Lauri Watts 2 Contents 1 Introduction 1 2 Using KolourPaint 2 3 Tools 3 3.1 Tool Reference............................. 3 3.2 Brush.................................. 4
PHOTOSHOP & ILLUSTRATOR BOOTCAMP
 FALL 2014 - ELIZABETH LIN PHOTOSHOP & ILLUSTRATOR BOOTCAMP ILLUSTRATOR ALIGNMENT To access the alignment panel, go to Window -> Align. You should see a panel like the one below. This panel allows you to
Photoshop CS part 2. Workshop Objective. Getting Started Quit all open applications Single click Adobe Photoshop from the Dock
 pg. 1 Photoshop CS part 2 Photoshop is the premier digital photo editor application used for photo retouching, creating web images, film/video compositing, and other pixel/vector-based imagery. Workshop
Chapter 4: Draw with the Pencil and Brush
 Page 1 of 15 Chapter 4: Draw with the Pencil and Brush Tools In Illustrator, you create and edit drawings by defining anchor points and the paths between them. Before you start drawing lines and curves,
Corel Painter for Beginners Course
 Corel Painter for Beginners Course Learn the essential skills required to master Corel Painter. Painter Master, Aaron Rutten guides you through all of the important tools and features of Painter while
Compositing. Compositing is the art of combining two or more distinct elements to create a sense of seamlessness or a feeling of belonging.
 Compositing Compositing is the art of combining two or more distinct elements to create a sense of seamlessness or a feeling of belonging. Selection Tools In the simplest terms, selections help us to cut
Exploring Photoshop Tutorial
 Exploring Photoshop Tutorial Objective: In this tutorial we will create a poster composed of three distinct elements: a Bokeh, an image and title text. The Bokeh is an effect which is sometimes seen in
ADD A REALISTIC WATER REFLECTION
 ADD A REALISTIC WATER REFLECTION In this Photoshop photo effects tutorial, we re going to learn how to easily add a realistic water reflection to any photo. It s a very easy effect to create and you can
Texts and Resources: Assessments: Freefoto.com Group Photo Projects
 Effective Date: 2009-10 Name of Course: Digital Photography Grade Level: 9-12 Department: Industrial Technology and Engineering Length of Course: 30 cycles Instructional Time: 180 days Period Per Cycle:
Introduction to Photoshop: Basic Editing & Prepare Images for the Web
 Introduction to Photoshop: Basic Editing & Prepare Images for the Web 1 LEARNING OBJECTIVES Basic tools in Photoshop & Use of Bridge Prepare images for print and web use TOPICS COVERED Photoshop Interface
Source photo, sketchbook collage and digital collage
 Source photo, sketchbook collage and digital collage Develop a mixed media project using traditional media, digital camera, scanner and image manipulation software. This technique encourages a creative
The original image. Let s get started! The final rainbow effect. The photo sits on the Background layer in the Layers panel.
 Add A Realistic Rainbow To A Photo In this Photoshop photo effects tutorial, we ll learn how to easily add a rainbow, and even a double rainbow, to a photo! As we ll see, Photoshop ships with a ready-made
Photoshop CC Editing Images
 Photoshop CC Editing Images Rotate a Canvas A canvas can be rotated 90 degrees Clockwise, 90 degrees Counter Clockwise, or rotated 180 degrees. Navigate to the Image Menu, select Image Rotation and then
Rendering a perspective drawing using Adobe Photoshop
 Rendering a perspective drawing using Adobe Photoshop This hand-out will take you through the steps to render a perspective line drawing using Adobe Photoshop. The first important element in this process
UNDERSTANDING LAYER MASKS IN PHOTOSHOP
 UNDERSTANDING LAYER MASKS IN PHOTOSHOP In this Adobe Photoshop tutorial, we re going to look at one of the most essential features in all of Photoshop - layer masks. We ll cover exactly what layer masks
Photoshop Blending Modes
 Photoshop Blending Modes https://photoshoptrainingchannel.com/blending-modes-explained/#when-blend-modes-added For those mathematically inclined. https://photoblogstop.com/photoshop/photoshop-blend-modes-
Photoshop CC 2018 Essential Skills
 Photoshop CC 2018 Essential Skills Adobe Photoshop Creative Cloud 2018 University Information Technology Services Learning Technology, Training, Audiovisual and Outreach Copyright 2018 KSU Division of
Photoshop: a Beginner s course. by: Charina Ong Centre for Development of Teaching and Learning National University of Singapore
 Photoshop: a Beginner s course by: Charina Ong Centre for Development of Teaching and Learning National University of Singapore Table of Contents About the Workshop... 1 Prerequisites... 1 Workshop Objectives...
Welcome to Corel DESIGNER, a comprehensive vector-based package for technical graphic users and technical illustrators.
 Workspace tour Welcome to Corel DESIGNER, a comprehensive vector-based package for technical graphic users and technical illustrators. This tutorial will help you become familiar with the terminology and
PIXELMATOR FOR IPAD HELP
 PIXELMATOR FOR IPAD HELP Yves Cornil Pixelmator. Pixelmator.... 2 Get started.... 4 Pixelmator at a glance... 4 Create or open an image.... 6 Basic gestures... 7 Tap... 7 Scroll and swipe... 7 Drag...
4 layer BASiCS lesson overview 104
 4 layer basics Lesson overview In this lesson, you ll learn how to do the following: Organize artwork on layers. Create, view, hide, and select layers. Rearrange layers to change the stacking order of
iphoto Getting Started Get to know iphoto and learn how to import and organize your photos, and create a photo slideshow and book.
 iphoto Getting Started Get to know iphoto and learn how to import and organize your photos, and create a photo slideshow and book. 1 Contents Chapter 1 3 Welcome to iphoto 3 What You ll Learn 4 Before
CSCI Lab 6. Part I: Simple Image Editing with Paint. Introduction to Personal Computing University of Georgia. Multimedia/Image Processing
 CSCI-1100 Introduction to Personal Computing University of Georgia Lab 6 Multimedia/Image Processing Purpose: The purpose of this lab is for you to gain experience performing image processing using some