Touch Probe Cycles TNC 426 TNC 430
|
|
|
- Ernest Richards
- 5 years ago
- Views:
Transcription

")
1 Touch Probe Cycles TNC 426 TNC 430 NC Software xx xx xx xx xx xx User s Manual English (en) 6/2003
2
3 TNC Model, Software and Features This manual describes functions and features provided by TNCs as of the following NC software numbers. TNC model NC software number TNC 426, TNC TNC 426, TNC TNC 426, TNC The suffixes E and F indicate the export versions of the TNC The export versions of the TNC have the following limitations: Linear movement is possible in no more than 4 axes simultaneously. The machine tool builder adapts the useable features of the TNC to his machine by setting machine parameters. Some of the functions described in this manual may not be among the features provided by your machine tool. TNC functions that may not be available on your machine include: Digitizing option Tool Measurement with the TT Please contact your machine tool builder to become familiar with the features of your machine. Many machine manufacturers, as well as HEIDENHAIN, offer programming courses for the TNCs. We recommend these courses as an effective way of improving your programming skill and sharing information and ideas with other TNC users. User s Manual: All TNC functions that have no connection with touch probes are described in the User's Manual of the respective control. Please contact HEIDENHAIN if you need a copy of this User s Manual. Location of use The TNC complies with the limits for a Class A device in accordance with the specifications in EN 55022, and is intended for use primarily in industrially-zoned areas. HEIDENHAIN TNC 426, TNC 430 I
4 New features of the NC software xx Management of an arbitrary number of calibration data with the TS triggering touch probe (see Managing more than one block of calibrating data (as of NC software xx) on page 15) Cycles for automatic tool measurement with the TT 130 according to ISO (see Overview on page 112) Cycle for measuring the thermal behavior of a machine (see MEASURE AXIS SHIFT (touch probe cycle 440, ISO: G440, available as of NC software xx) on page 106) Changed features of the NC software xx All cycles for the automatic datum setting can now also be run during an active basic rotation (see Characteristics common to all touch probe cycles for datum setting on page 43). Cycle 431 find the angular values needed for tilting the working plane with a spatial angle (see MEASURE PLANE (touch probe cycle 431, ISO: G431) on page 97). II
5 Contents Introduction 1 Touch Probe Cycles in the Manual and Electronic Handwheel Modes 2 Touch Probe Cycles for Automatic Workpiece Inspection 3 Touch Probe Cycles for Automatic Tool Measurement 4 Digitizing 5 HEIDENHAIN TNC 426, TNC 430 III
6
7 1 Introduction General Information on Touch Probe Cycles... 2 Function... 2 Touch Probe Cycles in the Manual and Electronic Handwheel Modes... 3 Touch probe cycles for automatic operation Before You Start Working with Touch Probe Cycles!... 5 Maximum traverse to touch point: MP Safety clearance to touch point: MP Orient the infrared touch probe to the programmed probe direction: MP6165 (as of )... 5 Multiple measurement: MP Confidence interval for multiple measurement: MP Touch trigger probe, probing feed rate: MP Touch trigger probe, rapid traverse for pre-positioning: MP Measuring touch probe, probing feed rate: MP Measuring touch probe, rapid traverse for pre-positioning: MP Running touch probe cycles... 7 HEIDENHAIN TNC 426, TNC 430 V
8 2 Touch Probe Cycles in the Manual and Electronic Handwheel Modes Introduction Overview Selecting probe cycles Recording Measured Values from the Probe Cycles Writing the measured values from probe cycles in datum tables Calibrating a Touch Trigger Probe Introduction Calibrating the effective length Calibrating the effective radius and compensating center misalignment Displaying calibration values Managing more than one block of calibrating data (as of NC software xx) Calibrating a Measuring Touch Probe Introduction Course of actions Displaying calibration values Compensating Workpiece Misalignment Introduction Measuring the basic rotation Displaying a basic rotation Cancel a basic rotation Setting the Datum with a 3-D Touch Probe Introduction To set the datum in any axis (see figure at right) Corner as datum using points that were already probed for a basic rotation (see figure at right) Corner as datum without using points that were already probed for a basic rotation Circle center as datum Setting datum points using holes/cylindrical studs Measuring Workpieces with a 3-D Touch Probe Introduction To find the coordinate of a position on an aligned workpiece: Finding the coordinates of a corner in the working plane Measuring workpiece dimensions To find the angle between the angle reference axis and a side of the workpiece VI
9 3 Touch Probe Cycles for Automatic Workpiece Inspection Measuring Workpiece Misalignment Overview Characteristics common to all touch probe cycles for measuring workpiece misalignment BASIC ROTATION (touch probe cycle 400, ISO: G400) BASIC ROTATION from two holes (touch probe cycle 401, ISO: G401) BASIC ROTATION over two studs (touch probe cycle 402, ISO: G402) BASIC ROTATION compensation via rotary axis (touch probe cycle 403, ISO: G403) SET BASIC ROTATION (touch probe cycle 404, ISO: G404, available as of NC software xx) Compensating workpiece misalignment by rotating the C axis (touch probe cycle 405, ISO: G405, available as of NC software xx) Automatic Datum Setting Overview Characteristics common to all touch probe cycles for datum setting DATUM FROM INSIDE OF RECTANGLE (touch probe cycle 410, ISO: G410) DATUM FROM OUTSIDE OF RECTANGLE (touch probe cycle 411, ISO: G411) DATUM FROM INSIDE OF CIRCLE (touch probe cycle 412, ISO: G412) DATUM FROM OUTSIDE OF CIRCLE (touch probe cycle 413, ISO: G413) DATUM FROM OUTSIDE OF CORNER (touch probe cycle 414, ISO: G414) DATUM FROM INSIDE OF CORNER (touch probe cycle 415, ISO: G415) DATUM CIRCLE CENTER (touch probe cycle 416, ISO: G416) DATUM IN TOUCH PROBE AXIS (touch probe cycle 417, ISO: G417) DATUM AT CENTER BETWEEN 4 HOLES (touch probe cycle 418, ISO: G418) HEIDENHAIN TNC 426, TNC 430 VII
10 VIII 3.3 Automatic Workpiece Measurement Overview Recording the results of measurement Measurement results in Q parameters Classification of results Tolerance monitoring Tool monitoring Reference system for measurement results REFERENCE PLANE (touch probe cycle 0, ISO: G55) DATUM PLANE (touch probe cycle 1) MEASURE ANGLE (touch probe cycle 420, ISO: G420) MEASURE HOLE (touch probe cycle 421, ISO: G421) MEASURE CIRCLE OUTSIDE (touch probe cycle 422, ISO: G422) MEASURE RECTANGLE FROM INSIDE (touch probe cycle 423, ISO: G423) MEASURE RECTANGLE FROM OUTSIDE (touch probe cycle 424, ISO: G424) MEASURE INSIDE WIDTH (touch probe cycle 425, ISO: G425) MEASURE RIDGE WIDTH (touch probe cycle 426, ISO: G426) MEASURE COORDINATE (touch probe cycle 427, ISO: G427) MEASURE BOLT HOLE CIRCLE (touch probe cycle 430, ISO: G430) MEASURE PLANE (touch probe cycle 431, ISO: G431) Special Cycles Overview CALIBRATE TS (touch probe cycle 2) MEASURING (touch probe cycle 3, available as of NC software xx) MEASURE AXIS SHIFT (touch probe cycle 440, ISO: G440, available as of NC software xx)
11 4 Touch Probe Cycles for Automatic Tool Measurement Tool Measurement with the TT Tool Touch Probe Overview Setting the machine parameters Display the results of measurement Available Cycles Overview Differences between Cycles 31 to 33 and Cycles 481 to Calibrating the TT Measuring the tool length Measuring the tool radius Measuring tool length and radius Digitizing Digitizing with Triggering or Measuring Touch Probe (Option) Overview Function Programming Digitizing Cycles Selecting digitizing cycles Defining the digitizing range Point Tables Types of Digitizing Meander digitizing Contour line digitizing Unidirectional line digitizing Digitizing with rotary axes Using Digitized Data in a Part Program Resulting NC blocks of a file containing data that were digitized with the CONTOUR LINES cycle HEIDENHAIN TNC 426, TNC 430 IX
12 X
13 Introduction 1
14 1.1 General Information on Touch Probe Cycles 1.1 General Information on Touch Probe Cycles Function The TNC must be specially prepared by the machine tool builder for the use of a 3-D touch probe. If you are carrying out measurements during program run, be sure that the tool data (length, radius) can be used from the calibrated data or from the last TOOL CALL block (selected with MP7411). If you are working alternately with a triggering and a measuring touch probe, be sure that You have selected the correct touch probe in MP The measuring and triggering touch probes are never connected to the control at the same time. The TNC cannot detect which probe is actually in the spindle. Whenever the TNC runs a touch probe cycle, the 3-D touch probe approaches the workpiece in one linear axis. This is also true during an active basic rotation or with a tilted working plane. The machine tool builder determines the probing feed rate in a machine parameter (see Before You Start Working with Touch Probe Cycles later in this chapter). When the probe stylus contacts the workpiece, the 3-D touch probe transmits a signal to the TNC: the coordinates of the probed position are stored, the touch probe stops moving, and returns to its starting position in rapid traverse. Y Z F X If the stylus is not deflected within a distance defined in MP 6130), the TNC displays an error message. F MAX 2 1 Introduction

15 Touch Probe Cycles in the Manual and Electronic Handwheel Modes In the Manual and Electronic Handwheel operating modes, the TNC provides touch probe cycles that allow you to: Calibrate the touch probe Compensate workpiece misalignment Datum setting Touch probe cycles for automatic operation Besides the touch probe cycles, which you can use in the Manual and Electronic handwheel operating modes, the TNC provides numerous cycles for a wide variety of applications in automatic operation: Calibrating the touch probe (Chapter 3) Compensating workpiece misalignment (Chapter 3) Setting datums (Chapter 3) Automatic workpiece inspection (Chapter 3) Automatic workpiece measurement (Chapter 4) Digitizing with triggering or measuring touch probe (Option, Chapter 5) You can program the touch probe cycles in the Programming and Editing operating mode via the TOUCH PROBE key. Like the most recent fixed cycles, touch probe cycles use Q parameters with numbers of 400 and above as transfer parameters. Parameters with the same function that the TNC requires in several cycles always have the same number: For example, Q260 is always assigned the clearance height, Q261 the measuring height, etc. To simplify programming, the TNC shows an illustration during cycle definition. In the illustration, the parameter that needs to be entered is highlighted (see figure at right). 1.1 General Information on Touch Probe Cycles To improve clarity, the help illustrations sometimes omit certain parameters. HEIDENHAIN TNC 426, TNC 430 3
16 1.1 General Information on Touch Probe Cycles Defining the touch probe cycle in the Programming and Editing operation mode The soft-key row shows all available touch probe functions divided into groups. Select the desired probe cycle, for example datum setting. Digitizing cycles and cycles for automatic tool measurement are available only if your machine has been prepared for them. Select a cycle, e.g. datum setting at pocket. The TNC initiates the programming dialog and asks all required input values. At the same time a graphic of the input parameters is displayed in the right screen window. The parameter that is asked for in the dialog prompt is highlighted. Enter all parameters requested by the TNC and conclude each entry with the ENT key. The TNC ends the dialog when all required data has been entered. Group of measuring cycles Cycles for automatic measurement and compensation of workpiece misalignment Cycles for automatic datum setting Cycles for automatic workpiece inspection Automatic calibration cycle Cycles for digitizing with measuring touch probe (option, not available for ISO) Soft key Example: NC blocks 5 TCH PROBE 410 DATUM INSIDE RECTAN. Q321=+50 ;CENTER IN 1ST AXIS Q322=+50 ;CENTER IN 2ND AXIS Q323=60 ;1ST SIDE LENGTH Q323=60 ;1ST SIDE LENGTH Q324=20 ;2ND SIDE LENGTH Q261=-5 ;MEASURING HEIGHT Q320=0 ;SET-UP CLEARANCE Q260=+20 ;CLEARANCE HEIGHT Q301=0 ;TRAVERSE TO CLEAR HEIGHT Q305=10 ;NO. IN TABLE Q331=+0 ;DATUM Q332=+0 ;DATUM Cycles for digitizing with measuring touch probe (option, not available for ISO) Cycles for automatic tool measurement (enabled by the machine tool builder, not ISO) 4 1 Introduction
17 1.2 Before You Start Working with Touch Probe Cycles! To make it possible to cover the widest possible range of applications, machine parameters enable you to determine the behavior common to all touch probe cycles: Maximum traverse to touch point: MP6130 If the stylus is not deflected within the path defined in MP6130, the TNC outputs an error message. Safety clearance to touch point: MP6140 In MP6140 you define how far from the defined (or calculated) touch point the TNC is to pre-position the touch probe. The smaller the value you enter, the more exactly must you define the touch point position. In many touch probe cycles you can also define a setup clearance in addition that is added to machine parameter Orient the infrared touch probe to the programmed probe direction: MP6165 (as of ) To increase measuring accuracy, you can use MP 6165 = 1 to have an infrared touch probe oriented in the programmed probe direction before every probe process. In this way the stylus is always deflected in the same direction. Multiple measurement: MP6170 To increase measuring certainty, the TNC can run each probing process up to three times in sequence. If the measured position values differ too greatly, the TNC outputs an error message (the limit value is defined in MP6171). With multiple measurement it is possible to detect random errors, e.g., from contamination. If the measured values lie within the confidence interval, the TNC saves the mean value of the measured positions. 1.2 Before You Start Working with Touch Probe Cycles! Confidence interval for multiple measurement: MP6171 In MP6171 you store the value by which the results may differ when you make multiple measurements. If the difference in the measured values exceeds the value in MP6171, the TNC outputs an error message. HEIDENHAIN TNC 426, TNC 430 5
18 1.2 Before You Start Working with Touch Probe Cycles! Touch trigger probe, probing feed rate: MP6120 In MP6120 you define the feed rate at which the TNC is to probe the workpiece. Touch trigger probe, rapid traverse for prepositioning: MP6150 In MP6150 you define the feed rate at which the TNC pre-positions the touch probe, or positions it between measuring points. Measuring touch probe, probing feed rate: MP6360 In MP6360 you define the feed rate at which the TNC is to probe the workpiece. Measuring touch probe, rapid traverse for prepositioning: MP6361 In MP6361 you define the feed rate at which the TNC pre-positions the touch probe, or positions it between measuring points. 6 1 Introduction
19 Running touch probe cycles All touch probe cycles are DEF active. This means that the TNC runs the cycle automatically as soon as the TNC executes the cycle definition in the program run. Make sure that at the beginning of the cycle the compensation data (length, radius) from the calibrated data or from the last TOOL CALL block are active (selection via MP7411, see the User's Manual of the respective control, General User Parameters ). NC software xx You can also run the touch probe cycles 410 to 418 during an active basic rotation. Make sure, however, that the basic rotation angle does not change when you use cycle 7 zero shift from datum table after the measuring cycle. Touch probe cycles with a number greater than 400 position the touch probe according to a positioning logic: If the current coordinate of the south pole of the stylus is less than the coordinate of the clearance height (defined in the cycle), the TNC retracts the touch probe in the probe axis to the clearance height and then positions it in the working plane to the first starting position. If the current coordinate of the south pole of the stylus is greater than the coordinate of the clearance height, the TNC first positions the probe in the working plane to the first starting position and then moves it immediately to the measuring height in the touch probe axis. 1.2 Before You Start Working with Touch Probe Cycles! HEIDENHAIN TNC 426, TNC 430 7
20

21 2 Touch Probe Cycles in the Manual and Electronic Handwheel Modes
22 2.1 Introduction 2.1 Introduction Overview The following touch probe cycles are available in the manual mode: Function Soft key Calibrate the effective length Calibrate the effective radius Measure a basic rotation using a line Datum setting in any axis Set the datum at a corner Set the datum at a circle center Measure a basic rotation using two holes/cylindrical studs Set the datum using four holes/cylindrical studs Set the circle center using three holes/cylindrical studs Selecting probe cycles Select the Manual Operation or Electronic Handwheel mode of operation. To choose the touch probe functions, press the TOUCH PROBE soft key. The TNC displays additional soft keys see table at right. To select the probe cycle: press the appropriate soft key, for example PROBING ROT, and the TNC displays the associated menu Touch Probe Cycles in the Manual and Electronic Handwheel Modes

23 Recording Measured Values from the Probe Cycles The TNC must be specially prepared by the machine tool builder for use of this function. The machine tool manual provides further information. After executing any selected probe cycle, the TNC displays the soft key PRINT. If you press this soft key, the TNC will record the current values determined in the active probe cycle. You can then use the PRINT function in the menu for setting the data interface (see the User's Manual Chapter 12, MOD Functions, Setting the Data Interfaces ) to define whether the TNC is to print the measuring result, store the measuring results on the TNC s hard disk, or store the measuring results on a PC. If you store the measuring results, the TNC creates the ASCII file %TCHPRNT.A. Unless you define a specific path and interface in the interface configuration menu, the TNC will store the %TCHPRNT file in the main directory TNC:\. 2.1 Introduction When you press the PRINT soft key, the %TCHPRNT.A file must not be active in the Programming and Editing mode of operation. The TNC will otherwise display an error message. The TNC stores the measured data in the %TCHPRNT.A file only. If you execute several probe cycles in succession and want to store the resulting measured data, you must make a backup of the contents stored in %TCHPRNT.A between the individual cycles by copying or renaming the file. Format and contents of the %TCHPRNT file are preset by the machine tool builder. HEIDENHAIN TNC 426, TNC
24 2.1 Introduction Writing the measured values from probe cycles in datum tables This function is active only if you have datum tables active on your TNC (bit 3 in machine parameter =0). With the ENTER IN DATUM TABLE soft key, the TNC can write the values measured during a probe cycle in a datum table: Select any probe function. Enter the desired coordinates of the datum in the appropriate input fields (depends on the touch probe cycle being run). Enter the datum number in the datum number = input box. Enter the name of the datum table (complete path) in the datum table input box. Press the soft key ENTER IN DATUM TABLE. The TNC displays whether the data are to be transferred to the indicated datum table as actual values or reference values. If, in addition to the desired coordinate of the datum, you wish to enter an incremental distance in the table, switch the soft key DISTANCE to ON. The TNC then displays an additional input box for each axis, in which you can enter the desired distance. The TNC then writes the sum of the desired datum and its assigned distance into the table. If immediately after probing you have used the probing menu to reset the datum, do not write the probe values to a datum table. The probe values saved by the TNC are always based on the datum that was active at the time of probing. Writing the probe values to a datum table would result in incorrect entries Touch Probe Cycles in the Manual and Electronic Handwheel Modes
25 2.2 Calibrating a Touch Trigger Probe Introduction The touch probe must be calibrated in the following cases: Commissioning Stylus breakage Stylus exchange Change in the probe feed rate Irregularities caused, for example, when the machine heats up During calibration, the TNC finds the effective length of the stylus and the effective radius of the ball tip. To calibrate the touch probe, clamp a ring gauge of known height and known internal radius to the machine table. Calibrating the effective length Set the datum in the spindle axis such that for the machine tool table Z=0. To select the calibration function for the touch probe length, press the TOUCH PROBE and CAL L soft keys. The TNC then displays a menu window with four input fields. Enter the tool axis (with the axis key). Datum: Enter the height of the ring gauge. The menu items Effective ball radius and Effective length do not require input. Move the touch probe to a position just above the ring gauge. To change the traverse direction (if necessary) press a soft key or an arrow key. To probe the upper surface of the ring gauge, press the machine START button. 5 Y Z X 2.2 Calibrating a Touch Trigger Probe HEIDENHAIN TNC 426, TNC
26 2.2 Calibrating a Touch Trigger Probe Calibrating the effective radius and compensating center misalignment After the touch probe is inserted it normally needs to be aligned exactly with the spindle axis. The misalignment is measured with this calibration function and compensated electronically. For this operation the TNC rotates the 3-D touch probe by 180. The rotation is initiated by a miscellaneous function that is set by the machine tool builder in machine parameter The center misalignment is measured after the effective ball tip radius is calibrated. In the Manual Operation mode, position the ball tip in the bore of the ring gauge. To select the calibration function for the ball-tip radius and the touch probe center misalignment, press the CAL R soft key. Select the tool axis and enter the radius of the ring gauge. To probe the workpiece, press the machine START button four times. The touch probe contacts a position on the bore in each axis direction and calculates the effective ball-tip radius. If you want to terminate the calibration function at this point, press the ENDE soft key. Y Z 10 X In order to be able to determine ball-tip center misalignment, the TNC needs to be specially prepared by the machine manufacturer. The machine tool manual provides further information. If you want to determine the ball-tip center misalignment, press the180 soft key. The TNC rotates the touch probe by 180. To probe the workpiece, press the machine START button four times. The touch probe contacts a position on the bore in each axis direction and calculates the ball-tip center misalignment Touch Probe Cycles in the Manual and Electronic Handwheel Modes

27 Displaying calibration values The TNC stores the effective length and radius, as well as the center misalignment, for use when the touch probe is needed again. You can display the values on the screen with the soft keys CAL L and CAL R. Storing calibration values in the TOOL.T tool table This function is only available if bit 0 in machine parameter 7411 = 1 is set (activate touch probe data with TOOL CALL), and tool table TOOL.T is active (machine parameter 7260 not equal to 0). If you conduct measurements during program run, the compensation data for the touch probe can be activated from the tool table via a TOOL CALL. To store the calibration data in the TOOL.T tool table, enter the tool number in the calibration menu (confirm with ENT) and then press the ENTER R IN TOOL TABLE or the ENTER L IN TOOL TABLE soft key. Managing more than one block of calibrating data (as of NC software xx) To be able to use more than one block of calibration data, you must set bit one in machine parameter The calibration data (length, radius, center misalignment, and spindle angle) are then always saved by the TNC in the tool table TOOL.T under a tool number that can be selected in the calibration menu (see also User's Manual, section 5.2, Tool Data ). 2.2 Calibrating a Touch Trigger Probe If you use this function, you must first activate the corresponding tool number with a tool call before executing a touch probe cycle, regardless of whether you wish to run the touch probe cycle in automatic mode or manual mode. You can view and edit the calibration data in the calibration menu, but you must make sure to write the changes back into the tool table by pressing the ENTER R IN TOOL TABLE or ENTER L IN TOOL TABLE soft key. The TNC does not write the calibration values into the table automatically! HEIDENHAIN TNC 426, TNC
28 2.3 Calibrating a Measuring Touch Probe 2.3 Calibrating a Measuring Touch Probe Introduction If the TNC displays the error message "Stylus already in contact," select the 3-D calibration menu and press the RESET 3D soft key. The measuring touch probe must be calibrated whenever the machine parameters for 3-D touch probes are changed. The effective length is calibrated in the same way as with triggering touch probes. You must also enter tool radius R2 (corner radius). With MP6321 you can define whether the TNC should probe to find the stylus center. The 3-D calibration cycle for measuring touch probes enables you to measure a standard ring gauge fully automatically. (The standard ring gauge is available from HEIDENHAIN). Fix the standard ring gauge to the machine table with fixing clamps. From the data measured during calibration, the TNC calculates the spring rate of the touch probe, the stylus deflection and the stylus center misalignment. At the end of the calibration cycle, the TNC automatically stores these values in the input menu. Course of actions In the Manual Operation mode, position the touch probe to a position approximately in the center of the standard ring gauge and set it to 180. To select the 3-D calibration cycle, press the 3D CAL soft key Enter the values for stylus radius 1 and stylus radius 2. Enter the same value for stylus radius 1 and 2 if you are using a stylus with ball tip. Enter different values for stylus radius 1 and 2 if you are using a stylus with a corner radius. Diameter ring gauge: The diameter is engraved on the standard ring gauge. To start the calibration cycle, press the machine START button: The touch probe measures the standard ring gauge in a programmed sequence of steps. Rotate the touch probe to 0 as soon as the TNC asks you to. To start the calibration cycle once again to determine center misalignment, press the machine START button. The touch probe again measures the standard ring gauge in a programmed sequence of steps Touch Probe Cycles in the Manual and Electronic Handwheel Modes
29 Displaying calibration values The compensation factors and force ratios are stored in the TNC for later use whenever the measuring touch probe is needed. You can display the stored values on the screen by pressing the 3D CAL soft key. Storing calibration values in the TOOL.T tool table This function is only available if machine parameter 7411 = 1 is set (activate touch probe data with TOOL CALL), and tool table TOOL.T is active (machine parameter 7260 not equal to 0). If you conduct measurements during program run, the compensation data for the touch probe can be activated from the tool table via a TOOL CALL. To store the calibration data in the TOOL.T tool table, enter the tool number in the calibration menu (confirm with ENT) and then press the ENTER R IN TOOL TABLE soft key. The TNC stores the stylus radius 1 in the R column, and the stylus radius 2 in the R2 column. 2.3 Calibrating a Measuring Touch Probe HEIDENHAIN TNC 426, TNC
30 2.4 Compensating Workpiece Misalignment 2.4 Compensating Workpiece Misalignment Introduction The TNC electronically compensates workpiece misalignment by computing a basic rotation. For this purpose, the TNC sets the rotation angle to the desired angle with respect to the reference axis in the working plane. See figure at right. Select the probe direction perpendicular to the angle reference axis when measuring workpiece misalignment. To ensure that the basic rotation is calculated correctly during program run, program both coordinates of the working plane in the first positioning block. Measuring the basic rotation Select the probing function by pressing the PROBING ROT soft key. Position the ball tip at a starting position near the first touch point. Y PA X Y A B X Select the probe direction perpendicular to the angle reference axis: Select the axis by soft key. To probe the workpiece, press the machine START button. Position the ball tip at a starting position near the second touch point. To probe the workpiece, press the machine START button. The TNC saves the basic rotation in non-volatile memory. The basic rotation is effective for all subsequent program runs and graphic simulation Touch Probe Cycles in the Manual and Electronic Handwheel Modes
.")
31 Displaying a basic rotation The angle of the basic rotation appears after ROTATION ANGLE whenever PROBING ROT is selected. The TNC also displays the rotation angle in the additional status display (STATUS POS.). In the status display a symbol is shown for a basic rotation whenever the TNC is moving the axes according to a basic rotation. Cancel a basic rotation Select the probing function by pressing the PROBING ROT soft key. Enter a rotation angle of zero and confirm with the ENT key. To terminate the probe function, press the END key. 2.4 Compensating Workpiece Misalignment HEIDENHAIN TNC 426, TNC
32 2.5 Setting the Datum with a 3-D Touch Probe 2.5 Setting the Datum with a 3-D Touch Probe Introduction The following functions are available for setting the datum on an aligned workpiece: Datum setting in any axis with PROBING POS Defining a corner as datum with PROBING P Setting the datum at a circle center with PROBING CC To set the datum in any axis (see figure at right) Select the probing function by pressing the PROBING POS soft key. Move the touch probe to a starting position near the touch point. Select the probe axis and direction in which you wish to set the datum, such as Z in direction Z. Selection is made via soft keys. To probe the workpiece, press the machine START button. Datum: Enter the nominal coordinate and confirm your entry with ENT. Y Z X 20 2 Touch Probe Cycles in the Manual and Electronic Handwheel Modes
33 Corner as datum using points that were already probed for a basic rotation (see figure at right) To select the probe function, press ANTASTEN P. Touch points of basic rotation?: Press ENT to transfer the touch point coordinates to memory. Position the touch probe at a starting position near the first touch point of the side that was not probed for basic rotation. Select the probe direction with a soft key. To probe the workpiece, press the machine START button. Position the touch probe near the second touch point on the same side. To probe the workpiece, press the machine START button. Datum: Enter both datum coordinates into the menu window, and confirm your entry with the ENT key. To terminate the probe function, press the END key. Corner as datum without using points that were already probed for a basic rotation To select the probe function, press PROBING P. Touch points of basic rotation?: Press NO ENT to ignore the previous touch points. (The dialog question only appears if a basic rotation was made previously.) Probe both workpiece sides twice. Enter the coordinates of the datum and confirm your entry with ENT. Y=? Y P X=? X Y P X 2.5 Setting the Datum with a 3-D Touch Probe To terminate the probe function, press the END key. HEIDENHAIN TNC 426, TNC
34 2.5 Setting the Datum with a 3-D Touch Probe Circle center as datum With this function, you can set the datum at the center of bore holes, circular pockets, cylinders, studs, circular islands, etc. Inside circle The TNC automatically probes the inside wall in all four coordinate axis directions. For incomplete circles (circular arcs) you can choose the appropriate probing direction. Position the touch probe approximately in the center of the circle. To select the probe function, press ANTASTEN CC. To probe the workpiece, press the machine START button four times. The touch probe touches four points on the inside of the circle. If you are probing to find the stylus center (only available on machines with spindle orientation, depending on MP6160), press the 180 soft key and probe another four points on the inside of the circle. If you are not probing to find the stylus center, press the END key. Datum: Enter both circle center coordinates into the menu window, and confirm your entry with ENT. To terminate the probe function, press the END key. Outside circle Position the touch probe at the starting position for the first touch point outside of the circle. Select the probe direction with a soft key. To probe the workpiece, press the machine START button. Repeat the probing process for the remaining three points. See figure at lower right. Enter the coordinates of the datum and confirm your entry with ENT. Y Y X+ X Y+ Y+ Y X+ Y X X X After the probing procedure is completed, the TNC displays the coordinates of the circle center and the circle radius PR Touch Probe Cycles in the Manual and Electronic Handwheel Modes
35 Setting datum points using holes/cylindrical studs A second soft-key row provides soft keys for using holes or cylindrical studs to set datums. Define whether a hole or stud is to be probed Select the probing functions with the TOUCH PROBE, shift the soft-key row. Select the probing function: For example, press the PROBING ROT soft key. Select holes or cylindrical studs: the selected element appears in a box Probing holes Pre-position the touch probe approximately in the center of the hole. After you have pressed the external START key, the TNC automatically probes four points on the wall of the hole. Move the touch probe to the next hole and have the TNC repeat the probing procedure until all the holes have been probed to set datums. Probing cylindrical studs Position the ball tip at a starting position near the first touch point of the stud. Select the probing direction by soft key and press the machine START button to start probing. Perform the above procedure four times. Overview Cycle Basic rotation using 2 holes: The TNC measures the angle between the line connecting the centers of two holes and a nominal position (angle reference axis). Soft key 2.5 Setting the Datum with a 3-D Touch Probe Datum using 4 holes: The TNC calculates the intersection of the line connecting the first two probed holes with the line connecting the last two probed holes. You need to probe diagonally opposite holes one after another (as shown on the soft key), as otherwise the datum calculated by the TNC will be incorrect. Circle center using 3 holes: The TNC calculates a circle that intersects the centers of all three holes, and finds the center. HEIDENHAIN TNC 426, TNC
36 2.6 Measuring Workpieces with a 3-D Touch Probe 2.6 Measuring Workpieces with a 3-D Touch Probe Introduction You can also use the touch probe in the Manual and Electronic Handwheel operating modes to make simple measurements on the workpiece. With a 3-D touch probe you can determine: position coordinates, and from them, dimensions and angles on the workpiece. To find the coordinate of a position on an aligned workpiece: Select the probing function by pressing the PROBING POS soft key. Move the touch probe to a starting position near the touch point. Select the probe direction and axis of the coordinate. Use the corresponding soft keys for selection. To probe the workpiece, press the machine START button. The TNC shows the coordinates of the touch point as datum. Finding the coordinates of a corner in the working plane Find the coordinates of the corner point: See Corner as datum without using points that were already probed for a basic rotation, page 21. The TNC displays the coordinates of the probed corner as datum Touch Probe Cycles in the Manual and Electronic Handwheel Modes
37 Measuring workpiece dimensions Select the probing function by pressing the PROBING POS soft key. Position the touch probe at a starting position near the first touch point A. Select the probing direction with a soft key. To probe the workpiece, press the machine START button. If you will need the current datum later, write down the value that appears in the datum display. Datum: Enter 0. To terminate the dialog, press the END key. Select the probing function by pressing the PROBING POS soft key. Position the touch probe at a starting position near the second touch point B Select the probe direction with the soft keys: Same axis but from the opposite direction. To probe the workpiece, press the machine START button. The value displayed as datum is the distance between the two points on the coordinate axis. To return to the datum that was active before the length measurement: Select the probing function by pressing the PROBING POS soft key. Probe the first touch point again. Set the datum to the value that you wrote down previously. To terminate the dialog, press the END key. Y Z B l A X 2.6 Measuring Workpieces with a 3-D Touch Probe Measuring angles You can use the 3-D touch probe to measure angles in the working plane. You can measure the angle between the angle reference axis and a workpiece side, or the angle between two sides. The measured angle is displayed as a value of maximum 90. HEIDENHAIN TNC 426, TNC
38 2.6 Measuring Workpieces with a 3-D Touch Probe To find the angle between the angle reference axis and a side of the workpiece Select the probing function by pressing the PROBING ROT soft key. Rotation angle: If you will need the current basic rotation later, write down the value that appears under Rotation angle. Make a basic rotation with the side of the workpiece (see Compensating Workpiece Misalignment on page 18). Press the PROBING ROT soft key to display the angle between the angle reference axis and the side of the workpiece as the rotation angle. Cancel the basic rotation, or restore the previous basic rotation: This is done by setting the rotation angle to the value that you wrote down previously. To measure the angle between two workpiece sides: Select the probing function by pressing the PROBING ROT soft key. Rotation angle: If you will need the current basic rotation later, write down the value that appears under Rotation angle. Make a basic rotation with the side of the workpiece (see Compensating Workpiece Misalignment on page 18). Probe the second side as for a basic rotation, but do not set the rotation angle to zero! Press the PROBING ROT soft key to display the angle PA between the two sides as the rotation angle. Cancel the basic rotation, or restore the previous basic rotation by setting the rotation angle to the value that you wrote down previously. 100 Y 10 Z PA α? L? α? 100 X 26 2 Touch Probe Cycles in the Manual and Electronic Handwheel Modes

39 3 Touch Probe Cycles for Automatic Workpiece Inspection HEIDENHAIN TNC 426, TNC
40 3.1 Measuring Workpiece Misalignment 3.1 Measuring Workpiece Misalignment Overview The TNC provides five cycles that enable you to measure and compensate workpiece misalignment. In addition, you can reset a basic rotation with Cycle 404. Cycle 400 BASIC ROTATION Automatic measurement using two points. Compensation via basic rotation. 401 ROT OF 2 HOLES Automatic measurement using two holes. Compensation via basic rotation. 402 ROT OF 2 STUDS Automatic measurement using two studs. Compensation via basic rotation. 403 ROT IN ROTARY AXIS Automatic measurement using two points. Compensation via basic rotation. 405 ROT IN C AXIS Automatic alignment of an angular offset between a hole center and the positive Y axis. Compensation via table rotation. Soft key 404 SET BASIC ROTATION Setting any basic rotation Characteristics common to all touch probe cycles for measuring workpiece misalignment For the cycles 400, 401 and 402 you can define through parameter Q307 Default setting for basic rotation whether the measurement result is to be corrected by a known angle a (see figure at right). This enables you to measure the basic rotation against any straight line 1 of the workpiece and to establish the reference to the actual 0 direction Touch Probe Cycles for Automatic Workpiece Inspection
41 BASIC ROTATION (touch probe cycle 400, ISO: G400) Touch probe cycle 400 determines a workpiece misalignment by measuring two points, which must lie on a straight surface. With the basic rotation function the TNC compensates the measured value (See also Compensating Workpiece Misalignment on page 18). 1 The TNC positions the touch probe to the starting points at rapid traverse (value from MP6150 or MP6361) following the positioning logic (see Running touch probe cycles on page 7) to the programmed starting point 1. The TNC offsets the touch probe by the safety clearance in the direction opposite the defined traverse direction. 2 Then the touch probe moves to the entered measuring height and probes the first touch point at the probing feed rate (MP6120 or MP6360). 3 Then the touch probe moves to the next starting position 2 and probes the second position. 4 The TNC returns the touch probe to the clearance height and performs the basic rotation. Before programming, note the following: Before a cycle definition you must have programmed a tool call to define the touch probe axis. The TNC will reset an active basic rotation at the beginning of the cycle Measuring Workpiece Misalignment HEIDENHAIN TNC 426, TNC
42 3.1 Measuring Workpiece Misalignment First measuring point in the 1st axis Q263 (absolute): coordinate of the first touch point in the reference axis of the working plane. First measuring point in the 2nd axis Q264 (absolute): coordinate of the first touch point in the minor axis of the working plane. Second measuring point in the 1st axis Q265 (absolute): coordinate of the second touch point in the reference axis of the working plane Second measuring point in the 2nd axis Q266 (absolute): coordinate of the second touch point in the minor axis of the working plane Measuring axis Q272: axis in the working plane in which the measurement is to be made: 1: Reference axis = measuring axis 2: Minor axis = measuring axis Traverse direction 1 Q267: direction in which the probe is to approach the workpiece: -1: Negative traverse direction +1: Positive traverse direction Measuring height in the touch probe axis Q261 (absolute): coordinate of the ball tip center (= touch point) in the touch probe axis in which the measurement is to be made. Setup clearance Q320 (incremental): additional distance between measuring point and ball tip. Q320 is added to MP6140. Clearance height Q260 (absolute): coordinate in the touch probe axis at which no collision between tool and workpiece (fixtures) can occur. Traversing to clearance height Q301: definition of how the touch probe is to move between the measuring points: 0: Move at measuring height between measuring points 1: Move at clearance height between measuring points Default setting for basic rotation Q307 (absolute): If the misalignment is to be measured against a straight line other than the reference axis, enter the angle of this reference line. The TNC will then calculate the difference between the measured value and the angle of the reference line for the basic rotation. Y Q272=2 Q266 Q264 Example: NC blocks + Q267 + X Q263 Q265 Q272=1 5 TCH PROBE 400 BASIC ROTATION Q263=+10 ;1ST POINT 1ST AXIS Q264=+3.5 ;1ST POINT 2ND AXIS Q265=+25 ;2ND POINT 1ST AXIS Q266=+2 ;2ND POINT 2ND AXIS Q272=2 ;MEASURING AXIS Q267=+1 ;TRAVERSE DIRECTION Q261=-5 ;MEASURING HEIGHT Q320=0 ;SET-UP CLEARANCE Q260=+20 ;CLEARANCE HEIGHT Q301=0 ;TRAVERSE TO CLEAR HEIGHT Q307=+0 ;PRESET BASIC ROTATION MP Q Touch Probe Cycles for Automatic Workpiece Inspection
43 BASIC ROTATION from two holes (touch probe cycle 401, ISO: G401) The touch probe cycle 401 measures the centers of two holes. Then the TNC calculates the angle between the reference axis in the working plane and the line connecting the two hole centers. With the basic rotation function the TNC compensates the calculated value (See also Compensating Workpiece Misalignment on page 18). 1 Following the positioning logic (see Running touch probe cycles on page 7), the TNC positions the touch probe at rapid traverse (value from MP6150 or MP6361) to the point entered as center of the first hole 1. 2 Then the probe moves to the entered measuring height and probes four points to find the first hole center. 3 The touch probe returns to the clearance height and then to the position entered as center of the second hole 2. 4 The TNC moves the touch probe to the entered measuring height and probes four points to find the second hole center. 5 Then the TNC returns the touch probe to the clearance height and performs the basic rotation. Before programming, note the following: Before a cycle definition you must have programmed a tool call to define the touch probe axis. The TNC will reset an active basic rotation at the beginning of the cycle Measuring Workpiece Misalignment HEIDENHAIN TNC 426, TNC
44 3.1 Measuring Workpiece Misalignment First hole: Center in 1st axis Q268 (absolute): center of the first hole in the reference axis of the working plane. First hole: Center in 2nd axis Q269 (absolute): center of the first hole in the minor axis of the working plane. Second hole: Center in 1st axis Q270 (absolute): center of the second hole in the reference axis of the working plane. Second hole: Center in 2nd axis Q271 (absolute): center of the second hole in the minor axis of the working plane. Measuring height in the touch probe axis Q261 (absolute): coordinate of the ball tip center (= touch point) in the touch probe axis in which the measurement is to be made. Clearance height Q260 (absolute): coordinate in the touch probe axis at which no collision between tool and workpiece (fixtures) can occur. Default setting for basic rotation Q307 (absolute): If the misalignment is to be measured against a straight line other than the reference axis, enter the angle of this reference line. The TNC will then calculate the difference between the measured value and the angle of the reference line for the basic rotation. Example: NC blocks 5 TCH PROBE 401 ROT OF 2 HOLES Q268=-37 ;1ST CENTER 1ST AXIS Q269=+12 ;1ST CENTER 2ND AXIS Q270=+75 ;2ND CENTER 1ST AXIS Q271=+20 ;2ND CENTER 2ND AXIS Q261=-5 ;MEASURING HEIGHT Q260=+20 ;CLEARANCE HEIGHT Q307=+0 ;PRESET BASIC ROT Touch Probe Cycles for Automatic Workpiece Inspection
45 BASIC ROTATION over two studs (touch probe cycle 402, ISO: G402) The touch probe cycle 402 measures the centers of two studs. Then the TNC calculates the angle between the reference axis in the working plane and the line connecting the two stud centers. With the basic rotation function the TNC compensates the calculated value (See also Compensating Workpiece Misalignment on page 18). 1 Following the positioning logic (see Running touch probe cycles on page 7), the TNC positions the touch probe in rapid traverse (value from MP6150 or MP6361) to the starting point for probing the first stud 1. 2 Then the probe moves to the entered measuring height 1 and probes four points to find the center of the first stud. The touch probe moves on a circular arc between the touch points, each of which is offset by The touch probe returns to the clearance height and then to the starting point for probing 5 the second stud. 4 The TNC moves the touch probe to the entered measuring height 2 and probes four points to find the center of the second stud. 5 Then the TNC returns the touch probe to the clearance height and performs the basic rotation. Before programming, note the following: Before a cycle definition you must have programmed a tool call to define the touch probe axis. The TNC will reset an active basic rotation at the beginning of the cycle. Y 1 5 X 3.1 Measuring Workpiece Misalignment HEIDENHAIN TNC 426, TNC
46 3.1 Measuring Workpiece Misalignment First stud: Center in 1st axis Q268 (absolute): center of the first stud in the reference axis of the working plane. First stud: Center in 2nd axis Q269 (absolute): center of the first stud in the minor axis of the working plane. Diameter of stud 1 Q313: approximate diameter of the 1st stud. Enter a value that is more likely to be too large than too small. Measuring height 1 in the probe axis Q261 (absolute): coordinate of the ball tip center (= touch point in the touch probe axis) at which stud 1 is to be measured. Second stud: Center in 1st axis Q270 (absolute): center of the second stud in the reference axis of the working plane. Second stud: Center in 2nd axis Q271 (absolute): center of the second stud in the minor axis of the working plane. Diameter of stud 2 Q314: approximate diameter of the 2nd stud. Enter a value that is more likely to be too large than too small. Measuring height 2 in the probe axis Q315 (absolute): coordinate of the ball tip center (= touch point in the touch probe axis) at which stud 2 is to be measured. Setup clearance Q320 (incremental): additional distance between measuring point and ball tip. Q320 is added to MP6140. Clearance height Q260 (absolute): coordinate in the touch probe axis at which no collision between tool and workpiece (fixtures) can occur. Traversing to clearance height Q301: definition of how the touch probe is to move between the measuring points: 0: Move at measuring height between measuring points 1: Move at clearance height between measuring points Default setting for basic rotation Q307 (absolute): If the misalignment is to be measured against a straight line other than the reference axis, enter the angle of this reference line. The TNC will then calculate the difference between the measured value and the angle of the reference line for the basic rotation. Q271 Q269 Y Z Example: NC blocks Q268 Q313 Q261 Q270 MP Q320 Q315 Q314 5 TCH PROBE 402 ROT OF 2 STUDS Q268=-37 ;1ST CENTER 1ST AXIS Q269=+12 ;1ST CENTER 2ND AXIS Q313=60 ;DIAMETER OF STUD 1 Q261=-5 ;MEASURING HEIGHT 1 Q270=+75 ;2ND CENTER 1ST AXIS Q271=+20 ;2ND CENTER 2ND AXIS Q314=60 ;DIAMETER STUD 2 Q315=-5 ;MEASURING HEIGHT 2 Q320=0 ;SET-UP CLEARANCE Q260=+20 ;CLEARANCE HEIGHT Q301=0 ;TRAVERSE TO CLEAR HEIGHT Q307=+0 ;PRESET BASIC ROT. X Q260 X 34 3 Touch Probe Cycles for Automatic Workpiece Inspection
47 BASIC ROTATION compensation via rotary axis (touch probe cycle 403, ISO: G403) Touch probe cycle 403 determines a workpiece misalignment by measuring two points, which must lie on a straight surface. The TNC compensates the misalignment by rotating the A, B or C axis. The workpiece can be clamped in any position on the rotary table. 1 The TNC positions the touch probe to the starting points at rapid traverse (value from MP6150 or MP6361) following the positioning logic (see Running touch probe cycles on page 7) to the programmed starting point 1. The TNC offsets the touch probe by the safety clearance in the direction opposite the defined traverse direction. 2 Then the touch probe moves to the entered measuring height and probes the first touch point at the probing feed rate (MP6120 or MP6360). 3 Then the touch probe moves to the next starting position 2 and probes the second position. 4 The TNC returns the touch probe to the clearance height and moves the rotary axis, which was defined in the cycle, by the measured value. Before programming, note the following: Before a cycle definition you must have programmed a tool call to define the touch probe axis Measuring Workpiece Misalignment HEIDENHAIN TNC 426, TNC
48 3.1 Measuring Workpiece Misalignment First measuring point in the 1st axis Q263 (absolute): coordinate of the first touch point in the reference axis of the working plane. First measuring point in the 2nd axis Q264 (absolute): coordinate of the first touch point in the minor axis of the working plane. Second measuring point in the 1st axis Q265 (absolute): coordinate of the second touch point in the reference axis of the working plane Second measuring point in the 2nd axis Q266 (absolute): coordinate of the second touch point in the minor axis of the working plane Measuring axis Q272: axis in which the measurement is to be made: 1: Reference axis = measuring axis 2: Minor axis = measuring axis 3: Touch probe axis = measuring axis Traverse direction 1 Q267: direction in which the probe is to approach the workpiece: -1: Negative traverse direction +1: Positive traverse direction Measuring height in the touch probe axis Q261 (absolute): coordinate of the ball tip center (= touch point) in the touch probe axis in which the measurement is to be made. Setup clearance Q320 (incremental): additional distance between measuring point and ball tip. Q320 is added to MP6140. Clearance height Q260 (absolute): coordinate in the touch probe axis at which no collision between tool and workpiece (fixtures) can occur. Traversing to clearance height Q301: definition of how the touch probe is to move between the measuring points: 0: Move at measuring height between measuring points 1: Move at clearance height between measuring points Axis for compensation motion Q312: assignment of the rotary axis in which the TNC is to compensate the measured misalignment: 4: Compensate misalignment with rotary axis A 5: Compensate misalignment with rotary axis B 6: Compensate misalignment with rotary axis C Y Q272=2 Q266 Q264 Example: NC blocks A B C X Q263 Q265 Q272=1 5 TCH PROBE 403 ROT IN C-AXIS Q263=+0 ;1ST POINT 1ST AXIS Q264=+0 ;1ST POINT 2ND AXIS Q265=+20 ;2ND POINT 1ST AXIS Q266=+30 ;2ND POINT 2ND AXIS Q272=1 ;MEASURING AXIS Q267=+1 ;TRAVERSE DIRECTION Q261=-5 ;MEASURING HEIGHT Q320=0 ;SET-UP CLEARANCE Q260=+20 ;CLEARANCE HEIGHT Q301=0 ;TRAVERSE TO CLEAR HEIGHT Q312=6 ;COMPENSATION AXIS + + Q267 MP Q Touch Probe Cycles for Automatic Workpiece Inspection
49 SET BASIC ROTATION (touch probe cycle 404, ISO: G404, available as of NC software xx) With touch probe cycle 404 you can set any basic rotation automatically during program run. This cycle is intended primarily for resetting a previous basic rotation. Preset value for basic rotation: Angular value at which the basic rotation is to be set. Example: NC blocks 5 TCH PROBE 404 BASIC ROTATION 307=+0 ;PRESET BASIC ROTATION 3.1 Measuring Workpiece Misalignment HEIDENHAIN TNC 426, TNC
50 3.1 Measuring Workpiece Misalignment Compensating workpiece misalignment by rotating the C axis (touch probe cycle 405, ISO: G405, available as of NC software xx) With touch probe cycle 405 you can measure the angular offset between the positive Y axis of the active coordinate system and the center of a hole, or the angular offset between the nominal position and the actual position of a hole center. The TNC compensates the misalignment by rotating the C axis. The workpiece can be clamped in any position on the rotary table, but the Y coordinate of the hole must be positive. If you measure the angular misalignment of the hole with touch probe axis Y (horizontal position of the hole), it may be necessary to conduct the cycle more than once because the measuring strategy causes an inaccuracy of approx. 1% of the misalignment. 1 The TNC positions the touch probe to the starting points at rapid traverse (value from MP6150 or MP6361) following the positioning logic (see Running touch probe cycles on page 7) to the starting point 1. The TNC calculates the probe starting points from the data in the cycle and the safety clearance from MP Then the touch probe moves to the entered measuring height and probes the first touch point at the probing feed rate (MP6120 or MP6360). The TNC derives the probing direction automatically from the programmed starting angle. 3 Then the touch probe moves in a circular arc either at measuring height or at clearance height to the next starting point 2 and probes the second touch point. 4 The TNC positions the probe to starting point 3 and then to starting point 4 to probe the third and fourth touch points and positions the touch probe on the hole centers measured. 5 Finally the TNC returns the touch probe to the clearance height and aligns the workpiece by rotating the table. The TNC rotates the rotary table so that the hole center after compensation lies in the direction of the positive Y axis, or on the nominal position of the hole center both with a vertical and horizontal touch probe axis. The measured angular misalignment is also available in parameter Q Before programming, note the following: To prevent a collision between the touch probe and the workpiece, enter a low estimate for the nominal diameter of the pocket (or hole). If the dimensions of the pocket and the safety clearance do not permit pre-positioning in the proximity of the touch points, the TNC always starts probing from the center of the pocket. In this case the touch probe does not return to the clearance height between the four measuring points. Before a cycle definition you must have programmed a tool call to define the touch probe axis Touch Probe Cycles for Automatic Workpiece Inspection
51 Center in 1st axis Q321 (absolute value): Center of the pocket in the reference axis of the working plane. Center in 2nd axis Q322 (absolute value): Center of the pocket in the minor axis of the working plane If you program Q322 = 0, the TNC aligns the hole center to the positive Y axis. If you program Q322 not equal to 0, then the TNC aligns the hole center to the nominal position. Nominal diameter Q262: approximate diameter of the circular pocket (or hole). Enter a value that is more likely to be too small than too large. Starting angle Q325 (absolute): angle between the reference axis of the working plane and the first touch point. Stepping angle Q247 (incremental): Angle between two measuring points. The algebraic sign of the stepping angle determines the direction of rotation (negative = clockwise) in which the touch probe moves to the next measuring point. If you wish to probe a circular arc instead of a complete circle, then program the stepping angle to be less than 90. The smaller the angle, the less accurately the TNC can calculate the circle center. Minimum input value: 5. Q322 Y Q247 Q321 Q325 Q262 X 3.1 Measuring Workpiece Misalignment HEIDENHAIN TNC 426, TNC
52 3.1 Measuring Workpiece Misalignment Measuring height in the touch probe axis Q261 (absolute): coordinate of the ball tip center (= touch point) in the touch probe axis in which the measurement is to be made. Setup clearance Q320 (incremental): additional distance between measuring point and ball tip. Q320 is added to MP6140. Clearance height Q260 (absolute): coordinate in the touch probe axis at which no collision between tool and workpiece (fixtures) can occur. Traversing to clearance height Q301: definition of how the touch probe is to move between the measuring points: 0: Move at measuring height between measuring points 1: Move at clearance height between measuring points Set to zero after alignment Q337: definition of whether the TNC should set the display of the C-axis to zero, or write the angular misalignment in column C of the datum table: 0: Set display of C to 0 >0: Write the angular misalignment, including algebraic sign, in the datum table. Line number = value of Q337. If a C-axis shift is registered in the datum table, the TNC adds the measured angular misalignment. Z Example: NC blocks MP Q320 Q261 Q260 5 TCH PROBE 405 ROT IN C-AXIS Q321=+50 ;CENTER IN 1ST AXIS Q322=+50 ;CENTER IN 2ND AXIS Q262=10 ;NOMINAL DIAMETER Q325=+0 ;STARTING ANGLE Q247=90 ;STEPPING ANGLE Q261=-5 ;MEASURING HEIGHT Q320=0 ;SET-UP CLEARANCE Q260=+20 ;CLEARANCE HEIGHT Q301=0 ;TRAVERSE TO CLEAR HEIGHT Q337=0 ;SET TO ZERO X 40 3 Touch Probe Cycles for Automatic Workpiece Inspection
53 Example: Determining a basic rotation from two holes 0 BEGIN PGM CYC401 MM 1 TOOL CALL 0 Z 2 TCH PROBE 401 ROT OF 2 HOLES Q268=+25 ;1ST CENTER 1ST AXIS Q269=+15 ;1ST CENTER 2ND AXIS Q270=+80 ;2ND CENTER 1ST AXIS Q271=+35 ;2ND CENTER 2ND AXIS Center of the 1st hole: X coordinate Center of the 1st hole: Y coordinate Center of the 2nd hole: X coordinate Center of the 2nd hole: Y coordinate Q261=-5 ;MEASURING HEIGHT Coordinate in the touch probe axis in which the measurement is made Q260=+20 ;CLEARANCE HEIGHT Height in the touch probe axis at which the probe can traverse without collision Q307=+0 ;PRESET BASIC ROTATION Angle of the reference line 3 CALL PGM 35K47 Part program call 4 END PGM CYC401 MM Y X Y Z 3.1 Measuring Workpiece Misalignment HEIDENHAIN TNC 426, TNC
54 3.2 Automatic Datum Setting 3.2 Automatic Datum Setting Overview The TNC provides nine cycles for automatic datum setting or automatic entry of the measured values into the active datum table: Cycle 410 DATUM INSIDE RECTAN. Measuring the inside length and width of a rectangle, and defining the center as datum 411 DATUM OUTSIDE RECTAN. Measuring the outside length and width of a rectangle, and defining the center as datum 412 DATUM INSIDE CIRCLE Measuring any four points on the inside of a circle, and defining the center as datum 413 DATUM OUTSIDE CIRCLE Measuring any four points on the outside of a circle, and defining the center as datum Soft key 414 DATUM OUTSIDE CORNER Measuring two lines from the outside of the angle, and defining the intersection as datum 415 DATUM INSIDE CORNER Measuring two lines from within the angle, and defining the intersection as datum 416 DATUM CIRCLE CENTER (2nd soft-key level) Measuring any three holes on a bolt hole circle, and defining the bolt-hole center as datum 417 DATUM IN TS AXIS (2nd soft-key level) Measuring any position in the touch probe axis and defining it as datum 418 DATUM FROM 4 HOLES (2nd soft-key level) Measuring 4 holes crosswise and defining the intersection of the lines between them as datum 42 3 Touch Probe Cycles for Automatic Workpiece Inspection
55 Characteristics common to all touch probe cycles for datum setting In TNCs with NC software xx you may also run the touch probe cycles 410 to 418 during an active basic rotation (basic rotation or Cycle 10). In previous versions the TNC displays an error message if the basic rotation is active. Datum point and touch probe axis From the touch probe axis that you have defined in the measuring program the TNC determines the working plane for the datum: Active touch probe axis Z or W Y or V X or U Datum setting in X and Y Z and X Y and Z 3.2 Automatic Datum Setting Writing the calculated datum to a datum table In all cycles for datum setting you can use the input parameter Q305 to define whether you wish the TNC to set the calculated datum shown in the display or enter it in a datum table. If you want the calculated datum to be entered in a datum table, you must first activate a datum table (status M) in a program run mode before starting the measuring program. When writing to a datum table, the TNC observes machine parameter 7475: MP7475 = 0: Values are referenced to workpiece datum, MP7475 = 1: Values are referenced to the machine datum. If you change the setting in MP7475, the TNC does not convert the values already saved in datum tables. HEIDENHAIN TNC 426, TNC
56 3.2 Automatic Datum Setting DATUM FROM INSIDE OF RECTANGLE (touch probe cycle 410, ISO: G410) Touch probe cycle 410 finds the center of a rectangular pocket and defines its center as datum. If desired, the TNC can also enter the coordinates into a datum table. 1 The TNC positions the touch probe to the starting points at rapid traverse (value from MP6150 or MP6361) following the positioning logic (see Running touch probe cycles on page 7) to the starting point 1. The TNC calculates the probe starting points from the data in the cycle and the safety clearance from MP Then the touch probe moves to the entered measuring height and probes the first touch point at the probing feed rate (MP6120 or MP6360). 3 Then the touch probe moves either paraxially at the measuring height or linearly at the clearance height to the next starting point 2 and probes the second touch point. 4 The TNC positions the probe to starting point 3 and then to starting point 4 to probe the third and fourth touch points. 5 Finally the TNC returns the touch probe to the clearance height and sets the datum in the pocket center, or enters the coordinates of the pocket center in the active datum table Before programming, note the following: To prevent a collision between touch probe and workpiece, enter low estimates for the lengths of the 1st and 2nd sides. If the dimensions of the pocket and the safety clearance do not permit pre-positioning in the proximity of the touch points, the TNC always starts probing from the center of the pocket. In this case the touch probe does not return to the clearance height between the four measuring points. Before a cycle definition you must have programmed a tool call to define the touch probe axis Touch Probe Cycles for Automatic Workpiece Inspection
57 Center in 1st axis Q321 (absolute value): Center of the pocket in the reference axis of the working plane. Center in 2nd axis Q322 (absolute value): Center of the pocket in the minor axis of the working plane. First side length Q323 (incremental value): Pocket length, parallel to the reference axis of the working plane. Second side length Q324 (incremental value): Pocket length, parallel to the minor axis of the working plane Measuring height in the touch probe axis Q261 (absolute): coordinate of the ball tip center (= touch point) in the touch probe axis in which the measurement is to be made. Setup clearance Q320 (incremental): additional distance between measuring point and ball tip. Q320 is added to MP6140. Clearance height Q260 (absolute): coordinate in the touch probe axis at which no collision between tool and workpiece (fixtures) can occur. Traversing to clearance height Q301: definition of how the touch probe is to move between the measuring points: 0: Move at measuring height between measuring points 1: Move at clearance height between measuring points Datum number in table Q305: Enter the datum number in the table in which the TNC is to save the coordinates of the pocket center. If you enter Q305=0, the TNC automatically sets the display so that the new datum is at the center of the pocket. New datum for reference axis Q331 (absolute): coordinate in the reference axis at which the TNC should set the pocket center. Basic setting = 0 New datum for minor axis Q332 (absolute): coordinate in the minor axis at which the TNC should set the pocket center. Basic setting = 0 Q322 Y Example: NC blocks Q323 Q321 MP Q320 5 TCH PROBE 410 DATUM INSIDE RECTAN. Q321=+50 ;CENTER IN 1ST AXIS Q322=+50 ;CENTER IN 2ND AXIS Q323=60 ;1ST SIDE LENGTH Q324=20 ;2ND SIDE-LENGTH Q261=-5 ;MEASURING HEIGHT Q320=0 ;SET-UP CLEARANCE Q260=+20 ;CLEARANCE HEIGHT Q301=0 ;TRAVERSE TO CLEAR HEIGHT Q305=10 ;NO. IN TABLE Q331=+0 ;DATUM Q332=+0 ;DATUM Q324 X 3.2 Automatic Datum Setting HEIDENHAIN TNC 426, TNC
58 3.2 Automatic Datum Setting DATUM FROM OUTSIDE OF RECTANGLE (touch probe cycle 411, ISO: G411) Touch probe cycle 411 finds the center of a rectangular stud and defines its center as datum. If desired, the TNC can also enter the coordinates into a datum table. 1 The TNC positions the touch probe to the starting points at rapid traverse (value from MP6150 or MP6361) following the positioning logic (see Running touch probe cycles on page 7) to the starting point 1. The TNC calculates the probe starting points from the data in the cycle and the safety clearance from MP Then the touch probe moves to the entered measuring height and probes the first touch point at the probing feed rate (MP6120 or MP6360). 3 Then the touch probe moves either paraxially at the measuring height or linearly at the clearance height to the next starting point 2 and probes the second touch point. 4 The TNC positions the probe to starting point 3 and then to starting point 4 to probe the third and fourth touch points. 5 Finally the TNC returns the touch probe to the clearance height and sets the datum at the measured center, or enters its coordinates in the active datum table Before programming, note the following: To prevent a collision between the touch probe and workpiece, enter high estimates for the lengths of the 1st and 2nd sides. Before a cycle definition you must have programmed a tool call to define the touch probe axis Touch Probe Cycles for Automatic Workpiece Inspection
59 Center in 1st axis Q321 (absolute value): Center of the stud in the reference axis of the working plane. Center in 2nd axis Q322 (absolute value): Center of the stud in the minor axis of the working plane. First side length Q323 (incremental value): Stud length, parallel to the reference axis of the working plane Second side length Q324 (incremental value): Stud length, parallel to the secondary axis of the working plane. Measuring height in the touch probe axis Q261 (absolute): coordinate of the ball tip center (= touch point) in the touch probe axis in which the measurement is to be made. Setup clearance Q320 (incremental): additional distance between measuring point and ball tip. Q320 is added to MP6140. Clearance height Q260 (absolute): coordinate in the touch probe axis at which no collision between tool and workpiece (fixtures) can occur. Traversing to clearance height Q301: definition of how the touch probe is to move between the measuring points: 0: Move at measuring height between measuring points 1: Move at clearance height between measuring points Datum number in table Q305: Enter the datum number in the table in which the TNC is to save the coordinates of the stud center. If you enter Q305=0, the TNC automatically sets the display so that the new datum is on the stud center. New datum for reference axis Q331 (absolute): coordinate in the reference axis at which the TNC should set the stud center. Basic setting = 0 New datum for minor axis Q332 (absolute): coordinate in the minor axis at which the TNC should set the stud center. Basic setting = 0 Example: NC blocks 5 TCH PROBE 411 DATUM OUTS. RECTAN. Q321=+50 ;CENTER IN 1ST AXIS Q322=+50 ;CENTER IN 2ND AXIS Q323=60 ;1ST SIDE LENGTH Q324=20 ;2ND SIDE-LENGTH Q261=-5 ;MEASURING HEIGHT Q320=0 ;SET-UP CLEARANCE Q260=+20 ;CLEARANCE HEIGHT Q301=0 ;TRAVERSE TO CLEAR HEIGHT Q305=0 ;NO. IN TABLE Q331=+0 ;DATUM Q332=+0 ;DATUM 3.2 Automatic Datum Setting HEIDENHAIN TNC 426, TNC
60 3.2 Automatic Datum Setting DATUM FROM INSIDE OF CIRCLE (touch probe cycle 412, ISO: G412) Touch probe cycle 412 finds the center of a circular pocket (or of a hole) and defines its center as datum. If desired, the TNC can also enter the coordinates into a datum table. 1 The TNC positions the touch probe to the starting points at rapid traverse (value from MP6150 or MP6361) following the positioning logic (see Running touch probe cycles on page 7) to the starting point 1. The TNC calculates the probe starting points from the data in the cycle and the safety clearance from MP Then the touch probe moves to the entered measuring height and probes the first touch point at the probing feed rate (MP6120 or MP6360). The TNC derives the probing direction automatically from the programmed starting angle. 3 Then the touch probe moves in a circular arc either at measuring height or at clearance height to the next starting point 2 and probes the second touch point. 4 The TNC positions the probe to starting point 3 and then to starting point 4 to probe the third and fourth touch points. 5 Finally the TNC returns the touch probe to the clearance height and sets the datum at the measured center, or enters its coordinates in the active datum table Before programming, note the following: To prevent a collision between the touch probe and the workpiece, enter a low estimate for the nominal diameter of the pocket (or hole). If the dimensions of the pocket and the safety clearance do not permit pre-positioning in the proximity of the touch points, the TNC always starts probing from the center of the pocket. In this case the touch probe does not return to the clearance height between the four measuring points. Before a cycle definition you must have programmed a tool call to define the touch probe axis Touch Probe Cycles for Automatic Workpiece Inspection
61 Center in 1st axis Q321 (absolute value): Center of the pocket in the reference axis of the working plane. Center in 2nd axis Q322 (absolute value): Center of the pocket in the minor axis of the working plane If you program Q322 = 0, the TNC aligns the hole center to the positive Y axis. If you program Q322 not equal to 0, then the TNC aligns the hole center to the nominal position. Nominal diameter Q262: approximate diameter of the circular pocket (or hole). Enter a value that is more likely to be too small than too large. Starting angle Q325 (absolute): angle between the reference axis of the working plane and the first touch point. Stepping angle Q247 (incremental): Angle between two measuring points. The algebraic sign of the stepping angle determines the direction of rotation (negative = clockwise) in which the touch probe moves to the next measuring point. If you wish to probe a circular arc instead of a complete circle, then program the stepping angle to be less than 90. Q322 Y Z Q247 Q321 Q325 Q262 X 3.2 Automatic Datum Setting The smaller the angle, the less accurately the TNC can calculate the datum. Minimum input value: 5 Measuring height in the touch probe axis Q261 (absolute): coordinate of the ball tip center (= touch point) in the touch probe axis in which the measurement is to be made. Setup clearance Q320 (incremental): additional distance between measuring point and ball tip. Q320 is added to MP6140. Clearance height Q260 (absolute): coordinate in the touch probe axis at which no collision between tool and workpiece (fixtures) can occur. Traversing to clearance height Q301: definition of how the touch probe is to move between the measuring points: 0: Move at measuring height between measuring points 1: Move at clearance height between measuring points Datum number in table Q305: Enter the datum number in the table in which the TNC is to save the coordinates of the pocket center. If you enter Q305=0, the TNC automatically sets the display so that the new datum is on the pocket center. New datum for reference axis Q331 (absolute): coordinate in the reference axis at which the TNC should set the pocket center. Basic setting = 0 New datum for minor axis Q332 (absolute): coordinate in the minor axis at which the TNC should set the pocket center. Basic setting = 0 Example: NC blocks MP Q320 Q261 Q260 5 TCH PROBE 412 DATUM INSIDE CIRCLE Q321=+50 ;CENTER IN 1ST AXIS Q322=+50 ;CENTER IN 2ND AXIS Q262=65 ;NOMINAL DIAMETER Q325=+0 ;STARTING ANGLE Q247=90 ;STEPPING ANGLE Q261=-5 ;MEASURING HEIGHT Q320=0 ;SET-UP CLEARANCE Q260=+20 ;CLEARANCE HEIGHT Q301=0 ;TRAVERSE TO CLEAR HEIGHT Q305=12 ;NO. IN TABLE Q331=+0 ;DATUM Q332=+0 ;DATUM X HEIDENHAIN TNC 426, TNC
62 3.2 Automatic Datum Setting DATUM FROM OUTSIDE OF CIRCLE (touch probe cycle 413, ISO: G413) Touch probe cycle 413 finds the center of a circular stud and defines it as datum. If desired, the TNC can also enter the coordinates into a datum table. 1 The TNC positions the touch probe to the starting points at rapid traverse (value from MP6150 or MP6361) following the positioning logic (see Running touch probe cycles on page 7) to the starting point 1. The TNC calculates the probe starting points from the data in the cycle and the safety clearance from MP Then the touch probe moves to the entered measuring height and probes the first touch point at the probing feed rate (MP6120 or MP6360). The TNC derives the probing direction automatically from the programmed starting angle. 3 Then the touch probe moves in a circular arc either at measuring height or at clearance height to the next starting point 2 and probes the second touch point. 4 The TNC positions the probe to starting point 3 and then to starting point 4 to probe the third and fourth touch points. 5 Finally the TNC returns the touch probe to the clearance height and sets the datum at the measured center, or enters its coordinates in the active datum table Before programming, note the following: To prevent a collision between the touch probe and the workpiece, enter a high estimate for the nominal diameter of the pocket (or hole). Before a cycle definition you must have programmed a tool call to define the touch probe axis Touch Probe Cycles for Automatic Workpiece Inspection
63 Center in 1st axis Q321 (absolute value): Center of the stud in the reference axis of the working plane. Center in 2nd axis Q322 (absolute value): Center of the stud in the minor axis of the working plane. If you program Q322 = 0, the TNC aligns the hole center to the positive Y axis. If you program Q322 not equal to 0, then the TNC aligns the hole center to the nominal position. Nominal diameter Q262: approximate diameter of the stud. Enter a value that is more likely to be too large than too small. Starting angle Q325 (absolute): angle between the reference axis of the working plane and the first touch point. Stepping angle Q247 (incremental): Angle between two measuring points. The algebraic sign of the stepping angle determines the direction of rotation (negative = clockwise) in which the touch probe moves to the next measuring point. If you wish to probe a circular arc instead of a complete circle, then program the stepping angle to be less than 90. Q322 Y Q247 Q321 Q325 Q262 X 3.2 Automatic Datum Setting The smaller the angle, the less accurately the TNC can calculate the datum. Minimum input value: 5. Measuring height in the touch probe axis Q261 (absolute): coordinate of the ball tip center (= touch point) in the touch probe axis in which the measurement is to be made. Setup clearance Q320 (incremental): additional distance between measuring point and ball tip. Q320 is added to MP6140. Clearance height Q260 (absolute): coordinate in the touch probe axis at which no collision between tool and workpiece (fixtures) can occur. Traversing to clearance height Q301: definition of how the touch probe is to move between the measuring points: 0: Move at measuring height between measuring points 1: Move at clearance height between measuring points Datum number in table Q305: Enter the datum number in the table in which the TNC is to save the coordinates of the stud center. If you enter Q305=0, the TNC automatically sets the display so that the new datum is on the stud center. New datum for reference axis Q331 (absolute): coordinate in the reference axis at which the TNC should set the stud center. Basic setting = 0 New datum for minor axis Q332 (absolute): coordinate in the minor axis at which the TNC should set the stud center. Basic setting = 0 Example: NC blocks 5 TCH PROBE 413 DATUM OUTSIDE CIRCLE Q321=+50 ;CENTER IN 1ST AXIS Q322=+50 ;CENTER IN 2ND AXIS Q262=65 ;NOMINAL DIAMETER Q325=+0 ;STARTING ANGLE Q247=90 ;STEPPING ANGLE Q261=-5 ;MEASURING HEIGHT Q320=0 ;SET-UP CLEARANCE Q260=+20 ;CLEARANCE HEIGHT Q301=0 ;TRAVERSE TO CLEAR HEIGHT Q305=15 ;NO. IN TABLE Q331=+0 ;DATUM Q332=+0 ;DATUM HEIDENHAIN TNC 426, TNC
64 3.2 Automatic Datum Setting DATUM FROM OUTSIDE OF CORNER (touch probe cycle 414, ISO: G414) Touch probe cycle 414 finds the intersection of two lines and defines it as the datum. If desired, the TNC can also enter the intersection into a datum table. 1 Following the positioning logic (see Running touch probe cycles on page 7), the TNC positions the touch probe at rapid traverse (value from MP6150 or MP6361) to the first touch point 1 (see figure at upper right). The TNC offsets the touch probe by the safety clearance in the direction opposite the respective traverse direction. 2 Then the touch probe moves to the entered measuring height and probes the first touch point at the probing feed rate (MP6120 or MP6360). The TNC derives the probing direction automatically from the programmed 3rd measuring point. The TNC always measures the first line in the direction of the minor axis of the working plane. 3 Then the touch probe moves to the next starting position 2 and probes the second position. 4 The TNC positions the probe to starting point 3 and then to starting point 4 to probe the third and fourth touch points. 5 Finally the TNC returns the touch probe to the clearance height and sets the datum at the intersection of the measured lines, or enters its coordinates in the active datum table Before programming, note the following: By defining the position of the measuring points 1 and 3 you also determine the corner at which the TNC sets the datum (see figure at right and table at lower right). Before a cycle definition you must have programmed a tool call to define the touch probe axis Corner Condition X Condition Y A X1 greater than X3 Y1 less than Y3 B X1 less than X3 Y1 less than Y3 C X1 less than X3 Y1 greater than Y3 D X1 greater than X3 Y1 greater than Y Touch Probe Cycles for Automatic Workpiece Inspection
65 First measuring point in the 1st axis Q263 (absolute): coordinate of the first touch point in the reference axis of the working plane. First measuring point in the 2nd axis Q264 (absolute): coordinate of the first touch point in the minor axis of the working plane. Spacing in 1st axis Q326 (incremental): distance between the first and second measuring points in the reference axis of the working plane. 3rd measuring point in 1st axis Q296 (absolute): coordinate of the third touch point in the reference axis of the working plane. 3rd measuring point in 2nd axis Q297 (absolute): coordinate of the third touch point in the minor axis of the working plane. Spacing in 2nd axis Q327 (incremental): distance between third and fourth measuring points in the minor axis of the working plane. Measuring height in the touch probe axis Q261 (absolute): coordinate of the ball tip center (= touch point) in the touch probe axis in which the measurement is to be made. Q327 Q297 Y Q296 MP Q320 Q263 Q326 Q264 X 3.2 Automatic Datum Setting Setup clearance Q320 (incremental): additional distance between measuring point and ball tip. Q320 is added to MP6140. Clearance height Q260 (absolute): coordinate in the touch probe axis at which no collision between tool and workpiece (fixtures) can occur. Traversing to clearance height Q301: definition of how the touch probe is to move between the measuring points: 0: Move at measuring height between measuring points 1: Move at clearance height between measuring points Execute basic rotation Q304: definition of whether the TNC should compensate workpiece misalignment with a basic rotation: 0: No basic rotation 1: Basic rotation HEIDENHAIN TNC 426, TNC
66 3.2 Automatic Datum Setting Datum number in table Q305: Enter the datum number in the table in which the TNC is to save the coordinates of the corner. If you enter Q305=0, the TNC automatically sets the display so that the new datum is on the corner. New datum for reference axis Q331 (absolute): coordinate in the reference axis at which the TNC should set the corner. Basic setting = 0 New datum for minor axis Q332 (absolute): coordinate in the minor axis at which the TNC should set the corner. Basic setting = 0 Example: NC blocks 5 TCH PROBE 414 DATUM OUTSIDE CORNER Q263=+37 ;1ST POINT 1ST AXIS Q264=+7 ;1ST POINT 2ND AXIS Q326=50 ;SPACING IN 1ST AXIS Q296=+95 ;3RD POINT 1ST AXIS Q297=+25 ;3RD POINT 2ND AXIS Q327=45 ;SPACING IN 2ND AXIS Q261=-5 ;MEASURING HEIGHT Q320=0 ;SET-UP CLEARANCE Q260=+20 ;CLEARANCE HEIGHT Q301=0 ;TRAVERSE TO CLEAR HEIGHT Q304=0 ;BASIC ROTATION Q305=7 ;NO. IN TABLE Q331=+0 ;DATUM Q332=+0 ;DATUM 54 3 Touch Probe Cycles for Automatic Workpiece Inspection
67 DATUM FROM INSIDE OF CORNER (touch probe cycle 415, ISO: G415) Touch probe cycle 415 finds the intersection of two lines and defines it as the datum. If desired, the TNC can also enter the intersection into a datum table. 1 Following the positioning logic (see Running touch probe cycles on page 7), the TNC positions the touch probe at rapid traverse (value from MP6150 or MP6361) to the first touch point 1 (see figure at upper right) that you have defined in the cycle. The TNC offsets the touch probe by the safety clearance in the direction opposite the respective traverse direction. 2 Then the touch probe moves to the entered measuring height and probes the first touch point at the probing feed rate (MP6120 or MP6360). The probing direction is derived from the number by which you identify the corner. The TNC always measures the first line in the direction of the minor axis of the working plane. 3 Then the touch probe moves to the next starting position 2 and probes the second position. 4 The TNC positions the probe to starting point 3 and then to starting point 4 to probe the third and fourth touch points. 5 Finally the TNC returns the touch probe to the clearance height and sets the datum at the intersection of the measured lines, or enters its coordinates in the active datum table Automatic Datum Setting Before programming, note the following: Before a cycle definition you must have programmed a tool call to define the touch probe axis. HEIDENHAIN TNC 426, TNC
68 3.2 Automatic Datum Setting First measuring point in the 1st axis Q263 (absolute): coordinate of the first touch point in the reference axis of the working plane. First measuring point in the 2nd axis Q264 (absolute): coordinate of the first touch point in the minor axis of the working plane. Spacing in 1st axis Q326 (incremental): distance between the first and second measuring points in the reference axis of the working plane. Spacing in 2nd axis Q327 (incremental): distance between third and fourth measuring points in the minor axis of the working plane. Corner Q308: number identifying the corner which the TNC is to set as datum. Measuring height in the touch probe axis Q261 (absolute): coordinate of the ball tip center (= touch point) in the touch probe axis in which the measurement is to be made. Setup clearance Q320 (incremental): additional distance between measuring point and ball tip. Q320 is added to MP6140. Q327 Q264 Y Q263 MP Q320 Q308=4 Q326 Q308=3 Q308=1 Q308=2 X Clearance height Q260 (absolute): coordinate in the touch probe axis at which no collision between tool and workpiece (fixtures) can occur. Traversing to clearance height Q301: definition of how the touch probe is to move between the measuring points: 0: Move at measuring height between measuring points 1: Move at clearance height between measuring points Execute basic rotation Q304: definition of whether the TNC should compensate workpiece misalignment with a basic rotation: 0: No basic rotation 1: Basic rotation 56 3 Touch Probe Cycles for Automatic Workpiece Inspection
69 Datum number in table Q305: Enter the datum number in the table in which the TNC is to save the coordinates of the corner. If you enter Q305=0, the TNC automatically sets the display so that the new datum is on the corner. New datum for reference axis Q331 (absolute): coordinate in the reference axis at which the TNC should set the corner. Basic setting = 0 New datum for minor axis Q332 (absolute): coordinate in the minor axis at which the TNC should set the corner. Basic setting = 0 Example: NC blocks 5 TCH PROBE 415 DATUM OUTSIDE CORNER Q263=+37 ;1ST POINT 1ST AXIS Q264=+7 ;1ST POINT 2ND AXIS Q326=50 ;SPACING IN 1ST AXIS Q327=45 ;SPACING IN 2ND AXIS Q308=3 ;CORNER Q261=-5 ;MEASURING HEIGHT Q320=0 ;SET-UP CLEARANCE Q260=+20 ;CLEARANCE HEIGHT Q301=0 ;TRAVERSE TO CLEAR HEIGHT Q304=0 ;BASIC ROTATION Q305=8 ;NO. IN TABLE Q331=+0 ;DATUM Q332=+0 ;DATUM 3.2 Automatic Datum Setting HEIDENHAIN TNC 426, TNC
70 3.2 Automatic Datum Setting DATUM CIRCLE CENTER (touch probe cycle 416, ISO: G416) Touch probe cycle 416 finds the center of a bolt hole circle and defines its center as datum. If desired, the TNC can also enter the coordinates into a datum table. 1 Following the positioning logic (see Running touch probe cycles on page 7), the TNC positions the touch probe at rapid traverse (value from MP6150 or MP6361) to the point entered as center of the first hole 1. 2 Then the probe moves to the entered measuring height and probes four points to find the first hole center. 3 The touch probe returns to the clearance height and then to the position entered as center of the second hole 2. 4 The TNC moves the touch probe to the entered measuring height and probes four points to find the second hole center. 5 The touch probe returns to the clearance height and then to the position entered as center of the third hole 3. 6 The TNC moves the touch probe to the entered measuring height and probes four points to find the third hole center. 7 Finally the TNC returns the touch probe to the clearance height and sets the datum at the measured center of the bolt hole circle, or enters its coordinates in the active datum table Before programming, note the following: Before a cycle definition you must have programmed a tool call to define the touch probe axis Touch Probe Cycles for Automatic Workpiece Inspection
71 Center of 1st axis Q273 (absolute): bolt hole circle center (nominal value) in the reference axis of the working plane. Center in 2nd axis Q274 (absolute): bolt hole circle center (nominal value) in the minor axis of the working plane. Nominal diameter Q262: enter the approximate bolt hole circle diameter. The smaller the hole diameter, the more exact the nominal diameter must be. Angle of 1st hole Q291 (absolute): polar coordinate angle of the first hole center in the working plane. Angle of 2nd hole Q292 (absolute): polar coordinate angle of the second hole center in the working plane. Angle of 3rd hole Q293 (absolute): polar coordinate angle of the third hole center in the working plane. Measuring height in the touch probe axis Q261 (absolute): coordinate of the ball tip center (= touch point) in the touch probe axis in which the measurement is to be made. Clearance height Q260 (absolute): coordinate in the touch probe axis at which no collision between tool and workpiece (fixtures) can occur. Datum number in table Q305: enter the datum number in the table in which the TNC is to save the coordinates of the bolt-hole circle center. If you enter Q305=0, the TNC automatically sets the display so that the new datum is on the bolt hole center. New datum for reference axis Q331 (absolute): coordinate in the reference axis at which the TNC should set the bolt-hole center. Basic setting = 0 New datum for minor axis Q332 (absolute): coordinate in the minor axis at which the TNC should set the bolt-hole center. Basic setting = 0 Example: NC blocks 5 TCH PROBE 416 DATUM CIRCLE CENTER Q273=+50 ;CENTER IN 1ST AXIS Q274=+50 ;CENTER IN 2ND AXIS Q262=90 ;NOMINAL DIAMETER Q291=+35 ;ANGLE OF 1ST HOLE Q292=+70 ;ANGLE OF 2ND HOLE Q293=+210 ;ANGLE OF 3RD HOLE Q261=-5 ;MEASURING HEIGHT Q260=+20 ;CLEARANCE HEIGHT Q305=12 ;NO. IN TABLE Q331=+0 ;DATUM Q332=+0 ;DATUM 3.2 Automatic Datum Setting HEIDENHAIN TNC 426, TNC
72 3.2 Automatic Datum Setting DATUM IN TOUCH PROBE AXIS (touch probe cycle 417, ISO: G417) Touch probe cycle 417 measures any coordinate in the touch probe axis and defines it as datum. If desired, the TNC can also enter the measured coordinate into a datum table. 1 The TNC positions the touch probe to the starting points at rapid traverse (value from MP6150 or MP6361) following the positioning logic (see Running touch probe cycles on page 7) to the programmed starting point 1. The TNC offsets the touch probe by the safety clearance in the positive direction of the touch probe axis. 2 Then the touch probe moves in its own axis to the coordinate entered as starting point 1 and measures the actual position with a simple probing movement. 3 Finally the TNC returns the touch probe to the clearance height and sets the datum in the touch probe axis, or enters its coordinates in the active datum table. Before programming, note the following: 1 Before a cycle definition you must have programmed a tool call to define the touch probe axis. The TNC then sets the datum in this axis. First measuring point in the 1st axis Q263 (absolute): coordinate of the first touch point in the reference axis of the working plane. MP Q320 Q294 Z 1 Q260 First measuring point in the 2nd axis Q264 (absolute): coordinate of the first touch point in the minor axis of the working plane. First measuring point in the 3rd axis Q294 (absolute): coordinate of the first touch point in the touch probe axis. X Setup clearance Q320 (incremental): additional distance between measuring point and ball tip. Q320 is added to MP6140. Example: NC blocks Clearance height Q260 (absolute): coordinate in the touch probe axis at which no collision between tool and workpiece (fixtures) can occur. Datum number in table Q305: Enter the datum number in the table in which the TNC is to save the coordinate. If you enter Q305=0, the TNC automatically sets the display so that the new datum is on the probed surface. New datum for touch probe axis Q333 (absolute): coordinate in the touch probe axis at which the TNC should set the datum. Basic setting = 0 5 TCH PROBE 417 DATUM IN TS AXIS Q263=+25 ;1ST POINT 1ST AXIS Q264=+25 ;1ST POINT 2ND AXIS Q294=+25 ;1ST POINT 3RD AXIS Q320=0 ;SET-UP CLEARANCE Q260=+50 ;CLEARANCE HEIGHT Q305=0 ;NO. IN TABLE Q333=+0 ;DATUM 60 3 Touch Probe Cycles for Automatic Workpiece Inspection
73 DATUM AT CENTER BETWEEN 4 HOLES (touch probe cycle 418, ISO: G418) Touch probe cycle 418 calculates the intersection of the lines connecting opposite corners of a rectangle defined by four hole centers. If desired, the TNC can also enter the intersection into a datum table. 1 Following the positioning logic (see Running touch probe cycles on page 7), the TNC positions the touch probe at rapid traverse (value from MP6150 or MP6361) to the center of the first hole 1. 2 Then the probe moves to the entered measuring height and probes four points to find the first hole center. 3 The touch probe returns to the clearance height and then to the position entered as center of the second hole 2. 4 The TNC moves the touch probe to the entered measuring height and probes four points to find the second hole center. 5 The TNC repeats steps 3 and 4 for the holes 3 and 4. 6 Finally the TNC returns the touch probe to the clearance height and sets the datum at the intersection of the diagonal lines connecting opposite holes 1/3 and 2/4 or writes the coordinates of the intersection to the active datum table. Y X 3.2 Automatic Datum Setting Before programming, note the following: Before a cycle definition you must have programmed a tool call to define the touch probe axis. HEIDENHAIN TNC 426, TNC
74 3.2 Automatic Datum Setting First center in 1st axis Q268 (absolute): center of the 1st hole in the reference axis of the working plane. First center in 2nd axis Q269 (absolute): center of the 1st hole in the minor axis of the working plane. Second center in 1st axis Q270 (absolute): center of the 2nd hole in the reference axis of the working plane. Second center in 2nd axis Q271 (absolute): center of the 2nd hole in the minor axis of the working plane. Third center in 1st axis Q316 (absolute): center of the 3rd hole in the reference axis of the working plane. Third center in 2nd axis Q317 (absolute): center of the 3rd hole in the minor axis of the working plane. Fourth center in 1st axis Q318 (absolute): center of the 4th hole in the reference axis of the working plane. Fourth center in 2nd axis Q319 (absolute): center of the 4th hole in the minor axis of the working plane. Measuring height in the touch probe axis Q261 (absolute): coordinate of the ball tip center (= touch point) in the touch probe axis in which the measurement is to be made. Clearance height Q260 (absolute): coordinate in the touch probe axis at which no collision between tool and workpiece (fixtures) can occur. Q319 Q269 Y Z Q318 Q268 Q261 Q316 Q270 Q317 Q271 X Q260 X 62 3 Touch Probe Cycles for Automatic Workpiece Inspection
75 Datum number in table: Enter the datum number in the table in which the TNC is to save the coordinates of the line intersection. If you enter Q305=0, the TNC automatically sets the display so that the new datum is at the intersection of the connecting lines. New datum for reference axis Q331 (absolute): coordinate in the reference axis at which the TNC should set the intersection of the connecting lines. Basic setting = 0 New datum for minor axis Q332 (absolute): coordinate in the minor axis at which the TNC should set the intersection of the connecting lines. Basic setting = 0 Example: NC blocks 5 TCH PROBE 418 DATUM FROM 4 HOLES Q268=+20 ;1ST CENTER 1ST AXIS Q269=+25 ;1ST CENTER 2ND AXIS Q270=+150 ;2ND CENTER 1ST AXIS Q271=+25 ;2ND CENTER 2ND AXIS Q316=+150 ;3RD CENTER 1ST AXIS Q317=+85 ;3RD CENTER 2ND AXIS Q318=+22 ;4TH CENTER 1ST AXIS Q319=+80 ;4TH CENTER 2ND AXIS Q261=-5 ;MEASURING HEIGHT Q260=+10 ;CLEARANCE HEIGHT Q305=12 ;NO. IN TABLE Q331=+0 ;DATUM Q332=+0 ;DATUM 3.2 Automatic Datum Setting HEIDENHAIN TNC 426, TNC
76 3.2 Automatic Datum Setting Example: Datum setting on top surface of workpiece and in center of a circular segment 0 BEGIN PGM CYC413 MM 1 TOOL CALL 0 Z Call tool 0 to define the touch probe axis 2 TCH PROBE 417 DATUM IN TS AXIS Cycle definition for datum setting in the touch probe axis Q263=+25 ;1ST POINT 1ST AXIS Q264=+25 ;1ST POINT 2ND AXIS Q294=+25 ;1ST POINT 3RD AXIS Touch point: X coordinate Touch point: Y coordinate Touch point: Z coordinate Q320=2 ;SET-UP CLEARANCE Safety clearance in addition to MP6140 Q260=+20 ;CLEARANCE HEIGHT Height in the touch probe axis at which the probe can traverse without collision Q305=0 ;NO. IN TABLE Set display Q333=+0 ;DATUM Set touch-probe axis to Touch Probe Cycles for Automatic Workpiece Inspection
77 3 TCH PROBE 413 DATUM OUTSIDE CIRCLE Q321=+25 ;CENTER IN 1ST AXIS Q322=+25 ;CENTER IN 2ND AXIS Center of circle: X coordinate Center of circle: Y coordinate Q262=30 ;NOMINAL DIAMETER Diameter of circle Q325=+90 ;STARTING ANGLE Polar coordinate angle for 1st touch point Q247=+45 ;STEPPING ANGLE Stepping angle for calculating the starting points 2 to 4 Q261=-5 ;MEASURING HEIGHT Coordinate in the touch probe axis in which the measurement is made Q320=2 ;SET-UP CLEARANCE Safety clearance in addition to MP6140 Q260=+10 ;CLEARANCE HEIGHT Height in the touch probe axis at which the probe can traverse without collision Q301=0 ;TRAVERSE TO CLEAR HEIGHT Do not move to clearance height between measuring points Q305=0 ;NO. IN TABLE Set display Q331=+0 ;DATUM Set the display in X to 0 Q332=+10 ;DATUM Set the display in Y to 10 Q332=+10 ;DATUM Set the display in Y to 10 4 CALL PGM 35K47 Part program call 5 END PGM CYC413 MM 3.2 Automatic Datum Setting HEIDENHAIN TNC 426, TNC
78 3.2 Automatic Datum Setting Example: Datum setting on top surface of workpiece and in center of a bolt hole circle The measured bolt hole center shall be written in the datum table so that it may be used at a later time BEGIN PGM CYC416 MM 1 TOOL CALL 0 Z Call tool 0 to define the touch probe axis 2 TCH PROBE 417 DATUM IN TS AXIS Cycle definition for datum setting in the touch probe axis Q263=+7.5 ;1ST POINT 1ST AXIS Touch point: X coordinate Q264=+7.5 ;1ST POINT 2ND AXIS Touch point: Y coordinate Q294=+25 ;1ST POINT 3RD AXIS Touch point: Z coordinate Q320=0 ;SET-UP CLEARANCE Safety clearance in addition to MP6140 Q260=+50 ;CLEARANCE HEIGHT Height in the touch probe axis at which the probe can traverse without collision Q305=1 ;NO. IN TABLE Enter Z coordinate in the datum table Q333=+0 ;DATUM Set touch-probe axis to Touch Probe Cycles for Automatic Workpiece Inspection
79 3 TCH PROBE 416 DATUM CIRCLE CENTER Q273=+35 ;CENTER 1ST AXIS Q274=+35 ;CENTER IN 2ND AXIS Center of the bolt hole circle: X coordinate Center of the bolt hole circle: Y coordinate Q262=50 ;NOMINAL DIAMETER Diameter of the bolt hole circle Q291=+90 ;ANGLE OF 1ST HOLE Polar coordinate angle for 1st hole center 1 Q292=+180 ;ANGLE OF 2ND HOLE Polar coordinate angle for 2nd hole center 2 Q293=+270 ;ANGLE OF 3RD HOLE Polar coordinate angle for 3rd hole center 3 Q261=+15 ;MEASURING HEIGHT Coordinate in the touch probe axis in which the measurement is made Q260=+10 ;CLEARANCE HEIGHT Height in the touch probe axis at which the probe can traverse without collision Q305=1 ;NO. IN TABLE Enter center of bolt hole circle (X and Y) in the datum table Q331=+0 ;DATUM Q332=+0 ;DATUM 4 CYCL DEF 7.0 DATUM SHIFT Use Cycle 7 to shift datum to the center of the bolt hole circle 5 CYCL DEF 7.1 #1 6 CALL PGM 35KL7 Part program call 7 END PGM CYC416 MM 3.2 Automatic Datum Setting HEIDENHAIN TNC 426, TNC
80 3.3 Automatic Workpiece Measurement 3.3 Automatic Workpiece Measurement Overview The TNC offers twelve cycles for measuring workpieces automatically. Cycle 0 REFERENCE PLANE Measuring a coordinate in a selectable axis 1 POLAR DATUM PLANE Measuring a point in a probing direction 420 MEASURE ANGLE Measuring an angle in the working plane 421 MEASURE HOLE Measuring the position and diameter of a hole 422 MEAS. CIRCLE OUTSIDE Measuring the position and diameter of a circular stud 423 MEAS. RECTAN. INSIDE Measuring the position, length and width of a rectangular pocket 424 MEAS. RECTAN. OUTSIDE Measuring the position, length and width of a rectangular stud Soft key 425 MEASURE INSIDE WIDTH (2nd soft-key level) Measuring slot width 426 MEASURE RIDGE WIDTH (2nd soft-key level) Measuring the width of a ridge 427 MEASURE COORDINATE (2nd soft-key level) Measuring any coordinate in a selectable axis 430 MEAS. BOLT HOLE CIRC. (2nd soft-key level) Measuring position and diameter of a bolt hole circle 431 MEASURE PLANE (2nd soft-key level) Measuring the A and B axis angles of a plane 68 3 Touch Probe Cycles for Automatic Workpiece Inspection
81 Recording the results of measurement For all cycles in which you automatically measure workpieces (with the exception of Cycles 0 and 1), the TNC records the results. As standard procedure the TNC saves the measuring log as an ASCII file in the directory from which you run the measuring program. As an alternative you can also send the measuring log directly to a printer or transfer it to a PC. To do this, set the print function (in the interface configuration menu) to RS232:\ (see also the User's Manual under "MOD Functions, Setting Up the Data Interface"). All measured values listed in the log file are referenced to the datum that is active during the respective cycle you are running. In addition, the coordinate system may have been rotated in the plane or the plane may have been tilted by using 3D-ROT. In this case, the TNC converts the measuring results to the respective active coordinate system. Use the HEIDENHAIN data transfer software TNCremo if you wish to output the measuring log via the data interface. Example: Measuring log for touch probe cycle 423: *** Measuring Log for Probing Cycle 421 Hole Measuring *** Date: Time: 6:55:04 Measuring program: TNC:\GEH35712\CHECK1.H Nominal values: Center in reference axis: Center in minor axis: Diameter: Given limit values: Maximum limit for center in reference axis: Minimum limit for center in reference axis: Maximum limit for center in minor axis: Minimum limit for center in minor axis: Maximum dimension for hole: Minimum dimension for hole ******************************************************* Actual values: Center in reference axis: Center in minor axis: Diameter: Deviations: Center in reference axis: Center in minor axis: Diameter: ******************************************************* Further measuring results: Measuring height: ***************** End of measuring log ***************** 3.3 Automatic Workpiece Measurement HEIDENHAIN TNC 426, TNC

82 3.3 Automatic Workpiece Measurement Measurement results in Q parameters The TNC saves the measurement results of the respective touch probe cycle in the globally effective Q parameters Q150 to Q160. Deviations from the nominal value are saved in the parameters Q161 to Q166. Note the table of result parameters that are listed with every cycle description. During cycle definition the TNC also shows the result parameters for the respective cycle in a help graphic (see figure at upper right). Classification of results For some cycles you can inquire the status of measuring results through the globally effective Q parameters Q180 to Q182: Class of results Parameter value Measurement results are within tolerance Q180 = 1 Rework is required Q181 = 1 Scrap Q182 = 1 The TNC sets the rework or scrap marker as soon as one of the measuring values falls outside of tolerance. To determine which of the measuring results lies outside of tolerance, check the measuring log, or compare the respective measuring results (Q150 to Q160) with their limit values. The TNC also sets the status marker if you have defined no tolerance values or largest/smallest dimensions. Tolerance monitoring For most of the cycles for workpiece inspection you can have the TNC conduct tolerance monitoring. This requires that you define the necessary limit values during cycle definition. If you do not wish to monitor for tolerances, simply leave the 0 (the default value) in the monitoring parameters Touch Probe Cycles for Automatic Workpiece Inspection
83 Tool monitoring For some cycles for workpiece inspection you can have the TNC conduct tool monitoring. The TNC then monitors whether The tool radius should be compensated because of the deviations from the nominal value (values in Q16x). The deviations from the nominal value (values in Q16x) are greater than the tool breakage tolerance. Tool compensation This function works only: If the tool table is active. If tool monitoring is switched on in the cycle (enter Q330 not equal to 0). The TNC always compensates the tool radius in the DR column of the tool table, even if the measured deviation lies within the given tolerance. You can inquire whether re-working is necessary via Parameter Q181 in the NC program (Q181=1: must be reworked). For Cycle 427: If an axis of the active working plane is defined as measuring axis (Q272 = 1 or 2), the TNC compensates the tool radius as described above. From the defined traversing direction (Q267) the TNC determines the direction of compensation. If the touch probe axis is defined as measuring axis (Q272 = 3), the TNC compensates the tool length. 3.3 Automatic Workpiece Measurement Tool breakage monitoring This function works only: If the tool table is active. If tool monitoring is switched on in the cycle (enter Q330 not equal to 0). If the breakage tolerance RBREAK for the tool number entered in the table is greater than 0 (see also the User's Manual, section 5.2 Tool Data ). The TNC will output an error message and stop program run if the measured deviation is greater than the breakage tolerance of the tool. At the same time the tool will be deactivated in the tool table (column TL = L). Reference system for measurement results The TNC transfers all the measurement results to the results parameter and the protocol file in the active coordinate system, or as the case may be, the displaced coordinate system. HEIDENHAIN TNC 426, TNC
84 3.3 Automatic Workpiece Measurement REFERENCE PLANE (touch probe cycle 0, ISO: G55) 1 The touch probe moves at rapid traverse (value from MP6150 or MP6361) to the starting position 1 programmed in the cycle. 2 Then the touch probe approaches the workpiece at the feed rate assigned in MP6120 or MP6360. The probing direction is to be defined in the cycle. 3 After the TNC has saved the position, the probe retracts to the starting point and saves the measured coordinate in a Q parameter. The TNC also stores the coordinates of the touch probe position at the time of the triggering signal in the parameters Q115 to Q119. For the values in these parameters the TNC does not account for the stylus length and radius. Before programming, note the following: Pre-position the touch probe in order to avoid a collision when the programmed pre-positioning point is approached. Parameter number for result: Enter the number of the Q parameter to which you want to assign the coordinate. Probing axis/probing direction: Enter the probing axis with the axis selection keys or ASCII keyboard and the algebraic sign for the probing direction. Confirm your entry with the ENT key. Position value: Use the axis selection keys or the ASCII keyboard to enter all coordinates of the nominal pre-positioning point values for the touch probe. To end input: press the ENT key 1 Example: NC blocks 67 TCH PROBE 0.0 REF. PLANE Q5 X- 68 TCH PROBE 0.1 X+5 Y+0 Z Touch Probe Cycles for Automatic Workpiece Inspection
85 DATUM PLANE (touch probe cycle 1) Touch probe cycle 1 measures any position on the workpiece in any direction. 1 The touch probe moves at rapid traverse (value from MP6150 or MP6361) to the starting position 1 programmed in the cycle. 2 Then the touch probe approaches the workpiece at the feed rate assigned in MP6120 or MP6360. During probing the TNC moves simultaneously in 2 axes (depending on the probing angle). The scanning direction is defined by the polar angle entered in the cycle. 3 After the TNC has saved the position, the probe returns to the starting point. The TNC also stores the coordinates of the touch probe position at the time of the triggering signal in parameters Q115 to Q119. Before programming, note the following: Pre-position the touch probe in order to avoid a collision when the programmed pre-positioning point is approached. Probing axis: Enter the probing axis with the axis selection keys or ASCII keyboard. Confirm your entry with the ENT key. Probing angle: Angle, measured from the probing axis, at which the touch probe is to move. Position value: Use the axis selection keys or the ASCII keyboard to enter all coordinates of the nominal pre-positioning point values for the touch probe. Y 1 Example: NC blocks 67 TCH PROBE 1.0 POLAR DATUM PLANE 68 TCH PROBE 1.1 X ANGLE: TCH PROBE 1.2 X+5 Y+0 Z-5 X 3.3 Automatic Workpiece Measurement To end input: press the ENT key HEIDENHAIN TNC 426, TNC
86 3.3 Automatic Workpiece Measurement MEASURE ANGLE (touch probe cycle 420, ISO: G420) Touch probe cycle 420 measures the angle that any straight surface on the workpiece describes with respect to the reference axis of the working plane. 1 The TNC positions the touch probe to the starting points at rapid traverse (value from MP6150 or MP6361) following the positioning logic (see Running touch probe cycles on page 7) to the programmed starting point 1. The TNC offsets the touch probe by the safety clearance in the direction opposite the defined traverse direction. 2 Then the touch probe moves to the entered measuring height and probes the first touch point at the probing feed rate (MP6120 or MP6360). 3 Then the touch probe moves to the next starting position 2 and probes the second position. 4 The TNC returns the touch probe to the clearance height and saves the measured angle in the following Q parameter: Parameter number Q150 Meaning The measured angle is referenced to the reference axis of the machining plane. Before programming, note the following: Before a cycle definition you must have programmed a tool call to define the touch probe axis. Y Q272=2 Q266 Q Q267 + MP Q320 First measuring point in the 1st axis Q263 (absolute): coordinate of the first touch point in the reference axis of the working plane. First measuring point in the 2nd axis Q264 (absolute): coordinate of the first touch point in the minor axis of the working plane. X Q263 Q265 Q272=1 Second measuring point in the 1st axis Q265 (absolute): coordinate of the second touch point in the reference axis of the working plane Second measuring point in the 2nd axis Q266 (absolute): coordinate of the second touch point in the minor axis of the working plane Measuring axis Q272: axis in which the measurement is to be made: 1: Reference axis = measuring axis 2: Minor axis = measuring axis 3: Touch probe axis = measuring axis 74 3 Touch Probe Cycles for Automatic Workpiece Inspection
87 If touch probe axis = measuring axis, then: Set Q263 equal to Q265, if the angle about the A axis is to be measured; Set Q263 not equal to Q265 if the angle is to be measured about the B axis. Traverse direction 1 Q267: direction in which the probe is to approach the workpiece: -1: Negative traverse direction +1: Positive traverse direction Measuring height in the touch probe axis Q261 (absolute): coordinate of the ball tip center (= touch point) in the touch probe axis in which the measurement is to be made. Setup clearance Q320 (incremental): additional distance between measuring point and ball tip. Q320 is added to MP6140. Clearance height Q260 (absolute): coordinate in the touch probe axis at which no collision between tool and workpiece (fixtures) can occur. Traversing to clearance height Q301: definition of how the touch probe is to move between the measuring points: 0: Move at measuring height between measuring points 1: Move at clearance height between measuring points Measuring log Q281: definition of whether the TNC is to create a measuring log: 0: No measuring log 1: Generate measuring log: with the standard setting the TNC saves the log file TCHPR420.TXT in the directory in which your measuring program is also stored. Example: NC blocks 5 TCH PROBE 420 MEASURE ANGLE Q263=+10 ;1ST POINT 1ST AXIS Q264=+10 ;1ST POINT 2ND AXIS Q265=+15 ;2ND POINT 1ST AXIS Q266=+95 ;2ND POINT 2ND AXIS Q272=1 ;MEASURING AXIS Q267=-1 ;TRAVERSE DIRECTION Q261=-5 ;MEASURING HEIGHT Q320=0 ;SET-UP CLEARANCE Q260=+10 ;CLEARANCE HEIGHT Q301=1 ;TRAVERSE TO CLEAR HEIGHT Q281=1 ;MEASURING LOG 3.3 Automatic Workpiece Measurement HEIDENHAIN TNC 426, TNC
88 3.3 Automatic Workpiece Measurement MEASURE HOLE (touch probe cycle 421, ISO: G421) Touch probe cycle 421 measures the center and diameter of a hole (or circular pocket). If you define the corresponding tolerance values in the cycle, the TNC makes a nominal-to-actual value comparison and saves the deviation values in system parameters. 1 The TNC positions the touch probe to the starting points at rapid traverse (value from MP6150 or MP6361) following the positioning logic (see Running touch probe cycles on page 7) to the starting point 1. The TNC calculates the probe starting points from the data in the cycle and the safety clearance from MP Then the touch probe moves to the entered measuring height and probes the first touch point at the probing feed rate (MP6120 or MP6360). The TNC derives the probing direction automatically from the programmed starting angle. 3 Then the touch probe moves in a circular arc either at measuring height or at clearance height to the next starting point 2 and probes the second touch point. 4 The TNC positions the probe to starting point 3 and then to starting point 4 to probe the third and fourth touch points. 5 Finally the TNC returns the touch probe to the clearance height and saves the actual values and the deviations in the following Q parameters: Parameter number Q151 Meaning Actual value of center in reference axis Q152 Q153 Q161 Q162 Q163 Actual value of center in minor axis Actual value of diameter Deviation from center of reference axis Deviation from center of minor axis Deviation from diameter Before programming, note the following: Before a cycle definition you must have programmed a tool call to define the touch probe axis Touch Probe Cycles for Automatic Workpiece Inspection
89 Center in 1st axis Q273 (absolute value): center of the hole in the reference axis of the working plane. Center in 2nd axis Q274 (absolute value): center of the hole in the minor axis of the working plane. Nominal diameter Q262: Enter the diameter of the hole. Starting angle Q325 (absolute): angle between the reference axis of the working plane and the first touch point. Stepping angle Q247 (incremental): angle between two measuring points. The algebraic sign of the stepping angle determines the direction of rotation (negative = clockwise). If you wish to probe a circular arc instead of a complete circle, then program the stepping angle to be less than 90. The smaller the angle, the less accurately the TNC can calculate the hole dimensions. Minimum input value: 5. Measuring height in the touch probe axis Q261 (absolute): coordinate of the ball tip center (= touch point) in the touch probe axis in which the measurement is to be made. Setup clearance Q320 (incremental): additional distance between measuring point and ball tip. Q320 is added to MP6140. Y Q274 ±Q280 Q247 MP Q320 Q273 ±Q279 Q325 Q276 Q262 Q275 X 3.3 Automatic Workpiece Measurement Clearance height Q260 (absolute): coordinate in the touch probe axis at which no collision between tool and workpiece (fixtures) can occur. Traversing to clearance height Q301: definition of how the touch probe is to move between the measuring points: 0: Move at measuring height between measuring points 1: Move at clearance height between measuring points Maximum dimension of size for hole Q275: maximum permissible dimension for the hole (circular pocket). Minimum dimension for hole Q276: minimum permissible dimension for the hole (circular pocket). Tolerance value for center 1st axis Q279: permissible position deviation in the reference axis of the working plane. Tolerance value for center 2nd axis Q280: permissible position deviation in the minor axis of the working plane HEIDENHAIN TNC 426, TNC
90 3.3 Automatic Workpiece Measurement Measuring log Q281: definition of whether the TNC is to create a measuring log: 0: No measuring log 1: Generate measuring log: with the standard setting the TNC saves the log file TCHPR421.TXT in the directory in which your measuring program is also stored. PGM stop if tolerance error Q309: definition of whether in the event of a violation of tolerance limits the TNC is to interrupt the program run and output an error message: 0: Do not interrupt program run, no error message 1: Interrupt program run, output an error message Tool number for monitoring Q330: definition of whether the TNC is to monitor the tool (see Tool monitoring on page 71) 0: Monitoring not active >0: Tool number in the tool table TOOL.T Example: NC blocks 5 TCH PROBE 421 MEASURE HOLE Q273=+50 ;CENTER IN 1ST AXIS Q274=+50 ;CENTER IN 2ND AXIS Q262=75 ;NOMINAL DIAMETER Q325=+0 ;STARTING ANGLE Q247=+60 ;STEPPING ANGLE Q261=-5 ;MEASURING HEIGHT Q320=0 ;SET-UP CLEARANCE Q260=+20 ;CLEARANCE HEIGHT Q301=1 ;TRAVERSE TO CLEAR HEIGHT Q275=75.12;MAXIMUM DIMENSION Q276=74.95;MINIMUM DIMENSION Q279=0.1 ;TOLERANCE 1ST CENTER Q280=0.1 ;TOLERANCE 2ND CENTER Q281=1 ;MEASURING LOG Q309=0 ;PGM-STOP IF ERROR Q330=0 ;TOOL NUMBER 78 3 Touch Probe Cycles for Automatic Workpiece Inspection
91 MEASURE CIRCLE OUTSIDE (touch probe cycle 422, ISO: G422) Touch probe cycle 422 measures the center and diameter of a circular stud. If you define the corresponding tolerance values in the cycle, the TNC makes a nominal-to-actual value comparison and saves the deviation values in system parameters. 1 The TNC positions the touch probe to the starting points at rapid traverse (value from MP6150 or MP6361) following the positioning logic (see Running touch probe cycles on page 7) to the starting point 1. The TNC calculates the probe starting points from the data in the cycle and the safety clearance from MP Then the touch probe moves to the entered measuring height and probes the first touch point at the probing feed rate (MP6120 or MP6360). The TNC derives the probing direction automatically from the programmed starting angle. 3 Then the touch probe moves in a circular arc either at measuring height or at clearance height to the next starting point 2 and probes the second touch point. 4 The TNC positions the probe to starting point 3 and then to starting point 4 to probe the third and fourth touch points. 5 Finally the TNC returns the touch probe to the clearance height and saves the actual values and the deviations in the following Q parameters: Parameter number Q151 Meaning Actual value of center in reference axis Automatic Workpiece Measurement Q152 Q153 Actual value of center in minor axis Actual value of diameter Q161 Deviation from center of reference axis Q162 Q163 Deviation from center of minor axis Deviation from diameter Before programming, note the following: Before a cycle definition you must have programmed a tool call to define the touch probe axis. HEIDENHAIN TNC 426, TNC
92 3.3 Automatic Workpiece Measurement Center in 1st axis Q273 (absolute value): Center of the stud in the reference axis of the working plane. Center in 2nd axis Q274 (absolute value): Center of the stud in the minor axis of the working plane. Nominal diameter Q262: enter the diameter of the stud. Starting angle Q325 (absolute): angle between the reference axis of the working plane and the first touch point. Stepping angle Q247 (incremental): angle between two measuring points. The algebraic sign of the stepping angle determines the direction of rotation (negative = clockwise). If you wish to probe a circular arc instead of a complete circle, then program the stepping angle to be less than 90. The smaller the angle, the less accurately the TNC can calculate the stud dimensions. Minimum input value: 5 Measuring height in the touch probe axis Q261 (absolute): coordinate of the ball tip center (= touch point) in the touch probe axis in which the measurement is to be made. Setup clearance Q320 (incremental): additional distance between measuring point and ball tip. Q320 is added to MP6140. Clearance height Q260 (absolute): coordinate in the touch probe axis at which no collision between tool and workpiece (fixtures) can occur. Traversing to clearance height Q301: definition of how the touch probe is to move between the measuring points: 0: Move at measuring height between measuring points 1: Move at clearance height between measuring points Maximum dimension of size for stud Q275: maximum permissible dimension for the stud. Minimum dimension of size for the stud Q276: minimum permissible dimension for the stud. Tolerance value for center 1st axis Q279: permissible position deviation in the reference axis of the working plane. Tolerance value for center 2nd axis Q280: permissible position deviation in the minor axis of the working plane 80 3 Touch Probe Cycles for Automatic Workpiece Inspection
93 Measuring log Q281: definition of whether the TNC is to create a measuring log: 0: No measuring log 1: Generate measuring log: with the standard setting the TNC saves the log file TCHPR422.TXT in the directory in which your measuring program is also stored. PGM stop if tolerance error Q309: definition of whether in the event of a violation of tolerance limits the TNC is to interrupt the program run and output an error message: 0: Do not interrupt program run, no error message 1: Interrupt program run, output an error message Tool number for monitoring Q330: definition of whether the TNC is to monitor the tool (see Tool monitoring on page 71): 0: Monitoring not active >0: Tool number in the tool table TOOL.T Example: NC blocks 5 TCH PROBE 422 MEAS. CIRCLE OUTSIDE Q273=+20 ;CENTER IN 1ST AXIS Q274=+30 ;CENTER IN 2ND AXIS Q262=35 ;NOMINAL DIAMETER Q325=+90 ;STARTING ANGLE Q247=+30 ;STEPPING ANGLE Q261=-5 ;MEASURING HEIGHT Q320=0 ;SET-UP CLEARANCE Q260=+10 ;CLEARANCE HEIGHT Q301=0 ;TRAVERSE TO CLEAR HEIGHT Q275=35.15;MAXIMUM DIMENSION Q276=34.9 ;MINIMUM DIMENSION Q279=0.05 ;TOLERANCE 1ST CENTER Q280=0.05 ;TOLERANCE 2ND CENTER Q281=1 ;MEASURING LOG Q309=0 ;PGM-STOP IF ERROR Q330=0 ;TOOL NUMBER 3.3 Automatic Workpiece Measurement HEIDENHAIN TNC 426, TNC
94 3.3 Automatic Workpiece Measurement MEASURE RECTANGLE FROM INSIDE (touch probe cycle 423, ISO: G423) Touch probe cycle 423 finds the center, length and width of a rectangular pocket. If you define the corresponding tolerance values in the cycle, the TNC makes a nominal-to-actual value comparison and saves the deviation values in system parameters. 1 The TNC positions the touch probe to the starting points at rapid traverse (value from MP6150 or MP6361) following the positioning logic (see Running touch probe cycles on page 7) to the starting point 1. The TNC calculates the probe starting points from the data in the cycle and the safety clearance from MP Then the touch probe moves to the entered measuring height and probes the first touch point at the probing feed rate (MP6120 or MP6360). 3 Then the touch probe moves either paraxially at the measuring height or linearly at the clearance height to the next starting point 2 and probes the second touch point. 4 The TNC positions the probe to starting point 3 and then to starting point 4 to probe the third and fourth touch points. 5 Finally the TNC returns the touch probe to the clearance height and saves the actual values and the deviations in the following Q parameters: Parameter number Q151 Q152 Meaning Actual value of center in reference axis Actual value of center in minor axis Q154 Q155 Q161 Q162 Q164 Q165 Actual value of length in the reference axis Actual value of length in the minor axis Deviation from center of reference axis Deviation from center of minor axis Deviation of length in reference axis Deviation of length in minor axis Before programming, note the following: Before a cycle definition you must have programmed a tool call to define the touch probe axis. If the dimensions of the pocket and the safety clearance do not permit pre-positioning in the proximity of the touch points, the TNC always starts probing from the center of the pocket. In this case the touch probe does not return to the clearance height between the four measuring points Touch Probe Cycles for Automatic Workpiece Inspection
95 Center in 1st axis Q273 (absolute value): Center of the pocket in the reference axis of the working plane. Center in 2nd axis Q274 (absolute value): Center of the pocket in the minor axis of the working plane. First side length Q282: pocket length, parallel to the reference axis of the working plane. Second side length Q283: pocket length, parallel to the secondary axis of the working plane. Measuring height in the touch probe axis Q261 (absolute): coordinate of the ball tip center (= touch point) in the touch probe axis in which the measurement is to be made. Setup clearance Q320 (incremental): additional distance between measuring point and ball tip. Q320 is added to MP6140. Clearance height Q260 (absolute): coordinate in the touch probe axis at which no collision between tool and workpiece (fixtures) can occur. Traversing to clearance height Q301: definition of how the touch probe is to move between the measuring points: 0: Move at measuring height between measuring points 1: Move at clearance height between measuring points Max. size limit 1st side length Q284: maximum permissible length of the pocket Min. size limit 1st side length Q285: minimum permissible length of the pocket Y Q274 ±Q280 Z Q284 Q282 Q285 Q273 ±Q279 MP Q320 Q261 Q260 Q287 Q283 Q286 X X 3.3 Automatic Workpiece Measurement Max. size limit 2nd side length Q286: maximum permissible width of the pocket Min. size limit 2nd side length Q287: minimum permissible width of the pocket Tolerance value for center 1st axis Q279: permissible position deviation in the reference axis of the working plane. Tolerance value for center 2nd axis Q280: permissible position deviation in the minor axis of the working plane HEIDENHAIN TNC 426, TNC
96 3.3 Automatic Workpiece Measurement Measuring log Q281: definition of whether the TNC is to create a measuring log: 0: No measuring log 1: Generate measuring log: with the standard setting the TNC saves the log file TCHPR423.TXT in the directory in which your measuring program is also stored. PGM stop if tolerance error Q309: definition of whether in the event of a violation of tolerance limits the TNC is to interrupt the program run and output an error message: 0: Do not interrupt program run, no error message 1: Interrupt program run, output an error message Tool number for monitoring Q330: definition of whether the TNC is to monitor the tool (see Tool monitoring on page 71) 0: Monitoring not active >0: Tool number in the tool table TOOL.T Example: NC blocks 5 TCH PROBE 423 MEAS. RECTAN. INSIDE Q273=+50 ;CENTER IN 1ST AXIS Q274=+50 ;CENTER IN 2ND AXIS Q282=80 ;1ST SIDE LENGTH Q283=60 ;2ND SIDE LENGTH Q261=-5 ;MEASURING HEIGHT Q320=0 ;SET-UP CLEARANCE Q260=+10 ;CLEARANCE HEIGHT Q301=1 ;TRAVERSE TO CLEAR HEIGHT Q284=0 ;MAX. LIMIT 1ST SIDE Q285=0 ;MIN. LIMIT 1ST SIDE Q286=0 ;MAX. LIMIT 2ND SIDE Q287=0 ;MIN. LIMIT 2ND SIDE Q279=0 ;TOLERANCE 1ST CENTER Q280=0 ;TOLERANCE 2ND CENTER Q281=1 ;MEASURING LOG Q309=0 ;PGM-STOP IF ERROR Q330=0 ;TOOL NUMBER 84 3 Touch Probe Cycles for Automatic Workpiece Inspection
97 MEASURE RECTANGLE FROM OUTSIDE (touch probe cycle 424, ISO: G424) Touch probe cycle 424 finds the center, length and width of a rectangular stud. If you define the corresponding tolerance values in the cycle, the TNC makes a nominal-to-actual value comparison and saves the deviation values in system parameters. 1 The TNC positions the touch probe to the starting points at rapid traverse (value from MP6150 or MP6361) following the positioning logic (see Running touch probe cycles on page 7) to the starting point 1. The TNC calculates the probe starting points from the data in the cycle and the safety clearance from MP Then the touch probe moves to the entered measuring height and probes the first touch point at the probing feed rate (MP6120 or MP6360). 3 Then the touch probe moves either paraxially at the measuring height or linearly at the clearance height to the next starting point 2 and probes the second touch point. 4 The TNC positions the probe to starting point 3 and then to starting point 4 to probe the third and fourth touch points. 5 Finally the TNC returns the touch probe to the clearance height and saves the actual values and the deviations in the following Q parameters: Parameter number Q151 Q152 Meaning Actual value of center in reference axis Actual value of center in minor axis Automatic Workpiece Measurement Q154 Q155 Q161 Q162 Q164 Q165 Actual value of length in the reference axis Actual value of length in the minor axis Deviation from center of reference axis Deviation from center of minor axis Deviation of length in reference axis Deviation of length in minor axis Before programming, note the following: Before a cycle definition you must have programmed a tool call to define the touch probe axis. HEIDENHAIN TNC 426, TNC
98 3.3 Automatic Workpiece Measurement Center in 1st axis Q273 (absolute value): Center of the stud in the reference axis of the working plane. Center in 2nd axis Q274 (absolute value): Center of the stud in the minor axis of the working plane. First side length Q282: stud length, parallel to the reference axis of the working plane Second side length Q283: stud length, parallel to the secondary axis of the working plane Measuring height in the touch probe axis Q261 (absolute): coordinate of the ball tip center (= touch point) in the touch probe axis in which the measurement is to be made. Setup clearance Q320 (incremental): additional distance between measuring point and ball tip. Q320 is added to MP6140. Clearance height Q260 (absolute): coordinate in the touch probe axis at which no collision between tool and workpiece (fixtures) can occur. Traversing to clearance height Q301: definition of how the touch probe is to move between the measuring points: 0: Move at measuring height between measuring points 1: Move at clearance height between measuring points Max. size limit 1st side length Q284: maximum permissible length of the stud Min. size limit 1st side length Q285: minimum permissible length of the stud Y Q274 ±Q280 Z Q284 Q282 Q285 Q273 ±Q279 Q261 MP Q320 Q287 Q283 Q286 X Q260 X Max. size limit 2nd side length Q286: maximum permissible width of the stud Min. size limit 2nd side length Q287: minimum permissible width of the stud Tolerance value for center 1st axis Q279: permissible position deviation in the reference axis of the working plane. Tolerance value for center 2nd axis Q280: permissible position deviation in the minor axis of the working plane 86 3 Touch Probe Cycles for Automatic Workpiece Inspection
99 Measuring log Q281: definition of whether the TNC is to create a measuring log: 0: No measuring log 1: Generate measuring log: with the standard setting the TNC saves the log file TCHPR424.TXT in the directory in which your measuring program is also stored. PGM stop if tolerance error Q309: definition of whether in the event of a violation of tolerance limits the TNC is to interrupt the program run and output an error message: 0: Do not interrupt program run, no error message 1: Interrupt program run, output an error message Tool number for monitoring Q330: definition of whether the TNC is to monitor the tool (see Tool monitoring on page 71): 0: Monitoring not active >0: Tool number in the tool table TOOL.T Example: NC blocks 5 TCH PROBE 424 MEAS. RECTAN. OUTS. Q273=+50 ;CENTER IN 1ST AXIS Q274=+50 ;CENTER IN 2ND AXIS Q282=75 ;1ST SIDE LENGTH Q283=35 ;2ND SIDE LENGTH Q261=-5 ;MEASURING HEIGHT Q320=0 ;SET-UP CLEARANCE Q260=+20 ;CLEARANCE HEIGHT Q301=0 ;TRAVERSE TO CLEAR HEIGHT Q284=75.1 ;MAX. LIMIT 1ST SIDE Q285=74.9 ;MIN. LIMIT 1ST SIDE Q286=35 ;MAX. LIMIT 2ND SIDE Q287=34.95;MIN. LIMIT 2ND SIDE Q279=0.1 ;TOLERANCE 1ST CENTER Q280=0.1 ;TOLERANCE 2ND CENTER Q281=1 ;MEASURING LOG Q309=0 ;PGM-STOP IF ERROR Q330=0 ;TOOL NUMBER 3.3 Automatic Workpiece Measurement HEIDENHAIN TNC 426, TNC
100 3.3 Automatic Workpiece Measurement MEASURE INSIDE WIDTH (touch probe cycle 425, ISO: G425) Touch probe cycle 425 measures the position and width of a slot (or pocket). If you define the corresponding tolerance values in the cycle, the TNC makes a nominal-to-actual value comparison and saves the deviation value in a system parameter. 1 The TNC positions the touch probe to the starting points at rapid traverse (value from MP6150 or MP6361) following the positioning logic (see Running touch probe cycles on page 7) to the starting point 1. The TNC calculates the probe starting points from the data in the cycle and the safety clearance from MP Then the touch probe moves to the entered measuring height and probes the first touch point at the probing feed rate (MP6120 or MP6360). 1. The first probing is always in the positive direction of the programmed axis. 3 If you enter an offset for the second measurement, the TNC then moves the touch probe paraxially to the next starting point 2 and probes the second touch point. If you do not enter an offset, the TNC measures the width in the exact opposite direction. 4 Finally the TNC returns the touch probe to the clearance height and saves the actual values and the deviation in the following Q parameters: Parameter number Q156 Q157 Meaning Actual value of measured length Actual value of the centerline 2 1 Q166 Deviation of the measured length Before programming, note the following: Before a cycle definition you must have programmed a tool call to define the touch probe axis Touch Probe Cycles for Automatic Workpiece Inspection
101 Starting point in 1st axis Q328 (absolute): starting point for probing in the reference axis of the working plane. Starting point in 2nd axis Q329 (absolute): starting point for probing in the minor axis of the working plane. Offset for 2nd measurement Q310 (incremental): distance by which the touch probe is displaced before the second measurement. If you enter 0, the TNC does not displace the touch probe. Measuring axis Q272: axis in the working plane in which the measurement is to be made: 1: Reference axis = measuring axis 2: Minor axis = measuring axis Measuring height in the touch probe axis Q261 (absolute): coordinate of the ball tip center (= touch point) in the touch probe axis in which the measurement is to be made. Clearance height Q260 (absolute): coordinate in the touch probe axis at which no collision between tool and workpiece (fixtures) can occur. Nominal length Q311: nominal value of the length to be measured. Maximum dimension Q288: maximum permissible length. Minimum dimension Q289: minimum permissible length Y Q272=2 Q329 Q288 Q311 Q289 Q328 Q310 X Q272=1 3.3 Automatic Workpiece Measurement Measuring log Q281: definition of whether the TNC is to create a measuring log: 0: No measuring log 1: Generate measuring log: with the standard setting the TNC saves the log file TCHPR425.TXT in the directory in which your measuring program is also stored. PGM stop if tolerance error Q309: definition of whether in the event of a violation of tolerance limits the TNC is to interrupt the program run and output an error message: 0: Do not interrupt program run, no error message 1: Interrupt program run, output an error message Tool number for monitoring Q330: definition of whether the TNC is to monitor the tool (see Tool monitoring on page 71): 0: Monitoring not active >0: Tool number in the tool table TOOL.T Example: NC blocks 5 TCH PROBE 425 MEASURE INSIDE WIDTH Q328=+75 ;STARTNG PNT 1ST AXIS Q329=-12,5;STARTNG PNT 2ND AXIS Q310=+0 ;OFFS. 2ND MEASUREMNT Q272=1 ;MEASURING AXIS Q261=-5 ;MEASURING HEIGHT Q260=+10 ;CLEARANCE HEIGHT Q311=25 ;NOMINAL LENGTH Q288=25.05;MAXIMUM DIMENSION Q289=25 ;MINIMUM DIMENSION Q281=1 ;MEASURING LOG Q309=0 ;PGM-STOP IF ERROR Q330=0 ;TOOL NUMBER HEIDENHAIN TNC 426, TNC
102 3.3 Automatic Workpiece Measurement MEASURE RIDGE WIDTH (touch probe cycle 426, ISO: G426) Touch probe cycle 426 measures the position and width of a ridge. If you define the corresponding tolerance values in the cycle, the TNC makes a nominal-to-actual value comparison and saves the deviation in system parameters. 1 The TNC positions the touch probe to the starting points at rapid traverse (value from MP6150 or MP6361) following the positioning logic (see Running touch probe cycles on page 7) to the starting point 1. The TNC calculates the probe starting points from the data in the cycle and the safety clearance from MP Then the touch probe moves to the entered measuring height and probes the first touch point at the probing feed rate (MP6120 or MP6360). 1. The first probing is always in the negative direction of the programmed axis. 3 Then the touch probe moves at clearance height to the next starting position and probes the second touch point. 4 Finally the TNC returns the touch probe to the clearance height and saves the actual values and the deviation in the following Q parameters: Parameter number Q156 Q157 Q166 Meaning Actual value of measured length Actual value of the centerline Deviation of the measured length 2 1 Before programming, note the following: Before a cycle definition you must have programmed a tool call to define the touch probe axis. First measuring point in the 1st axis Q263 (absolute): coordinate of the first touch point in the reference axis of the working plane. First measuring point in the 2nd axis Q264 (absolute): coordinate of the first touch point in the minor axis of the working plane. Second measuring point in the 1st axis Q265 (absolute): coordinate of the second touch point in the reference axis of the working plane. Second measuring point in the 2nd axis Q266 (absolute): coordinate of the second touch point in the minor axis of the working plane 90 3 Touch Probe Cycles for Automatic Workpiece Inspection
103 Measuring axis Q272: axis in the working plane in which the measurement is to be made: 1: Reference axis = measuring axis 2: Minor axis = measuring axis Measuring height in the touch probe axis Q261 (absolute): coordinate of the ball tip center (= touch point) in the touch probe axis in which the measurement is to be made. Setup clearance Q320 (incremental): additional distance between measuring point and ball tip. Q320 is added to MP6140. Clearance height Q260 (absolute): coordinate in the touch probe axis at which no collision between tool and workpiece (fixtures) can occur. Nominal length Q311: nominal value of the length to be measured. Maximum dimension Q288: maximum permissible length. Minimum dimension Q289: minimum permissible length Measuring log Q281: definition of whether the TNC is to create a measuring log: 0: No measuring log 1: Generate measuring log: with the standard setting the TNC saves the log file TCHPR426.TXT in the directory in which your measuring program is also stored. PGM stop if tolerance error Q309: definition of whether in the event of a violation of tolerance limits the TNC is to interrupt the program run and output an error message: 0: Do not interrupt program run, no error message 1: Interrupt program run, output an error message Tool number for monitoring Q330: definition of whether the TNC is to monitor the tool (see Tool monitoring on page 71) 0: Monitoring not active >0: Tool number in the tool table TOOL.T Example: NC blocks 5 TCH PROBE 426 MEASURE RIDGE WIDTH Q263=+50 ;1ST POINT 1ST AXIS Q264=+25 ;1ST POINT 2ND AXIS Q265=+50 ;2ND POINT 1ST AXIS Q266=+85 ;2ND POINT 2ND AXIS Q272=2 ;MEASURING AXIS Q261=-5 ;MEASURING HEIGHT Q320=0 ;SET-UP CLEARANCE Q260=+20 ;CLEARANCE HEIGHT Q311=45 ;NOMINAL LENGTH Q288=45 ;MAXIMUM DIMENSION Q289=44.95;MINIMUM DIMENSION Q281=1 ;MEASURING LOG Q309=0 ;PGM-STOP IF ERROR Q330=0 ;TOOL NUMBER 3.3 Automatic Workpiece Measurement HEIDENHAIN TNC 426, TNC
104 3.3 Automatic Workpiece Measurement MEASURE COORDINATE (touch probe cycle 427, ISO: G427) Touch probe cycle 427 finds a coordinate in a selectable axis and saves the value in a system parameter. If you define the corresponding tolerance values in the cycle, the TNC makes a nominal-to-actual value comparison and saves the deviation value in system parameters. 1 The TNC positions the touch probe to the starting points at rapid traverse (value from MP6150 or MP6361) following the positioning logic (see Running touch probe cycles on page 7) to the starting point 1. The TNC offsets the touch probe by the safety clearance in the direction opposite the defined traverse direction. 2 Then the TNC positions the touch probe to the entered touch point 1 in the working plane and measures the actual value in the selected axis. 3 Finally the TNC returns the touch probe to the clearance height and saves the measured coordinate in the following Q parameter: Parameter number Q160 Meaning Measured coordinate Before programming, note the following: Before a cycle definition you must have programmed a tool call to define the touch probe axis Touch Probe Cycles for Automatic Workpiece Inspection
105 First measuring point in the 1st axis Q263 (absolute): coordinate of the first touch point in the reference axis of the working plane. First measuring point in the 2nd axis Q264 (absolute): coordinate of the first touch point in the minor axis of the working plane. Measuring height in the touch probe axis Q261 (absolute): coordinate of the ball tip center (= touch point) in the touch probe axis in which the measurement is to be made. Setup clearance Q320 (incremental): additional distance between measuring point and ball tip. Q320 is added to MP6140. Measuring axis (1..3: 1=reference axis) Q272: axis in which the measurement is to be made: 1: Reference axis = measuring axis 2: Minor axis = measuring axis 3: Touch probe axis = measuring axis Traverse direction 1 Q267: direction in which the probe is to approach the workpiece: -1: Negative traverse direction +1: Positive traverse direction Clearance height Q260 (absolute): coordinate in the touch probe axis at which no collision between tool and workpiece (fixtures) can occur. Measuring log Q281: definition of whether the TNC is to create a measuring log: 0: No measuring log 1: Generate measuring log: with the standard setting the TNC saves the log file TCHPR427.TXT in the directory in which your measuring program is also stored. Maximum dimension Q288: maximum permissible measured value. minimum dimension Q289: Minimum permissible measured value PGM stop if tolerance error Q309: definition of whether in the event of a violation of tolerance limits the TNC is to interrupt the program run and output an error message: 0: Do not interrupt program run, no error message 1: Interrupt program run, output an error message Tool number for monitoring Q330: definition of whether the TNC is to monitor the tool (see Tool monitoring on page 71): 0: Monitoring not active >0: Tool number in the tool table TOOL.T MP Q320 + Q267 Y + Q272=2 Q264 X Q263 Q272=1 Example: NC blocks 5 TCH PROBE 427 MEASURE COORDINATE Q263=+35 ;1ST POINT 1ST AXIS Q264=+45 ;1ST POINT 2ND AXIS Q261=+5 ;MEASURING HEIGHT Q320=0 ;SET-UP CLEARANCE Q272=3 ;MEASURING AXIS Q267=-1 ;TRAVERSE DIRECTION Q260=+20 ;CLEARANCE HEIGHT Q281=1 ;MEASURING LOG Q288=5.1 ;MAXIMUM DIMENSION Q289=4.95 ;MINIMUM DIMENSION Q309=0 ;PGM-STOP IF ERROR Q330=0 ;TOOL NUMBER 3.3 Automatic Workpiece Measurement HEIDENHAIN TNC 426, TNC
106 3.3 Automatic Workpiece Measurement MEASURE BOLT HOLE CIRCLE (touch probe cycle 430, ISO: G430) Touch probe cycle 430 finds the center and diameter of a bolt hole circle by probing three holes. If you define the corresponding tolerance values in the cycle, the TNC makes a nominal-to-actual value comparison and saves the deviation in system parameters. 1 Following the positioning logic (see Running touch probe cycles on page 7), the TNC positions the touch probe at rapid traverse (value from MP6150 or MP6361) to the point entered as center of the first hole 1. 2 Then the probe moves to the entered measuring height and probes four points to find the first hole center. 3 The touch probe returns to the clearance height and then to the position entered as center of the second hole 2. 4 The TNC moves the touch probe to the entered measuring height and probes four points to find the second hole center. 5 The touch probe returns to the clearance height and then to the position entered as center of the third hole 3. 6 The TNC moves the touch probe to the entered measuring height and probes four points to find the third hole center. 7 Finally the TNC returns the touch probe to the clearance height and saves the actual values and the deviations in the following Q parameters: Parameter number Q151 Meaning Actual value of center in reference axis Q152 Q153 Q161 Q162 Q163 Actual value of center in minor axis Actual value of bolt hole circle diameter Deviation from center of reference axis Deviation from center of minor axis Deviation of bolt hole circle diameter Before programming, note the following: Before a cycle definition you must have programmed a tool call to define the touch probe axis Touch Probe Cycles for Automatic Workpiece Inspection
107 Center of 1st axis Q273 (absolute): bolt hole circle center (nominal value) in the reference axis of the working plane. Center in 2nd axis Q274 (absolute): bolt hole circle center (nominal value) in the minor axis of the working plane. Nominal diameter Q262: enter the bolt hole circle diameter. Angle of 1st hole Q291 (absolute): polar coordinate angle of the first hole center in the working plane. Angle of 2nd hole Q292 (absolute): polar coordinate angle of the second hole center in the working plane. Angle of 3rd hole Q293 (absolute): polar coordinate angle of the third hole center in the working plane. Measuring height in the touch probe axis Q261 (absolute): coordinate of the ball tip center (= touch point) in the touch probe axis in which the measurement is to be made. Clearance height Q260 (absolute): coordinate in the touch probe axis at which no collision between tool and workpiece (fixtures) can occur. Maximum dimension Q288: maximum permissible diameter of bolt hole circle. Minimum dimension Q289: minimum permissible diameter of bolt hole circle. Tolerance value for center 1st axis Q279: permissible position deviation in the reference axis of the working plane. Tolerance value for center 2nd axis Q280: permissible position deviation in the minor axis of the working plane 3.3 Automatic Workpiece Measurement HEIDENHAIN TNC 426, TNC
108 3.3 Automatic Workpiece Measurement Measuring log Q281: definition of whether the TNC is to create a measuring log: 0: No measuring log 1: Generate measuring log: with the standard setting the TNC saves the log file TCHPR430.TXT in the directory in which your measuring program is also stored. PGM stop if tolerance error Q309: definition of whether in the event of a violation of tolerance limits the TNC is to interrupt the program run and output an error message: 0: Do not interrupt program run, no error message 1: Interrupt program run, output an error message Tool number for monitoring Q330: definition of whether the TNC is to monitor for tool breakage(see Tool monitoring on page 71): 0: Monitoring not active >0: Tool number in the tool table TOOL.T Note: Only tool breakage monitoring active, no automatic tool compensation. Example: NC blocks 5 TCH PROBE 430 MEAS. BOLT HOLE CIRC Q273=+50 ;CENTER IN 1ST AXIS Q274=+50 ;CENTER IN 2ND AXIS Q262=80 ;NOMINAL DIAMETER Q291=+0 ;ANGLE OF 1ST HOLE Q292=+90 ;ANGLE OF 2ND HOLE Q293=+180 ;ANGLE OF 3RD HOLE Q261=-5 ;MEASURING HEIGHT Q260=+10 ;CLEARANCE HEIGHT Q288=80.1 ;MAXIMUM DIMENSION Q289=79.9 ;MINIMUM DIMENSION Q279=0.15 ;TOLERANCE 1ST CENTER Q280=0.15 ;TOLERANCE 2ND CENTER Q281=1 ;MEASURING LOG Q309=0 ;PGM-STOP IF ERROR Q330=0 ;TOOL NUMBER 96 3 Touch Probe Cycles for Automatic Workpiece Inspection
109 MEASURE PLANE (touch probe cycle 431, ISO: G431) Touch probe cycle 431 finds the angle of a plane by measuring three points. It saves the measured values in system parameters. 1 Following the positioning logic (see Running touch probe cycles on page 7), the TNC positions the touch probe at rapid traverse (value from MP6150 or MP6361) to the programmed starting point 1 and measures the first touch point of the plane. The TNC offsets the touch probe by the safety clearance in the direction opposite to the direction of probing. 2 The touch probe returns to the clearance height and then moves in the working plane to starting point 2 and measures the actual value of the second touch point of the plane. 3 The touch probe returns to the clearance height and then moves in the working plane to starting point 3 and measures the actual value of the third touch point. 4 Finally the TNC returns the touch probe to the clearance height and saves the measured angle values in the following Q parameters: Parameter number Q158 Q159 Q170 Q171 Meaning Angle of the A axis Angle of the B axis Rotation about the A axis Rotation about the B axis Automatic Workpiece Measurement Q172 Rotation about the C axis Before programming, note the following: Before a cycle definition you must have programmed a tool call to define the touch probe axis. For the TNC to be able to calculate the angular values, the three measuring points must not be positioned on one straight line. As of NC software , parameters Q170 to Q172 find the angle of the rotary axes that are needed in the tilted working plane with spatial angle function. With the first two measuring points you also specify the direction of the reference axis when tilting the working plane. HEIDENHAIN TNC 426, TNC
110 3.3 Automatic Workpiece Measurement First measuring point in the 1st axis Q263 (absolute): coordinate of the first touch point in the reference axis of the working plane. First measuring point in the 2nd axis Q264 (absolute): coordinate of the first touch point in the minor axis of the working plane. First measuring point in the 3rd axis Q294 (absolute): coordinate of the first touch point in the touch probe axis. Second measuring point in the 1st axis Q265 (absolute): coordinate of the second touch point in the reference axis of the working plane Second measuring point in the 2nd axis Q266 (absolute): coordinate of the second touch point in the minor axis of the working plane Second measuring point in the 3rd axis Q295 (absolute): coordinate of the second touch point in the touch probe axis. 3rd measuring point in 1st axis Q296 (absolute): coordinate of the third touch point in the reference axis of the working plane. 3rd measuring point in 2nd axis Q297 (absolute): coordinate of the third touch point in the minor axis of the working plane. Third measuring point in the 3rd axis Q298 (absolute): coordinate of the third touch point in the touch probe axis. Setup clearance Q320 (incremental): additional distance between measuring point and ball tip. Q320 is added to MP6140. Clearance height Q260 (absolute): coordinate in the touch probe axis at which no collision between tool and workpiece (fixtures) can occur. Measuring log Q281: definition of whether the TNC is to create a measuring log: 0: No measuring log 1: Generate measuring log: with the standard setting the TNC saves the log file TCHPR431.TXT in the directory in which your measuring program is also stored. Example: NC blocks 5 TCH PROBE 431 MEASURE PLANE Q263=+20 ;1ST POINT 1ST AXIS Q264=+20 ;1ST POINT 2ND AXIS Q294=-10 ;1ST POINT 3RD AXIS Q265=+50 ;2ND POINT 1ST AXIS Q266=+80 ;2ND POINT 2ND AXIS Q295=+0 ;2ND POINT 3RD AXIS Q296=+90 ;3RD POINT 1ST AXIS Q297=+35 ;3RD POINT 2ND AXIS Q298=+12 ;3RD POINT 3RD AXIS Q320=0 ;SET-UP CLEARANCE Q260=+5 ;CLEARANCE HEIGHT Q281=1 ;MEASURING LOG 98 3 Touch Probe Cycles for Automatic Workpiece Inspection
111 Example: Measuring and reworking a rectangular stud Program sequence: - Roughing with 0.5 mm finishing allowance - Measuring - Rectangular stud finishing in accordance with the measured values 0 BEGIN PGM BEAMS MM 1 TOOL CALL 0 Z Prepare tool call 2 L Z+100 R0 F MAX Retract the tool 50 Y X Y 10 Z 3.3 Automatic Workpiece Measurement 3 FN 0: Q1 = +81 Pocket length in X (roughing dimension) 4 FN 0: Q2 = +61 Pocket length in Y (roughing dimension) 5 CALL LBL 1 Call subprogram for machining 6 L Z+100 R0 F MAX M6 Retract the tool, change the tool 7 TOOL CALL 99 Z Call the touch probe 8 TCH PROBE 424 MEAS. RECTAN. OUTS. Measure the rough-milled rectangle Q273=+50 ;CENTER IN 1ST AXIS Q274=+50 ;CENTER IN 2ND AXIS Q282=80 ;1ST SIDE LENGTH Nominal length in X (final dimension) Q283=60 ;2ND SIDE LENGTH Nominal length in Y (final dimension) Q261=-5 ;MEASURING HEIGHT Q320=0 ;SET-UP CLEARANCE Q260=+30 ;CLEARANCE HEIGHT Q301=0 ;TRAVERSE TO CLEAR HEIGHT Q284=0 ;MAX. LIMIT 1ST SIDE Input values for tolerance checking not required Q285=0 ;MIN. LIMIT 1ST SIDE Q286=0 ;MAX. LIMIT 2ND SIDE HEIDENHAIN TNC 426, TNC
112 3.3 Automatic Workpiece Measurement Q287=0 ;MIN. LIMIT 2ND SIDE Q279=0 ;TOLERANCE 1ST CENTER Q280=0 ;TOLERANCE 2ND CENTER Q281=0 ;MEASURING LOG No measuring log transmission Q309=0 ;PGM-STOP IF ERROR Do not output an error message Q330=0 ;TOOL NUMBER No tool monitoring 9 FN 2: Q1 = +Q1 - + Q164 Calculate length in X including the measured deviation 10 FN 2: Q2 = +Q2 - + Q165 Calculate length in Y including the measured deviation 11 L Z+100 R0 F MAX M6 Retract the touch probe, change the tool 12 TOOL CALL 1 Z S5000 Tool call for finishing 13 CALL LBL 1 Call subprogram for machining 14 L Z+100 R0 F MAX M2 Retract in the tool axis, end program 15 LBL 1 Subprogram with fixed cycle for rectangular studs 16 CYCL DEF 213 STUD FINISHING Q200=20 ;SET-UP CLEARANCE Q201=-10 ;DEPTH Q206=150 ;FEED RATE FOR PLUNGING Q202=5 ;PLUNGING DEPTH Q207=500 ;FEED RATE FOR MILLING Q203=+10 ;SURFACE COORDINATE Q204=20 ;2ND SET-UP CLEARANCE Q216=+50 ;CENTER IN 1ST AXIS Q217=+50 ;CENTER IN 2ND AXIS Q218=Q1 ;1ST SIDE LENGTH Length in X variable for roughing and milling Q219=Q2 ;2ND SIDE LENGTH Length in Y variable for roughing and milling Q220=0 ;CORNER RADIUS Q221=0 ;ALLOWANCE IN 1ST AXS 17 CYCL CALL M3 Call the cycle 18 LBL 0 End of subprogram 19 END PGM BEAMS MM Touch Probe Cycles for Automatic Workpiece Inspection
113 Example: Measuring a rectangular pocket and recording the results 0 BEGIN PGM BSMEAS MM 1 TOOL CALL 1 Z Tool call for touch probe 2 L Z+100 R0 F MAX Retract the touch probe 3 TCH PROBE 423 MEAS. RECTAN. INSIDE Q273=+50 ;CENTER IN 1ST AXIS Q274=+40 ;CENTER IN 2ND AXIS Q282=90 ;1ST SIDE LENGTH Nominal length in X Q283=70 ;2ND SIDE LENGTH Nominal length in Y Q261=-5 ;MEASURING HEIGHT Q320=0 ;SET-UP CLEARANCE Q260=+20 ;CLEARANCE HEIGHT Q301=0 ;TRAVERSE TO CLEAR HEIGHT Q284=90.15;MAX. LIMIT 1ST SIDE Maximum limit in X Q285=89.95;MIN. LIMIT 1ST SIDE Minimum limit in X Q286=70.1 ;MAX. LIMIT 2ND SIDE Maximum limit in Y Q287=69.9 ;MIN. LIMIT 2ND SIDE Minimum limit in Y Q279=0.15 ;TOLERANCE 1ST CENTER Permissible position deviation in X Q280=0.1 ;TOLERANCE 2ND CENTER Permissible position deviation in Y Q281=1 ;MEASURING LOG Transmit the measuring log Q309=0 ;PGM-STOP IF ERROR Do not display an error message in case of a tolerance violation Q330=0 ;TOOL NUMBER No tool monitoring 3.3 Automatic Workpiece Measurement HEIDENHAIN TNC 426, TNC
114 3.3 Automatic Workpiece Measurement 4 L Z+100 R0 F MAX M2 Retract in the tool axis, end program 5 END PGM BSMEAS MM Measuring log (file TCPR423.TXT) ****************** MEASURING LOG FOR PROBING CYCLE 423: RECTANGULAR POCKET MEASURING ******************* DATE: TIME: 8:21:33 MEASURING PROGRAM: TNC:\BSMESS\BSMES.H NOML. VALUES: CENTER IN REF. AXIS: CENTER IN MINOR AXIS: SIDE LENGTH IN REF. AXIS: SIDE LENGTH IN MINOR AXIS: GIVEN LIMIT VALUES: MAX. FOR CENTER IN REF. AXIS : MIN. FOR CENTER IN REF. AXIS : MAX. FOR CENTER IN MINOR AXIS : MIN. FOR CENTER IN MINOR AXIS : MAX. IN REFERENCE AXIS: MINIMUM DIMENSION IN REFERENCE AXIS: MAXIMUM SIDE LENGTH IN MINOR AXIS: MINIMUM SIDE LENGTH IN MINOR AXIS: ******************************************************************************************************** ACTUAL VALUES: CENTER IN REF. AXIS: CENTER IN MINOR AXIS: SIDE LENGTH IN REF. AXIS: SIDE LENGTH IN MINOR AXIS: DEVIATIONS: CENTER IN REF. AXIS: CENTER IN MINOR AXIS: SIDE LENGTH IN REF. AXIS: SIDE LENGTH IN MINOR AXIS: ******************************************************************************************************** FURTHER MEASURING RESULTS: MEASURING HEIGHT: ***************************************** END OF MEASURING LOG ***************************************** Touch Probe Cycles for Automatic Workpiece Inspection
115 3.4 Special Cycles Overview The TNC provides three cycles for the following special purposes: Cycle Soft key 2 CALIBRATE TS Calibrate touch probe 3 MEASURING Cycle for defining OEM cycles 3.4 Special Cycles 440 MEASURING AXIS SHIFT HEIDENHAIN TNC 426, TNC
116 3.4 Special Cycles CALIBRATE TS (touch probe cycle 2) Touch probe cycle 2 automatically calibrates a touch trigger probe using a ring gauge or a precision stud as calibration standard. Before you begin calibrating, you must define in the machine parameters to the center of the calibrating workpiece in the working space of the machine (REF coordinates). If you are working with several traverse ranges you can save a separate set of coordinates for the center of each calibrating workpiece (MP to and MP to ). 1 The touch probe moves at rapid traverse (value from MP6150) to the clearance height (but only if the current position is below the clearance height). 2 Then the TNC positions the touch probe in the working plane to the center of the ring gauge (calibration from inside) or in its proximity (calibration from outside). 3 The touch probe then moves to the measuring depth (result of machine parameters 618x.2 and 6185.x) and probes the ring gauge successively in X+, Y+, X- and Y-. 4 Finally, the TNC moves the touch probe to the clearance height and writes the effective radius of the ball tip to the calibration data. Clearance height (absolute): coordinate in the touch probe axis at which the touch probe cannot collide with the calibration workpiece or any fixtures. Radius of ring gauge: radius of the calibrating workpiece. Inside calib. =0/outs. calib.=1: definition of whether the TNC is to calibrate from inside or outside: 0: Calibrate from inside 1: Calibrate from outside Example: NC blocks 5 TCH PROBE 2.0 CALIBRATE TS 6 TCH PROBE 2.1 HEIGHT: +50 R DIRECTION: Touch Probe Cycles for Automatic Workpiece Inspection
117 MEASURING (touch probe cycle 3, available as of NC software xx) Touch probe cycle 3 measures any position on the workpiece in a selectable direction. Unlike other measuring cycles, Cycle 3 enables you to enter the measuring path and feed rate directly. The touch probe does not retract automatically after determining the measured value. 1 The touch probe moves from the current position at the entered feed rate in the defined probing direction. The probing direction must be defined in the cycle as a polar angle. 2 After the TNC has saved the position, the touch probe stops. The TNC saves the X, Y, Z coordinates of the probe-tip center in three successive Q parameters. You define the number of the first parameter in the cycle. 3 If necessary, you must program the retraction of the touch probe in a separate traversing block. 3.4 Special Cycles Before programming, note the following: With function FN17: SYSWRITE ID 990 NR 6 you can set whether the cycle runs through the probe input X12 or X13. With the non-modal function M141 (available as of NC software No ) you can switch off tool monitoring in order to be able to retract the tool in a traversing block. Make sure that you have selected the correct disengaging direction, otherwise the touch probe may be damaged. Parameter number for result: Enter the number of the Q parameter to which you want the TNC to assign the first coordinate (X). Probe axis: Enter the reference axis of the working plane (X for tool axis Z, Z for tool axis Y, and Y for tool axis X), and confirm with ENT. Probing angle: Angle, measured from the probing axis, at which the touch probe is to move. Confirm with ENT. Maximum measuring path: Enter the maximum distance from the starting point by which the touch probe may move. Confirm with ENT. Feed rate: Enter the measuring feed rate. To end input: press the ENT key Example: NC blocks 5 TCH PROBE 3.0 MEASURING 6 TCH PROBE 3.1 Q1 7 TCH PROBE 3.2 X ANGLE: TCH PROBE 3.3 DIST +10 F100 HEIDENHAIN TNC 426, TNC
118 3.4 Special Cycles MEASURE AXIS SHIFT (touch probe cycle 440, ISO: G440, available as of NC software xx) Touch probe cycle 440 measures the axis shifts of the machine. Make sure that the cylindrical calibrating tool used in connection with the TT 130 has the correct dimensions. Prerequisites: Before running cycle 440 for the first time, you must have calibrated the tool touch probe with tool-touch-probe cycle 30. Ensure that the tool data of the calibrating tool has been entered in the tool table TOOL.T. Before running the cycle, you must activate the calibrating tool with TOOL CALL. Ensure that the TT tool touch probe is connected to input X13 of the logic unit and is ready to function (machine parameter 65xx). 1 The TNC positions the calibrating tool at rapid traverse (value from MP6150 or MP6361) and following the positioning logic (refer to chapter 1.2) in the vicinity of the TT. 2 At first the TNC makes a measurement in the touch probe axis. The calibrating tool is offset by the value you have defined in the tool table TOOL.T under TT: R-OFFS (standard = tool radius). The TNC always performs the measurement in the touch probe axis. 3 Then the TNC makes the measurement in the working plane. You define via parameter Q364 in which axis and in which direction of the working plane the measurement is to be made. 4 If you make a calibration, the TNC saves the calibration data. Whenever you make a measurement, the TNC compares the measured values to the calibration data and writes the deviations to the following Q parameters: Parameter number Q185 Q186 Q187 Meaning Deviation from calibration value in X Deviation from calibration value in Y Deviation from calibration value in Z You can use this value for compensating the deviation through an incremental datum shift (cycle 7). 5 Finally, the calibrating tool returns to the clearance height Touch Probe Cycles for Automatic Workpiece Inspection
119 Before programming, note the following: Before you perform a measurement, you must have made at least one calibration, otherwise the TNC will output an error message. If you are working with several traverse ranges, you have to make a calibration for each of them. Each time you run cycle 440, the TNC resets the result parameters Q185 to Q187. If you want to set a limit for the axis shift in the machine axes, enter the desired limits in the tool table TOOL.T under LTOL for the spindle axis and under RTOL for the working plane. If the limits are exceeded, the TNC outputs a corresponding error message after the control measurement. After the cycle is completed, the TNC restores the spindle settings that were active before the cycle (M3/M4). 3.4 Special Cycles Direction: 0=Calibrate, 1=Measuring?: Definition of whether you want to calibrate or make a control measurement: 0: Calibrate 1: Measure Probing directions: definition of probing direction(s) in the working plane: 0: Measuring only in the positive direction of the reference axis 1: Measuring only in the positive direction of the minor axis 2: Measuring only in the negative direction of the reference axis 3: Measuring only in the negative direction of the minor axis 4: Measuring in the positive directions of the reference axis and the minor axis 5: Measuring in the positive direction of the reference axis and in the negative direction of the minor axis 6: Measuring in the negative direction of the reference axis and in the positive direction of the minor axis 7: Measuring in the negative directions of the reference axis and the minor axis Example: NC blocks 5 TCH PROBE 440 MEASURE AXIS SHIFT Q363=1 ;DIRECTION Q364=0 ;PROBING DIRECTIONS Q320=2 ;SET-UP CLEARANCE Q260=+50 ;CLEARANCE HEIGHT The TNC calculates incorrect values if the probing direction(s) for calibrating and measuring do not correspond. Setup clearance (incremental): additional distance between measuring point and probe contact. Q320 is added to MP6540. Clearance height (absolute): coordinate in the touch probe axis at which no collision between tool and workpiece (fixtures) can occur (referenced to the active datum). HEIDENHAIN TNC 426, TNC
120

121 4 Touch Probe Cycles for Automatic Tool Measurement
122 4.1 Tool Measurement with the TT Tool Touch Probe 4.1 Tool Measurement with the TT Tool Touch Probe Overview The TNC and the machine tool must be set up by the machine tool builder for use of the TT touch probe. Some cycles and functions may not be provided on your machine tool. Refer to your machine manual. In conjunction with the TNC s tool measurement cycles, the tool touch probe enables you to measure tools automatically. The compensation values for tool length and radius can be stored in the central tool file TOOL.T and are accounted for in the next tool call. The following types of tool measurement are provided: Tool measurement while the tool is at standstill. Tool measurement while the tool is rotating. Measuring individual teeth. Setting the machine parameters The TNC uses the feed rate for probing defined in MP6520 when measuring a tool at standstill. When measuring a rotating tool, the TNC automatically calculates the spindle speed and feed rate for probing. The spindle speed is calculated as follows: n = MP6570 / (r ) where n MP6570 r Spindle speed (rpm) maximum permissible cutting speed in m/min Active tool radius in mm The feed rate for probing is calculated from: v = meas. tolerance n where v Measuring tolerance n feed rate for probing in mm/min Measuring tolerance [mm], depending on MP6507 speed in rpm Touch Probe Cycles for Automatic Tool Measurement

123 MP6507 determines the calculation of the probing feed rate: MP6507=0: The measuring tolerance remains constant regardless of the tool radius. With very large tools, however, the feed rate for probing is reduced to zero. The smaller you set the maximum permissible rotational speed (MP6570) and the permissible tolerance (MP6510), the sooner you will encounter this effect. MP6507=1: The measuring tolerance is adjusted relative to the size of the tool radius. This ensures a sufficient feed rate for probing even with large tool radii. The TNC adjusts the measuring tolerance according to the following table: Tool radius up to 30 mm Measuring tolerance MP to 60 mm 2 MP to 60 mm 3 MP to 120 mm 4 MP6510 MP6507=2: The feed rate for probing remains constant, the error of measurement, however, rises linearly with the increase in tool radius: Measuring tolerance = (r MP6510)/ 5 mm) where r MP6510 Active tool radius in mm Maximum permissible error of measurement Display the results of measurement You can display the results of tool measurement in the additional status display by pressing the STATUS TOOL PROBE soft key (in the machine operating modes). The TNC then shows the program blocks in the left and the measuring results in the right screen window. The measuring results that exceed the permissible wear tolerance are marked in the status display with an asterisk * ; the results that exceed the permissible breakage tolerance are marked with the character B. 4.1 Tool Measurement with the TT Tool Touch Probe HEIDENHAIN TNC 426, TNC
124 4.2 Available Cycles 4.2 Available Cycles Overview You can program the cycles for tool measurement in the Programming and Editing mode of operation via the TOUCH PROBE key. The following cycles are available: Cycle Old format New format Calibrating the TT Measuring the tool length Measuring the tool radius Measuring tool length and radius Cycles 480 to 483 are available as of NC software xx. The measuring cycles can be used only when the central tool file TOOL.T is active. Before working with the measuring cycles, you must first enter all the required data into the central tool file and call the tool to be measured with TOOL CALL. You can also measure tools in a tilted working plane. Differences between Cycles 31 to 33 and Cycles 481 to 483 The features and the operating sequences are absolutely identical. There are only two differences between Cycles 31 to 33 and Cycles 481 to 483: Cycles 481 to 483 are also available in TNCs for ISO programming under G481 to G483. Instead of a selectable parameter for the status of the measurement, the new cycles use the fixed parameter Q Touch Probe Cycles for Automatic Tool Measurement
125 Calibrating the TT The functioning of the calibration cycle is dependent on MP Refer to your Machine Manual. Before calibrating the touch probe, you must enter the exact length and radius of the calibrating tool into the tool table TOOL.T. The position of the TT within the machine working space must be defined by setting the machine parameters to If you change the setting of any of the machine parameters to , you must recalibrate the TT. 4.2 Available Cycles The TT is calibrated automatically with the measuring cycle TCH PROBE 30 or TCH PROBE 480. The TNC also measures the center misalignment of the calibrating tool automatically by rotating the spindle by 180 after the first half of the calibration cycle. The calibrating tool must be a precisely cylindrical part, for example a cylinder pin. The resulting calibration values are stored in the TNC memory and are accounted for during subsequent tool measurement. Clearance height: Enter the position in the spindle axis at which there is no danger of collision with the workpiece or fixtures. The clearance height is referenced to the active workpiece datum. If you enter such a small clearance height that the tool tip would lie below the level of the probe contact, the TNC automatically positions the tool above the level of the probe contact (safety zone from MP6540) Example: NC blocks in old format 6 TOOL CALL 1 Z 7 TCH PROBE 30.0 TT CALIBRATE 8 TCH PROBE 30.1 HEIGHT: +90 Example: NC blocks in new format 6 TOOL CALL 1 Z 7 TCH PROBE 480 TT CALIBRATE Q260=+100 ;CLEARANCE HEIGHT HEIDENHAIN TNC 426, TNC
126 4.2 Available Cycles Measuring the tool length Before measuring a tool for the first time, enter the following data on the tool into the tool table TOOL.T: the approximate radius, the approximate length, the number of teeth, and the cutting direction. The tool length is measured with the cycle TCH PROBE 31 TOOL LENGTH. Depending on the input parameters you can measure the length of a tool by one of the following methods: If the tool diameter is larger than the diameter of the measuring surface of the TT, you can measure the tool while it is rotating. If the tool diameter is smaller than the diameter of the measuring surface of the TT, or if you are measuring the length of a drill or spherical cutter, you can measure the tool while it is at standstill. If the tool diameter is larger than the diameter of the measuring surface of the TT, you can measure the individual teeth of the tool while it is at standstill. Measuring cycle for measuring a tool during rotation The TNC determines the longest tooth of a rotating tool by positioning the tool to be measured at an offset to the center of the touch probe system and then moving it toward the measuring surface until it contacts the surface. The offset is programmed in the tool table under Tool offset: Radius (TT: R-OFFS). Measuring cycle for measuring a tool during standstill (e.g. for drills) The TNC positions the tool to be measured over the center of the measuring surface. It then moves the tool toward the measuring surface of the TT (without rotation of the spindle) until the tool contacts the surface. To activate this function, enter zero for the Tool offset: Radius (TT: R-OFFS) in the tool table. Measuring cycle for measuring individual teeth The TNC pre-positions the tool to be measured to a position at the side of the touch probe head. The distance from the tip of the tool to the upper edge of the touch probe head is defined in MP6530. You can enter an additional offset with Tool offset: Length (TT: L-OFFS) in the tool table. The TNC probes the tool radially during rotation to determine the starting angle for measuring the individual teeth. It then measures the length of each tooth by changing the corresponding angle of spindle orientation. To activate this function, program TCH PROBE 31 = 1 for CUTTER MEASUREMENT Touch Probe Cycles for Automatic Tool Measurement
127 Define cycle Measure tool=0 / Check tool=1: Select whether the tool is to be measured for the first time or whether a tool that has already been measured is to be inspected. If the tool is being measured for the first time, the TNC overwrites the tool length L in the central tool file TOOL.T by the delta value DL = 0. If you wish to inspect a tool, the TNC compares the measured length with the tool length L that is stored in TOOL.T. It then calculates the positive or negative deviation from the stored value and enters it into TOOL.T as the delta value DL. The deviation can also be used for Q parameter Q115. If the delta value is greater than the permissible tool length tolerance for wear or break detection, the TNC will lock the tool (status L in TOOL.T). Parameter number for result?: Parameter number in which the TNC stores the status of the measurement: 0.0: Tool is within the tolerance 1.0: Tool is worn (LTOL exceeded) 2.0: Tool is broken (LBREAK exceeded). If you do not wish to use the result of measurement within the program, answer the dialog prompt with NO ENT. Clearance height: Enter the position in the spindle axis at which there is no danger of collision with the workpiece or fixtures. The clearance height is referenced to the active workpiece datum. If you enter such a small clearance height that the tool tip would lie below the level of the probe contact, the TNC automatically positions the tool above the level of the probe contact (safety zone from MP6540) Example: Measuring a rotating tool for the first time; old format 6 TOOL CALL 12 Z 7 TCH PROBE 31.0 TOOL LENGTH 8 TCH PROBE 31.1 CHECK: 0 9 TCH PROBE 31.2 HEIGHT: TCH PROBE 31.3 PROBING THE TEETH: 0 Example: Inspecting a tool and measuring the individual teeth and saving the status in Q5; Old format 6 TOOL CALL 12 Z 7 TCH PROBE 31.0 TOOL LENGTH 8 TCH PROBE 31.1 CHECK: 1 Q5 9 TCH PROBE 31.2 HEIGHT: TCH PROBE 31.3 PROBING THE TEETH: 1 Example: NC blocks in new format 6 TOOL CALL 12 Z 7 TCH PROBE 481 TOOL LENGTH Q340=1 ;CHECK Q260=+100 ;CLEARANCE HEIGHT Q341=1 ;PROBING THE TEETH 4.2 Available Cycles Cutter measurement? 0=No / 1=Yes: Choose whether or not the TNC is to measure the individual teeth. HEIDENHAIN TNC 426, TNC
128 4.2 Available Cycles Measuring the tool radius Before measuring a tool for the first time, enter the following data on the tool into the tool table TOOL.T: the approximate radius, the approximate length, the number of teeth, and the cutting direction. The tool radius is measured with the cycle TCH PROBE 32 TOOL RADIUS. Depending on the input parameters you can measure the radius of a tool by: Measuring the tool while it is rotating. Measuring the tool while it is rotating and subsequently measuring the individual teeth. Cylindrical tools with diamond surfaces can be measured with stationary spindle as of NC software xx. To do so, define the number of teeth (CUT) with 0 and adjust the machine parameter Refer to your machine manual. Sequence of measurement The TNC pre-positions the tool to be measured to a position at the side of the touch probe head. The distance from the tip of the milling tool to the upper edge of the touch probe head is defined in MP6530. The TNC probes the tool radially while it is rotating. If you have programmed a subsequent measurement of individual teeth, the TNC measures the radius of each tooth with the aid of oriented spindle stops Touch Probe Cycles for Automatic Tool Measurement
129 Define cycle Measure tool=0 / Check tool=1: Select whether the tool is to be measured for the first time or whether a tool that has already been measured is to be inspected. If the tool is being measured for the first time, the TNC overwrites the tool radius R in the central tool file TOOL.T by the delta value DR = 0. If you wish to inspect a tool, the TNC compares the measured radius with the tool radius R that is stored in TOOL.T. It then calculates the positive or negative deviation from the stored value and enters it into TOOL.T as the delta value DR. The deviation can also be used for Q parameter Q116. If the delta value is greater than the permissible tool radius tolerance for wear or break detection, the TNC will lock the tool (status L in TOOL.T). Parameter number for result?: Parameter number in which the TNC stores the status of the measurement: 0.0: Tool is within the tolerance 1.0: Tool is worn (RTOL exceeded) 2.0: Tool is broken (RBREAK exceeded). If you do not wish to use the result of measurement within the program, answer the dialog prompt with NO ENT. Clearance height: Enter the position in the spindle axis at which there is no danger of collision with the workpiece or fixtures. The clearance height is referenced to the active workpiece datum. If you enter such a small clearance height that the tool tip would lie below the level of the probe contact, the TNC automatically positions the tool above the level of the probe contact (safety zone from MP6540) Example: Measuring a rotating tool for the first time; old format 6 TOOL CALL 12 Z 7 TCH PROBE 32.0 TOOL RADIUS 8 TCH PROBE 32.1 CHECK: 0 9 TCH PROBE 32.2 HEIGHT: TCH PROBE 32.3 PROBING THE TEETH: 0 Example: Inspecting a tool and measuring the individual teeth and saving the status in Q5; Old format 6 TOOL CALL 12 Z 7 TCH PROBE 32.0 TOOL RADIUS 8 TCH PROBE 32.1 CHECK: 1 Q5 9 TCH PROBE 32.2 HEIGHT: TCH PROBE 32.3 PROBING THE TEETH: 1 Example: NC blocks in new format 6 TOOL CALL 12 Z 7 TCH PROBE 482 TOOL RADIUS Q340=1 ;CHECK Q260=+100 ;CLEARANCE HEIGHT Q341=1 ;PROBING THE TEETH 4.2 Available Cycles Cutter measurement 0=No / 1=Yes: Choose whether or not the TNC is to measure the individual teeth. HEIDENHAIN TNC 426, TNC
130 4.2 Available Cycles Measuring tool length and radius Before measuring a tool for the first time, enter the following data on the tool into the tool table TOOL.T: the approximate radius, the approximate length, the number of teeth, and the cutting direction. To measure both the length and radius of a tool, program the measuring cycles TCH PROBE 33 MEASURE TOOL. This cycle is particularly suitable for the first measurement of tools, as it saves time when compared with individual measurement of length and radius. In input parameters you can select the desired type of measurement: Measuring the tool while it is rotating. Measuring the tool while it is rotating and subsequently measuring the individual teeth. Cylindrical tools with diamond surfaces can be measured with stationary spindle as of NC software xx. To do so, define the number of teeth (CUT) with 0 and adjust the machine parameter Refer to your machine manual. Sequence of measurement The TNC measures the tool in a fixed programmed sequence. First it measures the tool radius, then the tool length. The sequence of measurement is the same as for measuring cycles 31 and Touch Probe Cycles for Automatic Tool Measurement
131 Define cycle Measure tool=0 / Check tool=1: Select whether the tool is to be measured for the first time or whether a tool that has already been measured is to be inspected. If the tool is being measured for the first time, the TNC overwrites the tool radius R and the tool length L in the central tool file TOOL.T by the delta values DR = 0 and DL = 0. If you wish to inspect a tool, the TNC compares the measured data with the tool data stored in TOOL.T. The TNC calculates the deviations and enters them as positive or negative delta values DR and DL in TOOL.T. The deviations are also available in the Q parameters Q115 and Q116. If the delta values are greater than the permissible tool tolerances for wear or break detection, the TNC will lock the tool (status L in TOOL.T). Parameter number for result?: Parameter number in which the TNC stores the status of the measurement: 0.0: Tool is within the tolerance 1.0: Tool is worn (LTOL or/and RTOL exceeded) 2.0: Tool is broken (LBREAK or/and RBREAK exceeded). If you do not wish to use the result of measurement within the program, answer the dialog prompt with NO ENT. Example: Measuring a rotating tool for the first time; old format 6 TOOL CALL 12 Z 7 TCH PROBE 33.0 MEASURE TOOL 8 TCH PROBE 33.1 CHECK: 0 9 TCH PROBE 33.2 HEIGHT: TCH PROBE 33.3 PROBING THE TEETH: 0 Example: Inspecting a tool and measuring the individual teeth and saving the status in Q5; Old format 6 TOOL CALL 12 Z 7 TCH PROBE 33.0 MEASURE TOOL 8 TCH PROBE 33.1 CHECK: 1 Q5 9 TCH PROBE 33.2 HEIGHT: TCH PROBE 33.3 PROBING THE TEETH: 1 Example: NC blocks in new format 4.2 Available Cycles Clearance height: Enter the position in the spindle axis at which there is no danger of collision with the workpiece or fixtures. The clearance height is referenced to the active workpiece datum. If you enter such a small clearance height that the tool tip would lie below the level of the probe contact, the TNC automatically positions the tool above the level of the probe contact (safety zone from MP6540) 6 TOOL CALL 12 Z 7 TCH PROBE 483 MEASURE TOOL Q340=1 ;CHECK Q260=+100 ;CLEARANCE HEIGHT Q341=1 ;PROBING THE TEETH Cutter measurement 0=No / 1=Yes: Choose whether or not the TNC is to measure the individual teeth. HEIDENHAIN TNC 426, TNC
132
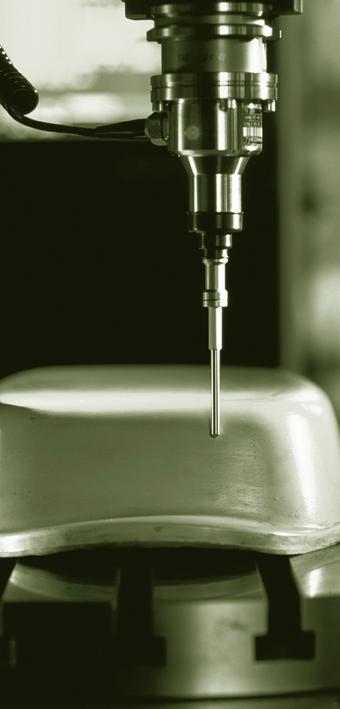
133 Digitizing 5
Touch Probe Cycles itnc 530
 Touch Probe Cycles itnc 530 NC Software 340 420-xx 340 421-xx User s Manual English (en) 4/2002 TNC Models, Software and Features This manual describes functions and features provided by the TNCs as of
User s Manual Cycle Programming TNC 320. NC Software
 User s Manual Cycle Programming TNC 320 NC Software 340 551-04 340 554-04 English (en) 9/2009 About this Manual The symbols used in this manual are described below. This symbol indicates that important
User's Manual POSITIP 855. for Lathes. April 1996
 User's Manual POSITIP 855 April 1996 for Lathes Screen Plain language dialog line Input line Distance-to-go display Operating mode or function Reference marks have been crossed over Operating mode symbols
VUE READOUTS REFERENCE MANUAL
 VUE READOUTS REFERENCE MANUAL VUE Key Layout 1 Display Aera 2 Soft keys 3 Page Indicator light 4 UP/DOWN arrow keys are also used to adjust the screen contrast 5 Axis Keys 6 Numeric Keypad 7 ENTER key
MANUALplus 620 The Contouring Control for CNC and Cycle Lathes
 MANUALplus 620 The Contouring Control for CNC and Cycle Lathes June 2014 Start smart For many years now, the MANUALplus has been proving itself in daily use on cycle lathes and has earned a reputation
Dozuki. Written By: Dozuki System. Guide to calibrating the Haas wireless intuitive probing system. How to Calibrate WIPS
 Dozuki How to Calibrate WIPS Guide to calibrating the Haas wireless intuitive probing system. Written By: Dozuki System 2017 www.dozuki.com Page 1 of 22 INTRODUCTION Getting Started On initial setup or
Projects. 5 For each component, produce a drawing showing the intersection BO.O. C'BORE 18 DIA x 5 DEEP FROM SECTION ON A - A
 Projects ~ Figure Pl Project 1 If you have worked systematically through the assignments in this workbook, you should now be able to tackle the following milling and turning projects. It is suggested that
[ means: One-stop shop. EMCOMAT FB-450 L / FB-600 L. Universal milling machines with Heidenhain TNC 320 or EMCO Easy Cycle
 [ E[M]CONOMY] means: One-stop shop. EMCOMAT FB-450 L / FB-600 L Universal milling machines with Heidenhain TNC 320 or EMCO Easy Cycle EMCOMAT FB-450 L / FB-600 L Whether single or small series production,
CNC Machinery. Module 5: CNC Programming / Milling. IAT Curriculum Unit PREPARED BY. August 2009
 CNC Machinery Module 5: CNC Programming / Milling PREPARED BY IAT Curriculum Unit August 2009 Institute of Applied Technology, 2009 ATM313-CNC Module 5: CNC Programming / Milling Module Objectives: 1.
A study of accuracy of finished test piece on multi-tasking machine tool
 A study of accuracy of finished test piece on multi-tasking machine tool M. Saito 1, Y. Ihara 1, K. Shimojima 2 1 Osaka Institute of Technology, Japan 2 Okinawa National College of Technology, Japan yukitoshi.ihara@oit.ac.jp
NZX NLX
 NZX2500 4000 6000 NLX1500 2000 2500 Table of contents: 1. Introduction...1 2. Required add-ins...1 2.1. How to load an add-in ESPRIT...1 2.2. AutoSubStock (optional) (for NLX configuration only)...3 2.3.
200S READOUTS REFERENCE MANUAL
 200S READOUTS REFERENCE MANUAL 200S Key Layout 1 Display Area 2 Soft keys 3 Power Indicator light 4 Arrow Keys: Use the UP/DOWN keys to adjust the screen contrast. 5 Axis Keys 6 Numeric Keypad 7 ENTER
527F CNC Control. User Manual Calmotion LLC, All rights reserved
 527F CNC Control User Manual 2006-2016 Calmotion LLC, All rights reserved Calmotion LLC 21720 Marilla St. Chatsworth, CA 91311 Phone: (818) 357-5826 www.calmotion.com NC Word Summary NC Word Summary A
User s Manual. Position Display Units for Milling Machines 9/2000
 User s Manual Position Display Units for Milling Machines 9/2000 Position display (ND 710 only two axes) Select coordinate axes (ND 710 only X and Y) Select axis-specific operating parameters Status display:
Figure 1: NC Lathe menu
 Click To See: How to Use Online Documents SURFCAM Online Documents 685)&$0Ã5HIHUHQFHÃ0DQXDO 5 /$7+( 5.1 INTRODUCTION The lathe mode is used to perform operations on 2D geometry, turned on two axis lathes.
How to Calibrate a CNC Machine's Positioning System
 How to Calibrate a CNC Machine's Positioning System Guide to calibrating the Haas wireless intuitive probing system. Written By: Kim Payne 2018 gunnerautomotive.dozuki.com/ Page 1 of 20 INTRODUCTION Attention:
An Introduction to Dimensioning Dimension Elements-
 An Introduction to Dimensioning A precise drawing plotted to scale often does not convey enough information for builders to construct your design. Usually you add annotation showing object measurements
Geometric Dimensioning and Tolerancing
 Geometric Dimensioning and Tolerancing (Known as GDT) What is GDT Helps ensure interchangeability of parts. Use is dictated by function and relationship of the part feature. It does not take the place
125 years of innovation. Cylindricity. Global Excellence in Metrology
 125 years of innovation Cylindricity Cylindricity Contents Introduction Instrument Requirements Reference Cylinders Cylindricity Parameters Measurement Techniques & Methods Measurement Errors & Effects
INDEX A FAGOR. 1. MC Training Manual. 2. Additional Simple Cycles. 3. USB Interface. 4. Installation. 5. Electrical Drawings
 KNEE MILL PACKAGE INDEX 1. MC Training Manual 2. Additional Simple Cycles 3. USB Interface 4. Installation 5. Electrical Drawings 1 800 4A FAGOR * This information package also includes 8055 CNC Training
GE Fanuc Automation. Symbolic CAP T C/Y Axis Module V1. Computer Numerical Control Products. Operator s Manual
 GE Fanuc Automation Computer Numerical Control Products Symbolic CAP T C/Y Axis Module V1 Operator s Manual GFZ-62824EN-1/01 January 1999 Warnings, Cautions, and Notes as Used in this Publication GFL-001
Geometry Controls and Report
 Geometry Controls and Report 2014 InnovMetric Software Inc. All rights reserved. Reproduction in part or in whole in any way without permission from InnovMetric Software is strictly prohibited except for
MANUALplus 620 The Control for CNC and Cycle Lathes
 MANUALplus 620 The Control for CNC and Cycle Lathes 05/2018 MANUALplus 620 with 15.6 touchscreen and machine operating panel Windows 7, Windows 8, and Windows 10 are trademarks of Microsoft Corporation
Figure 1: NC EDM menu
 Click To See: How to Use Online Documents SURFCAM Online Documents 685)&$0Ã5HIHUHQFHÃ0DQXDO 6 :,5(('0 6.1 INTRODUCTION SURFCAM s Wire EDM mode is used to produce toolpaths for 2 Axis and 4 Axis EDM machines.
Fixed Headstock Type CNC Automatic Lathe
 Fixed Headstock Type CNC Automatic Lathe MSY The BNE series is renowned for its high rigidity, heavy cutting capability and outstanding precision. The new MSY model extends the ability of the BNE series
User s Manual ND 930 ND 970. Position Display Units for Lathes 5/95
 User s Manual ND 930 ND 970 Position Display Units for Lathes 5/95 Position display (ND 930: only two axes) Message field Input field Rx Distance-to-go display (traversing to zero) For incremental dimensions
Select datum Page backward in. parameter list
 HEIDENHAIN Working with the measured value display unit ND Actual value and input display (7-segment LED, 9 decades and sign) Select datum Page backward in parameter list Confirm entry value Set display
Prismatic Machining Preparation Assistant
 Prismatic Machining Preparation Assistant Overview Conventions What's New Getting Started Open the Design Part and Start the Workbench Automatically Create All Machinable Features Open the Manufacturing
CNC PILOT 640 The Control for Lathes and Turning-Milling Machines
 CNC PILOT 640 The Control for Lathes and Turning-Milling Machines June 2016 Start smart Lathe controls from HEIDENHAIN have been proving themselves for years both on compact and complex lathes. They are
Table 5.1: Drilling canned cycles. Action at the bottom of the hole. Cancels drilling canned cycle Intermittent or continuous feed.
 5.18 CANNED CYCLES FOR DRILLING On a lathe, equipped with live tooling (which allows a tool, obviously a drilling or a similar tool, to rotate at the specified RPM, as in a milling machine) and an additional
CNC Machinery. Module 4: CNC Programming "Turning" IAT Curriculum Unit PREPARED BY. August 2009
 CNC Machinery Module 4: CNC Programming "Turning" PREPARED BY IAT Curriculum Unit August 2009 Institute of Applied Technology, 2009 2 Module 4: CNC Programming "Turning" Module 4: CNC Programming "Turning"
ND 510 ND 550 Y Z SPEC FCT MOD
 HEIDENHAIN Working with the digital readouts ND 510 ND 550 Actual value and input display (7-segment LED, 8 decades and sign) Downwards: X-axis, Y-axis, ND 550 only: Z-axis Select coordinate axis (Z-axis
Milling and turning with SINUMERIK:
 Milling and turning with SINUMERIK: CNC solutions for the shopfloor SINUMERIK Answers for industry. Simple to set up... Contents Shopfloor solutions for CNC machines with SINUMERIK Milling with the SINUMERIK
Section 6: Fixed Subroutines
 Section 6: Fixed Subroutines Definition L9101 Probe Functions Fixed Subroutines are dedicated cycles, standard in the memory of the control. They are called by the use of an L word (L9101 - L9901) and
Advance Steel. Tutorial
 Advance Steel Tutorial Table of contents About this tutorial... 7 How to use this guide...9 Lesson 1: Creating a building grid...10 Step 1: Creating an axis group in the X direction...10 Step 2: Creating
MTC200 Description of NC Cycles. Application Manual SYSTEM200 DOK-MTC200-CYC*DES*V22-AW02-EN-P
 X rapid feed feed first feed * n... appr.. * appr.. * 1... end point Z gradient starting point Z end p. X start. p. X Z MTC200 Description of NC Cycles Application Manual SYSTEM200 About this Documentation
Geometric Tolerances & Dimensioning
 Geometric Tolerances & Dimensioning MANUFACTURING PROCESSES - 2, IE-352 Ahmed M. El-Sherbeeny, PhD KING SAUD UNIVERSITY Spring - 2015 1 Content Overview Form tolerances Orientation tolerances Location
VBXC CONFIGURATION AND PROCESS CONTROL MANUAL
 VBXC CONFIGURATION AND PROCESS CONTROL MANUAL SOFTWARE VERSION 2.4 DOCUMENT #D10008 REVISION: A OCTOBER 2018 All rights reserved. No patent liability is assumed with respect to the use of the information
Motion Manipulation Techniques
 Motion Manipulation Techniques You ve already been exposed to some advanced techniques with basic motion types (lesson six) and you seen several special motion types (lesson seven) In this lesson, we ll
Technical information Overview software enhancements Disc eroding machine QXD250
 Technical information Overview software enhancements Disc eroding machine QXD250 TB Software enhancements QXD250 Page 2 Table of contents Program enhancement 04.05.206... 5. Enhancement of measuring program
Advanced CO2 car Import CAM Procedures
 Advanced CO2 car Import CAM Procedures While the standard CO2 car tutorial within Quick CAM has a part that is sized to fit the billet as custom designed cars are produced this will not be the case. Before
CNC Turning Training CNC MILLING / ROUTING TRAINING GUIDE. Page 1
 CNC Turning Training www.denford.co.uk Page 1 Table of contents Introduction... 3 Start the VR Turning Software... 3 Configure the software for the machine... 4 Load your CNC file... 5 Configure the tooling...
Select datum Page backward in parameter list
 HEIDENHAIN Working with the measured value display unit ND Actual value and input display (7-segment LED, 9 decades and sign) Select datum Page backward in parameter list Confirm entry value Set display
Trade of Toolmaking. Module 6: Introduction to CNC Unit 2: Part Programming Phase 2. Published by. Trade of Toolmaking Phase 2 Module 6 Unit 2
 Trade of Toolmaking Module 6: Introduction to CNC Unit 2: Part Programming Phase 2 Published by SOLAS 2014 Unit 2 1 Table of Contents Document Release History... 3 Unit Objective... 4 Introduction... 4
PROGRAMMING January 2005
 PROGRAMMING January 2005 CANNED CYCLES FOR DRILLING TAPPING AND BORING A canned cycle is used to simplify programming of a part. Canned cycles are defined for the most common Z-axis repetitive operation
Computer Numeric Control
 Computer Numeric Control TA202A 2017-18(2 nd ) Semester Prof. J. Ramkumar Department of Mechanical Engineering IIT Kanpur Computer Numeric Control A system in which actions are controlled by the direct
MAXYM Mortiser Operating Manual
 MAXYM Mortiser Operating Manual Rev 2.112/16/02 Copyright MAXYM Technologies Inc. Table of Contents Visual Tour 1-2 Operating the Maxym Mortiser 3 Starting the Mortiser 3 Touch Screen Description 3 Mortise
Getting Started. Terminology. CNC 1 Training
 CNC 1 Training Getting Started What You Need for This Training Program This manual 6 x 4 x 3 HDPE 8 3/8, two flute, bottom cutting end mill, 1 Length of Cut (LOC). #3 Center Drill 1/4 drill bit and drill
Mill Operator Users Guide. Mike Cope Product Technical Specialist
 Mill Operator Users Guide Mike Cope Product Technical Specialist copem@hurco.com Table of Contents Performing a Tool Change Clear the Tool in Spindle Tool Touch-off Without touch probe With touch probe
Trade of Sheet Metalwork. Module 7: Introduction to CNC Sheet Metal Manufacturing Unit 7: CNC Setting & Operation Phase 2
 Trade of Sheet Metalwork Module 7: Introduction to CNC Sheet Metal Manufacturing Unit 7: CNC Setting & Operation Phase 2 Table of Contents List of Figures... 4 List of Tables... 5 Document Release History...
Software Development & Education Center NX 8.5 (CAD CAM CAE)
") Software Development & Education Center NX 8.5 (CAD CAM CAE) Detailed Curriculum Overview Intended Audience Course Objectives Prerequisites How to Use This Course Class Standards Part File Naming Seed
Software Development & Education Center NX 8.5 (CAD CAM CAE) Detailed Curriculum Overview Intended Audience Course Objectives Prerequisites How to Use This Course Class Standards Part File Naming Seed
ND 530 ND 570. Reference mark crossed over datum points are now stored in nonvolatile memory. Blinking: Waiting for confirmation from operator.
 HEIDENHAIN Working with the position display unit ND 530 ND 570 Actual value and input display (7-segment LED, 8 decades and sign); upper display: X axis; middle display: Z 0 ; lower display: Z axis Select
SolidWorks 95 User s Guide
 SolidWorks 95 User s Guide Disclaimer: The following User Guide was extracted from SolidWorks 95 Help files and was not originally distributed in this format. All content 1995, SolidWorks Corporation Contents
SOLIDWORKS 2015 and Engineering Graphics
 SOLIDWORKS 2015 and Engineering Graphics An Integrated Approach Randy H. Shih SDC PUBLICATIONS Better Textbooks. Lower Prices. www.sdcpublications.com Powered by TCPDF (www.tcpdf.org) Visit the following
SINUMERIK System 800 Cycles, User Memory Submodule 4
 SINUMERIK System 800 Cycles, User Memory Submodule 4 User Documentation SINUMERIK System 800 Cycles, User Memory Submodule 4 Programming Guide User Documentation Valid for: Control Software version SINUMERIK
Prasanth. Lathe Machining
 Lathe Machining Overview Conventions What's New? Getting Started Open the Part to Machine Create a Rough Turning Operation Replay the Toolpath Create a Groove Turning Operation Create Profile Finish Turning
ENGI 7962 Mastercam Lab Mill 1
 ENGI 7962 Mastercam Lab Mill 1 Starting a Mastercam file: Once the SolidWorks models is complete (all sketches are Fully Defined), start up Mastercam and select File, Open, Files of Type, SolidWorks Files,
Confirm entry value Set display to value from Actual value and input display Select datum P79 (P80!) (7-segment LED,
 (7-segment LED,") HEIDENHAIN Working with the measured value display unit ND 261 Confirm entry value Set display to value from Actual value and input display Select datum P79 (P80!) (7-segment LED, Page backward in 9 decades
HEIDENHAIN Working with the measured value display unit ND 261 Confirm entry value Set display to value from Actual value and input display Select datum P79 (P80!) (7-segment LED, Page backward in 9 decades
3D SENSORS 2-in-1 3-AXIS EDGE FINDER & MEASURING INSTRUMENT.
 3D SENSORS 2-in-1 3-AXIS EDGE FINDER & MEASURING INSTRUMENT www.haimer-usa.com HAIMER Sensors Benefits 1. No math needed Zero on the indicator = Zero on the machine control The sensor is pre-calibrated
Engineering & Design: Geometric Dimensioning
 Section Contents NADCA No. Format Page Frequently Asked Questions -2 s e c t i o n 1 Introduction -2 2 What is GD&T? -2 3 Why Should GD&T be Used? -2 4 Datum Reference Frame -4 4.1 Primary, Secondary,
Table of Contents. Table of Contents. Preface 11 Prerequisites... 12
 Table of Contents Preface 11 Prerequisites... 12 Basic machining practice experience... 12 Controls covered... 12 Limitations... 13 The need for hands -on practice... 13 Instruction method... 13 Scope...
F. D. Hurka Company AUTOMATED VISION SYSTEMS TIP SHEETS. F. D. Hurka Company 4731 Stockholm Ct Charlotte, NC Dated: 2/2/17
 F. D. Hurka Company AUTOMATED VISION SYSTEMS TIP SHEETS F. D. Hurka Company 4731 Stockholm Ct Charlotte, NC 28273 Dated: 2/2/17 The Purpose of this tip sheet is to aid in the training for the Inspec software.
CAD/CAM/CAE Computer Aided Design/Computer Aided Manufacturing/Computer Aided Manufacturing. Part-10 CNC Milling Programming
 CAD/CAM/CAE Computer Aided Design/Computer Aided Manufacturing/Computer Aided Manufacturing Part-10 CNC Milling Programming To maximize the power of modern CNC milling machines, a programmer has to master
Processing and Quality Assurance Equipment
 Processing and Quality Assurance Equipment The machine tool, the wash station, and the coordinate measuring machine (CMM) are the principal processing equipment. These machines provide the essential capability
12. CNC Machine Tools and Control systems
 CAD/CAM Principles and Applications 12 CNC Machine Tools and Control systems 12-1/12-39 12. CNC Machine Tools and Control systems 12.1 CNC Machining centres Vertical axis machining centre, and Horizontal
Advance Steel. Drawing Style Manager s guide
 Advance Steel Drawing Style Manager s guide TABLE OF CONTENTS Chapter 1 Introduction...7 Details and Detail Views...8 Drawing Styles...8 Drawing Style Manager...9 Accessing the Drawing Style Manager...9
1: INTRODUCTION TO AUTOCAD
 AutoCAD syllabus 1: INTRODUCTION TO AUTOCAD Starting AutoCAD AutoCAD Screen Components Drawing Area Command Window Navigation bar Status bar Invoking Commands in AutoCAD Keyboard Ribbon Application Menu
Mach4 CNC Controller Lathe Programming Guide Version 1.0
 Mach4 CNC Controller Lathe Programming Guide Version 1.0 1 Copyright 2014 Newfangled Solutions, Artsoft USA, All Rights Reserved The following are registered trademarks of Microsoft Corporation: Microsoft,
Metrology Prof. Dr Kanakuppi Sadashivappa Bapuji Institute of Engineering and Technology Davangere. Lecture 24 Measurement of Screw Thread Element
 Metrology Prof. Dr Kanakuppi Sadashivappa Bapuji Institute of Engineering and Technology Davangere Lecture 24 Measurement of Screw Thread Element I welcome you all for the module 6 lecture 2, in this lecture
for Solidworks TRAINING GUIDE LESSON-9-CAD
 for Solidworks TRAINING GUIDE LESSON-9-CAD Mastercam for SolidWorks Training Guide Objectives You will create the geometry for SolidWorks-Lesson-9 using SolidWorks 3D CAD software. You will be working
PicoMill CNC. PicoMill CNC. High-tech for Production and Training Purposes. CNC Mini Drill Press/Milling Machine.
 CNC Mini Drill Press/Milling Machine High-tech for Production and Training Purposes Table travel X, Y 10 x 4.13 Spindle mount MT3 With advanced GPlus 450 CNC or Siemens 808 D control GPlus 450 Siemens
Fixed Headstock Type CNC Automatic Lathe
 Fixed Headstock Type CNC Automatic Lathe GTY Configured with two spindles, one turret, 2 x Y axes, gang tools and X3 axis to back spindle, the BNA42GTY can mount up to 45 tools. 3 tool simultaneous cutting
Chapter 22 MACHINING OPERATIONS AND MACHINE TOOLS
 Chapter 22 MACHINING OPERATIONS AND MACHINE TOOLS Turning and Related Operations Drilling and Related Operations Milling Machining Centers and Turning Centers Other Machining Operations High Speed Machining
Table of Contents. Preface 9 Prerequisites 9. Key Concept 1: Know Your Machine From A Programmer s Viewpoint 13. Table of Contents
 Preface 9 Prerequisites 9 Basic machining practice experience 9 Controls covered 10 Limitations 10 Programming method 10 The need for hands -on practice 10 Instruction method 11 Scope 11 Key Concepts approach
True Bevel technology XPR bevel compensation cut charts
 True Bevel technology XPR bevel compensation cut charts White paper Introduction Using plasma systems to perform bevel cutting on specially designed cutting tables (with bevel heads) has been done in the
HAAS AUTOMATION, INC.
 PROGRAMMING WORKBOOK HAAS AUTOMATION, INC. 2800 Sturgis Rd. Oxnard, CA 93030 January 2005 JANUARY 2005 PROGRAMMING HAAS AUTOMATION INC. 2800 Sturgis Road Oxnard, California 93030 Phone: 805-278-1800 www.haascnc.com
TNC 640 Contouring Control for Machining Centers and Milling-Turning Machines
 TNC 640 Contouring Control for Machining Centers and Milling-Turning Machines 02/2018 TNC 640 With touchscreen TNC 640 With soft keys The functions and specifications described in this brochure apply for
Autodesk Advance Steel. Drawing Style Manager s guide
 Autodesk Advance Steel Drawing Style Manager s guide TABLE OF CONTENTS Chapter 1 Introduction... 5 Details and Detail Views... 6 Drawing Styles... 6 Drawing Style Manager... 8 Accessing the Drawing Style
Solutions to Exercise problems
 Brief Overview on Projections of Planes: Solutions to Exercise problems By now, all of us must be aware that a plane is any D figure having an enclosed surface area. In our subject point of view, any closed
Rotational Patterns of Pick and Place Features
 Rotational Patterns of Pick and Place Features The most efficient way to create multiple copies of one feature is to use the patterning function. Not only is it faster, but dimensioning is simplified,
Chapter 2. Drawing Sketches for Solid Models. Learning Objectives
 Chapter 2 Drawing Sketches for Solid Models Learning Objectives After completing this chapter, you will be able to: Start a new template file to draw sketches. Set up the sketching environment. Use various
User manual Automatic Material Alignment Beta 2
 www.cnccamera.nl User manual Automatic Material Alignment For integration with USB-CNC Beta 2 Table of Contents 1 Introduction... 4 1.1 Purpose... 4 1.2 OPENCV... 5 1.3 Disclaimer... 5 2 Overview... 6
CORDIPAR. Universal Length Measuring Instruments. From our range. KORDT GmbH & Co. KG Preyerstraße D Eschweiler / GERMANY
 From our range External Thread Measuring Gauges from 2-996 nominal diameter Internal Thread Measuring Gauges from - 1026 nominal diameter Thread Depth Gauges to check thread depth of bores Thread Setting
Prof. Steven S. Saliterman Introductory Medical Device Prototyping
 Introductory Medical Device Prototyping Department of Biomedical Engineering, University of Minnesota http://saliterman.umn.edu/ You must complete safety instruction before using tools and equipment in
ASME Y14.5M-1994 GD&T Certification Preparation Examination
 ASME Y14.5M-1994 GD&T Certification Preparation Examination Directions: On the response sheet on the last page, fill in the circle of the letter which best completes the following statements. Do not write
Optical Measurement P-1
 Optical Measurement P-1 FAST ROUND PART INSPECTION The whole TESA-Scan product line belongs to the range of dedicated non-contact opto-electronic measuring centres that provide Users with a complete solution
Learning Guide. ASR Automated Systems Research Inc. # Douglas Crescent, Langley, BC. V3A 4B6. Fax:
 Learning Guide ASR Automated Systems Research Inc. #1 20461 Douglas Crescent, Langley, BC. V3A 4B6 Toll free: 1-800-818-2051 e-mail: support@asrsoft.com Fax: 604-539-1334 www.asrsoft.com Copyright 1991-2013
AutoCAD Tutorial First Level. 2D Fundamentals. Randy H. Shih SDC. Better Textbooks. Lower Prices.
 AutoCAD 2018 Tutorial First Level 2D Fundamentals Randy H. Shih SDC PUBLICATIONS Better Textbooks. Lower Prices. www.sdcpublications.com Powered by TCPDF (www.tcpdf.org) Visit the following websites to
LinuxCNC Help for the Sherline Machine CNC System
 WEAR YOUR SAFETY GLASSES FORESIGHT IS BETTER THAN NO SIGHT READ INSTRUCTIONS BEFORE OPERATING LinuxCNC Help for the Sherline Machine CNC System LinuxCNC Help for Programming and Running 1. Here is a link
and Engineering Graphics
 SOLIDWORKS 2018 and Engineering Graphics An Integrated Approach Randy H. Shih SDC PUBLICATIONS Better Textbooks. Lower Prices. www.sdcpublications.com Powered by TCPDF (www.tcpdf.org) Visit the following
Tutorial 4 - Open Dxf file and create multiple toolpaths (Contour, Pocket and Drill).
.") Tutorial 4 - Open Dxf file and create multiple toolpaths (Contour, Pocket and Drill). In this tutorial you will open a Dxf file and create the toolpath that cut the external of the part, another toolpath
Tutorial 4 - Open Dxf file and create multiple toolpaths (Contour, Pocket and Drill). In this tutorial you will open a Dxf file and create the toolpath that cut the external of the part, another toolpath
Lesson 4 Holes and Rounds
 Lesson 4 Holes and Rounds 111 Figure 4.1 Breaker OBJECTIVES Sketch arcs in sections Create a straight hole through a part Complete a Sketched hole Understand the Hole Tool Use Info to extract information
AutoCAD LT 2009 Tutorial
 AutoCAD LT 2009 Tutorial Randy H. Shih Oregon Institute of Technology SDC PUBLICATIONS Schroff Development Corporation www.schroff.com Better Textbooks. Lower Prices. AutoCAD LT 2009 Tutorial 1-1 Lesson
Tutorial Guide to AutoCAD 2014
 Tutorial Guide to AutoCAD 2014 2D Drawing, 3D Modeling Shawna Lockhart SDC P U B L I C AT I O N S For Microsoft Windows Better Textbooks. Lower Prices. www.sdcpublications.com Visit the following websites
Tutorial Guide to AutoCAD 2013
 Tutorial Guide to AutoCAD 2013 2D Drawing, 3D Modeling Shawna Lockhart SDC P U B L I C AT I O N S Schroff Development Corporation For Microsoft Windows Better Textbooks. Lower Prices. www.sdcpublications.com
Beginner s Guide to SolidWorks Alejandro Reyes, MSME Certified SolidWorks Professional and Instructor SDC PUBLICATIONS
 Beginner s Guide to SolidWorks 2008 Alejandro Reyes, MSME Certified SolidWorks Professional and Instructor SDC PUBLICATIONS Schroff Development Corporation www.schroff.com www.schroff-europe.com Part Modeling
Dimensioning. Dimensions: Are required on detail drawings. Provide the shape, size and location description: ASME Dimensioning Standards
 Dimensioning Dimensions: Are required on detail drawings. Provide the shape, size and location description: - Size dimensions - Location dimensions - Notes Local notes (specific notes) General notes ASME
4.8 TOOL RETRACT AND RECOVER
 4.AUTOMATIC OPERATION OPERATION B-63944EN/02 4.8 TOOL RETRACT AND RECOVER The tool can be retracted from a workpiece to replace the tool, if damaged during machining, or to check the status of machining.
Module 1H: Creating an Ellipse-Based Cylindrical Sheet-metal Lateral Piece
 Inventor (10) Module 1H: 1H- 1 Module 1H: Creating an Ellipse-Based Cylindrical Sheet-metal Lateral Piece In this Module, we will learn how to create an ellipse-based cylindrical sheetmetal lateral piece
SKF Shaft Alignment Tool Horizontal machines app
 SKF Shaft Alignment Tool Horizontal machines app Short flex couplings Instructions for use Table of contents 1. Using the Horizontal shaft alignment app... 2 1.1 How to change the app language...2 1.2