Version 2 (March 2018)
|
|
|
- Carol Atkinson
- 5 years ago
- Views:
Transcription

1 6 Version 2 (March 2018)
2 Table of Contents 1 Introduction Game Components Game Setup Game Play Overview The Campaign Sequence Player Actions Sea Zones Supply Syracuse Strategy Cards Random Events Actions Expansive Actions Settle a Location Develop a Location Fortify a Location Aggressive Actions Attack a Location Reinforce a Land Battle Resolving a Land Battle Cavalry Raid Engage Enemy Fleet Bribery Financial Actions Take Money Trader Merchant Pillage Card Management Actions Draft an Empire Card Discard Cards Return Card to Empire deck Reserve a Card Retrieve Your Reserve Strategy Actions Buy Strategy Card Discard Strategy Card Cycle Strategy Cards Other Actions Sea Move Withdraw from a siege Build a Warship Pass Ending the Game Automatic Victory Game Ending Conditions Fate Marker (Optional Rule) Fortuna Expansion Rules Strategy Card Maintenance Deus Ex Machina Cards Alternate Random Event Cards Acknowledgments

3 1 Introduction Hands in the Sea is a 2-player game about the struggle between Rome and Carthage for control of Sicily, Sardinia and Corsica in the years BC. It is a game of actions. The actions you can perform in the game are determined by the cards in your Hand and in your Deck. Each of the major powers has its own set of cards, though certain cards are shared by both players. You may increase your range of available actions by drafting new cards and putting them into your Discard pile, which you will eventually draw from. There are 4 different types of cards - Location, Empire, Event, and Strategy cards. Each location on the map has a corresponding card. You add Location cards to your deck by settling new locations or by capturing them from your opponent. Other types of cards are drafted, and most have to be paid for using Silver, the game s currency. Each player starts with control of some of the locations on the board and begins the game with the corresponding Location cards in their Deck. Location cards serve primarily as a resource generator, and the resources they generate are used to perform many of the available actions. Locations provide a means of transport, acquiring income and colonists, and developing your militia and navy, as well as a starting point to launch attacks. Empire cards comprise several different types of cards. Many have a military function, such as infantry or cavalry. Other cards enhance your available actions or could be used to harm your opponent in some way. You need to tailor the cards in your deck to suit your objectives. If you wish to develop your Towns quickly, or build Warships, then it will help to have more colonists in your deck. If you want to focus on raiding your opponent s Towns and Cities, then you will need to draft cavalry, and so on. There are neutral Empire cards and Strategy cards, both of which can be purchased by either player. Strategy cards are unique in that they do not go into your deck but represent a semi-permanent ability that gives your side a special advantage over and above the normal rules. There are also Random Events which happen at the end of every turn. These represent events that either did occur or plausibly could have occurred, at the time of this conflict. Your ability to overcome various disasters during the course of the game will be crucial to your success. Each player has a Fleet that can move to various Sea Zones on the board. There are advantages to controlling a Sea Zone, such as interfering with your opponent s ability to supply or reinforce certain areas. The game ends if one of the Game Ending Conditions occurs, ranging from scoring enough Victory Points (VP), to a sudden death victory by capturing your opponent s capital. 2 Game Components Game Board 138 cards 38 Town tokens (19 Red, 18 Blue, 1 Yellow) 16 City tokens (9 Red, 7 Blue) 2 Capital tokens (1 Red, 1 Blue) 2 Fleet tokens (1 Red, 1 Blue) 2 Battle Round tokens (1 Red, 1 Blue) 30 Currency tokens (20 Silver, 10 Gold) 6 Maintenance tokens (3 Red, 3 Blue) 13 Hex Marker tokens (6 Red, 6 Blue, 1 grey) 5 Fortification tokens 1 Fate Token 2 Player Aids (1 per player) 1 Game Mat 8 Dice (4 Red, 4 Blue) 2 Figure 1 Game Components
.")


4 Game Board The board consists of a series of connected Cities and Towns across Africa, Corsica- Sardinia, Italy, and Sicily. There are also 4 Sea Zones, each one adjacent to one of those regions, respectively (see Figure 2). The upper right corner contains the Turn track at the top and the Pillage track below, respectively (see Figure 3). Turn track Pillage track Figure 3 Turn & Pillage track Figure 2 Island of Sicily The left and right side of the game board has an area for each Empire, i.e., Rome and Carthage. These areas have three important tracks that are the following: Battle Strength, Prestige, and Warships (see Figure 4). Player Aids Each player has a Player Aid with a series of named spaces that are used to hold cards. The various spaces are Roman & Carthaginian Battle, Strategy, Empire, Draw, Discard, and Reserve. Warship track Battle Strength track Figure 4 Carthage Empire Area Game Cards There are 4 types of cards, i.e., Location, Empire, Event, and Strategy cards (see Figure 6). Location cards have a named location on them and have a red, blue, green, or yellow border. All cards with a red or blue border that do not have named locations on them are Empire cards. Cards with a black border are Event cards. Cards with a purple border are Strategy cards. Players may only use Empire cards with a border that matches their Empire color, i.e., red for Rome and blue for Carthage. Cards with a symbol on them (in the upper left corner of the Ability box) are starting cards for each player (see Figure 5). Cards with a grey border are neutral Empire cards and can be drafted and used by either player. Figure 5 Ability box The border color for each Location card corresponds to its geographic area on the map in order to aid you in finding it. Location cards for locations within Italy have a red border, those in Africa have a blue border, those in Corsica-Sardinia have a green border, and those in Sicily have a yellow border. The top half of a Location card shows connected locations and the transport required to travel there. The icons in the Ability box are resources that you can use to perform various actions described on the next page under Game Card Symbols. 3 Prestige track


 that can be carried out by the")


5 Figure 6 Location card / Empire card / Event card / Strategy card Game Card Symbols Most cards have an area at the bottom which contains text and/or symbols. The text on a card will explain the action(s) that can be carried out by the card. The symbols vary in their use and/or employment as explained below: Wagon cards with this symbol allow you to travel by road. Ship cards with this symbol allow you to travel by sea. They can also be used to reinforce a land battle in a coastal area. Silver cards with this symbol on it can earn an amount of Silver equal to the number shown on the coin. Note: Gold tokens are worth 5 Silver tokens. Wine cards with this symbol on it can be used in conjunction with the Merchant card to earn money, 2 Silver per wine card played. Leader cards with this symbol are Leader cards. Bribe cards with this symbol indicate a card is a Mercenary and can be bribed. Strength cards with this symbol can be used in battles. Each symbol on a card counts as 1 strength point. Colonist cards with this symbol on it can be played to settle a location that contains this symbol. It can also be used to develop a Town and is necessary to purchase a Warship and non-mercenary Heavy Infantry. Starting cards with this symbol will be placed in a player s initial Draw deck at the start of the game. Cavalry cards with this symbol are Cavalry cards. Light Infantry cards with this symbol are Light Infantry cards. Reshuffle Event cards with this symbol indicate a player must collect all discarded Event cards and shuffle the entire Event deck. Heavy Infantry cards with this symbol are Heavy Infantry cards. Ownership a Strategy card with these symbols indicates the card may only be purchased by that Empire, i.e., R for Rome and C for Carthage. IMPORTANT: There is only a single card for each location, and the player controlling that location will have the corresponding Location card. When you capture a location owned by your opponent, he must give you that card no matter where it is: in his Hand, Reserve, Draw deck, Discard pile, or Empire deck. If the card is taken from the Draw deck, reshuffle that deck immediately. 4
 symbol on them, shuffle them and place them face down in their own Draw Deck space.")


, and place the neutral Empire cards (with a grey border). Note: These cards are not shuffled, and are placed face-up.")
6 3 Game Setup 1. Choose Empire: Players select either Rome or Carthage. Both players take all of their Location and Empire cards with a (starting) symbol on them, shuffle them and place them face down in their own Draw Deck space. Each player's starting Location cards match the red or blue starting areas on the map. For Rome, this is all red bordered Location cards, plus Messana and Catana. For Carthage, this is all blue bordered Location cards plus Caralis, Lilybaeum, and Panormus. In addition, the Carthaginian player puts the Campaign card at the bottom of his draw deck after shuffling. The remaining Empire cards do not need to be shuffled. 2. Collect Silver: Rome starts with 5 Silver while Carthage starts with 6 Silver. 3. Place Fleets: Both players place their Fleet token in their respective Figure 7 The Roman Port Home Port space indicated by a Warship beside their Capital (see Figure 7). In addition, Carthage places a blue Game marker on the 2 space on the Carthaginian s Warship track. Note: The Roman player does not start the game with any Warships. 4. Place Draw decks: Set aside space beside the board for the Strategy and Random Event decks. Then place the neutral Location cards (with a yellow or green border), and place the neutral Empire cards (with a grey border). Note: These cards are not shuffled, and are placed face-up. Players may inspect these cards at any time. Shuffle the Event deck and Strategy deck separately and place them face down. Draw the first 3 Strategy cards one at a time and put them face up to the right of the Strategy card deck (see Figure 8). 5. Place Towns and Cities: Each player starts with a number of Town tokens and City tokens on the board. Certain locations on the game board are colored red or blue to Figure 8 Strategy Card deck indicate which side initially controls them. The Roman player places a red Town token in each red location except Rome and Neapolis, which start with a City disc. The Carthaginian player places a blue Town token in each blue location except Carthage and Utica, which start with a City disc. A Town token or City token indicates control of a location. Finally, place a yellow Town token on Syracuse, as it starts as an independent location. (See rule 4.5 Syracuse, for more details.) 6. Draw Cards: Each player then draws 5 cards from the top of their Draw deck to create their starting Hand. 7. Place Game Markers: Each player puts one game marker (hexagon) on the 0 space of their own prestige track, one game marker on the 0 VP space and one next to the 10 VP space of the VP track, and one on the 0 space of the Pillage Track. The remaining markers are used for tracking your Fleet strength (see Place Fleets above) and your Battle Strength track. 4 Game Play Overview Players take alternating turns (called rounds ) using their cards to take up to 2 actions each (per round) until either a player achieves an automatic victory or a game ending condition is met. The Roman player always goes first. At the start of each round, you must first check to see if you have won or lost a land battle (see rule Resolving a Land Battle, for details). After that, you must perform 2 actions, except on the first round, when both players may only take 1 action each. Once you have completed your actions, if you have less than 5 cards in your Hand, draw cards from your Draw deck to bring your Hand up to your standard Hand size of 5 cards. As soon as your Draw deck is exhausted, you must shuffle your Discard pile and place it face down in the Draw deck space on your Player Aid. Note: It is possible that a player could end the round with 5 or more cards in Hand, either by retrieving a Reserve card or by playing certain cards that allow for more cards to be drawn. In that case, no additional cards may be drawn or discarded. It is also 5

7 possible that you might not be able to draw up to your maximum hand size because there aren't enough cards left in your Draw deck. In that case, there is no penalty, just draw as many as you can. Restrictions on Cards that let you draw more cards A player may not draw more cards than are remaining in their Draw deck when playing the Senatorial Support or Magistrate cards. In this case, you do not reshuffle your Discard pile; instead, you only draw the remaining cards, which may include the Campaign card. In that case, the Carthaginian player would finish out the round before resolving the Campaign card. (See 4.1 The Campaign Sequence, for more details.) The Importance of Locations and Location cards The Location cards are more or less the engine that drives most of the actions over the course of the game. If you lose a location on the board due to raiding or conquest (and your opponent does not elect to settle it upon victory), the location is out of supply, or the location is under attack, then its corresponding Location card is effectively a dead card in your deck until you either recapture it, the battle ends, you re-establish supply, or you remove the card from your deck (see 4.4 Supply, for more details). 4.1 The Campaign Sequence At any time, if the Carthaginian player draws the Campaign card, the game sequence is temporarily interrupted. The Carthaginian player sets the Campaign card aside, reshuffles his Discard pile back into the Draw deck, and draws back up to his Hand size. The following procedure is also performed in order: Draw an Event card and resolve its effects. Each player collects 1 Silver per in-supply City they control. Each player gains VP for each neutral (grey) location, Syracuse, and enemy locations that they control if they are in supply. Example: In Figure 9, the Carthaginian player scores 6 VP for controlling Agrigentum, Camarina, and Syracuse. Figure 9 Neutral Locations & Syracuse The Strategy card in the #3 position is discarded, and the remaining face-up Strategy cards are shifted to the right so that the #2 card is now in the #3 position, and the #1 card is in the #2 position. Then draw a new strategy card and place it in the #1 position (see Figure 8, in Game Setup). The Campaign card is then placed back on the bottom of the Carthaginian player s Draw deck, and the grey Turn marker is advanced 1 space on the Turn track (see Figure 3). It is then the Roman player s turn. Note: Triggering the Campaign Sequence has no effect on battles directly; however, Random Events may affect battles in progress. The Campaign card is removed from the Carthaginian player s deck the instant one of the game ending conditions is met, prior to the Carthaginian player refilling his Hand (see 6.2 Game Ending Conditions). Note: Because the Campaign card is set aside before drawing up to your Hand size, you cannot re-draw the Campaign card to cause an infinite loop. The Roman player will always get at least 1 round in before the Campaign card can be drawn again. 4.2 Player Actions Each round, after checking to see if a land battle has been resolved, you must perform 2 actions, plus any free actions you wish to take. Exception: Each player takes only 1 action on their very first round of the game. Each action is a discrete event and must be resolved before you perform your next action. You can perform most actions twice. Some actions, such as pillaging or passing, may only be selected once per round. There are some actions which are free actions. These do not count toward your 2-action limit and can be performed at any time during your round, regardless of what other actions you perform, except that you cannot perform a free action at the resolution of a battle or after drawing cards at the end of your round. 6


8 Most of the time, the cards that you play are placed into your Discard pile. If you play a card for a land battle or put a card in Reserve, place the card in the appropriate card space on your Player Aid. In the case of land battles, the appropriate place will depend on whether you are the attacker or the defender. 4.3 Sea Zones There are 4 Sea Zones on the map that corresponds to a given geographical area Africa, Italy, Sicily, and Corsica-Sardinia. All coastal locations are considered adjacent to their corresponding Sea Zone (see Figure 10). Map Note: If a location is touching water, it is a coastal location. The majority of locations in the game are coastal locations. Only Rome, Nuaro, Enna, and Hippana are not coastal locations. Also, note that all locations in Italy, regardless of how it may appear on the map, are in the Italy Sea Zone. All locations in Sicily are in the Sicily Sea Zone, and so on. Once your Fleet contains 1 or more Warships, it may move out to sea, and move Sea Zone to Sea Zone, using the Sea Move action. For convenience, each Sea Zone has its own location on the game board. When you move your Fleet out to sea, you should put your Fleet token in the appropriate location. If your Fleet is ever eliminated as the result of combat or a Random Event, then your Fleet token is immediately returned to your Home Port. Figure 10 Sea Zones Example: For 1 action, the Roman Fleet could move from its Home Port besides Rome to the Italy Sea Zone, or vice-versa. Similarly, the Carthaginian Fleet could move from its Home Port to the Africa Sea Zone or vice-versa. For future reference, if an enemy Fleet is in a Sea Zone, and you do not have a Fleet in that Sea Zone, it is considered enemy-controlled. If you have a Fleet in a Sea Zone, and your opponent does not, then it is considered friendlycontrolled. If neither or both players have a Fleet in a Sea Zone, then it is considered uncontrolled. Player s Note: Control of a Sea Zone can affect supply (especially for Corsica-Sardinia) and your ability to settle or reinforce a location by sea. 4.4 Supply In order to use a Location card for an action, you must control that location (i.e., have a token there), and you must be able to trace a line of supply to a Supply Point. A location can trace a line of supply over any number of land connections and across any number of Sea Zones, except for those that are enemy-controlled. Supply can be traced into or through unoccupied areas, friendly or uncontrolled Sea Zones, and areas where a battle is taking place. An out of supply Location card may not be used to meet the requirement of any other card or action, e.g., it cannot be added to a merchant or trader action, and it cannot be used to pillage, block a raid, or initiate a naval battle. You cannot reinforce an out of supply location that you control, nor raid from it. You do not collect income from an out of supply location, nor do you score victory points for it during the Campaign sequence. At the end of the game, you do not score VP for an out of supply location, except for captured enemy starting locations. A Location card is effectively a dead card in your deck until its location is back in supply. However, an out of supply Location card may be discarded, put in the Reserve, or returned to the Empire deck. There are 4 Supply Points in the game: Rome, Carthage, Lilybaeum, and Syracuse. These cities can also be identified by the Supply Point symbol next to them. 7
.")

9 Straits Supply may not be traced more than 2 spaces across the straits of Messana in either direction. For example, only Messana, Catana and Tyndaris can trace supply from Sicily to Rome by land (see Figure 11). Designer s Note: This makes capturing Syracuse of high importance for the Roman player since the Carthaginian player could block overseas supply to Sicily by placing her Fleet in the Sicily or Italy Sea Zone. The Carthaginian player may still trace supply to Carthage or Lilybaeum, even if they are unoccupied. Likewise, the Roman player may still trace supply to Rome, even if it is unoccupied. Player s Notes: Rome and Carthage could become unoccupied without triggering the Figure 11 Straits Example automatic victory conditions as the result of a cavalry raid. There are no Supply Points in Corsica-Sardinia, so the only way locations there can trace to a friendly Supply Point is by tracing across Sea Zones that are not controlled by the enemy! Clarification: The target location of an attack or settle action does not have to be in supply, though if acquired, its corresponding Location card would be useless until it becomes in supply. 4.5 Syracuse Syracuse must be captured before it can be used as a Supply Point. Its Town token is removed if it is captured. Until then, it is considered enemy-controlled territory for both players. The Town token itself is not worth any VP (at the end of the game), and winning the battle at Syracuse does not grant you a Prestige point. Neither player may trace supply to Syracuse while it is neutral or unoccupied, though either player may trace through Syracuse if it is unoccupied. Neither player may raid or pillage Syracuse while it is neutral. A player may attack Syracuse the same way he would attack any other enemy location. However, your opponent may NOT reinforce the defense of Syracuse, nor may your opponent attack Syracuse if a battle is already taking place there. Designer s Note: Historically, Rome and Syracuse fought briefly before Syracuse sought terms and then aided the Romans in their war effort. 4.6 Strategy Cards Unlike most Empire cards, when you purchase a Strategy card, it does not go into your Discard pile and is never shuffled into your Draw deck. These cards are placed face up in the Strategy Card area on your Player Aid. Strategy cards provide a continuous ability that allows a player to break the normal rules while that card is in play. For example, a player may normally only put up to 5 cards in Reserve. If a player purchases the Deep Reserve Strategy card, then they may put up to 7 cards in reserve, instead (see Figure 12). You may never own more than a single Strategy card at any time. If you already have a Strategy card and wish to purchase another, then you must first discard your current Strategy card, which requires an action. Note: Certain Strategy cards can only be purchased by a specific Empire. If the cost has an R icon, then only Rome may purchase that card. If the cost has a C icon, then only Carthage may purchase that card. See the individual Strategy cards for details of their effects. Figure 12 Strategy card 8


 and shuffle the entire Event deck")
10 4.7 Random Events A Random Event happens at the end of the turn when the Carthaginian player draws the Campaign card. The top card from the Event deck is flipped over, and its effects are resolved. Most events only affect a single player, and a die must be rolled to determine which player is affected. The numbers on the card represent the numbers that affect that player, expressed as a range. Thus, an Event card with Carthage 1-2 / Rome 3-6 (see Figure 13) means that the Carthaginian player is affected on a roll of 1 or 2, while the Roman player is affected on a roll of 3, 4, 5, or 6. In some cases, the event is not applicable to one or both players. In this case, there may be an alternate penalty. If there is no alternate penalty listed, then ignore the Random Event. Example: If the Carthaginian player was hit by the Leader Dies event but did not have a Leader card in his Hand, Reserve, or in a battle, then he would randomly discard a card from his Hand instead. Figure 13 Event card Example: If the Roman player was hit by the Traitor event, but the Roman player was not involved in a battle in a fortified area and did not control a location with a Fortification disc, then the event would be ignored, and the game would continue. IMPORTANT: If an Event card has a Reshuffle symbol in the upper right corner, then the player must collect all discarded Event cards (including the card just drawn) and shuffle the entire Event deck (see Figure 13). Some Strategy Cards have black capitalized text on the bottom that indicates how they modify certain Random Events when that Random Event is drawn. Likewise, some Random Events indicate how they are modified by certain Strategy cards (see Figure 14). Figure 14 Storms at Sea event 5 Actions Expansive Actions (5.1) Each player should strive to expand their empire. The following actions allow you to do this in some way: Settle a Location (5.1.1) Develop a Location (5.1.2) Fortify a Location (5.1.3) Aggressive Actions (5.2) These actions involve players in some form of conflict: Attack a Location (5.2.1) Reinforce a Land Battle (5.2.2) Cavalry Raid (5.2.4) Engage Enemy Fleet (5.2.5) Bribery (5.2.6) Financial Actions (5.3) These actions allow you to gain Silver: Take Money (5.3.1) Trader (5.3.2) Merchant (5.3.3) Pillage (5.3.4) Card Management Actions (5.4) These actions allow you to manage cards in some manner: Draft Empire Card (5.4.1) Discard Card(s) (5.4.2) Return Card to Empire Deck (5.4.3) Reserve 1 Card (5.4.4) Retrieve Card(s) from your Reserve (5.4.5) Note: There are also Empire cards that allow you to manage your cards in various ways. See the card descriptions for details. Strategy Actions (5.5) These actions apply to the management of Strategy cards: Buy Strategy Card (5.5.1) Discard Strategy Card (5.5.2) Cycle Strategy Cards (5.5.3) Other Actions (5.6) Sea Move (5.6.1) Withdraw from a Siege (5.6.2) Build a Warship (5.6.3) Pass (5.6.4) 9
11 5.1 Expansive Actions Settle a Location This action allows the player to place a Town token in an unoccupied location. The player must first play a Location card that connects to the location that is to be settled. Each Location card has a list of locations that it connects to. It also shows the type of transport required to reach those locations, which will either be a Ship or a Wagon symbol. The player must then play a second (and possibly a third) card to pay its transport cost. In the case of land connections over a regular road, any card with a Wagon symbol on it may be used to pay the transport cost. In the case of land connections over a rough road, or the straits of Messana, then any 2 cards with a Wagon symbol on it must be used to pay the transport cost. In the case of naval connections, the second card must have a Ship symbol in the bottom portion of the card to pay the transport cost. If the location that is to be settled has a Colonist symbol on it, then the player must also play a card that has a Colonist symbol on it. Once the necessary cards have been played, the player then places a Town token in the newly settled location, takes the matching Location card from the Location cards that were set to the side at the start of the game and places it on top of his Discard pile. IMPORTANT: Please do not forget to take the newly settled Location card! Example: The Roman player wishes to settle Tyndaris. To do so, she plays the Messana Location card since it is connected by land to Tyndaris. She must then play a card with a Wagon symbol on it, so she uses the Velia card. She then places a Town token in Tyndaris and places the Tyndaris Location card on the top of her Discard pile. Example: The Carthaginian player wishes to settle Agrigentum. To do so, he plays the Heraclea Location card since it is connected by land to Agrigentum. He must then play a card with a Wagon symbol on it, so he uses the Hadrumetum card. Since Agrigentum contains a Colonist symbol, he must also play a card with a Colonist symbol on it, so he uses the Hippo Acra card. He then places a Town token in Agrigentum and places the Agrigentum Location card on the top of his Discard pile. Restrictions on settling You may not settle a location using a naval connection if its Sea Zone is enemy-controlled Develop a Location A Town token in a location represents a Town, and a City token represents a City. To construct a City, you must first have a Town token in the location, and the location must be in supply. If these conditions are met, you can use an action to play a Location card that matches the desired location, along with a second card that has a Colonist symbol on it. The Town token is then returned to the player s stock and replaced with a City token to represent that a City has been constructed. A developed location has 2 benefits during the game: 1 Silver at the end of each Campaign and 1 VP at the end of the game. IMPORTANT: Only locations that are worth 2 or more VP may be developed into a City. These locations have a gold VP symbol beside them. These locations also have a Colonist symbol beside them. For example, both Messana and Rhegium are worth 2 VP and can be developed into a City (see Figure 11). Each player has a limited number of tokens, which in turn imposes a limit on the number of locations that can be developed. The game ends if a player develops and plays his last City token (see 6.2 Game Ending Conditions). Example: The Roman player wishes to develop Pisa. She must play the Pisa Location card and then a second card that has a Colonist symbol on it. She chooses to play the Rome Location card as her second card. She then replaces the Town token in Pisa with a City token. Note that the Roman player could NOT develop Cosa since it is only worth 1 VP. Designer s Note: The areas in the game were already populated at the start of the conflict, and the timescale of the game does not generally reflect a small town developing into a city. Rather, you should think of towns and cities as loose or tight political, economic, and military control, respectively Fortify a Location To fortify a location, the player must play a Fortification card (which must be drafted first) and the Location card for the desired location to be fortified and pay 3 Silver to the bank. The player then places a Fortification token beside the City token or Town token in the desired location. A location can only have 1 Fortification token on it. 10

12 IMPORTANT: This action cannot be selected if all of the available Fortification tokens are already on the map. Effects of Fortifications A fortified location starts a battle with 2 additional Strength points. These locations are also immune to cavalry raids and pillaging. Fortifications also negatively affect certain units in battle. For example, War Elephants suffer a penalty to their Strength die roll when played in a siege. Cavalry are half-strength when played in a siege, i.e., it requires 2 cavalry Strength points to generate 1 Battle Strength point. Restriction: A Fortification token cannot be added to a location where a battle is taking place. Note: A siege is a battle in a fortified area, (see 5.2 Aggressive Actions). 5.2 Aggressive Actions To take control of an unoccupied location, the player must settle it. However, if it is enemy-controlled, then the location must be attacked before it can be settled. If successful, the player will either take control of the opponent s location or leave it unoccupied. Battles are fought over a series of rounds, with a maximum number of rounds per battle. In unfortified areas, the battle is over at the end of 4 rounds. In fortified areas, the battle is over at the end of 6 rounds. IMPORTANT: A battle in an unfortified area is defined as a field battle, whereas a battle in a fortified area is a siege Attack a Location A Location card must be played that connects to the intended attacking location, then cards must be played to pay the necessary transport costs (similar to settling a location.) Finally, a card must be played that has at least 1 Sword symbol on it. The Location cards used to launch the attack should be placed on the attacking player s Discard pile. The card with the Sword symbol(s) on it must be placed on the attacking player s Battle Card space. If the attacking player is Roman, then place the card in the Roman Battle Card space (on the Roman Player Aid); if the attacking player is Carthaginian, place the card in the Carthaginian Battle Card space (on the Carthaginian Player Aid). Designer s Note: To the Carthaginian Player, leading with War Elephants can be hazardous! The attacking player places their Battle Round token (red for Rome and blue for Carthage) pointing near the location that is being attacked with the 1 round indicator facing up, signifying which round of the battle it is in and where the battle is located (see Figure 15). The Battle Strength marker is now adjusted according to the initial strength of both sides. Players use their own Battle Strength track, e.g., if you are the Roman player, then you would use the Roman Battle track for battles in which you are the attacker. To set the initial strengths, place the Battle Strength marker in the 1 space in favor of the defender. Every location has intrinsic defense strength of 1 (by default). Move the marker 2 additional spaces in the Figure 15 Battle Round token example defender s favor if there is a Fortification token in the location. Lastly, move the marker 1 space in the defender s favor if a defense modifier appears next to the location. This is the defender s initial strength. Now move the marker a number of spaces in favor of the attacker according to the military strength of the card that was initially used in the attack, i.e., the number of Sword symbols on the card. The battle is now underway. The Battle Round token will increase by 1 in each subsequent round, at the start of the attacking player s round. Rotate the token to indicate the current round. The battle lasts until one player wins it, withdraws from it, or it ends automatically. The Battle track length is finite and can never exceed the values printed on the track. The Location card of the area where a battle occurs may not be used for any action, though it can still be discarded, reserved, or returned to the Empire deck. Clarification: Do not confuse the Battle Round token with the Battle Strength marker. The token is placed onto the map to indicate where the battle is taking place and also what round the battle is in. The marker is located on the Battle track, which shows whether a player is winning or losing a battle. 11
13 Restrictions on Attacking A player may not initiate more than a single battle at a time but may be involved in a simultaneous battle that the opponent initiated. Also, a player may not attack (or reinforce) a location by sea if its Sea Zone is enemy-controlled; however, a player could still attack it using a land connection. Example: The Sicily Sea Zone is currently uncontrolled, so the Roman player decides to attack Lilybaeum. The Roman player plays the Agrigentum card (which is connected to Lilybaeum by sea), a card with a Ship symbol on it (the Neapolis Location card), and a card with 2 Sword symbols on it (a Roman Legion card). The Roman player places the battle round marker (with the round 1 indicator up) next to Lilybaeum, and his first 2 cards (Agrigentum and Neapolis) go into his Discard pile, while his Roman Legion card goes into his Roman Battle Card space on his Player Aid. Lilybaeum has an intrinsic defense of 1; however, it also has a Defense Bonus, so the Battle Strength marker initially starts in the 2 space in Carthage s favor. The Roman player then adjusts the marker 2 spaces to the right to reflect the 2 strength points from the Roman Legion card that was played. The marker is now on the grey 0 space. As a second action, the Roman player decides to Reinforce the battle at Lilybaeum (see Reinforce a Land Battle), plays a cavalry card, and then plays Consul as a free action. The Roman player places both cards in the Roman Battle Card space and adjusts the Battle Strength marker 2 more spaces to the right: 1 for the cavalry, and 1 for the leader. The marker is now on the red 2 space (see Figure 16). Figure 16 Battle track example Reinforce a Land Battle To increase your strength in a land battle, whether as an attacker or defender, play a card that has 1 or more Military symbols on it. A Military symbol is either a sword or, in the case of coastal locations, a ship. Increase the Battle Strength marker a number of spaces, towards your Empire color, equal to the number of Military symbols on the card (see example below). If there are 2 battles in progress, then the player may choose which one to use the card for. Example: In Figure 16, if the Roman player were to play a Legion I card, which has 2 Sword symbols, then he would move the Battle Strength marker to the red 4 space. The card played must be placed on your Player Mat, in the corresponding Battle card space. For example, if the Romans are the attackers and you are the Carthaginian player, then you would place your card in the Roman Battle Card space on your Player Aid. This includes Location cards that you play for their military strength. IMPORTANT: You can only reinforce locations that you can trace to a friendly supply point. A Fortification card can be used to reinforce a battle, but only by the defending player. When played this way, it has a strength of 1. A card with a Ship symbol has a military strength of 1 if it is used in a combat that occurs in a coastal location and is considered a Military symbol for purposes of combat. IMPORTANT: A player may not reinforce a coastal location with a ship if its Sea Zone is enemy-controlled. If a Location card has both a Ship symbol and a Military symbol, then a player may only use one of those for battle, not both. Normally, it does not matter which symbol a player chooses (they both provide 1 strength). However, the player must choose the Sword symbol instead of the Ship symbol if the location s Sea Zone is enemy-controlled. Adding a Leader card to a land battle is a free action, and the leader immediately adds its strength to the battle. Player s Note: The supply and Sea Zone control rules make invasions of Africa and Italy very difficult. They are meant to be. Historically there was only a single invasion of Africa, and none of Italy, during the entire war. Designer s Note: The location where a battle occurs is considered to have been committed to the battle at the outset. This is why defending locations have an intrinsic defense. 12
14 Combined Arms If a player has a Heavy Infantry card, a Light Infantry card, and a Cavalry card, all involved in the same battle, the player receives a +1 strength bonus to that battle. The bonus is applied as soon as the third card that matches the criteria is played. This bonus only applies to field battles, not sieges, and may only be applied once per battle. Note: Every Light or Heavy Infantry, Cavalry, and Leader card has a symbol in the upper right corner that indicates its card type. Example: The Carthaginian player (attacker) initiates a field battle against the Roman player (defender) at Thermae. The attacker s first action is to play Panormus, Hadrumetum (to pay the connection cost), and Greek Mercenaries (a Heavy Infantry card) for 2 strength. The attacker s second action is to play Ligurian Infantry (a Light Infantry card) for 1 strength. The defending player adds a Legion during his round. During the next round, the attacker s first action is to add a Numidian Cavalry card to the battle for +1 strength. Since the attacking player now has combined arms (Heavy Infantry, Light Infantry, and Cavalry), an additional +1 strength is immediately marked on the Battle track. Losing a Location during Battle It is possible that a Location card committed to a battle is then later lost during the battle. If this occurs, then the Location card is removed from the battle and put in your opponent s Discard pile; however, it does not affect the battle already in progress, i.e., you do not lose any strength points on the Battle track Resolving a Land Battle At the start of each round, the player must check the battle tracks to see whether or not a land battle has been won. Battles can end either because a player has sufficient strength to win immediately at the start of a round, or because the maximum number of rounds has elapsed. Winning as the Attacker In a land battle, if the attacker s Battle Strength marker shows an advantage in strength of 2 or more at the start of the attacker s round, (i.e., the marker is in the attacker s Empire color, see Figure 16), then the attacker has won the battle. Remove the defender s Town token or City token from the location attacked and retain it (they are worth victory points at the end of the game). Remove any Fortification token in the location and return it to the stock. If the location attacked does not have a Colonist symbol on it, then the winning player may immediately place a Town token in that location. If it does have a Colonist symbol in it, and the winning player would like to Settle the location, he may immediately play a card from his Hand that has a Colonist symbol on it to place a Town token in that location. If a Town token is placed on the location, then the winning player receives the Location card from the opponent and places it on top of the Discard pile. This does not count as an action. Note: You are never forced to settle a location where a battle is won. Settlement is always optional. If a location is captured, the defender must give the attacker that Location card. If the card is in the defender s Draw deck, reshuffle the Draw deck afterward. If it was in the defender s Reserve, there is no Silver cost to remove it. If not settled, then the location remains unoccupied, and the defender retains the Location card, although it is now treated as if it were out of supply. If your opponent settles the location later in the game, the corresponding Location card is immediately turned over. Winning as the Defender In a land battle, if the defender has an advantage in military strength of 1 or more at the start of the defender s round (or after the maximum number of rounds have elapsed), then the defender wins the battle and retains control of the location. Draws At the start of a round, if the maximum number of Battle Rounds has elapsed, and neither side has won the battle, i.e., the battle marker is in the grey 0 or 1 spaces, then the battle ends. The defender retains control of the location. Prestige The winner of a battle gains 1 Prestige point. Increase the marker on the Prestige track, up to a maximum of 8. These points are counted as VP at the end of the game. Neither player would gain Prestige if the battle was a draw. 13
15 Battle Losses and Cavalry Superiority The losing player must return a non-location card that was involved in the battle back to the Empire deck. For sieges, the loser selects the card that is lost. For field battles, if the winning player finished the battle with more cavalry strength points, he selects which card is lost; otherwise, the losing player selects. If the losing player had only Location cards in the battle, then no card is lost. If the battle resulted in a draw, then both players lose a card of their choice from the cards that were involved in the battle. Cavalry superiority is ignored in the event of a draw. Designer s Note: In the ancient world, having an advantage in cavalry could exacerbate victory and mitigate losses in defeat. In victory, it was used to pursue and cut down individual soldiers running from the battle. In defeat, it was used to harass enemy forces that would often break formation in an effort to pursue retreating infantry. Neither the Roman Dictator card nor the Carthaginian Mercenary General card can be taken as a loss. The infantry card that is part of the Roman initial Draw deck can be taken as a loss. Designer s Note: The Dictator and Mercenary General cards are automatically returned to their respective Empire deck at the end of the battle. That is the reason why they cannot be taken as a loss. After losses have been taken, both players return all their remaining cards involved in the battle to their Discard pile, and the attacker s Battle Round token is retrieved Cavalry Raid A player may use the cavalry raid action to capture an enemy Town token or City token from an enemy-controlled location without attempting to attack it. To launch a cavalry raid, the player plays 1 or more cards that states it can be used to raid. Playing a single card allows the player to raid a location that is directly connected by road to a location that is under the player s control. Each additional eligible card played increases the range by 1 connection. Hence, if 2 cavalry cards are played, then the raided location can be up to 2 connections away. Example: The Carthaginian player could raid Thermae or Hippana from Panormus using a single cavalry card. A raid against Tyndaris from Panormus would require the play of 2 eligible cards. Note: The player does not play Location cards to launch a cavalry raid, nor does the player need to play any transport symbols. Cavalry raids are unaffected by rough connections or by the intrinsic defensive bonus that some locations have; however, the player cannot raid across the straits of Messana. A player can raid beyond a location that contains an enemy Town token or City disc. However, the player cannot raid into or through a location that has a Fortification token in it. Also, the player may not raid into, from, or through a location where a battle is taking place, or from a location that is not in supply. The opposing player has the opportunity to block a raid by playing a card from their Hand that either states that it can block a raid, or by playing the Location card for the location that is being raided (if it is in supply). The card used to block the raid is then placed into the Discard pile. Clarification: Your opponent can block a raid against an out of supply location but cannot use that location s card to do it. If the raid is not blocked, then the raiding player takes the Town token or City token from the raided location. If a City token is taken from the location, then the opponent replaces it with a Town token from their stock, i.e., a City becomes a Town after a successful raid. The raiding player retains the token, and it will score VP at the end of the game. If the opposing player does not have a Town token available to replace a City token, then the location becomes unoccupied. In the unlikely event that Rome or Carthage becomes unoccupied as the result of a raid, the game is not automatically won. However, a player would win by taking the Settle a Location action in the opposing player s unoccupied home City at a later point in the game, unless the opposing player resettles it first Engage Enemy Fleet A player can attack an enemy Fleet if his Fleet is in the same Sea Zone. This action requires the player to play a card with a Ship symbol on it. The player cannot engage an enemy Fleet if they built a Warship earlier in the same round. 14

16 Each player simultaneously rolls a die for every ship in their Fleet. For every 5 or 6 that a player rolls, 1 enemy ship is sunk. Whoever sinks the most enemy ships wins the battle and gains a Prestige point. If there is a tie, or there are no surviving ships for either player, then it is a draw, and neither player receives a Prestige point. Exception: If one player s entire Fleet is sunk and the other player has at least one surviving ship, then the player with the surviving ship(s) wins the battle and gains the Prestige point, regardless of the number of actual ships sunk. If a Fleet is destroyed, return its Fleet token to its Home Port. Otherwise, the loser of the naval battle must choose to either retreat his Fleet to an adjacent Sea Zone that contains a friendly port or send it to his Home Port (regardless of whether or not it is adjacent). If the battle was a draw, then neither player is forced to retreat, though the defending player has the option to do so. Example: A Carthaginian Fleet of 4 ships engages a Roman Fleet of 5 ships in the Corsica-Sardinia Sea Zone. The Carthaginian player rolls a total of 4 dice, rolling a 1, 3, 5, and 6, for a total of 2 hits. The Roman player rolls 5 dice but rolls 1, 2, 2, 4, and 5, for a total of one hit. As a result, 2 Roman Warships and 1 Carthaginian Warship are destroyed. The Carthaginian player wins the battle since he sunk the most enemy ships and scores 1 Prestige point. The Roman player must now retreat to the Italy Sea Zone or back to his Home Port. The Roman player could not retreat to the Africa Sea Zone because he does not control a coastal location in Africa. Example 2: A Roman Fleet of 2 ships engages a Carthaginian Fleet of 3 ships. The Roman player gets lucky and rolls a 5 twice for 2 hits. The Carthaginian player rolls 6 twice and also a 3 for 2 hits. Although they each destroyed the same number of ships (which would normally be a draw), the entire Roman Fleet was sunk, and the Carthaginian player has 1 ship remaining. Therefore, the Carthaginian player wins the battle and gains a Prestige point. The Roman Fleet token is returned to its Home Port. Leaders in Naval Combat Leader cards in your Hand may be added to the naval combat. This is a free action and may be done by both players. The attacker first announces whether or not leader(s) will be added to the battle, then the defender. Each leader rolls 1 die per Sword symbol on the Leader card(s) and hits on a 4-6, except the Roman Praetor, which hits on a 5-6. Roll these dice separately from the dice rolled for the Warships. Example 3: A Roman Fleet of 4 ships engages a Carthaginian Fleet of 4 ships. The Roman player has a Consul in his Hand, and the Carthaginian player has a General in his. Both commit their leaders to the naval battle. The Roman player rolls 4 dice for the ships, rolling a 1, 4, 5 and 6. The 5 and 6 are hits. The Roman player rolls a die for the leader separately. The result is a 4, which is a hit. The Roman player has scored a total of 3 hits. The Carthaginian player rolls 4 dice and rolls a 2, 4, 4, and 6. Only the 6 is a hit. The Carthaginian player played a General, and receives an additional die, and rolls a 3 (a miss). So, the Carthaginian player sinks one enemy ship. The Roman player wins the battle (3 hits to 1), gains 1 Prestige point, and the Carthaginian Fleet must retreat. After a naval battle, if the Dictator and Mercenary General cards were played, then they are returned to that player's Empire deck. Any other type of Leader card that was committed to the naval battle is sent to the Discard pile. However, if an entire Fleet is destroyed, then that player returns any Leader cards committed to the naval battle to the Empire deck instead. Corvus Empire Card If the Roman player possesses the Corvus strategy card (see Figure 17), any Infantry cards from the Reserve may be committed to the naval battle at no cost, up to a maximum of 1 Infantry card per ship. The intention to include infantry in the battle, and the quantity, must be announced after leaders have been added, but before any dice are rolled. Set any committed Infantry cards to the side as a reminder. The Roman player then rolls an additional die for each Infantry card that was committed to the naval battle. Light Infantry cards hit on a 5 or higher and Heavy Infantry cards hit on a 3 or higher. Roll the dice for each type of infantry, light or heavy, separately. 15 Figure 17 Corvus card


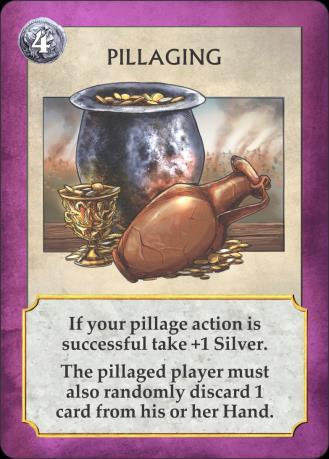
17 If the Roman player committed at least 1 Infantry card and wins the naval combat, then 1 enemy Warship is considered captured. Immediately add 1 free Warship to the Roman Fleet. If the Roman player does not have enough ships remaining at the end of the naval battle to carry the Infantry cards, (i.e., if there are fewer Roman Warships remaining than there are Infantry cards that were committed to the battle), then the excess Infantry cards are eliminated and those cards are returned to Rome s Empire deck. Any remaining infantry is sent to the Roman player's discard pile Bribery A successful bribe can reduce your opponent s available cards for play. A player plays a card that has the bribe ability and pays 1 Silver. The opponent may block this with a card that states it can block a bribe. The blocking card must be played from the opponent s Hand, not from the Reserve or a card currently used in battle. The card used to block is placed on the opponent s Discard pile. Note: Blocking a bribe is a free action. If a bribe is not blocked, then the opponent must select a card from his Hand or Reserve that is marked with the Bribe symbol (typically Mercenary cards) and return it to the respective Empire deck. Cards that are already engaged in a battle are not subject to bribery. If your opponent does not have a card that can be bribed and proves it by revealing the cards in his Hand, then the action is wasted. 5.3 Financial Actions Take Money The player plays one Location card and takes a number of Silver from the bank equal to the value indicated on the coin in the Ability box at the bottom of the card. Example: In Figure 18, a player using this action would receive 3 Silver from this card. Figure 18 Financial Actions Trader Play 1 card with a Ship symbol on it followed by playing 1 or 2 Location cards that have a Silver value in the Ability box at the bottom of the card. Take the total amount of Silver indicated on the Location card(s) from the bank Merchant Play the Merchant card followed by playing one or more Location cards that have the Wine symbol. For each card with the Wine symbol played, take 2 Silver from the bank Pillage Play a card with a Ship symbol to pillage an adjacent, enemy-controlled coastal location with your Fleet, or pillage an enemy-controlled coastal location in an adjacent Sea Zone by playing a second card with a Ship symbol. If successful, the player takes a number of Silver from the opponent equal to half the number of ships in the player s Fleet, rounded down. If the opponent does not have enough money, take the difference from the bank. Restriction: A player may only select the pillage action once per round. If the location is in supply, then the opponent may block a pillage attempt by playing the card of the location being pillaged, a Fortification card, or the Triremes card. If the location is out of supply, then the opponent may block a pillage attempt with only a Fortification or Triremes card. A player may not pillage a location that is fortified, or that has an enemy Fleet in its Sea Zone, or in which a field battle or siege is currently being fought. However, a player can pillage a location in an adjacent Sea Zone containing an enemy Fleet only if your Fleet is also in the current Sea Zone (see Example 2 on the next page). If a player successfully pillages the opponent, move the Pillage marker 1 space to the right on the Pillage track (see Figure 19). When the marker enters the 3, 5 or 8 space on the track, immediately subtract the 16 Figure 19 Pillage track

 to the Carthaginian player.")
 to raid Temesa instead, since the Roman Fleet is not in the Italy Sea Zone.")
18 indicated number of VP from the opponent s score. If the pillage marker reaches the 8 space, then reset the marker to the 0 space. Note: The points subtracted from the opponent are cumulative, e.g., if the pillage marker is on the 5 space, then the opponent has lost a total of 3 VP. Example 1: The Carthaginian Fleet, consisting of 5 Warships, is in the Sicily Sea Zone while the Roman Fleet is still in port. The Carthaginian player decides to pillage Messana and uses the Hippo Acra Location card (which has a Ship symbol on it) to pay for the action. The Roman player does not have a card that can block the pillage, and so must give 2 Silver (5 divided by 2, rounded down) to the Carthaginian player. Example 2: Both the Carthaginian Fleet and the Roman Fleet are in the Sicily Sea Zone. The Carthaginian player cannot pillage Messana since the Roman Fleet is in its Sea Zone. As a result, the Carthaginian player pays 2 ships (Utica and Hippo Acra) to raid Temesa instead, since the Roman Fleet is not in the Italy Sea Zone. However, the Roman player happens to have the Temesa Location card and plays it to block the pillage attempt. 5.4 Card Management Actions Draft an Empire Card The player selects an Empire card from his available Empire cards, pays the card s cost (if any) and places it onto his Discard pile. The upper left corner of the card will indicate the cost in Silver to be paid to the bank. The player can never take a card with a border of the opponent s color. The player may draft controlled Location cards that were sent to the Empire deck, even if out of supply. Some Heavy Infantry Empire cards have a manpower cost, represented by a Colonist symbol on the card, in addition to its Silver cost. When drafted, such a card requires you to discard a card with a Colonist symbol from your Hand. Otherwise, the card may not be purchased. Designer s Note: For Rome, raising legions required drawing from its substantial, but not unlimited, manpower pool. Carthage, on the other hand, relied mostly on mercenaries. Emergency Levy When drafting an Infantry, Cavalry, or Leader card from your Empire deck or the neutral Empire deck, you may pay double its Silver cost to place the card on top of your Draw deck instead of putting the card in your Discard pile. Other types of cards, such as Senatorial Support, Fortification, Siege Engine, etc., cannot be purchased in this manner. Note: Manpower costs are not doubled when using Emergency Levy Discard Cards The player may discard 1 or more cards from their Hand. Discarded cards are placed into the player s Discard pile. The cost in Silver to discard cards is progressive, starting at 0 Silver for the first card, and increasing by 1 Silver for each additional card. Example: Discarding a single card costs a player no Silver. Discarding two cards costs 1 Silver (0 + 1). Discarding three cards costs 3 Silver ( ) Return Card to Empire deck The player may put a card from his Hand back into the Empire deck. If a Location card is selected, then return the card to your Empire deck if you control that location or into the Neutral Empire card area if the location is unoccupied. Either player can draft Neutral Empire cards that are returned to the Empire deck. Restrictions: This action may only be selected once per round. The Rome or Carthage Location cards can never be returned to the Empire deck Reserve a Card Your Reserve gives you the flexibility to place cards to the side without burying them in your Discard pile or permanently removing them so that they can be easily retrieved later when they may be more useful. Select any card from your Hand (including a Location) and place it face up in the box marked Reserve on your Player Aid. A player s Reserve can only hold 5 cards. Cards in your Reserve are placed face-up and are public information (unless playing with the optional Hidden Reserve rule). 17

19 5.4.5 Retrieve Your Reserve As a free action, the player may retrieve the cards in his Reserve and place them back in their Hand. All cards in the Reserve must be retrieved, and the player must pay 1 Silver for each card retrieved. Note: It is possible to exceed your Hand size at the end of the round as a result of retrieving cards in Reserve. 5.5 Strategy Actions Buy Strategy Card Pay 0, 1, or 2 Silver, in addition to the card cost, to purchase an available Strategy card. A Strategy card in the #1 position costs 2 additional Silver, in the #2 position it costs 1 additional Silver, and a card in the #3 position costs no additional Silver. Place this card face-up on your Player Aid in the appropriate area. Strategy cards with an Ownership symbol in the cost may only be purchased by that Empire. Example: The Carthaginian player wishes to purchase the Celtic Allies card (see Figure 20), which is in the #1 position. The cost of the card is 4 Silver and an additional 2 Silver because it is in the #1 position. The Carthaginian player must pay a total of 6 Silver to buy this card. The Roman player can never purchase this card because it has a Carthaginian Ownership symbol on it. After purchasing a card, shift the remaining cards to the right, draw a new card and place it in the #1 position. Reshuffle the discarded Strategy cards if there are no remaining cards in the deck. You may not purchase a Strategy card if you already have a Strategy card in play, though you can discard it and buy another one later on (see Discard Strategy Card) Discard Strategy Card You may discard your Strategy card if you have one in play. Figure 20 Celtic Allies card Note: You must take this action before purchasing a new Strategy card, i.e., changing your Strategy card requires 2 actions Cycle Strategy Cards Discard 1, 2, or 3 Strategy cards on the Strategy card track; however, you must pay 1 Silver to discard the card in the #2 position and an additional 2 Silver to discard the card in the #1 position (see Figure 21). Shift any remaining face-up cards to the right and draw a new Strategy card for each card that was discarded, placing them right to left on the Player mat. Reshuffle the discarded Strategy cards the moment there are no remaining cards in the deck. Figure 21 Strategy Card deck IMPORTANT: If you are cycling more than 1 Strategy card, you must cycle them in right to left order, i.e., you must cycle the card in the #3 position before cycling the card in the #2 position. Player s Note: Not only is cycling the Strategy cards a good way to find a specific card you are looking for, but it is also a good way to deny a card that your opponent may have wanted! 18

20 Note: At the end of each turn (in the Campaign Sequence), a Strategy card is automatically cycled. 5.6 Other Actions Sea Move A player may move the Fleet token from his Home Port to its connected Sea Zone, or from its current Sea Zone to an adjacent Sea Zone, or its Home Port. An adjacent Sea Zone is one that is connected by arrows to your current Sea Zone, e.g., the Sicily Sea Zone is adjacent to the Italy Sea Zone and the Africa Sea Zone, but not the Corsica-Sardinia Sea Zone. IMPORTANT: The presence of an enemy Fleet does not prevent the Fleet from leaving or entering a Sea Zone. There is no interception in this game; however, a player may never enter an enemy s Home Port. A Fleet cannot be moved unless it contains at least 1 Warship, i.e., the player s Warship track is at 1 or higher Withdraw from a siege As a free action, a player may choose to withdraw from a siege. The result of this action is the same as if the player lost the siege, i.e., lose a non-location card from those in the Battle Card space, the remaining cards are placed onto your Discard pile, your opponent gains 1 Prestige point and places the cards from his Battle Card space into his Discard pile. You may not withdraw from a siege in the same round that you began the siege. Note: A player may not withdraw from field battles, only from sieges (locations with Fortification tokens). Player s Note: This is useful for those times when you are convinced you are going to lose a siege anyway and would rather cycle your cards back into your deck as soon as possible and/or you want to launch an attack somewhere else Build a Warship A player may pay 3 Silver and play a card with a Colonist symbol to increase the marker on their Warship track by 1. This action can be performed regardless if the Fleet is at sea or in your Home Port. However, you may not build a Warship in the same round in which you engaged an enemy Fleet. Both players are limited to a maximum 8 Warships Pass A player may do nothing during the round to collect 1 Silver. A player cannot pass more than once in the same round. 6 Ending the Game 6.1 Automatic Victory Rome wins immediately if either a battle is won in Carthage or Rome settles Carthage. Carthage wins immediately if either a battle is won in Rome or Carthage settles Rome. In the case of a battle, it is not necessary for a Town token to be placed in the location to trigger the victory condition. A player wins automatically if either there is at least a 25 VP lead over the opponent at the end of a Campaign or a player has captured every location in Sicily. 6.2 Game Ending Conditions If the game does not end in an automatic victory, then the game lasts until one of these conditions has been met at the end of a player s round: A player has placed all of his Town or City tokens onto the board A player has captured 10 points worth of Town and/or City tokens from his opponent; a Town token is worth 1 point, and a City token is worth 2 points A player has 8 Prestige points 12 turns have elapsed A player has scored at least 90 VP The Peace random event causes the game to end (see Figure 22). The Campaign card is removed the instant one of the game ending conditions has been met before the Carthaginian player refills his Hand. 19 Figure 22 Peace Event card


21 Except for automatic victory conditions, the game cannot end if there are any battles in progress at the start of a player s round. In that case the players continue, performing whatever actions they wish, except that neither player may start a new land or naval battle elsewhere. Once the last remaining battle has been resolved the game ends immediately (before any actions are played). If the Carthaginian player runs out of cards at this time and needs to draw again, reshuffle the discard deck and draw, but since the Campaign card has been removed, do not resolve a Random Event, collect VP, collect Silver or cycle Strategy cards. Each player then tallies their end of game victory points, which are added to their running total. Both players add: 1 VP for each friendly-controlled developed Location (in supply) 1 VP for each Prestige point 1 VP for each captured Town token 2 VP for each captured City disc VP of all captured enemy starting locations, whether or not they are in supply 5 VP if the player owns 7 or more areas in Sicily, whether or not they are in supply 2 VP if the player owns 3 or more areas in Corsica-Sardinia, whether or not they are in supply. The player who has the highest total VP is the winner. In the case of a tie, then the Carthaginian player is the winner. 6 Fate Token (Optional Rule) There is a Fate token included in the game, and neither player starts with it. However, the first time you are negatively affected by a random event, or your opponent is the beneficiary of a positive event; you take possession of the token. As long as you possess the Fate token, all future random event rolls are modified by 1 in your favor. If, while in possession of the token, your opponent is stricken by a negative event, or you are the beneficiary of a positive event, then you set aside the token (regardless of whether or not the modifier actually helped you). You or your opponent could later acquire the Fate token, perhaps multiple times, depending on how the random events fall. Note: You must actually be affected by a negative event in some way to receive the token. If, for example, you are hit by Storms at Sea but do not possess any ships, then you do NOT receive the Fate token. The rules for the modifier are the same as the Devotio Strategy card and are cumulative with that card. In other words, if you have both the Devotio card and the Fate token, random events would be modified by 2 in your favor. 7 Fortuna Expansion Rules This mini-expansion was introduced in the initial (2015) Kickstarter campaign and adds three new elements to Hands in the Sea. The first is a different set of Strategy cards to be used in conjunction with the Strategy card maintenance rule. This rule adds a cumulative maintenance cost to Strategy cards that make them more difficult to hang onto for long periods of time. The second is Deus Ex Machina cards. These are one-time events that players can use at certain points during the game to give them an advantage, but at the cost of VP. Lastly, there are 5 alternate Random Events that players may use instead of their deadlier originals. IMPORTANT: All of the expansion rules are optional and must be agreed to in advance by both players before being used. 7.1 Strategy Card Maintenance The alternate Strategy cards can be identified by the presence of a green numbered icon in the upper right corner of each card. This icon is the maintenance cost for the Strategy card. At the end of each Campaign sequence, you must pay the maintenance cost for your Strategy card. After collecting income, pay 1 Silver for the maintenance cost on your Strategy card, e.g., if your maintenance cost was 3, then you would pay 3 Silver, and so on. Then increase the maintenance cost using the Maintenance tokens included in the base game. Example: If Rome purchases the Diplomacy Strategy card (see Figure 23), Rome will not pay any maintenance on the first turn. However, the maintenance cost would increase based upon the maintenance cost listed in the upper right corner of the card. Rome would then place the 1 red Maintenance token on the Strategy card after collecting income. At the end of the next Campaign sequence, Rome would pay the current maintenance cost on the card denoted by the Maintenance token, (i.e., 1 Silver), and then 20


22 increase the Maintenance cost once again. The Diplomacy card has a maintenance cost of 1, so Rome simply flips the Maintenance token to the back side to reveal 2. During the end of the next Campaign sequence, Rome would then pay 2 Silver, and increase the Maintenance cost to 3. Note: The alternate Strategy cards have maintenance costs that range from 0 to 2. If you can no longer pay the maintenance cost, then the Strategy card is no longer in effect. In this case, you would flip the Strategy card over as a reminder to not pay maintenance. Once flipped, a Strategy card cannot be un-flipped while you still own it, and it is no longer considered in play for Random Events. You may still discard a flipped Strategy card as an action, as defined in the base rules for discarding a Strategy card. IMPORTANT: When using this rule, you must use the alternate Strategy cards that came with this expansion. Figure 23 Alternate Strategy Card Designer s Note: This variant was strongly considered as a core rule as a way to force a bit more churn in terms of purchasing and discarding Strategy cards. However, in the end, I decided just to make it an optional rule to help reduce complexity. Although not mandatory, I would recommend this rule for tournament play. 7.2 Deus Ex Machina Cards Prior to the start of the game, each player randomly selects 1 of the Deus Ex Machina cards for its power and sets it aside, keeping it secret. Do not mix this card in with your Draw deck. These are one-time events that may be played at any time during the player s round as a free action. Most Deus Ex Machina cards require a cost in VP in order to play, though one card (Gladiatorial Contest) costs Silver instead. Adjust the VP track (or spend Silver), as needed. A Deus Ex Machina card cannot be played once an end-game condition has been met. Once played, it is removed from the game permanently. Below is a bit of background to explain the basis of each card. Carthaginian Cards Sacrifice to Baal Both Plutarch and Diodorus Siculus report that the Carthaginians engaged in child sacrifice. Although there is some debate, the modern archaeological evidence seems to support that conclusion. Council of 104 This was an independent tribunal of judges that acted as the highest constitutional authority in Carthage. Their original responsibility was primarily to keep the military in check. However, their power effectively exceeded their own senate, and they became tyrannical until the reforms of Hannibal, who instituted term limits. Serpent of Africa The historian Orosius records that while the Roman Consul Regulus was camped in Africa near the Bagradas River, his army was briefly waylaid by a giant python, reportedly over 120 feet long. They used siege engines to kill it. Believe it or not. Western Resources Carthage obtained substantial quantities of gold, silver, tin, and iron from Africa and Spain, areas over which they had a tight monopoly. It was from this wealth that Carthage was able to raise large armies. Roman Cards Gladiatorial Contest The historian Livy records that the first gladiatorial contests started in 264 BC, the same year that the First Punic War started. Although religious in origin, over time, the purpose of gladiatorial contests changed to simply offering entertainment to its audiences and the subsequent political benefits for those who sponsored them. Noble Citizens After the naval defeat at Drepana, Rome simply did not have the funds in its treasury to rebuild its navy. However, a series of private loans from leading citizens gave them the money and material needed to rebuild their fleet and once again challenge Carthage at sea. 21

 of two vestals, as well as the sacrifice of a Greek and a Gaul,")


23 Punic Treachery The historian Frontinus records that in 261 BC, the Carthaginian general Hanno, faced with four thousand Celtic mercenaries who were threatening to revolt, personally promised them their money and then sent them out on a foraging mission. What he failed to mention was that he had also informed the nearby Roman consul when and where these particular Celts were foraging. The Celts were cut down by the Romans, and Hanno s money problems were solved. Vestal Sacrifice Although rare, the Romans did resort to human sacrifices in extremely desperate times, such as the sacrifice (burial) of two vestals, as well as the sacrifice of a Greek and a Gaul, after the battle of Cannae in the Second Punic War. 7.3 Alternate Random Event Cards There are 5 alternate Random Events included in the expansion, which can be differentiated from the originals by the Question Mark icon in the upper left corner (see Figure 24). You may choose to use some or all of these cards instead of their original counterpart as you see fit if you feel the original events are too harsh. The alternate Random Events are Leaders Quarrel, Mercenary Revolt, Naval Disaster, Rebellion, and Storms at Sea. In each case, the alternate cards are less severe than their original version. In the case of Storms at Sea, only 1 of the original cards is replaced, the other remains in the deck. Acknowledgments Credits Game design: Daniel Berger Graphic design & layout: Don Lloyd Artwork & illustrations: Jamie Noble Frier and Daniel Campos Box cover illustration: Naomi Robinson Historical research: Jonathan Nikitas Lead copy-editor: Rob Duman Copy-editing: Eric Alvarado, Jason Leveille, Ben Schomp, Paul Marjoram, Dustin Larsen, and Rodolphe Duhil Figure 24 Alternate Event Card Published by Knight Works, LLC Colorado Springs, CO, USA Designer s Notes Thank you to all of my playtesters, proofreaders, and anyone else who helped out along the way: Judd Vance, Chad Marlett, Jon Sirkis, Pete Stubner, Ben Schomp, Jeffrey Drozek-Fitzwater, Robert Bartelli, Jean-Michel Doan, David Janik-Jones, Kevin L. Kitchens, Michelle Arjona, Mark Innerebner, Scott Burns, and Tom Goetz. I also wanted to thank the folks who helped us in 2015 with podcasts, videos, and print articles to help promote the Kickstarter campaign to fund the game: Heavy Cardboard, All Us Geeks, Drive-Thru Review, I, Geek, Board Game Brawl, and Today in Board Games, as well as the kind folks at Slingshot Magazine. A special thank you goes to Judd Vance, whose tireless efforts into creating and updating the Vassal module were absolutely instrumental in playtesting and developing this game, and whose regular promotion on boardgamegeek.com helped put this game on the map for many people. Finally, I would like to thank Martin Wallace. By creating A Few Acres of Snow, he paved the way for deck building wargames and this game in particular. I expect more designers out there will be as inspired by it as I was. Publisher s Notes To all of the Kickstarter backers, please accept my humble thanks for your support of this game. Back in 2011, I was lucky enough to be an early adopter of Kickstarter with the 43 rd successful campaign in the Tabletop game category. This, in some ways, limited my success back then, but in other ways it allowed me to set the tone of how campaigns would be run in that very same category. I look forward to publishing more great games in the future. 22

24 Companion Guide The designer has created a Companion Guide that contains additional information and clarifications on some of the Random Events, Strategy cards, and Empire cards. Please check this guide for questions about specific cards, as they may be answered there. This guide also contains rule variants that players may opt to use instead of, or in addition to, the standard rules. A full-color deluxe book with artwork can be obtained from Knight Works, or you may download a free black and white text only version of the PDF from the following link: Expansive Actions (5.1) Each player should strive to expand their empire. The following actions allow you to do this in some way: Settle a Location (5.1.1) Develop a Location (5.1.2) Fortify a Location (5.1.3) Aggressive Actions (5.2) These actions involve players in some form of conflict: Attack a Location (5.2.1) Reinforce a Land Battle (5.2.2) Cavalry Raid (5.2.4) Engage Enemy Fleet (5.2.5) Bribery (5.2.6) Financial Actions (5.3) These actions allow you to gain Silver: Take Money (5.3.1) Trader (5.3.2) Merchant (5.3.3) Pillage (5.3.4) Card Management Actions (5.4) These actions allow you to manage cards in some manner: Draft Empire Card (5.4.1) Discard Card(s) (5.4.2) Return Card to Empire Deck (5.4.3) Reserve 1 Card (5.4.4) Retrieve Card(s) from your Reserve (5.4.5) Note: There are also Empire cards that allow you to manage your cards in various ways. See the card descriptions for details. Strategy Actions (5.5) These actions apply to the management of Strategy cards: Buy Strategy Card (5.5.1) Discard Strategy Card (5.5.2) Cycle Strategy Cards (5.5.3) Other Actions (5.6) Sea Move (5.6.1) Withdraw from a Siege (5.6.2) Build a Warship (5.6.3) Pass (5.6.4) 23
001 \ FORTRESS AMERICA
 TM TM 00 \ FORTRESS AMERICA ONE NATION, UNDER SIEGE! IN THE ST CENTURY, THE UNITED STATES OF AMERICA UNVEILED A NEW SYSTEM OF SATELLITES AND POWERFUL LASERS THAT PROVIDED NOT ONLY A FLAWLESS DEFENSE AGAINST
Caesar Augustus. Introduction. Caesar Augustus Copyright Edward Seager A board game by Edward Seager
 Caesar Augustus A board game by Edward Seager Introduction Caesar Augustus is a historical game of strategy set in the Roman Civil War period for 2-5 players. You will take the role of a Roman general,
GLOSSARY USING THIS REFERENCE THE GOLDEN RULES ACTION CARDS ACTIVATING SYSTEMS
 TM TM USING THIS REFERENCE This document is intended as a reference for all rules queries. It is recommended that players begin playing Star Wars: Rebellion by reading the Learn to Play booklet in its
Another boardgame player aid by
 Another boardgame player aid by Download a huge range of popular boardgame rules summaries, reference sheets and player aids at www.headlesshollow.com Universal Head Design That Works www.universalhead.com
Caesar Augustus. Introduction. Caesar Augustus Copyright Edward Seager A board game by Edward Seager
 Caesar Augustus A board game by Edward Seager Introduction Caesar Augustus is a historical game of strategy set in the Roman Civil War period for 2-5 players. You will take the role of a Roman general,
For 2 to 6 players / Ages 10 to adult
 For 2 to 6 players / Ages 10 to adult Rules 1959,1963,1975,1980,1990,1993 Parker Brothers, Division of Tonka Corporation, Beverly, MA 01915. Printed in U.S.A TABLE OF CONTENTS Introduction & Strategy Hints...
FEUDALISM Christo regnante, regem sperante
 FEUDALISM Christo regnante, regem sperante INTRODUCTION Feudalism is a card game for 2 players, covering, very loosely, the events, situations and rivalries in the kingdom of France from the end of the
Goal of the Game. For 2-4 Players
 RULEBOOK 1 For 2-4 Players As Jarl of a Viking clan, your followers have certain expectations: prosperity, security and glory. In return they follow you on raids of keep and villages and territories. They
Lightseekers Trading Card Game Rules
 Lightseekers Trading Card Game Rules 1: Objective of the Game 3 1.1: Winning the Game 3 1.1.1: One on One 3 1.1.2: Multiplayer 3 2: Game Concepts 3 2.1: Equipment Needed 3 2.1.1: Constructed Deck Format
Of Dungeons Deep! Table of Contents. (1) Components (2) Setup (3) Goal. (4) Game Play (5) The Dungeon (6) Ending & Scoring
 Components (2) Setup (3) Goal. (4) Game Play (5) The Dungeon (6) Ending & Scoring") Of Dungeons Deep! Table of Contents (1) Components (2) Setup (3) Goal (4) Game Play (5) The Dungeon (6) Ending & Scoring (1) Components 32 Hero Cards 16 Henchmen Cards 28 Dungeon Cards 7 Six Sided Dice
Of Dungeons Deep! Table of Contents (1) Components (2) Setup (3) Goal (4) Game Play (5) The Dungeon (6) Ending & Scoring (1) Components 32 Hero Cards 16 Henchmen Cards 28 Dungeon Cards 7 Six Sided Dice
Ancient/Medieval Campaign Rules
 Ancient/Medieval Campaign Rules Christopher Anders Berthier s Desk 2008 1 1 Revised after playtest feedback from John Martin & the North Georgia Diehards, Clay Knuckles/Marc Faircloth & NATO and Ian Buttridge
Buck Rogers Battle For The 25 th Century 1. 4 Turn Phases Complete each phase in order Definitions
 Buck Rogers Battle For The 25 th Century 1 OBJECT 1) Control 15 Territorial Zones at the end of any turn 2) Control the last Leader on the board at any time 3) Convince everyone else to surrender 4) Control
Struggle of Empires Game design by Martin Wallace. Artwork by Peter Dennis.
 Struggle of Empires Game design by Martin Wallace. Artwork by Peter Dennis. Overview Struggle of Empires recreates the military, economic, and political rivalries of the major European powers of the eighteenth
KUNG CHI. By Stone Mage Games RULES. Sample file
 KUNG CHI By Stone Mage Games RULES There are 15 Chi Markers per player, a 4 sided die, 15 Scroll Skrypt cards, 15 Sword Skrypt cards, and 15 Army cards. GAME COMPONENTS GAME SETUP The object of Kung Chi
CARCASSONNE. A tile-laying game for 2-5 players aged 10 and up.
 CARCASSONNE A tile-laying game for 2-5 players aged 10 and up. Contents 80 Sea Tiles (including 1 starting tile with Captain s Wheel icon and a dark back), which picture islands, trade routes, sea zones,
IMPERIAL ASSAULT-CORE GAME RULES REFERENCE GUIDE
 STOP! This Rules Reference Guide does not teach players how to play the game. Players should first read the Learn to Play booklet, then use this Rules Reference Guide as needed when playing the game. INTRODUCTION
game design - shem phillips illustration - mihajlo dimitrievski graphic design & layouts - shem phillips copyright 2015 garphill games
 game design - shem phillips illustration - mihajlo dimitrievski graphic design & layouts - shem phillips copyright 2015 garphill games www.garphill.com 2 introduction Raiders of the North Sea is set in
HISTORIA. Contents. The winner will be the player having the most impact on the history of mankind. 1 Gameboard. 2 Timeline markers
 1.13 HISTORIA Recreate the last 12,000 years of history. From the dawn of Civilization, through agriculture and navigation, nuclear energy and then into the future! In Historia, each player controls a
Rules: Axis and Allies 1942
 Page 1 of 22 Page 2 of 22 Rules: Axis and Allies 1942 NOTE: Although mostly the same as the tabletop rules, these rules have been modified to reflect the online version of the game. The rules themselves
Kingdoms of the Middle Sea A game for the piecepack by Phillip Lerche
 Kingdoms of the Middle Sea A game for the piecepack by Phillip Lerche Version 1.1, March 15, 2003 2-4 Players, 60-120 minutes Author and copyright by Phillip Lerche Equipment to play One piecepack (see
Musket Diplomacy. Contents
 Musket Diplomacy Contents 1. Introduction... 2 2. The Map... 2 3. Playing Pieces... 2 4. State Display & Player Aid Cards... 2 5. Sequence of Play... 3 1. Diplomacy Segment a. Alliances b. Event Cards
Free Shipping for all USA orders!
 Free Shipping for all USA orders! The Game Board The game board shows New York City and surrounding land and water areas. Locations are on land areas. Game units are placed on locations during game play.
Napoleon s Triumph. Rules of Play (draft) Table of Contents
 Table of Contents") Rules of Play (draft) Table of Contents 1. Game Equipment... 2 2. Introduction to Play... 2 3. Playing Pieces... 2 4. The Game Board... 2 5. Scenarios... 3 6. Setting up the Game... 3 7. Sequence of Play...
Rules of Play (draft) Table of Contents 1. Game Equipment... 2 2. Introduction to Play... 2 3. Playing Pieces... 2 4. The Game Board... 2 5. Scenarios... 3 6. Setting up the Game... 3 7. Sequence of Play...
Lightseekers Trading Card Game Rules
 Lightseekers Trading Card Game Rules Effective 7th of August, 2018. 1: Objective of the Game 4 1.1: Winning the Game 4 1.1.1: One on One 4 1.1.2: Multiplayer 4 2: Game Concepts 4 2.1: Equipment Needed
Command Phase. Setup. Action Phase. Status Phase. Turn Sequence. Winning the Game. 1. Determine Control Over Objectives
 Setup Action Phase Command Phase Status Phase Setup the map boards, map overlay pieces, markers and figures according to the Scenario. Players choose their nations. Green bases are American and grey are
ARMY COMMANDER - GREAT WAR INDEX
 INDEX Section Introduction and Basic Concepts Page 1 1. The Game Turn 2 1.1 Orders 2 1.2 The Turn Sequence 2 2. Movement 3 2.1 Movement and Terrain Restrictions 3 2.2 Moving M status divisions 3 2.3 Moving
Notes about the Kickstarter Print and Play: Components List (Core Game)
") Introduction Terminator : The Board Game is an asymmetrical strategy game played across two boards: one in 1984 and one in 2029. One player takes control of all of Skynet s forces: Hunter-Killer machines,
Introduction Terminator : The Board Game is an asymmetrical strategy game played across two boards: one in 1984 and one in 2029. One player takes control of all of Skynet s forces: Hunter-Killer machines,
COMPONENT OVERVIEW Your copy of Modern Land Battles contains the following components. COUNTERS (54) ACTED COUNTERS (18) DAMAGE COUNTERS (24)
 ACTED COUNTERS (18) DAMAGE COUNTERS (24)") GAME OVERVIEW Modern Land Battles is a fast-paced card game depicting ground combat. You will command a force on a modern battlefield from the 1970 s to the modern day. The unique combat system ensures
GAME OVERVIEW Modern Land Battles is a fast-paced card game depicting ground combat. You will command a force on a modern battlefield from the 1970 s to the modern day. The unique combat system ensures
COMPONENTS: No token counts are meant to be limited. If you run out, find more.
 Founders of Gloomhaven In the age after the Demon War, the continent enjoys a period of prosperity. Humans have made peace with the Valrath and Inox, and Quatryls and Orchids arrive from across the Misty
RULE BOOK. Conquest of Italy 386 to 272 BC. Table of Contents. 4.0 How to Win Sieges and Subjugation... 14
 Conquest of Italy 386 to 272 BC Designed by Wray Ferrell RULE BOOK Table of Contents 1.0 Introduction... 2 10.0 Interception... 10 2.0 Components... 2 11.0 Avoiding Battle... 11 3.0 Set Up... 2 12.0 Combat...
When placed on Towers, Player Marker L-Hexes show ownership of that Tower and indicate the Level of that Tower. At Level 1, orient the L-Hex
 Tower Defense Players: 1-4. Playtime: 60-90 Minutes (approximately 10 minutes per Wave). Recommended Age: 10+ Genre: Turn-based strategy. Resource management. Tile-based. Campaign scenarios. Sandbox mode.
IWO JIMA RAGE AGAINST THE MARINES 1. INTRODUCTION 2. COMPONENTS 2.1 COUNTERS. Operations Special Issue #1
 1. INTRODUCTION Iwo Jima. The only battle of World War Two that saw the United States Marines suffer more casualties than they inflicted on the enemy. It was a battle that would define a war and would
RANDOM MISSION CONTENTS TAKING OBJECTIVES WHICH MISSION? WHEN DO YOU WIN THERE ARE NO DRAWS PICK A MISSION RANDOM MISSIONS
 i The 1 st Brigade would be hard pressed to hold another attack, the S-3 informed Bannon in a workman like manner. Intelligence indicates that the Soviet forces in front of 1 st Brigade had lost heavily
Play with good sportsmanship and have fun!
 Rules of the High Seas Here are some game concepts important to the Pirates Constructible Strategy Game (CSG) rules: Six-sided dice are abbreviated d6. Ability text (found on the fronts of cards) overrules
Another boardgame player aid by
 Another boardgame player aid by Download a huge range of popular boardgame rules summaries, reference sheets and player aids at www.headlesshollow.com Universal Head Design That Works www.universalhead.com
P a g e Realms v1.2 Copyright 2010 Ignazio Corrao
 P a g e 1 P a g e 2 Siegfried, Snow White, D Artagnan, Red Riding Hood, and the other 12 Realms heroes are being reunited for one last great adventure. The Dark Lords have joined forces to completely conquer
Empires at War. 2. Win conditions Your main objective is destroy all unit cards of the opposing player. You can recognize unit
 Empires at War 1. About game Empires at War is a competitive card game set during I World War. Players create unique decks and take control over armies of conflicted nations. To win, you have to break
v.1.1 Colonial Summary A game by Christophe Pont - Rules revisited by Paolo D Ulisse
 Summary 0. Introduction...2 0.1. Object of the game...2 1. Game components...2 1.1. The Board...2 1.2. The Market place...3 1.3. The Loan display...3 1.4. A player s Nation board...3 2. Terminology...3
Clash of Giants The Campaigns of Tannenberg and The Marne, 1914
 RULEBOOK -UPDATED 12/25/01 Clash of Giants The Campaigns of Tannenberg and The Marne, 1914 Table of Contents 1.0 Introduction............... 2 2.0 Game Components........... 2 3.0 Game Setup...............
T H E G A M E O F S T R A T E G I C C O N Q U E S T
 AGES + - PLAYERS T H E G A M E O F S T R A T E G I C C O N Q U E S T FIELD GUIDE www.usaopoly.com We will be happy to hear your questions or comments about this game: Write to: USAOPOLY Customer Service
Axis & Allies Pacific FAQ
 Setup Axis & Allies Pacific FAQ December 11, 2003 Experienced players sometimes find that it s too easy for Japan to win. (Beginning players often decide that it s too hard for Japan to win it s all a
Portable Wargame. The. Rules. For use with a battlefield marked with a grid of hexes. Late 19 th Century Version. By Bob Cordery
 The Portable Wargame Rules Late 19 th Century Version For use with a battlefield marked with a grid of hexes By Bob Cordery Based on some of Joseph Morschauser s original ideas The Portable Wargame Rules
CONTENTS INTRODUCTION Compass Games, LLC. Don t fire unless fired upon, but if they mean to have a war, let it begin here.
 Revised 12-4-2018 Don t fire unless fired upon, but if they mean to have a war, let it begin here. - John Parker - INTRODUCTION By design, Commands & Colors Tricorne - American Revolution is not overly
Axis & Allies Europe FAQ
 Second Edition Rules Axis & Allies Europe FAQ November 17, 2005 Q. Did any rules change from the first to second editions of the rule book? A. Only two: 1. A destroyer taking part in an amphibious assault
game design - shem phillips illustration - mihajlo dimitrievski graphic design & layouts - shem phillips copyright 2016 garphill games
 game design - shem phillips illustration - mihajlo dimitrievski graphic design & layouts - shem phillips copyright 2016 garphill games www.garphill.com 2 introduction Explorers of the North Sea is set
Solitaire Rules Deck construction Setup Terrain Enemy Forces Friendly Troops
 Solitaire Rules Deck construction In the solitaire game, you take on the role of the commander of one side and battle against the enemy s forces. Construct a deck, both for yourself and the opposing side,
REINFORCEMENT PHASE F.A.Q.
 878 - VIKINGS F.A.Q. Special thanks to Ken Shogren for compiling all these questions from BGG and answering them. REINFORCEMENT PHASE F.A.Q. Are English Reinforcement placements required? Yes, English
A game by Wei Cheng Cheng. - Graphics: Olivier Revenu - Translation: Noël Haubry. Growling Tigers The Battle For
 BATTLES MAGAZINE #7 A game by Wei Cheng Cheng. - Graphics: Olivier Revenu - Translation: Noël Haubry Growling Tigers The Battle For Changde, 1943 is a two player wargame simulating the final stage of the
THE AGE OF DETERRENCE IS NOW THE AGE OF CONTROL. HE WHO CONTROLS THE BATTLEFIELD, CONTROLS HISTORY.
 AGES 0+ -5 PLAYERS FIELD GUIDE WAR HAS CHANGED PMCs (Private Military Companies) have taken the place of state armies as the world s primary war machines. As the fires of war continue to spread, take command
Comprehensive Rules Document v1.1
 Comprehensive Rules Document v1.1 Contents 1. Game Concepts 100. General 101. The Golden Rule 102. Players 103. Starting the Game 104. Ending The Game 105. Kairu 106. Cards 107. Characters 108. Abilities
RESERVES RESERVES CONTENTS TAKING OBJECTIVES WHICH MISSION? WHEN DO YOU WIN PICK A MISSION RANDOM MISSION RANDOM MISSIONS
 i The Flames Of War More Missions pack is an optional expansion for tournaments and players looking for quick pick-up games. It contains new versions of the missions from the rulebook that use a different
SUCCESSORS Living Rules, Sep The Battles for Alexander s Empire. by Mark Simonitch, Richard Berg, and John B. Firer RULES OF PLAY
 SUCCESSORS Living Rules, Sep 2015 1 The Battles for Alexander s Empire by Mark Simonitch, Richard Berg, and John B. Firer RULES OF PLAY Living Rules, September 2015 1. Introduction... 2 2. Game Components...
Henry Bodenstedt s Game of the Franco-Prussian War
 Graveyard St. Privat Henry Bodenstedt s Game of the Franco-Prussian War Introduction and General Comments: The following rules describe Henry Bodenstedt s version of the Battle of Gravelotte-St.Privat
LATE 19 th CENTURY WARGAMES RULES Based on and developed by Bob Cordery from an original set of wargames rules written by Joseph Morschauser
 LATE 19 th CENTURY WARGAMES RULES Based on and developed by Bob Cordery from an original set of wargames rules written by Joseph Morschauser 1. PLAYING EQUIPMENT The following equipment is needed to fight
SPACE EMPIRES Scenario Book SCENARIO BOOK. GMT Games, LLC. P.O. Box 1308 Hanford, CA GMT Games, LLC
 SPACE EMPIRES Scenario Book 1 SCENARIO BOOK GMT Games, LLC P.O. Box 1308 Hanford, CA 93232 1308 www.gmtgames.com 2 SPACE EMPIRES Scenario Book TABLE OF CONTENTS Introduction to Scenarios... 2 2 Player
CONTENTS TABLE OF BOX CONTENT SECTION SECTION SECTION SECTION SECTION SECTION SECTION
 BOX CONTENT 300 CARDS *20 Starter Cards [Grey Border] 4 Evasive Maneuvers 4 Tricorder 4 Phasers 4 Diagnostic Check 4 Starfleet Academy *54 Basic Characters [Yellow Border] 24 Ensign 16 Lieutenant 14 Commander
Explanation of terms. BRITANNIA II SOLITAIRE RULES by Moritz Eggert Version 1.1, March 15,
 Britannia II Solitaire Rules page 1 of 12 BRITANNIA II SOLITAIRE RULES by Moritz Eggert Version 1.1, March 15, 2006-03-15 The following rules should enable you to replace any nation on the board by an
110 cards, which are used to resolve battles between the Condottieri.
 Introduction During the Renaissance, Italy was divided into numerous independent city-states, sometimes friendly, sometimes hostile. The best known of these were Genoa, Florence, the Duchy of Milan, and
CEDAR CREEK BY LAURENT MARTIN Translation: Roger Kaplan
 CEDAR CREEK BY LAURENT MARTIN Translation: Roger Kaplan Cedar Creek 1864 simulates the Civil War battle that took place on October 19, 1864 and resulted in a Union victory. It uses many of the rules of
MAGISTRATVM A Group Projects game for the piecepack
 MAGISTRATVM A Group Projects game for the piecepack Date 1 November 2004 version 1.1 Number of Players 3 or 4 Game Length 90-120 min Designers Brad Johnson & Phillip Lerche Copyright 2003 the designers
RULE BOOK TABLE OF CONTENTS
 Living Rules May 2016 RULE BOOK [0.0] Using These Rules... 2 [1.0] Introduction... 2 [2.0] Game Equipment... 2 [3.0] Setting Up The Game... 5 [4.0] Sequence of Play... 5 [5.0] The Cards... 7 [6.0] Game
Details of Play Each player counts out a number of his/her armies for initial deployment, according to the number of players in the game.
 RISK Risk is a fascinating game of strategy in which a player can conquer the world. Once you are familiar with the rules, it is not a difficult game to play, but there are a number of unusual features
A GAME BY THOMAS SPITZER FOR 3 5 PLAYERS
 A GAME BY THOMAS SPITZER FOR 3 5 PLAYERS 1 Sub Dam CONTENTS 1.0 Introduction 2.0 Game Components 3.0 Aim of the Game 4.0 Preparations 5.0 Sequence of Play 6.0 Game End Scoring 7.0 Set up Changes in the
Stargrunt II Campaign Rules v0.2
 1. Introduction Stargrunt II Campaign Rules v0.2 This document is a set of company level campaign rules for Stargrunt II. The intention is to provide players with the ability to lead their forces throughout
16.0 OPTIONAL RULES These rules may be introduced to add variety to your games. WWII on the High Seas
 16.0 OPTIONAL RULES These rules may be introduced to add variety to your games. 16.1 Linked Games This rule links several battles to determine the overall winner. Set-up and play each battle as normal.
The Colonists of Natick - das Tilenspiel
 The Colonists of Natick - das Tilenspiel A Good Portsmanship game for the piecepack by Gary Pressler Based on The Settlers of Catan Card Game by Klaus Teuber Version 0.6, 2007.03.22 Copyright 2006 2 players,
Mythic Battles: Pantheon. Beta Rules. v2.5
 Mythic Battles: Pantheon Beta Rules v2.5 Notes: Anything with green highlighting is layout notes, and is NOT FOR PRINT. Anything with yellow highlighting is not yet finished. 1 Game Terms & General Rules
Runikend 1st edition Schneider Lab Ltd E. Hampden Ave Unit C-113 Denver CO,
 OFFICIAL RULEBOOK TABLE OF CONTENTS INTRO... 1 OBJECTIVE... 1 WARNING!... 1 SETUP... 2 GAME LAYOUT... 3 CARD LAYOUT... 4 TURN... 5 BUY... 6 TRADE... 6 BUILD... 7 COMBAT... 8 SELL (Advanced Rule)... 10
Angola! Rules of Play
 Angola! 1 Rules of Play 2 Angola! Table of Contents Errata 2 1 Introduction 3 1.1 Learning the Game 3 1.2 Definitions 3 1.3 Game Components 3 2 Game Overview 3 2.1 Factions 3 2.2 Playing the Game 3 2.3
Player counters. Back. Cost. Can only be built in. Rail Period Requires coal. Requires iron. Number of iron cubes placed on counter
 English rules Overview Welcome to eighteenth century Lancashire. The world is about to change from something we would call almost medieval to what we now know as the modern world. This change will be called
RULES OF PLAY. Table of Contents. The aim of the game. Game Overview
 RULES OF PLAY Caesar Hadrian ascended to the throne of the Roman Empire in 117 CE. During the early years of his reign, the Roman Empire faced various threats from the barbarians in Britain, Egypt and
Campaign Notes for a Grand-Strategic Game By Aaron W. Throne (This article was originally published in Lone Warrior 127)
") Campaign Notes for a Grand-Strategic Game By Aaron W. Throne (This article was originally published in Lone Warrior 127) When I moved to Arlington, Virginia last August, I found myself without my computer
Campaign Notes for a Grand-Strategic Game By Aaron W. Throne (This article was originally published in Lone Warrior 127) When I moved to Arlington, Virginia last August, I found myself without my computer
FAQ a n d Er ra t a - Version Updated January 27, 2011
 TM TM FAQ a n d Er ra t a - Version 1.2.1 Updated January 27, 2011 Battles of Westeros Errata Text in red indicates a change since the last update. Although the specific rules found in this FAQ have not
8 Weapon Cards (2 Sets of 4 Weapons)
") A Game by Pedro P. Mendoza (Note: Art, graphics and rules are not final) The way of the warrior is known as Bushido. It is a code that guides the life of a warrior and promotes values of sincerity, frugality,
A Game by Pedro P. Mendoza (Note: Art, graphics and rules are not final) The way of the warrior is known as Bushido. It is a code that guides the life of a warrior and promotes values of sincerity, frugality,
1. Overview. 2.Contents. 3. Setup
 1. Overview In this game players are powerful Archons who support the city of Cardis in order to win the King s favor. By sending their Courtiers to various locations of the city, players can perform various
Sequence of Play This rulebook is organized according to this Sequence of Play.
 Introduction...1 Sequence of Play...2 Campaign Set-Up...2 Start of Week...10 Pre-Combat...11 Combat...14 Post-Combat...19 End of Week...20 End of Campaign...22 Optional Rules...22 Credits...22 Sample Game...23
UNITS Hidden Units Formed Units Fighter Commander
 COLONIAL ADVENTURE UNITS Each unit consists of 5 to 20 figures. Additionally units may contain leaders (maximum 2 per unit), musicians (maximum 1 per unit) and color bearers (maximum 1 per unit). Each
MONUMENTAL RULES. COMPONENTS Cards AIM OF THE GAME SETUP Funforge. Matthew Dunstan. 1 4 players l min l Ages 14+ Tokens
 Matthew Dunstan MONUMENTAL 1 4 players l 90-120 min l Ages 14+ RULES In Monumental, each player leads a unique civilization. How will you shape your destiny, and how will history remember you? Dare you
EPIC VERSION RULEBOOK Fledgling empires expand across the globe in an attempt to control land and sea. The Epic game is playable in four to six hours.
 EPIC VERSION RULEBOOK Fledgling empires expand across the globe in an attempt to control land and sea. The Epic game is playable in four to six hours. DUST - RULES SUMMARY TABLE OF CONTENTS The Story of
RU L E S REFERENCE USING THIS RULES REFERENCE
 TM TM RU L E S REFERENCE USING THIS RULES REFERENCE This document is a reference for all Star Wars: Armada rules queries. Unlike the Learn to Play booklet, the Rules Reference booklet does not teach players
Supervillain Rules of Play
 Supervillain Rules of Play Legal Disclaimers & Remarks Trademark & Copyright 2017, Lucky Cat Games, LLC. All rights reserved. Any resemblance of characters to persons living or dead is coincidental, although
Mythic Battles: Pantheon. Beta Rules. v2.8
 Mythic Battles: Pantheon Beta Rules v2.8 Notes: Anything with green highlighting is layout notes, and is NOT FOR PRINT. Anything with yellow highlighting is not yet finished. 1 Appearance There are many
British Commonwealth 70. CANADA AND SOUTH AFRICA 71. AUSTRALIA 70.1 CANADA: 71.1 OVERVIEW: 70.2 SOUTH AFRICA:
 British Commonwealth 70. CANADA AND SOUTH AFRICA 70.1 CANADA 70.2 SOUTH AFRICA 70.1 CANADA: 70.11 OVERVIEW: Canada is part of the British Commonwealth and has its own units. 70.12 LOCATION: Canada is represented
Another game aid.
 Another game aid by Universal Head The Esoteric Order of Gamers www.orderofgamers.com Tabletop game rules summaries, foamcore box plans, articles, interviews, reviews and lots more at www.orderofgamers.com
26 Unit Tokens - 10 Red Units - 10 White Units - 6 Neutral Units
 Overview In March of 1917, Tsar Nicholas II was forced to abdicate the throne of Russia. In his place, a conservative Provisional Government formed, representing the official authority of the state. Opposed
30-45 Mins Ages Players BY JEREMY KALGREEN AND CHRIS VOLPE RULEBOOK
 30-45 Mins Ages 14+ 2-4 Players BY JEREMY KALGREEN AND CHRIS VOLPE RULEBOOK In the far future, robots have been designed to fight for the enjoyment of humanity. Bullets, lasers, bombs, drills, and various
Fujian Trader. A game built on a 17th century recently re-discovered Chinese trading map.
 Fujian Trader 福建 A game played using a recently discovered seventeenth-century trading map of East Asia once owned by a Chinese merchant family. A Gilbert & Batchelor Design INTRODUCTION Families of the
Frontier/Modern Wargames Rules
 Equipment: Frontier/Modern Wargames Rules For use with a chessboard battlefield By Bob Cordery Based on Joseph Morschauser s original ideas The following equipment is needed to fight battles with these
Range Example. Cards Most Wanted The special rule for the Most Wanted objective card should read:
 Range Example FAQ Version 1.2 / Updated 9.30.2015 This document contains frequently asked questions, rule clarifications, and errata for Star Wars: Armada. All changes and additions made to this document
Defenders of the Realm: Battlefields 1. Player seating arrangement -
 Defenders of the Realm: Battlefields is a competitive fantasy battle game for 2 to 4 players. In the game, one side takes the role of the Dark Lord s invading army and minions while the other side represents
CONTENTS. A WWII tactical and operational strongpoint defense game. PAGE 1 Introduction. PAGE 2 Setup minutes ages: players
 CONTENTS A WWII tactical and operational strongpoint defense game PAGE 1 Introduction PAGE 2 Setup PAGE 3 Counters and Cards PAGE 4 Playing the Game PAGE 5 Soviet Card Phase PAGE 9 Wehrmacht Card Phase
AGES PLAYERS
 AGES 0+ -5 PLAYERS RISK: HALO LEGENDARY EDITION In a distant corner of the galaxy a new Halo ring, one of the ancient superweapons of the mysterious Forerunner civilization is found and the battle sparks
Object of the Game. Game Components
 1 Object of the Game In Four Towers, each player represents a demigod striving to gain power in the enchanted land of Fognik. Players gain that power by influencing the four clans of humans and the creatures
martin wallace rules book MAD SCIENTISTS AND ATOMIC MONSTERS ATTACK THE earth
 martin wallace rules book MAD SCIENTISTS AND ATOMIC MONSTERS ATTACK THE earth moongha invaders thegamersgame #1 Moongha invaders MAD SCIENTISTS AND ATOMIC MONSTERS ATTACK THE earth! game design: Martin
Larsson's A&A50 House Rules
 Larsson's A&A50 House Rules 2009-03-17 House Rule 1 Black Sea - Official optional rule In order to maintain its neutrality, Turkey closed the narrow straights linking the Black Sea and the Mediterranean,
Introduction. Victory. Solitaire Decisions. Campaigns
 Introduction...2 Campaigns...2 Victory...2 Solitaire Decisions...2 Components...3 Force Counters...4 Force Descriptions...5 Ship Forces...5 Set-Up...7 Sequence of Play...7 Battle...11 Battle Set-Up...11
Battle. Table of Contents. James W. Gray Introduction
 Battle James W. Gray 2013 Table of Contents Introduction...1 Basic Rules...2 Starting a game...2 Win condition...2 Game zones...2 Taking turns...2 Turn order...3 Card types...3 Soldiers...3 Combat skill...3
Background. After the Virus
 After the Virus Background The zombie apocalypse is here! The world has been hit by a virus killing 90% of the population. Most of the survivors have turned into zombies, while the rest are left weak and
RULES OF PLAY T A B L E O F C O N T E N T S
 Game Design by Wray Ferrell and Brad Johnson RULES OF PLAY T A B L E O F C O N T E N T S 1. Introduction... 2 2. Components... 2 3. Starting the Game... 3 4. Definitions... 3 5. Cards... 4 6. Sequence
My Little Pony CCG Comprehensive Rules
 Table of Contents 1. Fundamentals 101. Deckbuilding 102. Starting a Game 103. Winning and Losing 104. Contradictions 105. Numeric Values 106. Players 2. Parts of a Card 201. Name 202. Power 203. Color