Color PQ GROUT TROUBLESHO TING GUIDE INSTALLATION SOLUTIONS F OR T I L E A N D STO N E.
|
|
|
- Michael Cross
- 5 years ago
- Views:
Transcription


1 NA NA Color PQ TM Premium Ready-to-Use Grout with Color-Coated Quartz GROUT TROUBLESHO TING GUIDE INSTALLATION SOLUTIONS F OR T I L E A N D STO N E
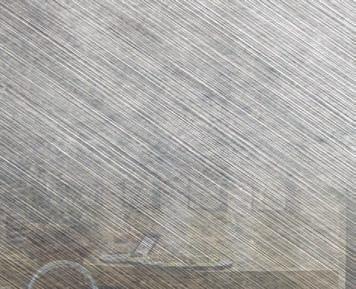
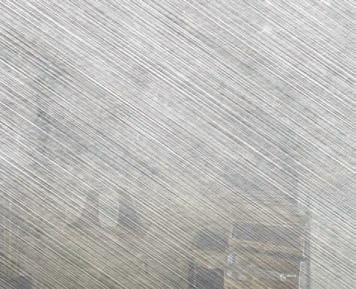
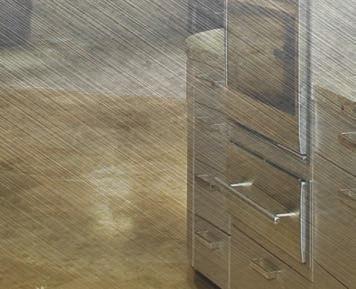
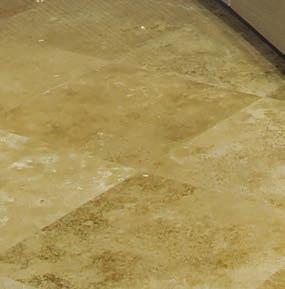
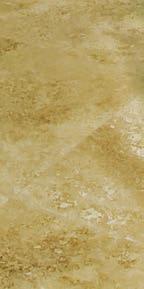
2 Grout discoloration A non-uniform, blotchy, shaded or dirty appearance of a grout joint that can be caused by several factors Jobsite conditions such as direct sun exposure, hot ambient or tile temperatures, or too much area being grouted at one time before the cleanup process begins Due to tile-spacing lugs left in the grout joints, variable depths of the joints caused shading. The varying density and porosity of the tile and natural stone caused the grout to dry blotchy and shaded. Grout cleaning was completed too early or too late after floating the grout into the joints. The grout s shelf life expired. Protect tilework from direct sunlight during application, and always apply grout within the temperature ranges of the current Technical Data Sheet (TDS). Grout small areas so that cleaning can begin within 5 to 7 minutes. Grout a test area to determine the impact of the tile-spacing lugs on the grout color. Remove spacers prior to grouting. Wet the edges of extremely porous stone or tile with a damp (not wet) sponge before grouting. Mist water on the tile surface before applying Ever Color PQ. For best results, begin to clean Ever Color PQ within 5 to 7 minutes of application. Grout that is allowed to linger too long can form a shiny grout haze on the surface, which can typically be removed with glass cleaner and a scrub pad. More stubborn haze will require an adhesive remover. Completely remove all cleaning products after cleanup to avoid deterioration of grout in the joints. Reference the product s shelf life on the TDS. Discard the grout if its shelf life has expired. The tile-setting material was not properly cured before grouting. A milky latex film formed on the surface of the grout joints just after cleaning. There was excessive tile-setting material in the grout joint. There were inconsistent grout joint depths and gap widths. There was 100% relative humidity (RH) or cold temperatures at the floor level. Ensure that the tile-setting material is fully cured before grouting. Typically this will require 24 hours or more (refer to the TDS of the mortar being used). The film occurs only under certain installation conditions. The film will dissipate between 20 to 30 minutes. Remove dried residue from the grout joints, ensuring that at least 2/3 of the depth is left available for grouting. Use tile spacers to ensure proper grout width. A lippage control system may be helpful as well. Remove spacers and tabs after the mortar has set. Use fans or air-moving devices to lower the RH and obtain hard grout joints. The product will not become hard at 100% RH or low temperatures. Ideal curing conditions would be 50% RH and 73 F (23 C). The concrete slab was not fully cured. Grouting was done by different installers and under different environmental conditions. Grout was prematurely exposed to an excessive amount of moisture. Routine maintenance/cleaning of the grout was performed too early after grouting. Water used in cleaning had a high content of iron and other minerals. Avoid grouting on less than fully cured substrates. When possible, use the same installer or group of installers and follow the same procedures. In addition, try to maintain consistent environmental conditions. Ever Color PQ grout cannot be exposed to moisture for at least 3 days after installation. Use fans and air-moving devices to ensure that the conditions are less than 100% RH. North American Adhesives does not recommend covering Ever Color PQ grout with Kraft paper, tarp, etc., that is in direct contact with the grout, as this will trap moisture and keep the RH percentage high. However, for exterior installations, tenting the grouted area with 3 ft. (0,91 m) or more of clearance is acceptable. Wait 3 days before routine maintenance/cleaning of the grout. Use potable water.


3 Tile discoloration A non-uniform hazy, filmy, shaded or dirty appearance on the tile surface that can be caused by several factors Grout haze was present on the tile surface after grouting because cleaning was not completed early enough. Jobsite conditions such as direct sun exposure, hot ambient or tile temperatures, or too much area being grouted at one time before the cleanup process begins Grout was trapped in the pits of tumbled or distressed travertine, or other pitted tiles. Water used in cleaning had a high content of iron and other minerals. Typically, 5 to 7 minutes of grouting is recommended before doing an initial wash. Temperature and humidity conditions can impact this recommendation. Window cleaner and a scrub pad can remove light haze; heavier haze will benefit from an adhesive remover. Protect tilework from direct sun during application, and always apply within the temperature ranges of the current Technical Data Sheet (TDS). Grout small areas that can be done in 5 to 7 minutes at a time, so that cleaning can begin before the grout skins over and dries on the tile surface. For severely pitted tile such as travertine, keep grout out of the pits by packing the joints only (a grout bag can help) and avoiding the pitted areas on the tile surface. Use potable water.
 at the floor level.")


. A sealer is not necessary for this grout.")


4 Grout not curing A grout that will not become hard or cured over time, instead remaining soft to the touch There was 100% relative humidity (RH) at the floor level. Use fans or air-moving devices to lower the RH and obtain hard grout joints. The product will not become hard at 100% RH. Ideal curing conditions would be 50% RH and 73 F (23 C). Too much water was used during the cleaning process. A sealer was applied prematurely after grouting. The tile-setting material was not properly cured and too much moisture was left in the joints before grouting. Grout was prematurely exposed to excessive amounts of water. Use a sponge slightly moistened but without water dripping out. Follow recommended product application procedures on the product label and Technical Data Sheet (TDS). A sealer is not necessary for this grout. If one is used, wait at least 72 hours before sealing Ever Color PQ grout. Ensure that the tile-setting material is fully cured and that joints are dry before starting to grout. Allow 72 hours after grouting before intermittent water exposure. Ever Color PQ grout is not for use in full-submersion installations. Grout was exposed to harsh chemicals prematurely. Allow 7 days before any exposure to harsh chemicals. Grout was not allowed to properly dry (cure). Use fans or air-moving devices to lower the RH and obtain hard grout joints. The product will not become hard at 100% RH. Ideal curing conditions would be 50% RH and 73 F (23 C). Light foot traffic is allowed 24 hours after installation, and heavy foot traffic is allowed 6 to 7 days after installation.

5 Grout with pinholes Very small holes typically the size of a pinhead or less that appear in the grout joint Too much water was used during the cleaning process. Grout was not correctly forced into the joints. Use a sponge slightly moistened but without water dripping out. Follow recommended product application procedures on the product label and Technical Data Sheet (TDS). Ever Color PQ grout should be floated with a medium- to hard-rubber float at a 45-degree angle to the tile surface. Excessive grout should be removed using the float at a 90-degree angle from the tile surface, moving diagonally to the joints. Grout with cracking A separation or slight opening in the grout joint, usually located between the grout joint edge and the edge of the tile Grout joints are less than full. Grout joints are too large or small for Ever Color PQ. Ensure that the joints are packed well and follow the installation steps found on the product label and/or Technical Data Sheet (TDS). If cracking, pinholes or shrinkage occurs, rebonding (re-application) over the existing Ever Color PQ grout 24 hours later can be an option. Ever Color PQ grout can be used in gap widths ranging from 1/16 to 1/2 (1,5 to 12 mm). Grout was installed before the tile-setting material had fully cured. Ensure that the tile-setting material is fully cured before starting to grout. Tile spacers were left in the grout joint. Remove all tile spacers before grouting. Temperature, humidity and wind can affect the way that grout cures. If grout cures improperly, cracks, pinholes, powdery grout or shading may develop. Follow installation recommendations on the product label and TDS. Grout was installed in moving joints where there is a change in plane. Use a caulking product in these areas. There was subfloor deflection (movement). Ensure that the subfloor follows the Tile Council of North America (TCNA) guidelines for determination of maximum allowable deflection. Expansion or movement joints were not installed to allow for proper expansion/contraction. Do not install tile over existing expansion joints. Do not use Ever Color PQ grout in these expansion joints. Follow TCNA Guideline EJ-171 for movement joints.


6 1144 E. Newport Center Drive Deerfield Beach, FL _0616 Customer Service Phone: Fax: (706) Technical Services Phone: Export Services Phone: Fax: (954) Skype name: NorthAmerican.export
StarQuartz Quartz-Lock Revolutionary Grout Technology
 StarQuartz Quartz-Lock Revolutionary Grout Technology Product Description StarQuartz, QuartzLock Grout is a PRE-MIXED, READY-TO-USE URETHANE and colored quartz-based grout for ceramic, porcelain, glass
Alterna Grouting Tiles & Planks
 Alterna Grouting Tiles & Planks Grouting Alterna Tiles and Planks Armstrong S-693 Premixed Sanded Acrylic Grout Soft rubber float Soft rubber Margin float White 3M pad Tile spacers Gloves Two- 5 Gallon
Keracolor U. Premium Unsanded Grout with Polymer DESCRIPTION FEATURES AND BENEFITS LIMITATIONS INDUSTRY STANDARDS AND APPROVALS SURFACE PREPARATION
 Version: Sept. 20, 2017 Keracolor U Premium with Polymer DESCRIPTION Keracolor U is a premium-grade, preblended, polymermodified unsanded Portland-cement tile grout that requires only the addition of water
3 Simple Steps to a Beautiful Tile Surface. Tec Skill Set How-To Project Guide Floor Tile 1. PREPARE THE SURFACE 2. SET THE TILE. Reverso en español
 Reverso en español Tec Skill Set How-To Project Guide Floor Tile 3 Simple Steps to a Beautiful Tile Surface 1. PREPARE THE SURFACE 2. SET THE TILE 3. Grout AND CAULK H.B. Fuller Construction Products Inc.
Wall Installations. Chapter 16 Wall Installations 16. 1
 16 Wall Installations Chapter 16 Wall Installations 16. 1 Alterna Premium Groutable Tile Create decorative backsplashes, accent walls, or other focal points with any size Alterna 16" x 16", 8" x 16", 8"
SPECTRALOCK PRO Premium Grout*
 SPECTRALOCK PRO Premium Grout* How to Grout TDS-1008 For most ceramic tile, glass tile, porcelain tile and natural stone Floors and walls Interior and exterior Residential and commercial Easy to Install,
TILE CARE & MAINTENANCE
 CERAMIC TILE Tile, whether glazed ceramic or porcelain, should be maintained on a regular and frequent basis to prevent build-up of soil, grease, residue, soap detergents, sealers, dampness, liquids, etc.,
PANEL INSTALLATION GUIDE
 GUIDE The Manufacturer has provided these instructions as installation guidelines in accordance with ASTM E-330. The manufacturer, however neither installs the panels nor has any control over the installation.
HOW TO TILE A SPLASHBACK
 HOW TO TILE A SPLASHBACK Don t just DO IT YOURSELF DO IT WITH BEAUMONTS! PREPARE & CLEAN A KITCHEN FOR TILING Any tiling job will only be as good as the surface it s laid on. It s important to ensure that,
POLYBLEND SANDED GROUT
 POLYBLEND SANDED GROUT 1. Product Name Polyblend Sanded Grout 2. Manufacturer Custom Building Products 13001 Seal Beach Blvd. Seal Beach, CA 90740-2757 Customer Support: 800-272-8786 Technical Services:
HAMPTON Crackle Wall Tile
 HAMPTON Crackle Wall Tile 70 71 White Bone Cadet Gray Stratus Stellar Blue CLASSIC GLOSSY FINISH The magic in the finely crafted Classic Crackle / Hampton Collection tiles begins with the crackleglazed
EXTRA LIGHT. installation. maintenance. and MADE IN FLORIM
 MADE IN FLORIM INSTALLATION AND MAINTENANCE 1) Characteristics of the surface choice of adhesive grout. 2) Laying the tiles 2 To ensure excellent adherence, the surface must always be uniform light colored,
NOTE: This product can be used externally if UV Guard is added (BY REQUEST ONLY).
.") Product Description PHOENIX PAINTS MAXICOAT 100 is a 2 Pack Water-Dispersed Top Coat which not only exhibits the physical and chemical strengths of epoxy, but also the safety and convenience of water as
Product Description PHOENIX PAINTS MAXICOAT 100 is a 2 Pack Water-Dispersed Top Coat which not only exhibits the physical and chemical strengths of epoxy, but also the safety and convenience of water as
CTIOA FIELD REPORT
 CERAMIC TILE INSTITUTE OF AMERICA, INC. 12061 Jefferson Blvd., Culver City, CA 90230-6219 Introduction: CTIOA FIELD REPORT 2003-7-23 Subject: COLORANTS, STAINS & ENHANCERS By: Michael Diaz and Albert Gutierrez
2007 Final Summary of the bed wood finishes testing
 2007 Final Summary of the bed wood finishes testing In the Summer of 2005 we began a test of 10 different wood finishes. The purpose was to get comparative test results of how well the finishes would last
Repairs. Chapter 10 Repairs 10. 1
 10 Repairs Chapter 10 Repairs 10. 1 Repairs As an installer, you will probably be called upon to repair damage to a resilient floor. Here are some of the most common problems and the recommended repairs
CTIOA REPORT (R-87)
") CERAMIC TILE INSTITUTE OF AMERICA, INC. 12061 Jefferson Blvd., Culver City, CA 90230-6219 CTIOA REPORT 82-1-9(R-87) SUBJECT: Ceramic Tile and Wood Frame Construction Plywood, Particle Board, and Other
CERAMIC TILE INSTITUTE OF AMERICA, INC. 12061 Jefferson Blvd., Culver City, CA 90230-6219 CTIOA REPORT 82-1-9(R-87) SUBJECT: Ceramic Tile and Wood Frame Construction Plywood, Particle Board, and Other
Agenda. Interior Painting Exterior Painting Typical Problems Low VOC Paints
 Painting 101 Agenda Interior Painting Exterior Painting Typical Problems Low VOC Paints Interior Painting Flat Requires less prep (spot patch & prime) Less durable Eggshell More durable than flat Requires
Installation in Four Easy Steps TILE & STONE INSTALLATION. Select products eligible for a lifetime warranty.
 Installation in Four Easy Steps TILE & STONE INSTALLATION Select products eligible for a lifetime warranty. Prep Preparing your surface A great tile project starts with a smooth, clean, solid, and level
C O M P A N Y C O M P A N Y
 O p e r a t i n g M a n u a l F I N I S H E D S U R F A C E S Daily Maintenance 1. Remove gross soils (labels, gum) with a putty knife or scraper. 2. Sweep or dust mop floors. 3. Place Wet Floor signs
AquaGuard - Water Resistant Flooring Installation guidelines
 AquaGuard - Water Resistant Flooring Installation guidelines Before You Start: Please read all the instructions before you begin the installation. Improper installation will void the warranty. Important
Adhesive Selection. 1/32 x 1/16 x 1/32 U-notch 4 Gallon 880-1,040 SF 40.0 P u u u. 1/32 x 1/16 x 1/32 U-notch 4 Gallon 1,200-1,400 SF 40.
 Sheet Flooring Installation Guide TOLI MATURE SELECT & TAKIRON WELS SHEET CBC Flooring Please refer to the CBC Flooring website www.cbcflooring.com for the most current guidance about product application
How to use a Touch Up Bottle & Brush
 How to use a Touch Up Bottle & Brush Tech Tips General Definitions Base Color (Basecoat): A color coat requiring a clear coat. Base Color provides color and appearance, while the clear coat provides gloss
CHEMICAL RESISTANT EPOXY
 CHEMICAL RESISTANT EPOXY DATE - 19 DECEMBRER 2016 TECHNICAL DATA SHEET DESCRIPTION is a solvent-less, two component epoxy coating system. It exhibits very good appearance and chemical and physical properties.
Kraus Engineered Luxury Vinyl Plank 5G Insta-Loc Click Installation Instructions
 Kraus Engineered Luxury Vinyl Plank 5G Insta-Loc Click Installation Instructions GENERAL GUIDELINES All instructions and recommendations are based on the most recent information available. They should
Install Instructions for Solano Jurastone #4012 Mantel
 Install Instructions for Solano Jurastone #4012 Mantel Please read this manual before installing the suite. This manual should remain with the homeowner. Updated 12/03/12 NOTE the installation requirements
LATICRETE SpectraLOCK PRO Grout Installation & Maintenance Guide TDS 400 PRO
 LATICRETE SpectraLOCK PRO Grout Installation & Maintenance Guide TDS 400 PRO Table of Contents INTRODUCTION SECTION 1: GROUT COLOR SELECTION SECTION 2: GROUT COVERAGE SECTION 3: CRITERIA FOR FINISHED GROUT
Before You Begin... TOOLS & PRODUCT INVENTORY
 Fireplace Surround Installation Instructions STANDARD WOOD FRAMING ONLY Congratulations on selecting an Eldorado Fireplace Surround! Eldorado Fireplace Surrounds have been designed to install in just 5
SPECTRALOCK 2000 IG Grout Guide
 SPECTRALOCK 2000 IG Grout Guide TDS 400 Table of Contents INTRODUCTION SECTION 1: GROUT COLOR SELECTION SECTION 2: GROUT COVERAGE SECTION 3: CRITERIA FOR FINISHED GROUT APPEARANCE SECTION 4: INSTALLATION
Sign Maintenance. Sign Maintenance
 When does it start? Maintenance should start before the ordered signs arrive. An area should be set aside for the storage of stock and replacement signs. Area should include racks where signs can be stacked
Polymer Plate Development Procedures. (800) or (802) (800)
 or (802) (800)") Polymer Plate ment Procedures (800) 272-7764 or (802) 362-0844 www.epsvt.com 1 www.epsvt.com (800) 272-7764 Introduction Understanding Plate Making Polymer plates consist of a photosensitive material which
Polymer Plate ment Procedures (800) 272-7764 or (802) 362-0844 www.epsvt.com 1 www.epsvt.com (800) 272-7764 Introduction Understanding Plate Making Polymer plates consist of a photosensitive material which
Setting Glass Tiles Linda J. Quesada
 s Linda J. Quesada s First Edition By Linda J. Quesada Wholesalers USA, Inc. Copyright 2007 Wholesalers USA, Inc. All rights reserved ISBN Number: 1-4276-0955-1 This e-book is distributed by Wholesalers
Installation Instructions
 Aspex Digitally Printed Wall Art PL PREMIUM HEAVY DUTY ADHESIVE ASPEX WALL ART DOUBLE SIDED FOAM TAPE Installation of Aspex Digitally Printed Wall Art with Foam Tape and PL Premium Adhesive. Maximum size
Identifying Common Interior Paint Defects/ Complaints
 Identifying Common Interior Paint Defects/ Complaints Use of low quality semi-gloss or gloss acrylic paints Use of flat paint in highly trafficked areas, where a higher sheen level would be desirable Use
SECTION COUNTERTOPS ecox PART 1 GENERAL
 SECTION 11456 COUNTERTOPS ecox PART 1 GENERAL 1.1 SECTION INCLUDES A. Countertops B. Bar tops C. Vanity tops D. Table tops E. Reception counters F. Cash/back wraps G. Transaction counters H. Service counters
STAR PAINT. Put some colour in your life COMMON PAINT PROBLEMS AND POSSIBLE SOLUTIONS TEL: FAX:
 COMMON PAINT PROBLEMS AND POSSIBLE SOLUTIONS STAR PAINT TEL: +268 518 6200 FAX: +268 518 6201 I info@starpaint.co.sz Put some colour in your life Property of Star Paint (PTY) Ltd Page 1 Common Paint Problems
NURABOND LOW FOAMING PU ADHESIVE TECHNICAL DATA SHEET
 53 A Victoria Street Onehunga Auckland Phone 09 579 2046 www.nuralite.co.nz NURABOND LOW FOAMING PU ADHESIVE TECHNICAL DATA SHEET DESCRIPTION AND USE Nurabond PU Adhesive is a ready to use, high performance,
Ceramic Tile - Routine Care
 Ceramic Tile - Routine Care Contaminants and spills on a glazed ceramic tile are, generally, easier to clean then other, more impervious surfaces. Glazed tile products should be cleaned routinely with
INSTALLATION. GlUElEss CliCK BamBoo installation GUidE. Introduction. Tips for a successful installation
 GlUElEss CliCK BamBoo installation GUidE Introduction Thank you for purchasing a Yanchi Bamboo Floor! Our flooring combines superior technology and the highest quality materials available so that your
TILING GUIDE. What you need: Tiles - Pliers and standard screwdriver
 TILING GUIDE What you need: Tiles - Pliers and standard screwdriver - Tile adhesive - Straightedge/level - Tile grout - Putty knife/scraper - Notched trowel - Rubber float/squeegee - Tile spacers - Sponge
Please also carry out relevant test patches to ensure product compatibility and colour satisfaction.
 INGILBY WATER BASED PAINTS GENERAL TIPS AND OBSERVATIONS In order to help projects run smoothly, if, at any stage during application, guidance is required please do not hesitate in contacting us for advice.
380 Swimming Pool Paint
 Issued 21 st April 2010 PRODUCT DATA SHEET UNPAINTED CEMENT 380 Swimming Pool Paint SURFACE PREPARATION New cement or render should be allowed to cure for at least 21-28 days before any preparation is
English Professional Installation Guidelines
 Professional Installation Guidelines General Installation Instructions NOTE: After proper acclimation, open cartons just prior to installation. NOTE: Mannington Laminate Flooring is intended to be installed
Loose Lay Luxury Vinyl Plank
 Loose Lay Luxury Vinyl Plank FLEX COLLECTION Installation & maintenance * PLEASE READ CAREFULLY * Installation, maintenance & warranty guideline for loose lay luxury vinyl products. Adherence to This guideline
Laying and maintenance of cement tiles
 Laying and maintenance of cement tiles David&Goliath cement tiles are manufactured under licence in the Far East, according to our standards and specifications concerning colour and dimensional stability;
Installation Instructions for Engineered Wood Flooring
 Installation Instructions for Engineered Wood Flooring PLEASE READ THESE INSTRUCTIONS IN THEIR ENTIERTY BEFORE BEGINNING THE INSTALLATION. Installer s / Owners Responsibility As a natural product, hardwood
Install Instructions for Torrance Jurastone #4004 Mantel
 Install Instructions for Torrance Jurastone #4004 Mantel Please read this manual before installing the suite. This manual should remain with the homeowner. 20/05/11 Fires of Tradition assumes no responsibility
MARBLE MOSAICS. Carrara White Penny Round Mosaic
 MARBLE MOSAICS Lavishly decorative and always on trend, the Marble Mosaics series boasts the natural patterning and hues of organic materials, injecting elegance and excitement into interiors. Carrara
TRIVERSA TRIVERSA ID. Triversa Triversa ID Installation Instructions. Remove the wall base and doorway trim. Always undercut wood door casings
 INSTALL ON ALL GRADE LEVELS Above Grade On Grade Below Grade by CONGOLEUM TRIVERSA TRIVERSA ID Triversa Triversa ID Installation Instructions GENERAL INFORMATION ATTENTION! READ BEFORE INSTALLING! Handle
Finishing and Pre-Finishing. Pre-Finishing
 Finishing and Pre-Finishing A quality wood treatment is recommended Enhances the natural beauty of the wood Protects against moisture, mildew and UV radiation Pre-finished siding products are available
DULUX UNIVERSAL UNDERCOAT
 TECHNICAL DATA SHEET Version 1 2015 JUNE THIS ISSUE SUPERSEDES ALL PREVIOUS PUBLICATIONS PRODUCT DESCRIPTION Intermediate coating for use under decorative topcoats, for interior and exterior use PRODUCT
Laminate Floor Installation Guide
 Laminate Floor Installation Guide Introduction This guide will take you through the necessary steps to install your Bel-Air Laminate Flooring. Make sure to carefully read through this guide so that you
Application of Air & Water Barrier Using Sprayers and Power Rollers TDS 410M
 Application of Air & Water Barrier Using Sprayers and Power Rollers TDS 410M Air & Water Barrier can be effectively sprayed or power rolled to increase productivity on large projects. In addition to the
PDF # HOW TO CLEAN TILE AND GROUT FLOORS DOCUMENT
 15 April, 2018 PDF # HOW TO CLEAN TILE AND GROUT FLOORS DOCUMENT Document Filetype: PDF 173.2 KB 0 PDF # HOW TO CLEAN TILE AND GROUT FLOORS DOCUMENT Avoiding the use of harsh cleaning chemicals will keep
Magnetpaint & Sketchpaint
 Magnetpaint & Sketchpaint Turn any smooth surface into a magnetically receptive whiteboard MagnetPaint is an exciting product that allows you to paint your own magnetic surface on any flat area. SketchPaint
How to Install a Mosaic Tile Border
 How to Install a Mosaic Tile Border A stunning mosaic border can add a lovely element of interest in any bathroom or kitchen. Glass mosaics will add additional reflected light, a striking mosaic can add
Sun Windows General Information New Construction Hinged Door Installation Instructions
 A G H F H H A. Apply Weather Resistive Barrier B. Apply Bottom Flashing Tape C. Install Sill Pan End Caps & Pan D. Caulk Sides & Top Nailing Surface, Set Door, Fasten E. Apply Side Flashing Tape F. Apply
ALLORA SWING PANEL INSTALLATION INSTRUCTIONS
 ALLORA SWING PANEL INSTALLATION INSTRUCTIONS Before Installation Please check that your Allora Swing Panel is undamaged SEQUENCE OF INSTALLATION These instructions are also available from the Athena website:
U.S. General Services Administration Historic Preservation Technical Procedures
 1 of 6 8/20/2010 8:22 AM U.S. General Services Administration Historic Preservation Technical Procedures 06400-02 SUPPLEMENTAL GUIDELINES FOR REMOVING PAINT FROM INTERIOR AND EXTERIOR WOOD SURFACES This
LUXURY VINYL FLOORING INSTALL INSTRUCTIONS
 PLEASE READ ALL INSTRUCTIONS CAREFULLY BEFORE YOU BEGIN INSTALLATION. IMPROPER INSTALLATION WILL VOID WARRANTY. Installation Preparation: The information on this sheet provides general guidelines. All
LUXAPOOL EPOXY POOL COATING APPLICATION GUIDE. New Cement Pools
 LUXAPOOL EPOXY POOL COATING APPLICATION GUIDE New Cement Pools 1. The render should consist of fresh cement and pure, clean sand only. Allow the render to cure for a minimum of 21 days prior to any preparation
GLAZED WALL DECOR SHADOWS GLOSSY MATTE COMBINATIONS
 SHADOWS COLLECTION GLAZED WALL DECOR SHADOWS GLOSSY MATTE 10 14 COMBINATIONS 3 TONAL HUES FORM A DYNAMIC BACKDROP SHADOWS White Matte 4 x / Black Matte 4 x SHADOWS Ash Grey Matte 4 x / Deep Grey Matte
CHEMICAL RESISTANT EPOXY
 CHEMICAL RESISTANT EPOXY ADHL-EPOX-CHEM TECHNICAL DATA SHEET DESCRIPTION ADHL-EPOX-CHEM is a solvent-less, two component epoxy coating system. It exhibits very good appearance and chemical and physical
installation manual m y w a l l a r t. c o m
 installation manual Step 1 Step 2 Acclimate panels for 48 hours in the environment and temperature they will be installed in. Step 3 Install over relatively smooth flat surfaces, all major holes or major
Troubleshooting Guide. Solutions to Common Finishing Problems
 Troubleshooting Guide s to Common Finishing s 1 Contents Adhesion Intercoat Stain Substrate Air Entrapment / Pinholing Bénard Cells Bleeding Blisters / Pinholes Blocking Blooming Blushing Brittleness Brown
Technical Newsletter
 Waterbase and Discharge Ink Printing Objectives: To improve production performance, minimize down time, and optimize screen life by preparing durable stencils with quality products and screen making techniques.
Capillary Film Troubleshooting. Pinholes. Stencil underexposed
 Capillary Film Troubleshooting Pinholes Dust on exposure glass, film positive or capillary film Capillary film too thin for mesh count Fabric too dry during film application Emulsion incompatible with
Gluing windows with SABA Glasstack 760
 Info sheet 208 Gluing windows with SABA Glasstack 760 Version 2008-05-08 EN, replaces all prior versions Page 2 of 9 Info sheet 208 Gluing windows with SABA Glasstack 760, version 2008-05-08 EN 1. Introduction
Installation Instructions for easy to install Texture Plus faux wall panels
 Installation Instructions for easy to install Texture Plus faux wall panels Questions? Web chat, phone or email us. Easy Instructions For Use We make easy to install faux wall panels that look amazingly
INSTALLATION INSTRUCTIONS
 VESDURA VINYL PLANKS 3MM PVC GLUE DOWN - OAK COLLECTION Safety First CAUTION Asbestos Warning in existing floor. Do not sand, dry scrape, bead blast or mechanically pulverize existing resilient flooring.
A. Section includes surface preparation and the application of paint systems on the following exterior substrates: 1. Steel and iron.
 Farmington, Missouri Project Number M1801~01 PART 1 ~GENERAL 1.1 RELATED DOCUMENTS Drawings and general provisions of the Contract, including General and Supplementary Conditions and Division 01 Specification
Premium quality tools are important; not only will high quality rollers, brushes, and products create a better result, they ll make your job easier.
 How to Paint your Pool Introduction Painting is one of the best ways to protect and beautify your pool. In addition to adding a vibrant, fresh color, a new coat of paint can be a cost- efficient way to
Product Data Sheet Awlwood MA Primers OJ3809 / OJ9809 / OJ7809 Specification Data
 Specification Data Packaging: Product Code: Cleaning: Available in 1 quart packs OJ3809 Clear; OJ9809 Yellow; OJ7809 Red OT0200 Awlwood MA Brush Cleaner Volume Solids: 45% Specific Gravity: OJ3809-1.013
Engineered Hardwood Flooring Installation Instructions
 Engineered Hardwood Flooring Installation Instructions 1 Important Information before You Begin 1.1 Installer/Owner Responsibility Carefully inspect all materials before installation. Materials installed
Installation Instructions for Viking Hearth Engineered Wood Flooring
 Installation Instructions for Viking Hearth Engineered Wood Flooring 4.16.15 PLEASE READ THESE INSTRUCTIONS IN THEIR ENTIERTY BEFORE BEGINNING THE INSTALLATION. Installer s / Owners Responsibility As a
APPLICATION NOTE - SR001. Cold Weather Application
 APPLICATION NOTE - SR001 Cold Weather Application Silent Running is best applied with the ambient, material and substrate temperature in the range of 65-85 degrees F. Lower temperatures will result in
Wall Panel Installation
 Wall Panel Installation Special care must be taken in handling of panels with grout lines, especially in cold weather. The indented grout lines are by necessity a little thinner than other areas of the
INSTALLATION. Installer / Owner Responsibility. Basic Tools and Equipment. Putty and Filler Use. Recommended Installation Methods
 Installer / Owner Responsibility Carefully inspect all materials before installation. Materials installed with visible defects are not covered under the warranty. Do not install if you are not satisfied
Staining Exterior Wood Our Solutions to Peeling Stain: Solution 1:
 Staining Exterior Wood How to apply stain on exterior wood decks is a common question posed by our clients. Here is a comprehensive guide to applying exterior stain to cedar wood decks, timber pergolas
WHY PAINT JOBS FAIL. ADHESION: (Loss of)
") WHY PAINT JOBS FAIL ADHESION: (Loss of) Carelessness and lack of skillful preparation of the surface are the major causes of poor adhesion. The application of a primer or protective coating material on
WHY PAINT JOBS FAIL ADHESION: (Loss of) Carelessness and lack of skillful preparation of the surface are the major causes of poor adhesion. The application of a primer or protective coating material on
Therma-Tru Fiber-Classic and Smooth-Star Sliding Patio Door System
 PATIODOORSYSTEMS Therma-Tru Fiber-Classic and Smooth-Star Sliding Patio Door System Quad Unit Assembly & Installation Read all instructions before starting. The applicable standards for these products
Adhesive Selection. ph Limit Trowel Size Unit Size Coverage per unit. 1/16 x 1/16 x 1/16 V-notch 2.85 Gallon SF 30.
 PVC-Free Tile & Plank Installation Guide CERES Sequioa & Halo Free CBC Flooring Please refer to the CBC Flooring website www.cbcflooring.com for the most current guidance about product application charts,
Engineered Hardwood Installation
 Engineered Hardwood Installation Installer / Owner Responsibility Carefully inspect all materials before installation. Materials installed with visible defects are not covered under the warranty. Do not
GREEN WORLD LUMBER GENUINE MAHOGANY DECKING INSTALLATION GUIDE
 GREEN WORLD LUMBER GENUINE MAHOGANY DECKING INSTALLATION GUIDE Genuine Mahogany is among the most durable natural wood decking available. When properly installed and maintained, you should have a beautiful
1INSTALLATION GUIDE: ENGINEERED WOOD FLOORING
 1INSTALLATION GUIDE: ENGINEERED WOOD FLOORING INSTALLATION GUIDELINES FOR ENGINEERED WOOD FLOORING These guidelines are designed to complement the current South African Flooring Standards. Engineered wood
Technical Information
 Fax to 732-279-3498 Technical Information APPEARANCE OF INSTALLED Pilkington Energy Advantage Low-E Glass AND Pilkington Solar E Solar Control Low-E Glass ATS-137-3 The low emissivity property of Pilkington
VERTICAL STILE ABOVE HORIZONTAL TRIM VERTICAL STILE BELOW COVE BASE ADHESIVE. 1" [25.4mm] BASE DETAIL
![VERTICAL STILE ABOVE HORIZONTAL TRIM VERTICAL STILE BELOW COVE BASE ADHESIVE. 1 [25.4mm] BASE DETAIL](/thumbs/87/96020661.jpg "VERTICAL STILE ABOVE HORIZONTAL TRIM VERTICAL STILE BELOW COVE BASE ADHESIVE. 1 [25.4mm] BASE DETAIL") Please Read All sheet will be provided in stock sizes for field cutting. All trims will be provided in 8-0 stock lengths for field cutting. CEILING TRIM 1" [25.4mm] Acrovyn Interiors vinyl acrylic wall
Please Read All sheet will be provided in stock sizes for field cutting. All trims will be provided in 8-0 stock lengths for field cutting. CEILING TRIM 1" [25.4mm] Acrovyn Interiors vinyl acrylic wall
DuraLife Porch Collection Installation Instructions
 DuraLife Porch Collection Installation Instructions Updated: 1/11 www.gaf.com 1 Getting Started... ilation and Drainage Plan the design of the porch it is the beginning of a successful project. DuraLife
STEPS and Stages of the Clay
 STEPS and Stages of the Clay Slip - Clay that is watered down - smooth and runny. It attaches handles and decorations.. Wedging Used for eliminating lumps and air bubbles, drying the clay. Wedging makes
THE PARQUET WORLD AT YOUR FEET
 THE WORLD AT YOUR FEET PREPARATION BONDING FINISHING Preparation DL EGALINE PRIMER Is used as a bonding primer for DL Egaline in case of layer on layer floor levelling application or as prior primer and
Product Catalog Sealing, Cleaning, Restoring & Problem Solving Solutions for Stone & Tile Surfaces
 Product Catalog Sealing, Cleaning, Restoring & Problem Solving Solutions for Stone & Tile Surfaces The Aqua Mix Legacy Aqua Mix has more than 30 years of history leading the global stone and tile industry
VIEWpanel Technical Manual
 VIEWpanel Technical Manual VIEWpanel is a prefabricated panel comprising 0.21 aluminium skin (1100 alloy) both sides, apart from our lite grade, which is 0.12 aluminium skin both sides and a polyethylene
More than 90 different designs available. 2 designs for outdoor decoration only.
 3M Europe, Effective August2017 Commercial Solutions Division 3M Fasara Glass Finishes Product Description 3M Fasara Glass Finishes are decorative glass and window films available in over 90 designs. These
IMPORTANT NOTES ABOUT YOUR FLOORING PLEASE READ BEFORE INSTALLING INSTALLATION & MAINTENANCE FOR ENGINNERED HERRINGBONE
 IMPORTANT NOTES ABOUT YOUR FLOORING PLEASE READ BEFORE INSTALLING INSTALLATION & MAINTENANCE FOR ENGINNERED HERRINGBONE ACCLIMATIZATION AND STORAGE Your new flooring has to be acclimatized before installation,
Sketchpaint. Ideal for turning any smooth surface into a whiteboard. Ready to use in 5 days
 Sketchpaint Ideal for turning any smooth surface into a whiteboard SketchPaint - A whiteboard straight out of a tin! White Gloss or Transparent Finish Simple application Tin size available: 3m² or 6m²
SCHWARTZ SOLVENT-BASE WOOD FLOOR SEALER AND SOLVENT-BASE POLYURETHANE FLOOR FINISH
 TECHNICAL BULLETIN Fax (905) 428-2057 SCHWARTZ SOLVENT-BASE WOOD FLOOR SEALER AND SOLVENT-BASE POLYURETHANE FLOOR FINISH A Complete Guide for Preparation, Application, Curing and Maintenance for use with
1. Initial Precautions 2. Technical Precautions and Suggestions 3. General Information and Cure Stages 4. Understanding and Controlling Cure Time
 How to apply Arctic Silver Premium Thermal Adhesive 1. Initial Precautions 2. Technical Precautions and Suggestions 3. General Information and Cure Stages 4. Understanding and Controlling Cure Time 5.
Installation Guide. Pionite Decorative Surfaces One Pionite Road, Auburn, Maine PIONITE ( )
") Installation Guide A Subsidiary of Panolam Surface Systems SMPBRO00-012 6/14 Pionite decorative laminates are designed for finished interior surfaces which require high impact, wear and stain resistance
Installation Guide A Subsidiary of Panolam Surface Systems SMPBRO00-012 6/14 Pionite decorative laminates are designed for finished interior surfaces which require high impact, wear and stain resistance
FITTING INSTRUCTIONS FOR OFD SOLID OAK FLOORING
 FITTING INSTRUCTIONS FOR OFD SOLID OAK FLOORING SECTION 1 Installers Responsibility Pre-Installation SECTION 2 Glue Down (Solid & Engineered Flooring) SECTION 3 Secret Nailing (Solid & Engineered Flooring)
Installation Instructions for TruWood Reversible Trim
 Installation Instructions for TruWood Reversible Trim Important: Read and understand all pages of the installation instructions before starting the trim application. For TruWood care and maintenance information,