Personalize. Metal Clay and Resin. Making your own molds is one way to. Make your own texture molds, use your own photo.
|
|
|
- Beverley Ramsey
- 6 years ago
- Views:
Transcription
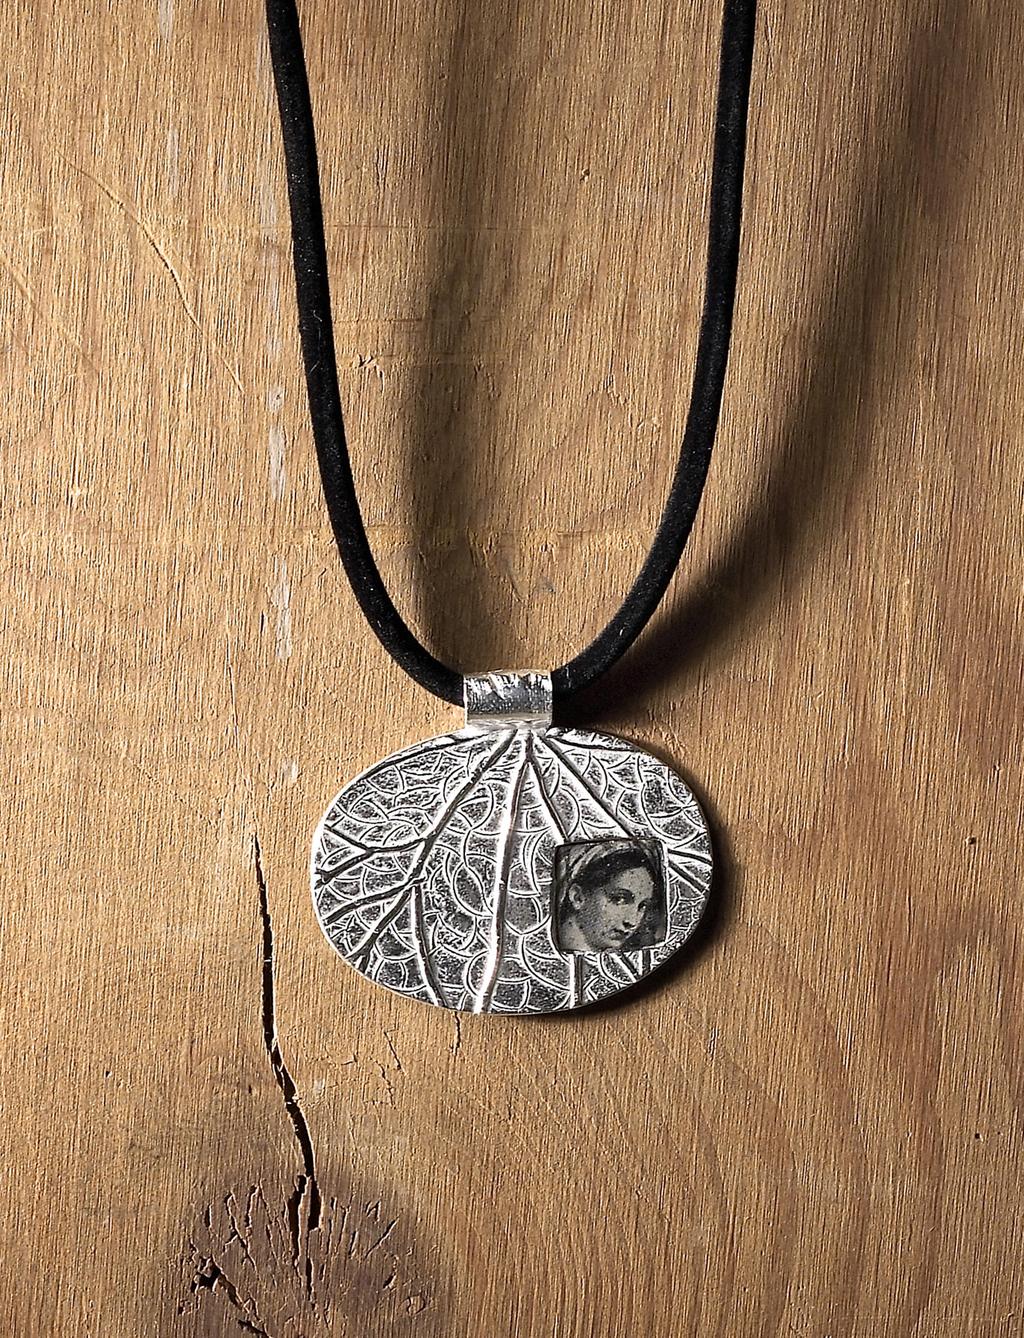
1 intermediate metal clay/resin Personalize CAPTURE A MOMENT Metal Clay and Resin Make your own texture molds, use your own photo. by Elaine D. Luther FCT-CR Making your own molds is one way to add custom tactile surfaces to your metal clay work. Impressed from a handmade mold, the distinctive texture on this pendant draws attention to the double-paned resin window that holds a favorite photograph. We ll show you how to make your own texture molds and sheets, using a two-part 2009 Kalmbach Publishing Co. This material may not be reproduced in any form without permission from the publisher. silicone molding compound. Then, you can use your molds to give your pendant and its bail a custom texture. You ll also learn how to incorporate a photocopy of a personal photograph or image within your pendant by encasing the image between layers of quick-curing adhesive epoxy resin. The x in. (7 x 49 mm) metal clay pendant captures a wink of time in a permanent keepsake. facetjewelry.com
2
 Two-part epoxy resin adhesive: quickcure formula Necklace cord or chain tools & supplies Olive oil or natural hand balm Acrylic roller Flexible Teflon sheet Texture sheet; or two-part")
 Square: 8 x 8 in.")
 Cardstock Tweezers Part 1 Pendant frame Roll out clay for the bail. Lightly oil your hands, an acrylic roller, a flexible Teflon sheet, a mold or texture sheet, and a drinking straw.")
 wide and long enough to wrap around the drinking straw with some overlap [1].")

3 materials Metal clay: 20 g Metal clay paste Photocopy of photograph or copyrightfree image: 8 x 8 in. (10 x 10 mm) Two-part epoxy resin adhesive: quickcure formula Necklace cord or chain tools & supplies Olive oil or natural hand balm Acrylic roller Flexible Teflon sheet Texture sheet; or two-part silicone molding compound: room-temperature-vulcanizing formula Drinking straw Playing cards Tissue blade Paintbrushes: fine tip, flat tip Distilled water Blending tool Mug warmer Emery board or 400-grit sandpaper Cutters: Oval: 1½ x 2 in. (8 x 51 mm) Square: 8 x 8 in. (10 x 10 mm) Carving tool (optional) Craft sticks, toothpicks Cosmetic foam-tip applicator Kiln, kiln shelf Pipe cleaner Tumbler, steel shot, burnishing compound Clear packing tape Duct tape (optional) Cardstock Tweezers Part 1 Pendant frame Roll out clay for the bail. Lightly oil your hands, an acrylic roller, a flexible Teflon sheet, a mold or texture sheet, and a drinking straw. For instructions on how to make your own mold or texture sheet, see Make a Mold or Texture Sheet, below. Roll about 4 g of metal clay to playing cards thick. Use a tissue blade to trim the clay into a rectangle that s approximately 7 16 in. (11 mm) wide and long enough to wrap around the drinking straw with some overlap [1]. Texturize and shape the clay strip. Press the clay strip into your mold or texture sheet, and then wrap the clay strip (texture-side out) around the straw. Use the tissue blade to cut the clay strip where it overlaps. Remove the excess clay. Form the bail. With a fine-tip paintbrush, apply a line of distilled water along the clay strip s seam. Use a blending tool to smooth the seam and to make sure that the edges have bonded. Place the straw with the clay strip on a flexible Teflon sheet, and put the sheet on a mug warmer [2]. Let the bail dry completely. Refine the bail. When the bail is completely dry, smooth and refine each end on an emery board [] or piece of 400grit sandpaper. Make the panel. Roll about 15 g of metal clay to 4 playing cards thick to make a clay sheet that s slightly larger than a 11 2 x 2-in. (8 x 51 mm) oval cutter. Place the clay sheet on your texture sheet. Roll over the clay with the acrylic roller. Carefully peel the clay from the texture sheet [4], and set the clay textureside up on the flexible Teflon sheet. Oil the cutting edge of your oval cutter. Cut out the oval panel and remove the excess clay [5].
![6 Cut a window into the panel. Staying at least 1 8 in. ( mm) in from the edges of the panel, use a 8 x 8 -in. (10 x 10 mm) square cutter to cut a window from the oval panel [6].](/docs-images/78/78535092/images/4-0.jpg "Remove the excess clay, and allow the panel to dry completely. 7 8 Attach the bail. Use a flat-tip paintbrush or carving tool to apply a line of metal clay paste to the bail [7].")
![Press the pasted portion of the bail against the top center edge of the panel [8]. Remove any excess slip, using a dry, flat-tip paintbrush. Set the assembly aside to dry completely.](/docs-images/78/78535092/images/4-1.jpg "I like to place a craft stick under the bail to support it while the paste dries. Refine the frame.")


. Mix the putty formulations together.")
![Measure equal amounts of each putty formulation [A]. I use plastic spoons to scoop out equal amounts from each container. Then, knead the putty until the compound is a uniform color. or Make a mold.](/docs-images/78/78535092/images/4-5.jpg "Working quickly, and keeping in mind the cure time for your compound, press the compound against your chosen texture [B].")
4 6 Cut a window into the panel. Staying at least 1 8 in. ( mm) in from the edges of the panel, use a 8 x 8 -in. (10 x 10 mm) square cutter to cut a window from the oval panel [6]. Remove the excess clay, and allow the panel to dry completely. 7 8 Attach the bail. Use a flat-tip paintbrush or carving tool to apply a line of metal clay paste to the bail [7]. Press the pasted portion of the bail against the top center edge of the panel [8]. Remove any excess slip, using a dry, flat-tip paintbrush. Set the assembly aside to dry completely. I like to place a craft stick under the bail to support it while the paste dries. Refine the frame. Moisten a foam-tip applicator with distilled water and use it mold texture sheet make a Textures are all around us, and with the help of a two-part, silicone, roomtemperature-vulcanizing (RTV) molding compound, you can make molds or texture sheets of just about any texture. Later you can use the molds or sheets to transfer the textures to your metal clay. RTV molding compounds are packaged as two putty formulations in separate containers. The putties are color-tinted to help you tell the formulations apart and determine when you ve mixed them completely. Before you mix the putty formulations together, read the manufacturer s instructions. Note the amount of time it takes the product to cure (you ll start timing as soon as you completely mix the putty formulations together). Mix the putty formulations together. Measure equal amounts of each putty formulation [A]. I use plastic spoons to scoop out equal amounts from each container. Then, knead the putty until the compound is a uniform color. or Make a mold. Working quickly, and keeping in mind the cure time for your compound, press the compound against your chosen texture [B]. NOTE: If you are taking an impression from organic materials, it s helpful to cover the object with a light coating of olive oil so that the molding compound doesn t stick to the surface of the organic material. Remove the compound and allow it to cure at room temperature according to the manufacturer s instructions. A The cured silicone mold is now ready to use for texturizing your metal clay. There is no need to use a release agent with the mold; the silicone will not stick to your clay. Make a texture sheet. To make a texture sheet, use an acrylic roller to roll out the kneaded compound, then place the compound on a flat, textured surface and roll over it again with the acrylic roller. Carefully peel the compound from the textured surface, and allow it to cure. B


5 9 10 Metal Clay Dryness Wet Clay contains a lot of moisture and is very pliable Semi-dry Clay contains some moisture, but is firm and holds its shape Mostly dry Clay is nearly devoid of all moisture and is rigid Completely dry Clay contains absolutely no moisture and can be fired 11 to smooth any rough edges on the frame [9 and 10]. Then use the moistened foam tip to smooth the seam that connects the bail to the frame [11]. To avoid marring your texture, use a minimal amount of pressure and water. Set the assembly aside to dry completely. Fire the frame. Fire the assembly in a kiln according to the manufacturer s instructions. Then allow the piece to cool completely. Finish the frame. Insert a pipe cleaner through the bail and twist to secure it. This prevents shot from getting lodged in the bail during tumbling. Polish the assembly for at least 0 minutes, using a tumbler with steel shot and burnishing compound. Remove the pipe cleaner and then rinse and dry the assembly.


![Use two layers of clear packing tape or a strip of duct tape to seal the back of the frame s opening [2].](/docs-images/78/78535092/images/6-2.jpg "NOTE: I learned that duct tape can leave a texture on cured resin. I found that packing tape s smooth surface works better.")


6 Process photos by Ralph Romero. 1 Part 2 Resin and photo Prepare the photo. Select a photocopy of a photograph or copyright-free image, and cut it to an exact fit for your frame s window [1]. NOTE: To prevent toner ink from coming in direct contact with the epoxy and potentially bleeding, use clear packing tape to laminate the front and back of your image. Smooth the tape to remove any trapped air bubbles, and then trim the excess tape. Seal the back of the frame. Use two layers of clear packing tape or a strip of duct tape to seal the back of the frame s opening [2]. NOTE: I learned that duct tape can leave a texture on cured resin. I found that packing tape s smooth surface works better. Apply the first layer of epoxy resin. Mix two-part epoxy resin according to the manufacturer s instructions. I used a two-part formula that is mixed in equal amounts and begins to cure within about 5 minutes []. I like to use a piece of cardstock as a support for the epoxy resin. Use a craft stick or toothpick to spread a level, thin layer of epoxy resin over the tape, within the panel s opening [4]. Be sure to spread the epoxy resin so that it reaches all four edges of the square. Allow 2 this layer to cure completely according to the manufacturer s instructions. Insert the photo. Use tweezers to place your photo on top of the layer of dry epoxy resin. Trim the photo if necessary. Add a topcoat of epoxy resin. Mix another batch of two-part epoxy resin and fill the window, covering the photo completely [5]. Place a box over the pendant to prevent dust from settling on the epoxy resin while it cures. 4 Finish the pendant. After the epoxy resin is fully cured, peel the tape from the back of the pendant. If necessary, place the pendant in a container of water and use 400-grit wet/dry sandpaper to remove any texture left on the epoxy resin from the tape. Slide a necklace cord or chain through the bail. 5
Hollow metal clay forms are typically built over organic cores like. Coreless Construction: Rethinking the Metal Clay
 PROJECT INTERMEDIATE METAL CLAY Coreless Construction: Rethinking the Metal Clay Build this four-sided pendant using forethought and a 3-D template. by Cindy Ambrose FCT-MWON0216_ART17 Hollow metal clay
Metal Clay-Wrapped. used a commercially available sterling silver and tear department, bracelets are not
 PROJECT INTERMEDIATE METAL CLAY Metal Clay-Wrapped Bangle by Pam East and Jane Levy Make a lightweight custom bracelet with metal clay and a prefabricated tube bangle. Take texture full circle with metal
Triangles. Pendulum. Dangling from handmade curvilinear ear wires, Construct earrings from carefully fitted panels. METAL CLAY EARRINGS
 The front of each earring is impressed with a slightly different pattern than those used on the sides and backs. 1¾ in. (44mm). beginner/intermediate metal clay METAL CLAY EARRINGS Pendulum Triangles Construct
facetjewelry.com FCT-CR _ Kalmbach Publishing Co. This material may not be reproduced in any form without permission from the publisher.
 The organic bell shape of the calla lily makes a graceful jewelry component. The pendant is 1½ x ¾ in. (38 x 19mm), and the earrings are 2 x ½ in. (51 x 13mm), including the ear wires. FCT-CR-071116_04
Build a Better. hollow-form metal clay beads. Use tools designed for polymer clay to make. intermediate metal clay OPENWORK BEADS
 intermediate metal clay OPENWORK BEADS Use tools designed for polymer clay to make hollow-form metal clay beads. Build a Better Hollow The metal clay beads and bead caps are constructed over a bead form
Metal clay. Skill Set. Whether you want to learn how to bezel-set a cabochon, Step Up Your. earring project.
 PROJECT INTERMEDIATE METAL CLAY Step Up Your Metal clay Skill Set Improve your craft à la carte in this technique-packed earring project. by Deb Fitz FCT-CRON0216_ART48 Whether you want to learn how to
Openwork. Pendant. Bezel-Set Cabochon. with Free Form. open spaces and a bezel-set stone. Frame a dimensional design accented with.
 ADVANCED Openwork Pendant with Free Form Bezel-Set Cabochon FCT-CRON0316_ART105 Frame a dimensional design accented with open spaces and a bezel-set stone. by Deb Fitz To create the focal point of my pendant,
Flower. Clay. Fine Silver. from Metal. Assemble painted leaves to create a beautifully detailed flower, then add gold for contrast and drama.
 BEGINNER/INTERMEDIATE Simple painted leaves take on a whole new dimension when assembled into a flower. 2 1 2 in. (64 mm) diameter. Fine Silver Flower from Metal FCT-CRON0316_ART110 Assemble painted leaves
The word origami is derived from the Japanese oru, meaning to fold, and kami, meaning
 MASTERING THE MINIATURE ORIGAMI A PERENNIAL FAVORITE Metal clay paper tulips take traditional origami from ephemeral to permanent. by Sara Jayne Cole The word origami is derived from the Japanese oru,
in Metal Clay Bezels by Patrik Kusek
 PROJECT BEGINNER METAL CLAY Frame Stones in Metal Clay Bezels Embed kiln-safe stones in metal clay to give them a bezel-set look, then arrange the components into clusters. by Patrik Kusek Setting gemstones
Take a Crash Course in Metal Clay with this. Appliquéd. Bisque-bead. Pendant. Discover how to use four types of metal clay paper, paste,
 PROJECT INTERMEDIATE METAL CLAY Take a Crash Course in Metal Clay with this Appliquéd Bisque-bead Pendant Discover how to use four types of metal clay paper, paste, syringe, and lump to create a detailed
polymer clay. by Jill Erickson
 intermediate polymer clay You ought to be in pictures... Transfer your favorite photographs to jewelry using polymer clay. by Jill Erickson This direct image-transfer technique is easy to master and does
MIX ARGENTIUM &METAL CLAY
 PROJECT INTERMEDIATE/ADVANCED METAL CLAY/METAL MIX ARGENTIUM &METAL CLAY in a Floral Pendant FCT-CR-032017_07 Combine two modern forms of silver in a project that plays to the strengths of each material.
shine to by Jana Roberts Benzon
 intermediate/ advanced polymer clay Taking a shine to polymer clay Give polymer clay a glossy surface with sandpaper and a quick buffing. FCT-CRON0216_ART30 The featured pendant s intricate cane pattern
MIXED-MEDIA LINKS. With three different paisley-shaped links and four ways to embellish. Combine woven wire and polymer clay to make bold links.
 Soldered wire frames are the backbone of each link in the bracelet. 8½ x 1¼ in. (21.6 x 3.2cm). WIRE AND POLYMER CLAY BRACELET MIXED-MEDIA LINKS Combine woven wire and polymer clay to make bold links.
PROJECT BEGINNER/INTERMEDIATE METAL/RESIN
 PROJECT BEGINNER/INTERMEDIATE METAL/RESIN FCT-CR-091816_05 A photograph taken by the Hubble Space Telescope inspired the design of this 13 4 x 1½-in. (44 x 38 mm) pendant. 2009 Kalmbach Publishing Co.
Open Lentil with Floating Pearl
 INTERMEDIATE Open Lentil with Floating Pearl A hollow bead with a hidden copper wire makes a pearl appear to levitate. by Pam East FCT-CRON0316_ART113 Pearls are a snap to set, and they add an undeniable
Eerie Halloween by Nunn Design
 Eerie Halloween by Nunn Design Approximate finished length: 20 inches Beads and other products needed for necklaces: 1 - Pewter Itsy Square Bezel Pendant with Flat Loop by Nunn Design - Antique Gold -
Colori. Part I Geometry
 Colori Part I Geometry 1 2 Determine the size of your cane. TOOLS & MATERIALS FOR BUILDING A CANE: - photocopy paper - ruler - pen or a black marker - color markers (optional) - pasta machine - clay of
Ribbon Beads. Metal Clay Jewelry Projects Chapter 7. Figure 7.64 Remember the wrapped hook clasp directions are available in Chapter 6.
 07 PYMCJ ch07 part2 4/6/08 8:31 PM Page 175 Figure 7.64 Remember the wrapped hook clasp directions are available in Chapter 6. If you d like an ID bracelet that is a little more colorful, consider adding
Introduction 6 Basics 7 Materials 7 Tools 8 Safety 9 Color 10 Workspace 11
 Contents Kalmbach Books 21027 Crossroads Circle Waukesha, Wisconsin 53186 www.kalmbach.com/books 2012 Lori Wilkes All rights reserved. Except for brief excerpts for review, this book may not be reproduced
Freehand Back-Filling: Polymer Clay and Resin Tutorial
 Page 1 of 9 Eugena Topina, 2016 Freehand Back-Filling: Polymer Clay and Resin Tutorial This tutorial is offered for your personal use only. Please do not distribute. Back-filling is a simple and very versatile
Building the 1, 2, or 3 Car
 Building the 1, 2, or 3 Car Garage kit by Railroad Kits. Thanks to Bob Butts for doing the building construction and writing / taking pictures. If this is your first craftsman kit or Railroad Kits purchase
The brooch s leaf and bud inserts are made of polymer clay. 5 x 3 8 in. (12.7 x 0.95cm). FCT-CRON0216_ART35
. FCT-CRON0216_ART35") FCT-CRON0216_ART35 The brooch s leaf and bud inserts are made of polymer clay. 5 x 3 8 in. (12.7 x 0.95cm). intermediate polymer clay/metal STERLING SILVER AND POLYMER CLAY BROOCH Less is More Sophisticated
FCT-CRON0216_ART35 The brooch s leaf and bud inserts are made of polymer clay. 5 x 3 8 in. (12.7 x 0.95cm). intermediate polymer clay/metal STERLING SILVER AND POLYMER CLAY BROOCH Less is More Sophisticated
Fine Feathers. Make a pair of silver-clay peacock earrings
 Fine Feathers Make a pair of silver-clay peacock earrings Objectives Create a base design which can stand alone or work with embellishments Add color to silver with permanent markers Make a narrow channel
Design and Build a Bracelet. a la Carte. by Deborah Francis
 PROJECT BEGINNER METAL Design and Build a Bracelet a la Carte Use basic cold connections to mix and match found objects, base metals, and polymer components. by Deborah Francis This inexpensive bracelet
Japanese Quartet. With. Nikolina Otržan
 Japanese Quartet With Nikolina Otržan List of tools and materials for this class: - Clean & Flat Surface - Pasta Machine - Round Kemper Cutters - A Rigid Blade - A Ruler - A Pen - A Needle Tool - Coarse
Silver Bumblebee. This little bumblebee in silver and gold is as relevant as he is. Sculpt a pendant from silver clay and wire
 Materials Metal Clay by Mitsubishi Materials PMC Flex Aura Gold paste Silver paste or slip 20 awg fine silver wire (20awg) Teflon sheet Nonstick spray Small paintbrush Jewelry pliers Wire cutters Roundnose
Repoussé is an ancient metalworking process that traditionally requires an
 This 6 x 2-in. (15.2 x 5.1 cm) fine-silver cuff features a metal clay paper repoussé image of a bishop s cap cactus. Try Entry-Level Repoussé Use household items to make a low-relief image emerge from
Tape Measure Metal Clippers Screw Bit Set With Extensions
 IMPORTANT: Read through instructions thoroughly before beginning to replace any damaged material. Minor damage can be fixed with a fiberglass repair kit and color matched paint. Tools Required Tape Measure
How to Make Faux Porcelain Pendants with Transfer Sheets & Gel Du Soleil
 How to Make Faux Porcelain Pendants with Transfer Sheets & Gel Du Soleil We look forward to bringing you exclusive innovations and distinctive products this year and beyond. www.nunndesign.com www.nunndesign.com
Art of Ancient Times, Studio 1 5
 Art of Ancient Times, Studio 1 5 Creating a Clay Relief Sculpture and an In-the-Round Sculpture In this studio you will make a relief sculpture and an in-the-round sculpture inspired by those created by
Step by Step Wing Bagging
 Step by Step Wing Bagging By Evan Shaw 073 589 9339 evanevshaw@gmail.com Preparing the Leading Edge 1. Cut cores. (Cutting of wing cores is covered in another article elsewhere) 2. Sand the LE to a nice
Collage Pendant from Recycled Tin
 PROJECT BEGINNER METAL Construct a Collage Pendant from Recycled Tin Cut, stack, and rivet elements from colorful tin containers to create a reversible pendant with a wooden core. by Christine Terrell
Tips & Tricks using Part 2
 Tips & Tricks using Part 2 Using the cobblestone mold #210...1 Making a dungeon diorama...2 Making torches...3 Making a textured door...4 Making a portcullis...5 Adding moss...6 Tips & Tricks using Bruce
Impress your clay and your friends with UV-etched solar-plate molds. all levels reference. by Maggie Bergman. Kissed. Sun. by the FCT-CRON0216_ART25
 Impress your clay and your friends with UV-etched solar-plate molds all levels reference by Maggie Bergman FCT-CRON0216_ART25 Kissed by the Sun olar plates, or photo-polymer plates as they are also known,
Fusion. Déjà. Fuse and solder a removable medallion that. fits on a fused, free-form chain.
 FUSE, SOLDER, FUSE AGAIN beginner metal Déjà Fusion Fuse and solder a removable medallion that fits on a fused, free-form chain. This chunky fused fine-silver chain looks equally striking with or without
Cold-connect Silver &
 PROJECT COVER STORY INTERMEDIATE METAL/PLASTIC Cold-connect Silver & ACR YLI C in a Layered Ring Learn to work with modern, lightweight acrylic sheet to introduce transparent color to your work. by Maria
Golden angels in an elegant design
 Golden angels in an elegant design The magic of advent these modern-looking, golden-gowned angels are simply perfect for giving your home a festive Christmas feel. Made using the clay-like FIMOair basic
FINISH 14 LINKS IN ONE EVENING. Pearls Wire. Grade A necklace no matter the. grade of your pearls. by Cynthia B. Wuller
 beginner wirework FINISH 4 LINKS IN ONE EVENING Pearls Wire and on Any Budget Make a Grade A necklace no matter the grade of your pearls. by Cynthia B. Wuller W hether you use economical materials or splurge
doodle me - do nikolina otržan Doodle me - do with Nikolina Otržan A CraftArtEdu Class Web: Customer Service:
 Doodle me - do with Nikolina Otržan doodle me - do by nikolina otržan TOOLS & MATERIALS: flat clean surface (glass would be ideal) pasta machine acrylic roller rigid blade ruler photocopy & parchment paper
TECHNIQUE. Because of the flexibility of the woven paper elements, this necklace moves nicely when worn. BEGINNER PAPER/WOOD. facetjewelry.
 TECHNIQUE FCT-SR-09248-03 BEGINNER PAPER/WOOD Because of the flexibility of the woven paper elements, this necklace moves nicely when worn. 203 Kalmbach Publishing Co. This material may not be reproduced
Simply shape your ideas necklace made of FIMO and leaf metal
 Simply shape your ideas necklace made of FIMO and leaf metal This necklace is real a eye-catcher. It s hard to believe that these beads are hand-made! The smaller ones are extremely impressive thanks to
Installation Instructions
 www.marlite.com Effective Date 03/01/2018 ARTIZAN FRP, SYMMETRIX FRP, ENVUE FRP, STANDARD FRP Installation Instructions Statements expressed in this technical bulletin are recommendations for the application
Beyond Rubber: Unique Techniques Your Own Stamps
 Beyond Rubber: Unique Techniques for or Making M Your Own Stamps There are many materials you can carve in order to make your own rubber stamps to use in décor projects. Popular materials include erasers,
BLADE REPAIR INSTRUCTION BOOKLET
 BLADE REPAIR INSTRUCTION BOOKLET Contents Section I: Section II: Section III: Section IV: Section V: Section VI: Removing a Blade Refer to this section if you need to remove the blade from an oar shaft.
Building an Unfeathered Paddle with a Wood Shaft and Carbon Fiber Blades
 Building an Unfeathered Paddle with a Wood Shaft and Carbon Fiber Blades by Duane Strosaker Choosing the Wood Two 3/4" pieces of Sitka spruce laminated with epoxy for an unfeathered one-piece paddle. For
Once you ve mastered these circular bangles, expand your design vocabulary with other shapes. Gohaywirewithovals,squares,ortriangles!
 Haywire Bangles Once you ve mastered these circular bangles, expand your design vocabulary with other shapes. Go haywire with ovals, squares, or triangles! 42 what you will need 20- or 18-gauge half-hard
WRIGHT FLYER 1 INSTRUCTIONS FOR THE D10LC KIT
 WRIGHT FLYER 1 INSTRUCTIONS FOR THE D10LC KIT Manufactured in the USA by Easy Built Models PO Box 681744, Prattville, AL 36068-1744 Visit us at www.easybuiltmodels.com Easy Built Models GLUE METHODS Always
3Insert the second rod no. 4
 Yamato: Step-by-step 37 The stern block and searchlight control towers a b c d e f Recommended tools and materials Wood glue Sandpaper (no. 800 grain) Metal file Putty Craft knife For metal: Super Glue
Learn how to make decorative rivets while working with this uncommon alloy. by Addie Kidd
 PROJECT INTERMEDIATE METAL Shibuichi Cuff: Learn how to make decorative rivets while working with this uncommon alloy. by Addie Kidd To take full advantage of shibuichi, you ve got to use patinas. One
LEARN CHASING & REPOUSSÉ
 PROJECT BEGINNER METAL High Relief, Low Risk: LEARN CHASING & REPOUSSÉ Transform a common tin container into a custom decorative trinket box. by Laurie Jane Kern FCT-MWON0216_ART05 62 materials Used tin
Parts Identification
 We are excited to introduce the Model Aero Aqua Sport. This is an excellent sport flyer, equally at home flying from grass fields, water, or even snow! The unique V-tail gives the Aqua Sport a distinctive
Art-Drawing-Painting. 3-D or 3 dimensional when all 3 dimensions: length, height, and width can be touched and felt.
 ART Art-Drawing-Painting *Sculpture words (Additional vocabulary follows the main list) *Crafts and Ceramics (Vocabulary specific to crafts and ceramics follow this main list) Essential Vocabulary Secondary
ANY DREAM WILL DO. Nikolina Otržan 2015
 ANY DREAM WILL DO Nikolina Otržan 2015 LIST OF tools: pasta machine blade roller shape template akto knife texturing sponge (clay-yo middle one or similar) curved baking base rubber stamps small brush
How to Instructions Double-Sided Resin Butterfly Pendant
 How to Instructions Double-Sided Resin Butterfly Pendant We look forward to bringing you exclusive innovations and distinctive products this year and beyond. www.nunndesign.com www.nunndesign.com 1 How
Sherri s Ultimate Guide to BRONZclay
 Version 2.20.9 2009 All images and content are the property of Sherri Haab and may not be altered in any way or reproduced in print or any other media except for personal use. This document cannot be used
Tips & Tricks using Part 24
 Tips & Tricks using Part 24 Finishing the River Sections... 2 Making Tentacles... 4 Making Fish... 6 Adding the Water... 8 Making the Plank Bridge... 13 Making Crystal Piles... 15 Finishing Various Accessories...
Building Tips This model can be built using the following types of adhesives:
 Page 1 Building Tips This model can be built using the following types of adhesives: Epoxy (with or without microballons) Odorless cyanoacrylate (CA) with accelerator UHU Creativ for Styrofoam (or UHU
HP Create. HP Create: Polymer Clay Photo Pendant
 : Polymer Clay Photo Pendant I love custom handmade gifts, especially if they include a photo. My little Polymer Clay Photo Pendants are perfect gifts to share to spread the love! You can make them into
Max Launch Abort System Prod. No *Kevlar is a registered trademark of Dupont
 Flying Model Parts List Max Launch Abort System Prod. No. 3014 A 11820 - Body Tube 3.5 Diam x 5.5" Long B 11824 - Orange Capsule Base Shoulder Ring C 16032 - Laser-cut Ring motor mount rear D 16033 - Laser-cut
Applications Engineering Notes
 Applications Engineering Notes Document Title Document Number Operating Instructions for the US Conec AEN-1408 Revision Number 1.0 Effective Date December 15, 2011 THE USE OF SAFETY GLASSES FOR EYE PROTECTION
Pettit Technical Bulletin Applying Topside Finishes
 What s better than a boat that looks good? The answer is simple, a boat that looks good and has superior protection from the elements all season long. Topside finishes do exactly that; provide your boat
Get the benefits of oil with the ease of latex
 One of the most rewarding home improvement projects is putting a fresh coat of paint on your kitchen cabinets. A new color brightens up your kitchen, and can give it a complete updated look. But at the
to Precious From Plumbing PROJECT INTERMEDIATE METALS facetjewelry.com FCT-MW
 PROJECT INTERMEDIATE METALS From Plumbing to Precious FCT-MW-061217-07 2013 Kalmbach Publishing Co. This material may not be reproduced in any form without permission from the publisher. facetjewelry.com
Witch Hat Pendant By Valorie Clifton
 Witch Hat Pendant By Valorie Clifton Ah, Halloween! It s always been one of my favorite holidays. The kids and I like to watch Halloween movies. We decorate the house and enjoy the cooler temperatures
CIRRUS AIRPLANE MAINTENANCE MANUAL MODELS SR22 AND SR22T CHAPTER 56-30: DOOR GENERAL. Door 56-30: DOOR. 1. General
 CIRRUS AIRPLANE MAINTENANCE MANUAL Door CHAPTER 56-30: DOOR GENERAL 56-30: DOOR 1. General The cabin door windows are manufactured of acrylic and adhesive bonded to the door structure. Replacement is accomplished
Stenciling on Fabric. with Renegade (vinyl) Stencils. All Things Silhouette Early Edition
 Stencils. All Things Silhouette Early Edition") Stenciling on Fabric with Renegade (vinyl) Stencils 2016 Shelly Stokes Cedar Canyon Textiles www.cedarcanyontextiles.com You can purchase or make stencils from many different materials. Here are the pros
Stenciling on Fabric with Renegade (vinyl) Stencils 2016 Shelly Stokes Cedar Canyon Textiles www.cedarcanyontextiles.com You can purchase or make stencils from many different materials. Here are the pros
Millefiori Made Easy
 Millefiori Made Easy With Deb Wood Prepared as an addition to the Beauty of the Sea Mermaid Class One Session 21 pages Please read through the whole session before you begin. Deb Wood /Enchanted Hearts
PMC and the versatile Bisque Bead
 Aftosa s how-to series: Metal Clay Skill level: Intermediate/Advanced Aftosa s how-to series: Metal Clay Skill level: IntermediateB PMC and the versatile Bisque Bead by Patrik Kusek Looking for a new way
Souffle Fairy House Table Set
 Souffle Fairy House Table Set If you frequent the garden centers, you KNOW the hottest thing now is not even a plant! It s a fairy garden! You can spend a fortune at the garden center or create your own
Leaf Necklace Use keum-boo to enrich a handmade, asymmetrical collar.
 intermediate metal Leaf Necklace Use keum-boo to enrich a handmade, asymmetrical collar. by Noël Yovovich Inspired by ancient torques, rigid collars that open in the front, this delicate, contemporary
Layered Cuff. Uncover the. Secrets of a. Elegantly simple fabrication tricks are the key to making this intricate bracelet.
 Uncover the Secrets of a Layered Cuff Elegantly simple fabrication tricks are the key to making this intricate bracelet. by Hiromi Suter FCT-MW-042417-04 2011 Kalmbach Publishing Co. This material may
Cardboard Model Buildings
 Cardboard Model Buildings Get more model kits from http://www.modelbuildings.org PRINTING & ASSEMBLY TIPS: These OO designs can easily be resized by reducing the print percentage as follows: OO scale is
 http://www.fulcrumsites.com/haunt/html/foam_tombstones.html Building Tombstones from Pink Foam By Kevin T. Kennedy Tombstone making is a must-have skill for any home haunter. Store-bought stones are not
Installation Instructions
 Aspex Digitally Printed Wall Art PL PREMIUM HEAVY DUTY ADHESIVE ASPEX WALL ART DOUBLE SIDED FOAM TAPE Installation of Aspex Digitally Printed Wall Art with Foam Tape and PL Premium Adhesive. Maximum size
#70 grit sand Putty knives, sized as needed #1 fine gray sand Corner tools Milestone acrylic liquid
 Countertops Supplies Tools White and/or gray Milestone cement 12 inch steel trowel #70 grit sand Putty knives, sized as needed #1 fine gray sand Corner tools Milestone acrylic liquid Hock Universal tints
ProSeal Instructions for Konica C35 EF3, C35 AF and similar
 ProSeal Instructions for Konica C35 EF3, C35 AF and similar Please read these instructions completely before you start. Knowledge will increase your confidence, and like most jobs, this is better done
Nanton Grain Mill Assembly
 ( 1 ) Nanton Grain Mill Assembly Locate package for assembling storage building. These are cut from 1/8 masonite. Inspect and lightly sand edges where it will be bonded. Use white glue or CA glue to bond.
MAKE IT YOURS. Digital Photo Decoupage Art. How-2 instruction books for cool projects you can make your own.
 MAKE IT YOURS Digital Photo Decoupage Art How-2 instruction books for cool projects you can make your own. DIGITAL PHOTO DECOUPAGE ART WHAT YOU WILL NEED Computer / Internet Connection Digital photos you
ascading Create the tiered appearance of chandelier crystals in this elegant set by Jennifer Jordan Park
 intermediate wire ascading carnelian Create the tiered appearance of chandelier crystals in this elegant set by Jennifer Jordan Park Jewelry designers are especially receptive to color, shape, and texture.
Masking: Each mirrored sheet is well protected by a durable paint backing and
 STORAGE Horizontal storage: If mirror sheets are stored flat, care must be taken to avoid warping, slipping and scratching. If different sizes are stored together the largest panels should at the bottom
Wallgard 1,3 product
 INSTALLATION INSTRUCTIONS Wallgard 1,3 product October 2015 GENERAL Application can be done to smooth, dry, clean, sound walls of concrete, plaster, hardboard, plywood and fibreboard. Board material must
HOW TO SELECT & USE A ROLLER
 HOW TO SELECT & USE A ROLLER www.paintaids.co.nz 1 select the right roller The two most important things for a great paint finish are: a good quality paint, and the right roller sleeve to match the paint
stars nikolina otržan with Stars with Nikolina Otržan A CraftArtEdu Class Web: Customer Service:
 stars with nikolina otržan TOOLS & MATERIALS: pasta machine acrylic roller stiff blade craft knife/scalpel needle tool shape cutter or a template coarse sandpaper or a texture hand drill curved base for
Wax Resist. Judi Watanabe. Design by: 2007 Craft TV Weekly, Inc.
 Wax Resist Design by: Judi Watanabe 1 Wax on, wax off! Judi is resisting her paper crafting projects with wax! She protects photos and inked items with a little wax and then she gets creative. Judi rubs
E3 UV-30 Resist Film Instructions
 E3 UV-30 Resist Film Instructions For more information or to view instructions in color, visit www.sherrihaab.com Sherri Haab Designs 2016 Supplies needed: Metal plate to etch (copper, brass or silver)
This tutorial will work on whatever size roses you wish to make just follow the steps based on your cutter of choice.
 In this tutorial I will show you how to make gum paste rose buds and roses without using floral wire. If possible set aside a couple of days to make these as ideally you need to dry your rose base before
Serendipity. Earrings. Solder one-of-a-kind water-cast components into. truly organic jewelry. FORMED BY CHANCE, ASSEMBLED BY DESIGN.
 intermediate metal Serendipity FORMED BY CHANCE, ASSEMBLED BY DESIGN Earrings Solder one-of-a-kind water-cast components into truly organic jewelry. by Addie Kidd FCT-MWON06_ART84 009 Kalmbach Publishing
ODiSI Fiber Optic Sensor Installation Guide
 Application Note May 30, 2017 ODiSI Fiber Optic Sensor Installation Guide Contents 1. Introduction... 1 2. Contents of Fiber Optic Sensor Installation Kit... 2 3. Mounting the Strain Sensor... 2 3.1. Planning
How to Assemble the Vacuum Formed Plastic 7/8 Scale Lewis Gun
 How to Assemble the Vacuum Formed Plastic 7/8 Scale Lewis Gun 1. Read ALL the instructions before starting assembly. 2. Begin assembly by thoroughly washing the inside and outside surfaces of the vacuum
Tips & Tricks using Part 17
 Tips & Tricks using Part 17 Making a Secret Door Using Mold #96...1 Using Cotton Swabs For Antiquing...4 Planning Dungeon Waterways...5 Pouring and Texturing Water...6 Making Water for Fountains...11 Tips
WHAT TO DO WITH STOCKROOM MATERIAL LEFTOVERS.
 Sidewalk Chalk WHAT TO DO WITH STOCKROOM MATERIAL LEFTOVERS http://www.positivelysplendid.com/2011/05/sidewalk-chalk-paint-ssg-idea-7.html Permanent Chalk Pictures To make your chalk artwork more permanent
Finishes and Finishing Techniques
 Finishes and Finishing Techniques TED 126 Spring 2007 Review pages 147-150, 284-294 Finishes and finishing techniques The finishing process to choose depends partly on the type of wood and the appearance
Resin Tree Drop Earrings We look forward to bringing you exclusive innovations and distinctive products this year and beyond.
 Resin Tree Drop Earrings We look forward to bringing you exclusive innovations and distinctive products this year and beyond. www.nunndesign.com www.nunndesign.com 1 SUPPLIES NEEDED: PE9217-2 Pewter Drop
PREMIUM CONCRETE COUNTERTOP MIX INSTALLATION INSTRUCTIONS
 PREMIUM CONCRETE COUNTERTOP MIX INSTALLATION INSTRUCTIONS High Strength Fast Setting Pourable Helpful Items: TCC Materials February 09 Version 2.0 Tools Required: Concrete mixer or ½ drill (600 RPM or
Magnetpaint & Sketchpaint
 Magnetpaint & Sketchpaint Turn any smooth surface into a magnetically receptive whiteboard MagnetPaint is an exciting product that allows you to paint your own magnetic surface on any flat area. SketchPaint
Weathered Leather pendant
 Weathered Leather pendant Want to try your hand at faking it? Make this fake leather & fabric pendant from polymer clay... seriously, polymer clay! by Christi Friesen Sometimes you just have to fake it.
MUDGUN Drywall Finishing System
 Watch the demonstration video online at hydetools.com MUDGUN Drywall Finishing System Quick Start Guide Hyde Tools, Inc. / A Hyde Group Company / 800-872-4933 / custrelations@hydetools.com / hydetools.com
Coat Rack. Materials: Directions:
 Coat Rack 2x2 wooden poplar (foundation of the rack) 3/4 inch diameter wood dowels (5-8 depending on how many arms you want) 1/4 inch dowel screw 1/4 inch drill bit Power drill Ruler Pencil Paint/spray